Accessing a file on the host machine or guest machine is sometimes quite necessary when working with a virtual machine. In order to make this possible, you need to enable shared folders in VirtualBox.
Once a virtual instance is created, it is recommended that a shared folder be created so that users on both the host machine and the guest machine have full access to the file.
However, you can use features like drag-and-drop between machines for frequent use, but sharing a folder is your best bet when you need a file that exists on both machines.
Stay with us through this brief guide, and you’ll learn how to set up shared folders in VirtualBox.
Steps to Enable and Acess Shared folder in Linux Environment
Setting up shared folders in VirtualBox is a simple process that requires a few steps but should take no more than five minutes to complete. So first, open the Oracle VM VirtualBox Manager and follow the below steps:
Step 1: Mount and Install VirtualBox Addition Package
Installing “Guest Addition Image” on the guest machine is the first and most important step to sharing a folder between the host and guest operating systems.
To install the “Guest Addition Image” on the virtual instance, you must first start the virtual instance and wait until it is ready to take your command.
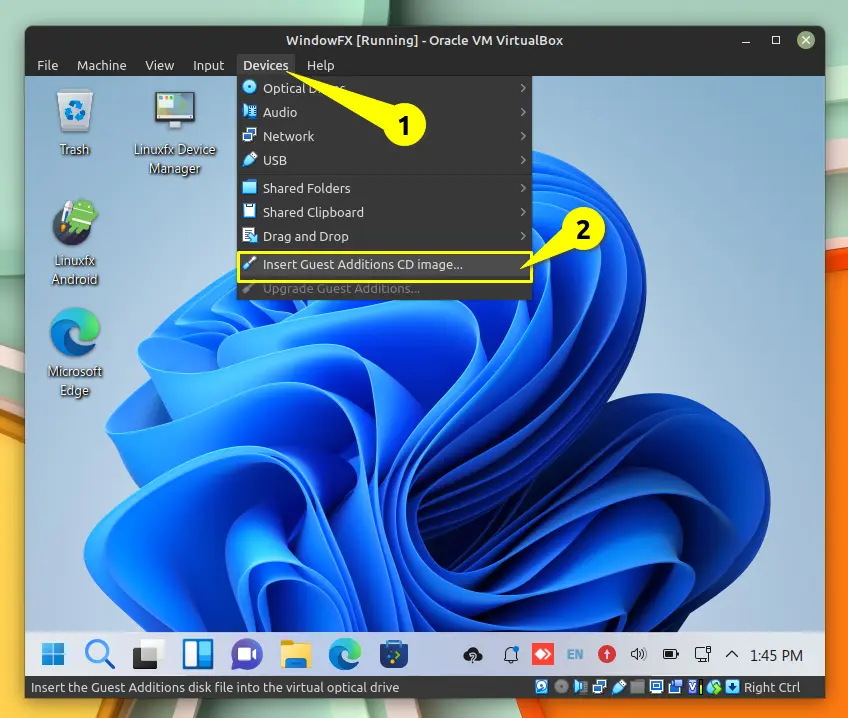
Once it’s ready, go to “Devices” and select “Insert Guest Addition CD” from the VirtualBox menubar, as shown in the below image.
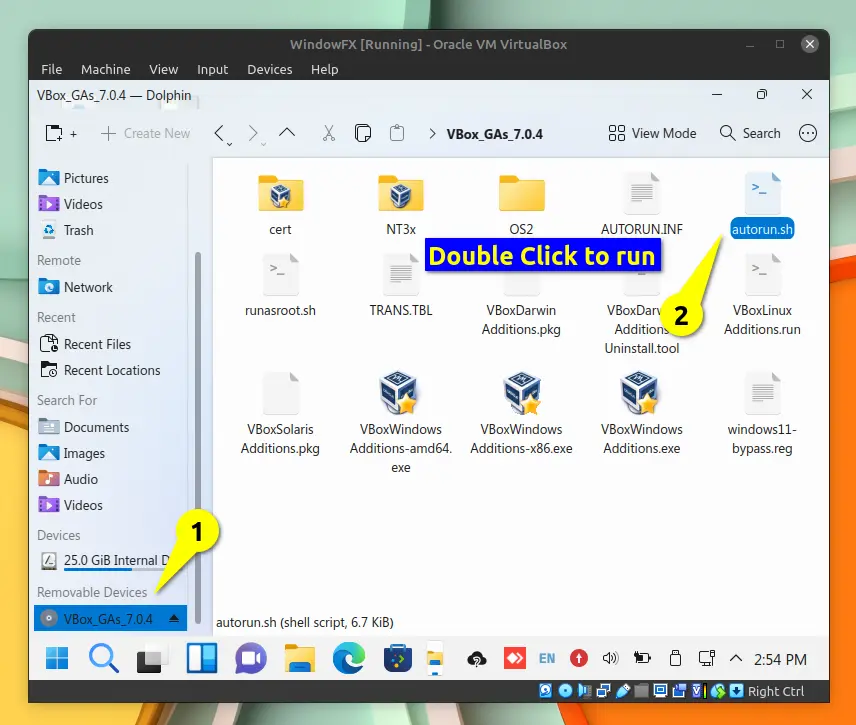
After that, you’ll be prompted to mount the VBox ISO file; if you don’t see that option, mount the “VirtualBox Guest Addition Image” manually through the file manager as shown below.
As soon as the file is mounted, you should enter it and look for “autorun.sh,” and once the file is found, double click on it to launch it in Terminal.
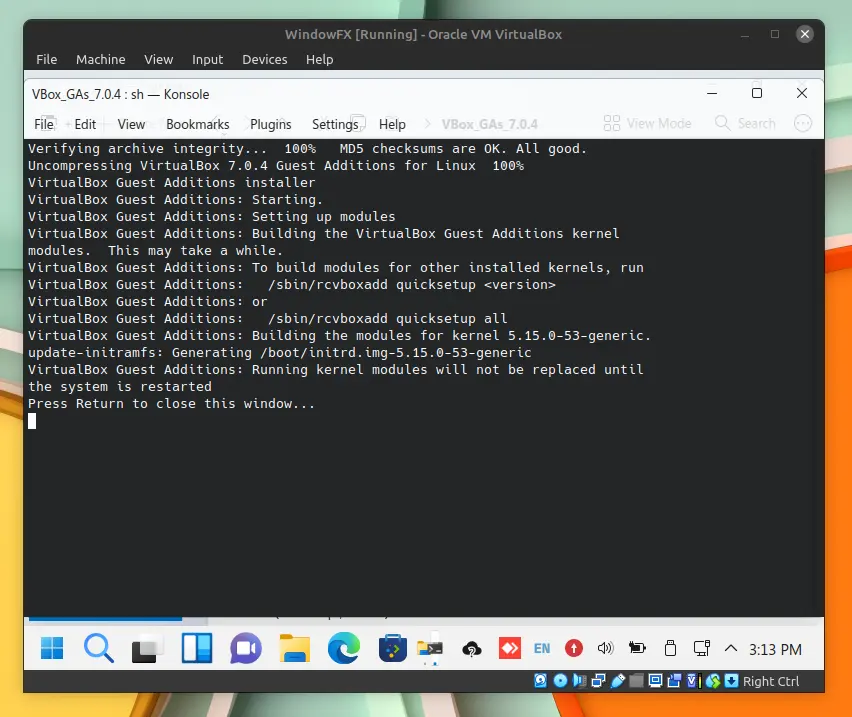
As a result, the terminal will appear in front of your screen and prompt you to enter the sudo password in order to proceed with the request.
Then, wait a few seconds to a minute for the script to finish installing. When it’s done, you’ll be asked to reboot, which means that your computer will need to be turned off and on again for these changes to take effect.
Step 2: Configure the guest machine to begin accessing files
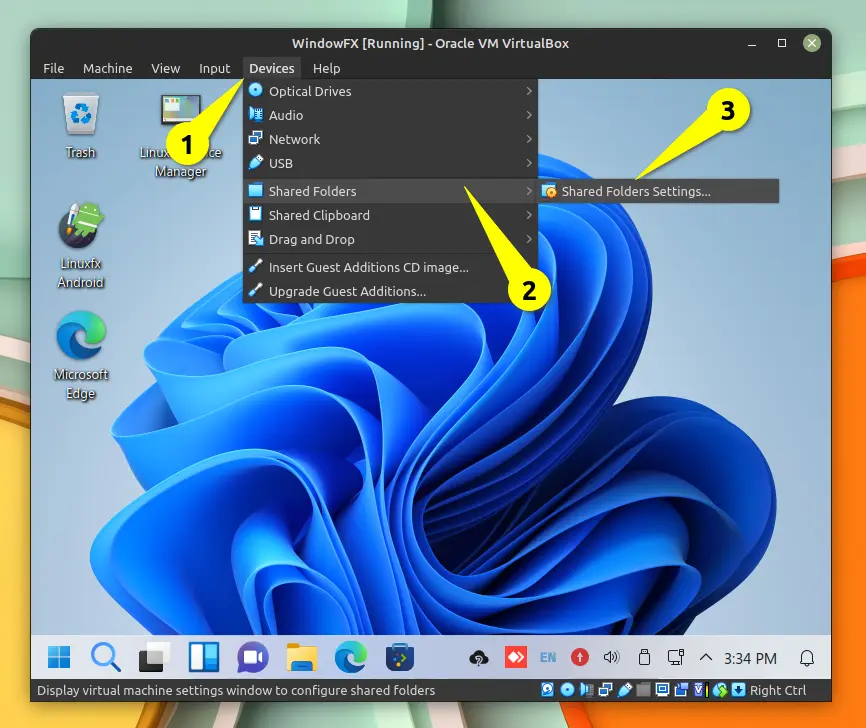
After installing the additional package, you still have a little bit of work left to do before you’re done, so go back to the menu and select “Devices” > “Share Folder” > “Share Folder Settings”, as shown in the image below.
Here you need to click on the folder icon, which has a plus sign on it, that you will find on the right side of this section. When you click the icon, a window will appear in which you must specify the path to the folder or directory that you want to share with guest operating systems.
After that, it will automatically fill in the “Folder Name,” but if you want, you can manually set it up.
Thereafter, you need to specify the path where you want to mount the shared folder on the guest machine, which will be the absolute path.
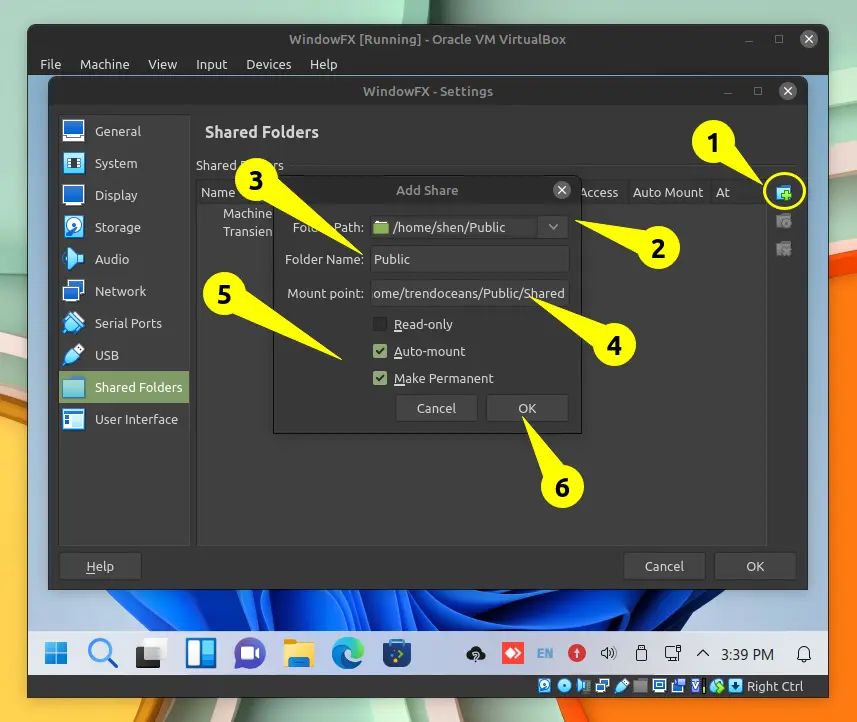
And last, you will find the three options “Read-only,” “Auto-mount,” and “Make Permanent”.
You can choose any option from the list, but I have checked on “Auto-mount” and “Make Permanent,” which will always mount the location to the guest machine, and the “Make Permanent” option will enable and keep the share mechanism permanently even after the virtual machine is rebooted.
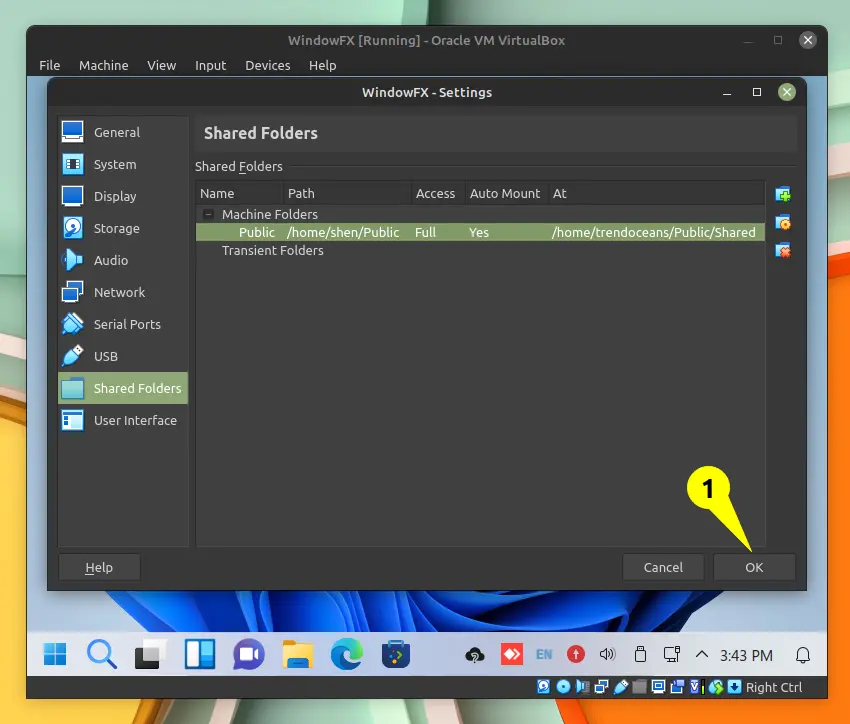
Once you are done specifying the path, click on “OK,” which will bring up the main shared folder setting, and under that you will find the shared folder name, path, access, automount, and location of the mount point.
If you’re wondering what machine folders and transient folders are, read on. Even if the virtual machine is restarted, the machine folder will retain the sharing settings.
That is not the case with transient sharing; once the virtual machine is powered off or rebooted, shared folder settings are wiped out, which I don’t think makes sense if you want to use directories on a regular basis.
If everything appears to be in order, click “OK”.
Step 3: Add the current user to the Vboxsf group to view content
Once you are done with the above setting, you just need to tweak permissions to access files normally from your guest machine. Otherwise, you need to access the file with the sudo command, which doesn’t make sense every time.
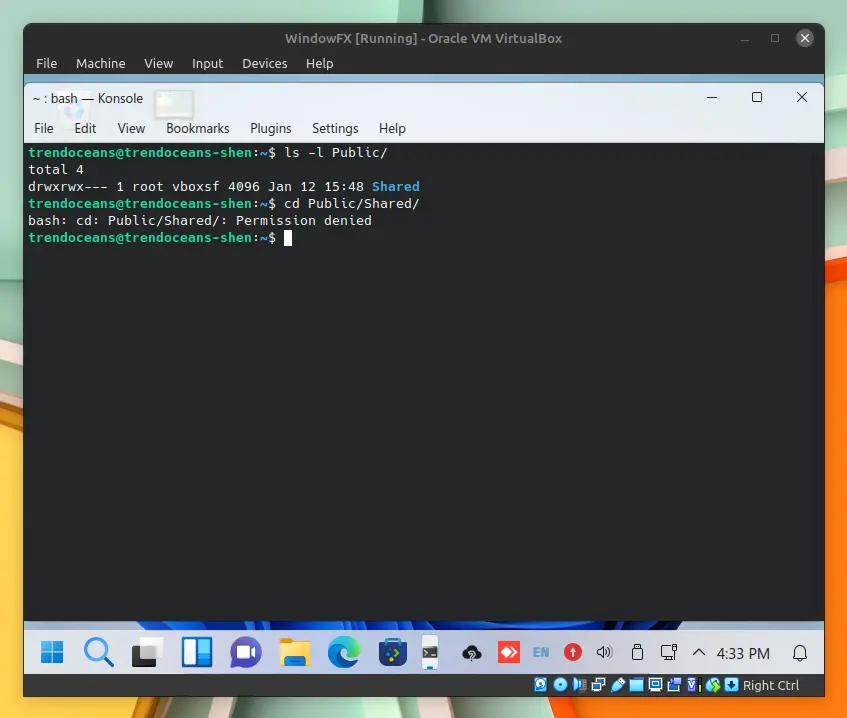
To add your account to the vboxsf group, go to your guest machine, open the terminal, and run the following command to get the current user to be part of the vboxsf group:
$ sudo chown -aG vboxsf trendoceans
$ grep "vboxsf" /etc/group
The output of the above command shows us that “trendoceans” is part of the vboxsf group, but you will still not be able to access the shared folder until you restart your system, so please restart the machine.

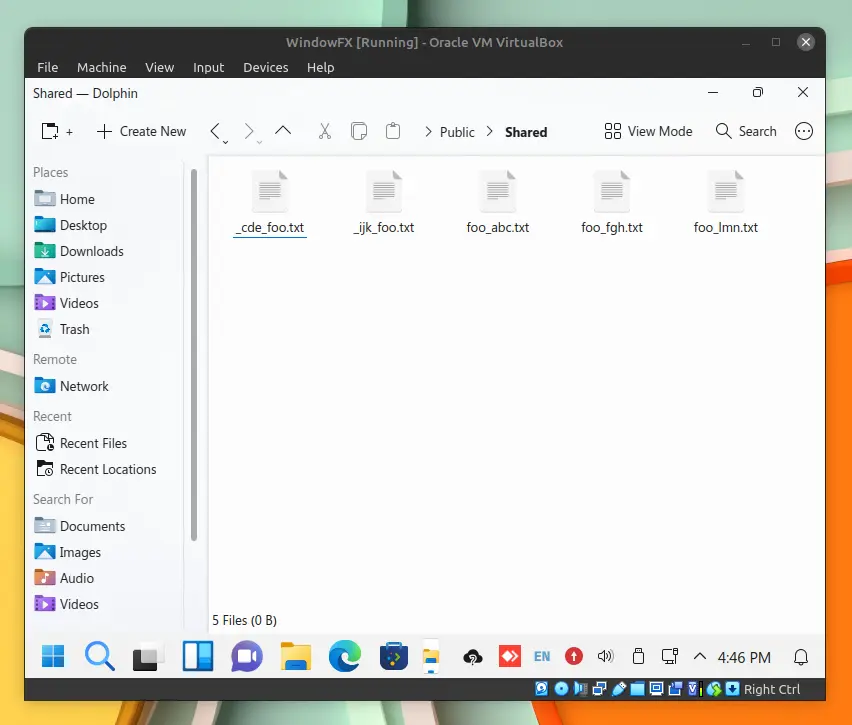
After restarting, the shared folder file will be accessible from the guest machine.
Wrap up
That’s all you need to do to turn on shared folders and get to them in Oracle VirtualBox.
Anyway, if there is something I need to consider, please use the space below to provide any additional information or feedback.
Till then, put your feet up and relax. As always, the next article will be up shortly.