For Nmap users time to taste another pie of network scanners powered by shodan.io.
Smap now brings all required features on hand to network admin or penetration tester without overgoing to shodan.io. Smap and Nmap are identical and generate the standard output, except Smap will also fetch public open port data from shodan.io as an addon to standard Nmap.
Who should use it?
Theoretically, Smap inherits all the functions of Nmap while taking advantage of shodan public API for port scanning with other features as follows…
Features
- Capable of scanning 200 hosts within a second
- Do not require an API key for port scanning
- Scan possible vulnerabilities in the target
- All scans performed in stealth mode
Installation
Binaries and Manual methods for the installation are available for Smap on your Linux system, except for Arch users who can directly install it using the AUR repository.
Method #1
For the Binaries installation method, visit the release page and download the latest tar file and follow the below method step by step.
Before proceeding further ensure the wget command is installed on your system.
$ tar -xf smap_0.1.0_linux_amd64.tar.xz
$ cd smap_0.1.0_linux_amd64
$ ./smap
Below is the behavior of the above command.
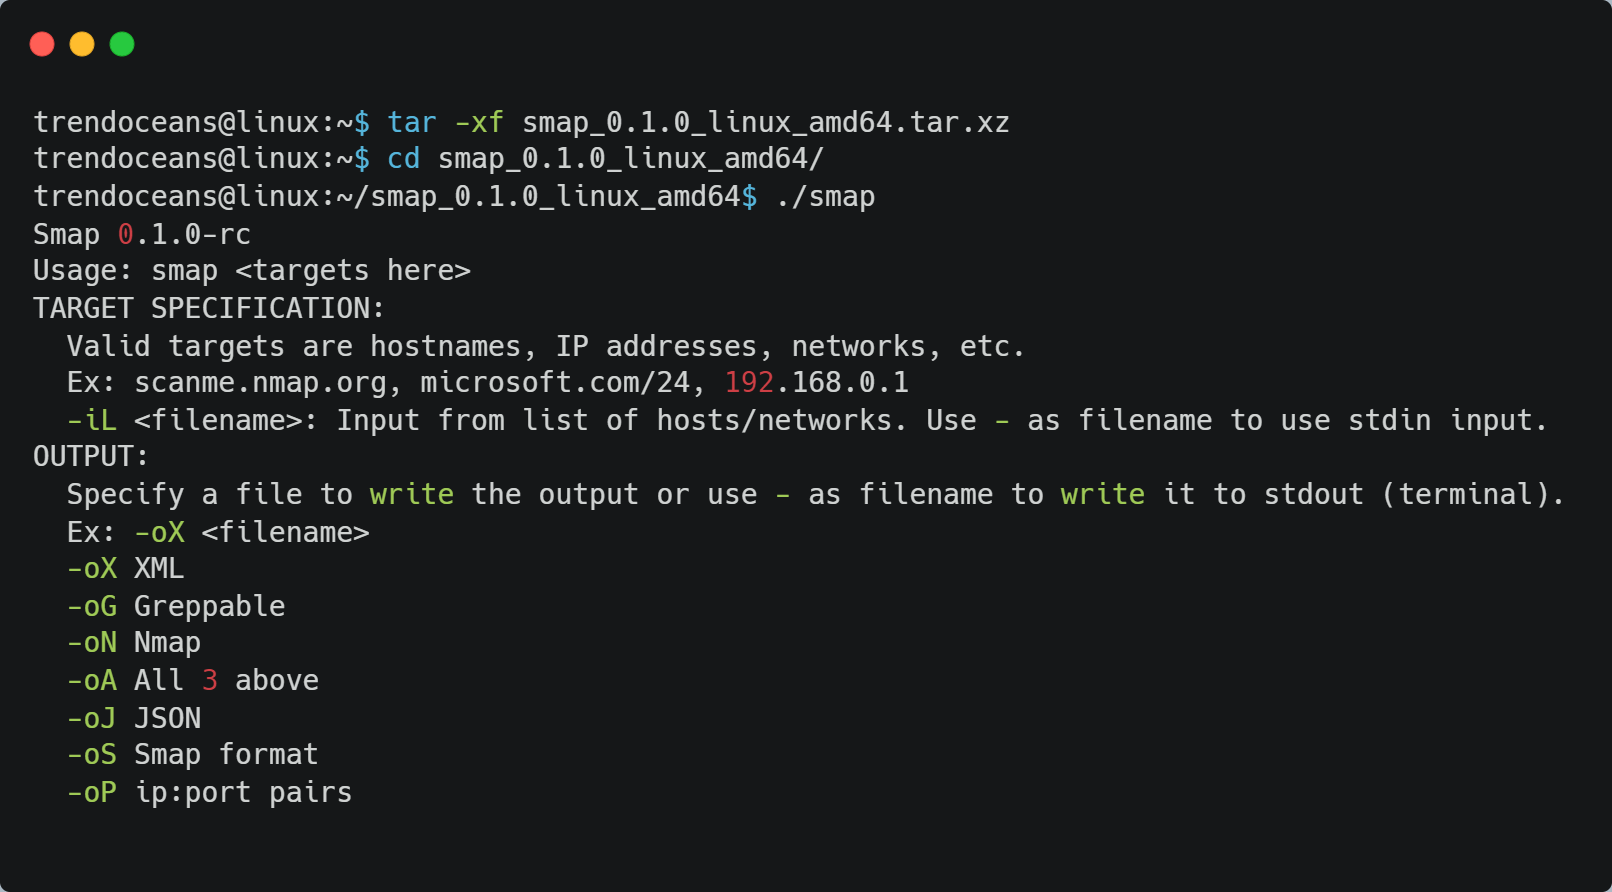
For now, you have to always navigate to the source directory to execute the smap command in this state. To make things easier, let’s place the source directory on the system path to make this command available from everywhere using the below code.
export PATH=$PATH:$HOME/smap_0.1.0_linux_amd64
Edit “.bashrc” or “.profile” for the bash shell or “.zshrc” for the zsh shell, and place the above code at the end of the line inside any of these files.
Method #2
This method requires golang on your system. Follow the below command to install golang on Ubuntu or other Debian-based distributions.
$ sudo apt install golang-goNow add the below line anywhere on “.bashrc” or “.profile” for the bash shell or “.zshrc” for the zsh shell.
export PATH=$PATH:$HOME/go/bin/Finally, install Smap using the below command on your system with golang.
$ go get -v github.com/s0md3v/smap/cmd/smap@latest
$ smap
Usage
Users familiar with Nmap can easily handle Smap and utilize options very efficiently. If you are unaware of Nmap and using Smap for the first time, then below is some example of Smap.
Syntax
$ smap [OPTIONS] [HOST]OPTIONS: These options/flag helps to define the method for scanning
HOST: Supported formats for the host are IPv4 Address (1.1.1.1), hostname (example.com), and CIDR (http://178.23.56.0/8)
Smap accepts all options of Nmap except a few are omitted, which include -p, -h, -o*, and -iL can be ignored. If you are unfamiliar with Nmap, below are some examples to help you.
Scanning Target
Specify directly the target address or hostname as shown below.
$ smap 192.168.0.1You can also scan multiple targets by locating them in a single text file and specify that text file in place of the hostname with the option -iL as shown below.
$ smap -iL targets.txtNote: All contents inside the targets.txt file should be valid IPv4, Hostname, or CIDR.
Identifying Ports
Currently, Smap scans 1237 Ports by default, and you can output the result using the -p option while scanning the host, as shown below.
$ smap -p21-30,80,443 -iL targets.txtFinal Thoughts
There are a few recommendations. I have been using Nmap for quite a while and recommend using Nmap for the initial users until smap is ultimately stabilizing with the industry standard.
Few complaints related to Smap such as being unable to scan some hosts and not giving relative output as Nmap. If you were facing any of those issues, please share your thoughts in the comments section.