Having a problem with PulseAudio and are not able to connect the latest pair of Bluetooth, then you must try to disable and enable the Pipewire audio server over PulseAudio to mitigate the issue.
There are lists of applications that I can’t afford to miss after setting up newly installed distributions, and one of them is EasyEffects, which enhances the audio quality to the next level.
Without it, I don’t get the real vibe from the music.
If you have ever used the EasyEffects, you will know it requires a PipeWire audio server, and it won’t work if you are using PulseAudio as an audio server, so I do have two options.
One option is that I could install PulseEffects, or else I could enable PipeWire, which is bundled with Ubuntu 22.04, and as you know, PulseAudio doesn’t support the latest Bluetooth earphones, so it’s better for me to enable Pipewire.
After making the changes, EasyEffects started working, so if you are having a similar kind of problem, then this article will be useful for you and you can even follow the below steps if your Bluetooth headset is not working in Ubuntu 22.04.
Replace/Disable PulseAudio with PipeWire
It’s quite simple to replace the PulseAudio audio server with PipeWire, you just need to follow the subsequent steps in the given sequence format.
 Check Audio Server Status
Before starting the procedure, let’s check whether PipeWire is installed on your Ubuntu system. As far as I know, you will find PipeWire installed on Ubuntu 22.04, and starting with the upcoming release of 22.10(Kinetic Kudu), you will find PipeWire as a default audio server.
But it is not enabled by default, so you need to make some effort to enable the PipeWire audio server.
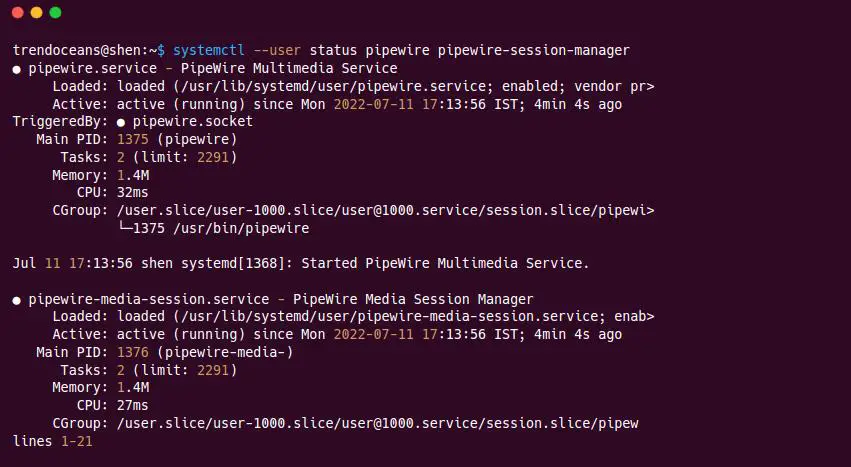
First, let’s check whether PipeWire is installed on your system by running the below command:
$ systemctl --user status pipewire pipewire-session-managerAs you can see PipeWire is installed but it is not in an active state.
For those who are following this guide on any other version of Ubuntu or Debian-based distribution, you will not get the above output, so to continue with us, you need to run the following command:
$ sudo apt update
$ sudo apt install pipewire
And when you run the pactl info command to check which audio server is currently in use, it will show “pulseaudio” is currently operating.

 Install the Audio Client and a Few Extra Libraries
From the above step, you have learned that PipeWire is not a default audio server even though PipeWire is preinstalled on Ubuntu 22.04 but is not enabled, so let’s enable it by installing external libraries.
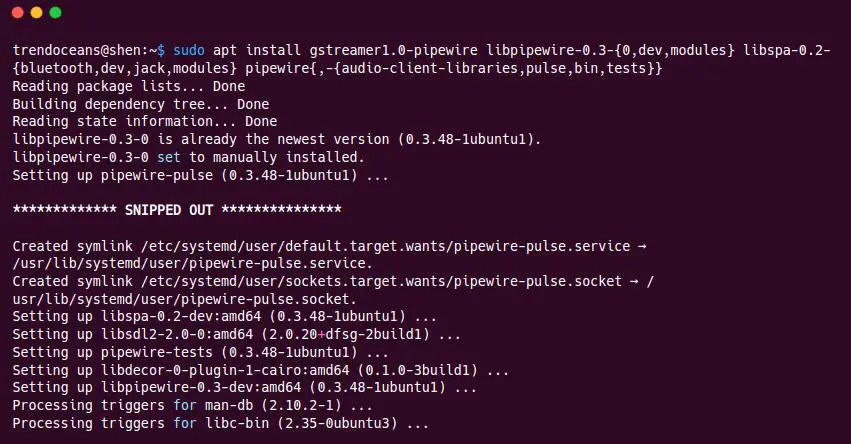
There are a couple of libraries you need to install on your system to avoid any issues while using hardware resources like Bluetooth or an audio jack.
$ sudo apt install gstreamer1.0-pipewire libpipewire-0.3-{0,dev,modules} libspa-0.2-{bluetooth,dev,jack,modules} pipewire{,-{audio-client-libraries,pulse,bin,tests}}Below is the output of the above command.
 Install WirePlumber
The last step is to install WirePlumber, which will work cordially with PipeWire to manage audio/video streams from hardware to software or vice-versa.
Apart from that, it also manages device permission and many other important management tasks.
Instead of WirePlumber, you can also install pipewire-media-session, but the developer suggests using WirePlumber; hence, we will also suggest you use WirePlumber.
To install WirePlumber run the following command:
$ sudo apt install wireplumber gir1.2-wp-0.4 libwireplumber-0.4-{0,dev} Disable and Enable PipeWire
After following the above steps, let’s disable PulseAudio and enable PipeWire. It’s quite simple to enable; you just need to invoke a couple of commands to start using it.
Do copy-paste the following command into your terminal window to disable PulseAudio.
$ systemctl --user --now disable pulseaudio.{socket,service}
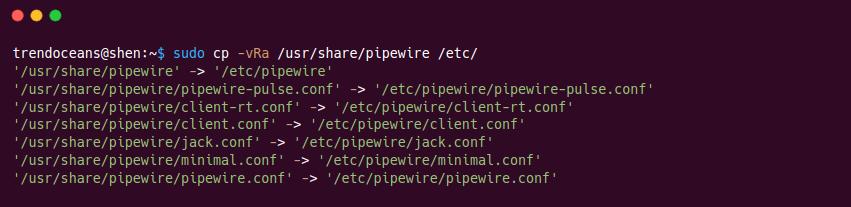
$ systemctl --user mask pulseaudioAfter invoking the above command, you need to copy the configuration file from /usr/share/pipewire to the /etc directory.
$ sudo cp -vRa /usr/share/pipewire /etc/Below is the output of the above command.
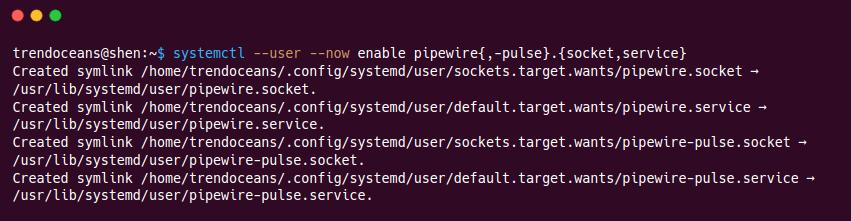
Once it is done, you can then run the final command to start PipeWire.
$ systemctl --user --now enable pipewire{,-pulse}.{socket,service}Below is the output of the above command.
 Verify
Once you have followed the complete steps, let’s verify the changes by running the “pactl info” command, which will show the current audio server name.

As you can see, my system is running with “PipeWire 0.3.48”. You may also get a similar output, just the version number will be different.
Replace/Disable PipeWire with PulseAudio
PipeWire is still in the initial phase, so you may face some difficulty while using it. If it is like that, then you can follow the below steps to revert the changes.
Temporary Disable PipeWire
Instead of removing PipeWire, you can also temporarily disable PipeWire and use PulseAudio. If you want to do that, then invoke the following sets of commands:
$ systemctl --user --now enable pulseaudio.service pulseaudio.socketIn case you get the error “Failed to enable unit: Unit file /home/trendoceans/.config/systemd/user/pulseaudio.service is masked”, then unmask PulseAudio, which you mask on the upper stage.
$ systemctl --user unmask pulseaudioAfter that invoke the below code to start PulseAudio:
$ systemctl --user --now enable pulseaudio.{socket,service}Once the above code is executed successfully, first reboot your system and run the below code to check the status of the audio server.
$ pactl info | grep 'Server Name'Below is the output of the above command.

Remove PipeWire
It’s not advisable to remove PipeWire from your system because it is already dependent upon other libraries, which may cause any unknown issue.
Even though you want to remove it, you can follow the below steps.
Remove Installed Libraries
On top, you have installed libraries to support PipeWire, so the first step is to remove all libraries or dependencies from your system by invoking the below command.
$ sudo apt remove gstreamer1.0-pipewire libpipewire-0.3-{0,dev,modules} libspa-0.2-{bluetooth,dev,jack,modules} pipewire{,-{audio-client-libraries,pulse,bin,tests}}Remove WirePlumber
After removing all the dependencies, remove WirePlumber:
$ sudo apt remove wireplumber gir1.2-wp-0.4 libwireplumber-0.4-{0,dev}Enable PulseAudio
Once you remove the package, you can enable the PulseAudio service by invoking the below code:
$ systemctl --user --now enable pulseaudio.{socket,service}In case you get the error “Failed to enable unit: Unit file /home/trendoceans/.config/systemd/user/pulseaudio.service is masked”, then unmask PulseAudio, which you mask on the upper stage.
$ systemctl --user unmask pulseaudioAfter completion of the above command, run the below command again.
$ systemctl --user --now enable pulseaudio.{socket,service}Verify Changes
You can verify the above changes by executing the below code, but you may get an error while checking the status like “Connection failure: Connection refused pa_context_connect() failed: Connection refused”.
To fix this issue simply restart your system, and try to run the same command once again.
$ pactl info | grep 'Server Name'Wrap up
That’s all for now!
If you are facing any issues while following the guide, then do let us know in the comment section. I’ll be glad to help you out.
Thank you so much! It worked!
hi, I have this problem:
pipewire-session-manager.service
Loaded: error (Reason: Unit pipewire-session-manager.service failed to loa>
Active: inactive (dead)
…..
how can i solve?
thank you
Step 3 should be something like this:
sudo apt install wireplumber gir1.2-wp-0.4 libwireplumber-0.4-{0,dev} pipewire-media-session-
The dash at the end will remover the pipewire-media-session package which is present in the Ubuntu 22.04. The wireplumber package is a replacement.
Just installed my dual boot Windows 10/Ubuntu 22.04, had no sound. This thing saved me. Thanks a lot!
Do you think this will work if I am running Ubuntu 22.04 inside Windows Hyper-V ?
I can’t vouch but as per my understanding, it should work!
Thank you for the great instructions! Only one comment – before I could successfully run “pactl info” I had to reboot.
Also for those who want the latest pipewire and wireplumber versions, there are two PPAs for both Ubuntu 20.04 and 22.04:
https://launchpad.net/~pipewire-debian/+archive/ubuntu/pipewire-upstream
https://launchpad.net/~pipewire-debian/+archive/ubuntu/wireplumber-upstream
Thanks!!!. It worked perfectly
Thanks. This worked perfectly.
WOW!!
Thx, it worked perfect!!
Thank You !!!!
Thanks, fixed my “dummy output” from my sound applcation
And? stil no sound with pipewire LOL!! WTF have i done!