GNOME DE is one of the most popular desktop environments in the Linux ecosystem and has been popular for a while. Even popular Linux distributions like Ubuntu or RedHat ship their operating systems with GNOME DE.
If you ever use the KDE DE, then you might criticize that GNOME is not that customizable like it, but that’s not true; you can utilize the GNOME shell extension (or plugins) to add external features to your current DE.
Top extensions like Dash to Dock, TopIcons Plus, User Themes, and more are available for GNOME DE. But the question is how to actually install these extensions on your GNOME desktop running on Ubuntu, Fedora, Rocky Linux, etc.
Fortunately, the process is quite simple and can be done through either the GNOME Shell Extensions website or using the gnome-extension command.
So, stick with this article till the end to discover the easiest and recommended ways to install GNOME shell extensions on your Ubuntu or any other system running on GNOME DE.
Methods to Install GNOME Extensions
There are mainly two ways to install GNOME extensions on your system:
- Install GNOME extension using GNOME Shell Firefox or Chrome extensions
- Install GNOME extension using Command line using a zip file
1
Install GNOME extension using GNOME Shell Firefox or Chrome Extensions
The first method is very convenient and easiest: installing any extension directly from the website using the GNOME Shell Integration extension available for popular browsers.
It enables your browser to communicate with the GNOME Shell and allows you to install, enable, and disable extensions directly from the website.
I’m installing the GNOME Shell integration extension on my Chrome browser.
You can do the same thing for the Firefox browser if you want, but since Firefox is installed from a snap package on Ubuntu, you may not be able to use extensions to install, remove, or enable and disable a plugin because snap packages have certain limitations when it comes to interacting with the host system.
In that case, you can install non-snap Firefox or an extension from a zip file.
Install the GNOME Shell Integration Extension
To begin, click on one of the following buttons to install the GNOME shell integration extension, depending on your browser.
Once you have installed the extension on your respective browser, you will need to install the connector on your Linux system, which will communicate with the extension installed on your browser. Otherwise, an error that the native host is not detected will be prompted to you.
Install Native Host Connector
To suppress the error, you can install the native host connector, which allows Firefox or Chrome to interact with the host system and enables you to use the extensions installed on your browser to manage your system GNOME plugins.
Execute one of the provided instructions to install the Native Host Connector based on your Linux distribution.
For Debian and Ubuntu-based distributions
$ sudo apt install chrome-gnome-shellFor RHEL and Fedora-based distributions
$ sudo dnf install chrome-gnome-shell			// Fedora 26 +

#OR

$ sudo dnf copr enable region51/chrome-gnome-shell	// Older version
$ sudo dnf install chrome-gnome-shell
For Arch and Manjaro-based distributions
$ git clone https://aur.archlinux.org/gnome-browser-connector.git
$ cd gnome-browser-connector
$ makepkg -si
For other Linux distributions, you can refer to this guide.
Install Extension
After completion of the above step, you can search for and install extensions from the official GNOME extension website so that you can enhance your experience with GNOME DE.
Here is the step-by-step guide to installing the extension.
1. First, visit the official GNOME extension website, which looks similar to the below image.
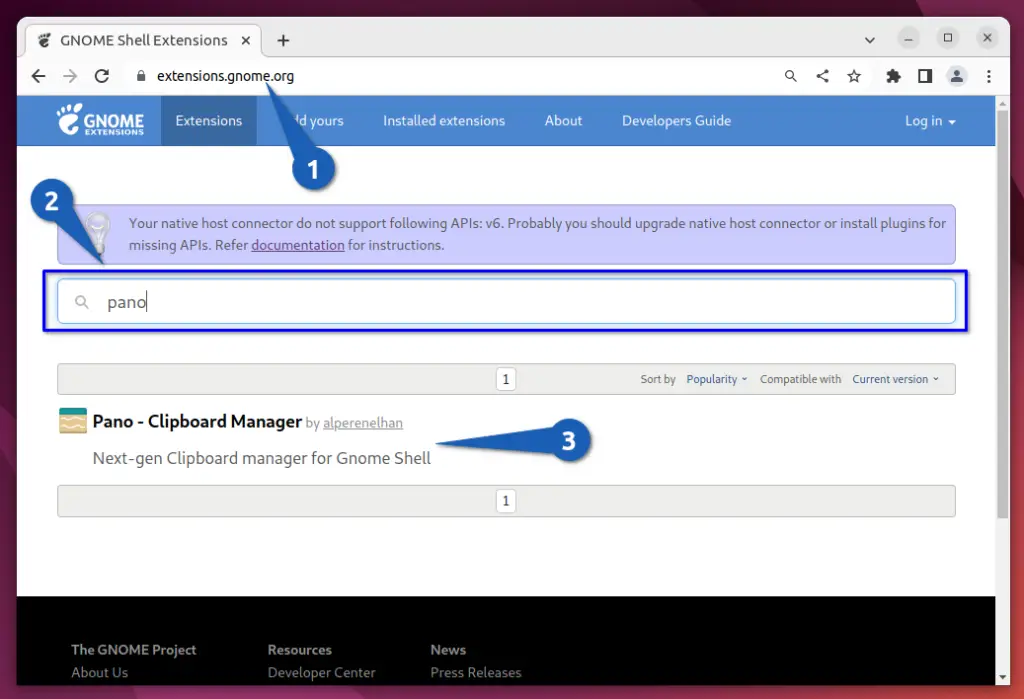
2. Follow the marking to search for the required extension, and as you can see, I have looked for “Pano – Clipboard Manager“, which is a modern clipboard manager for GNOME shell.
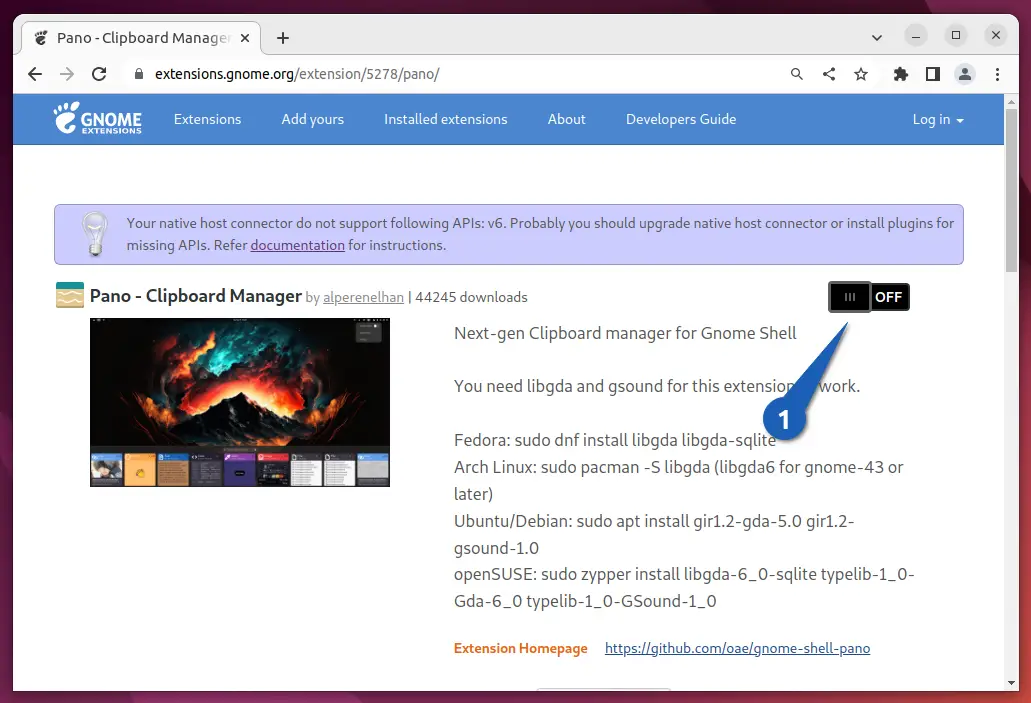
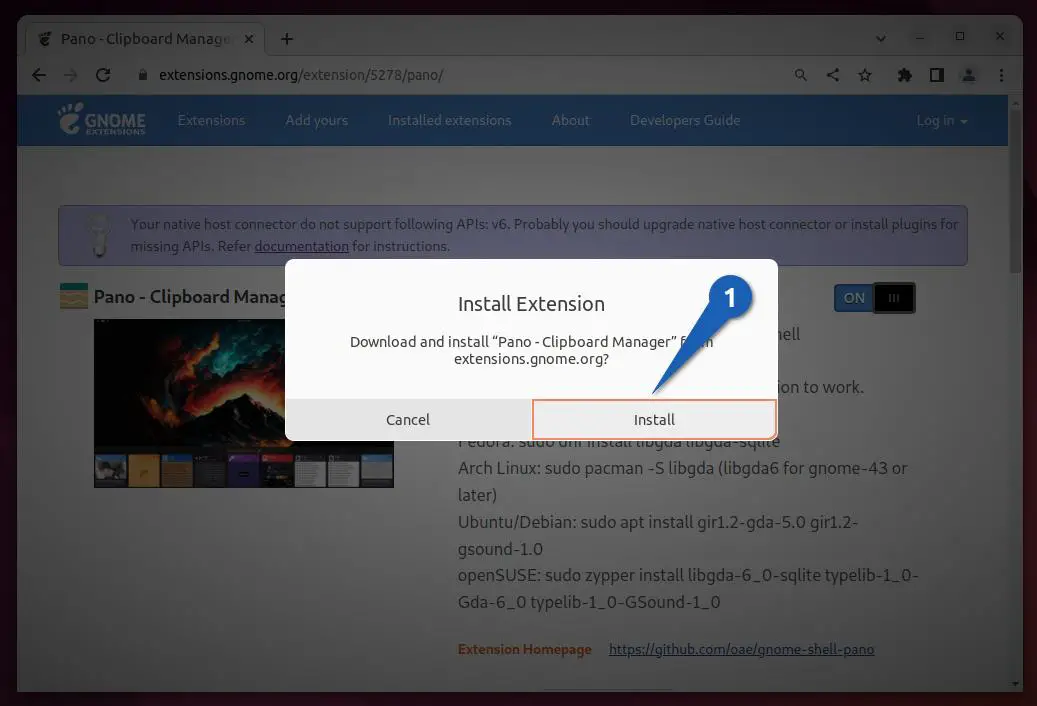
3. Now, click on the selected extension and flip the switch to install the extension, which will prompt you for confirmation, so please click on the “Install” button to continue.
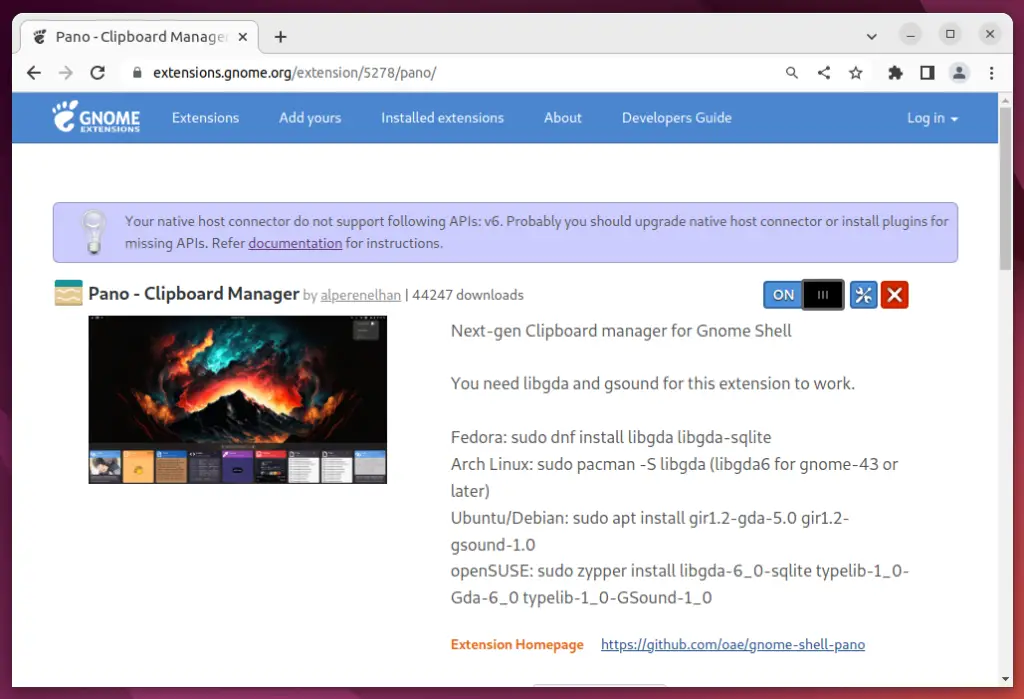
4. Once the installation is complete, you will find the webpage has added two more buttons for you. The first switch button is to enable and disable the extension; the second button is related to the preference or setting of the extension; and the last button is to remove the extension from your system.
Here, you are done. Quite simple, isn’t it? Now it’s your turn to install any extension.
2
Install the GNOME Extension using the Command-Line with a Zip File
When you have decided to manually install the extension on GNOME via command-line, then you need to get the “.zip” file for the required extension and the “gnome-shell-extension” tool to install, remove, enable, and disable the extension.
So first, open up your terminal screen and execute the following command to install the “gnome-shell-extension” package.
$ sudo apt update
$ sudo apt install gnome-shell-extensions
Once you have installed the “gnome-shell-extensions” package, visit the official GNOME website to get compatible extensions for your device.
Once you have selected the extension, scroll down and look for the “Download” option, where you need to select the shell version, which you can find by executing the “gnome-shell --version” command on your system.
As my system is running on GNOME shell version 42, let me select that and the 50 version of GSConnect.

After providing information, the file will automatically be downloaded to your system.
The next step is to install the downloaded “gsconnectandyholmes.github.io.v50.shell-extension.zip” file on the system by executing the following command:
$ gnome-shell /Download/gsconnectandyholmes.github.io.v50.shell-extension.zipOnce you are done, your extension will begin showing up, depending on its usage. For instance, if you have not found it, try to restart your system or run the following command to enable the extension.
$ gnome-shell enable [PRESS-TAB-TO-SUGGEST-ENABLE-EXTENSION]That’s it. You have successfully installed the GNOME shell extension manually from the command line.
Wrap up
That’s all for this article, where you have learned how to install extensions on GNOME through the official GNOME Shell Integration extension and using the command-line method.
If you are having any issues while following the guide, then let me know. I’ll be more than happy to help you out.