Rate limiting is very crucial for a website with a massive user base to avoid 503 or 429 errors. Even if you have a small website, you should limit the rate of each connection to prevent DDOS attacks (which are surely going to spoil the user experience) or prevent your server from receiving too many requests at the same time.
So, the question is how the rate limit for connections (or requests) will work on your NGINX server. The answer is pretty simple. Let me give you an example:
You have a room with space for 20 people. Usually, they come and go simultaneously, but in a situation where more than 20 people arrive in your room, you will gently avoid them with a message like 429 (too many people).
In such a situation, you can either kick them out and say “never ever gonna come here” or let them wait in the queue until the same number of people inside the room leave.
It’s all your choice what you wish to do with the extra people who arrived. So let’s see how you can apply this terminology to your NGINX server using the directives.
Limiting the Rate of Connections (or Requests) in NGINX
Open your NGINX configuration file using your choice of text editor.
$ sudo vim /etc/nginx/nginx.confIf you are using a separate virtual host for your site, then specify the location of that site configuration file, which in most cases is located at /etc/nginx/sites-enabled/example.conf.
After that, you are about to add some directives to your configuration file, starting with:
limit_req_zone
The limit_req_zone directive (valid for http {} context) is used to limit the rate of requests, taking three parameters as input: key, shared memory zone, and rate.
- Key: A variable which is used to distinguish one client from another.
- Shared memory zone: The name and the size of your zone that keeps the state of these keys.
- Rate: will specify the request rate limit in requests per second (
r/s) or requests per minute (r/m).
After setting all the above-mentioned parameters with the limit_req_zone directive, the result will look like below.
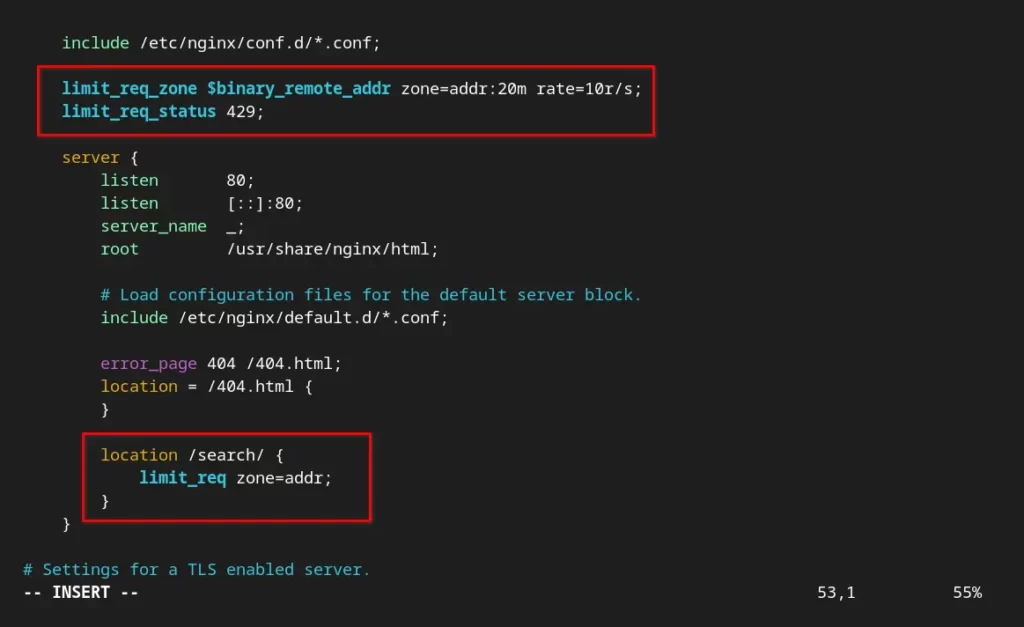
limit_req_zone $binary_remote_addr zone=addr:20m rate=10r/s;With this configuration, the shared memory zone addr will be created with a size of 20 megabytes. The addr zone will keep the state of the client’s IP address with the $binary_remote_addr (binary representation of the IP address) variable with 10 requests per second.
To measure the size of your shared memory zone, consider that the $binary_remote_addr value is 32 bits of IPv4 addresses and 128 bits for 64-bit addresses. Thus, the size of 16,000 IP addresses will occupy 1 megabyte of the zone.
limit_req_status
As mentioned earlier, if the storage capacity of the shared memory is exhausted, it will remove the old entry and add the new entry. However, if the freed space is not enough for a new entry, then it will throw a “503 Service Unavailable” error.
If you want to specify your own custom HTTP response code for returned or rejected requests, then use the limit_req_status directive.
limit_req_status 429;It is valid for server {}, location {}, or http {} context.
limit_req
Once the limit_req_zone and limit_req_status (optional) directives are set, you can use the limit_req directive to enable request limiting anywhere within the server {}, location {}, or http {} context.
It will take the shared memory zone (ex: addr) as a parameter and other optional parameters.
limit_req zone=addr;After applying all the above-mentioned directives to your web application (ex: / or /search/ or /downloads/ or /api/). It will process the 10 requests per second until the 20-megabyte shared memory zone is exhausted for a new request.
Below is how your configuration file will look after applying all the directives.
Save/close the configuration file and execute the following command to check if the modified configuration is not throwing any errors.
$ sudo nginx -tIf all the syntax and tests are OK, then execute the following command to reload the NGINX service to apply the changes.
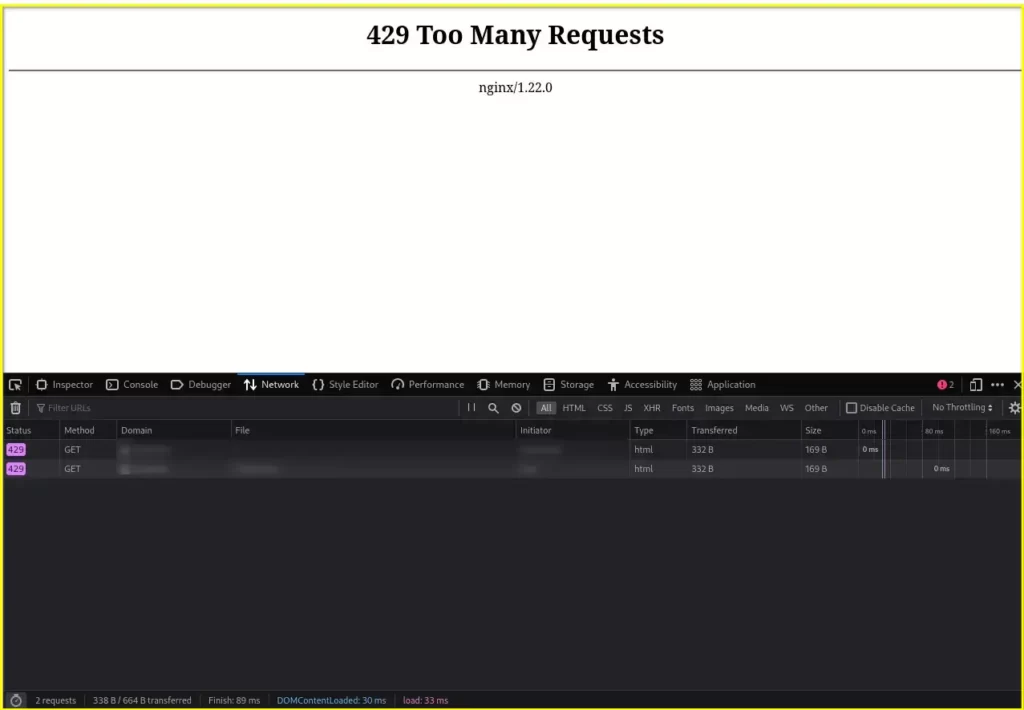
$ sudo systemctl reload nginxOnce the server rate limit reaches 10 requests per second at the /search/ location and all the shared memory storage is exhausted, you will get the following “429 Too many requests” error.
Handling Excessive Requests
Currently, when the shared memory storage reaches 20 megabytes and the rate limit is set to 10 requests per second, the new request is returned or rejected, and you also know that this is not the best way to handle the client (unless they are bots).
In such cases, you use the burst parameter with the limit_req directive. The parameter (integer) defined in burst will be the maximum number of excessive requests that will be awaited until the shared memory storage or rate limit is processed.
limit_req zone=addr burst=50;In the above scenario, if the request rate reaches more than 50 requests, it will throw a 503 error. To avoid it, you can use the nodelay parameter to start the queuing without any delay.
limit_req zone=addr burst=50 nodelay;That’s all for now. I hope you can apply the above directives to the configuration file on your own. If you are unable to do that, then read this article again or ask for help in the comment section.
Below are some useful links for you.
- How to Limit the HTTP Bandwidth in NGINX
- How to Limit the Number of Connections in NGINX
- How to allow/restrict access by IP address
- How to change the Nginx Web Document Location.
- How to Increase NGINX Worker Connections Limit in Linux
- How to Limit the Number of Connections in NGINX
Until then, sayonara!