Did you receive any errors while updating the repository, such as “E: /etc/apt/sources.list could not be read” or any other source file error? If yes, then restoring the default repositories can help fix such errors.
When you mess up with the source file, this error is very common to occur, and it’s difficult to find the cause when the system doesn’t print any kind of error, but once you try to install any application, you will find that application is not available in the repository.
The same thing has happened to me, where an application that was previously available in the repository is suddenly unavailable, and the apt install command returns the error “E: Unable to locate package screen.”
After debugging, I found the root cause of the above problem, which is why I’m here with you today to help you fix the same kind of problem on Ubuntu and Linux Mint.
How to Restore Default Repositories in Ubuntu
The steps are pretty simple and easy to follow. You jsut need to make a backup of the /etc/apt/ directory to prevent any changes to the following: additional PPAs that you have installed, your GPG key, and other important files.
 Create Backup of the /etc/apt/ directory
You can backup the /etc/apt/ repositories directory to make sure the current configuration is safe. If something unexpected occurs, you can simply rename the file to restore it.
To create a copy of the /etc/apt/ directory, type the following command.
$ sudo cp /etc/apt /etc/apt.bakOnce the backup is made, use the following set of commands to delete /etc/apt/sources.list and make a new one:
$ sudo rm -v /etc/apt/sources.list             # Remove source file
$ sudo touch /etc/apt/sources.list             # Create a new source file
And once the source file has been created, proceed to the next section to populate repository information.
Also Read: Where Do Files Go When the rm Command Is Executed?
 Restore Default Repositories
You can use the built-in “Software & Updates” application to bring back the default repository information that was saved in the /etc/apt/sources.list file.
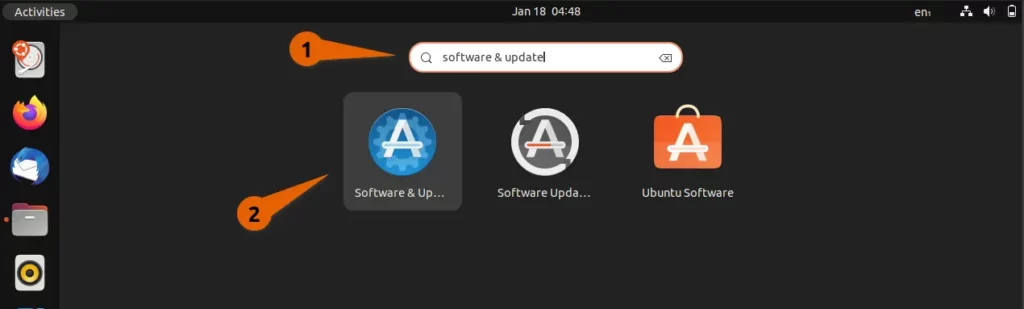
To begin the restoration process, hold down the “super” or “dash” key and look for “Software & Updates,” which should look like the image below.
When you open “Software & Updates,” you will see a variety of options, but you should focus on the first section, where you will select the repositories that you want on your system.
As you can see, it has multiple checkboxes, and from there, you need to select the repositories that you want on your system, but you may not be sure what type of repositories to select.
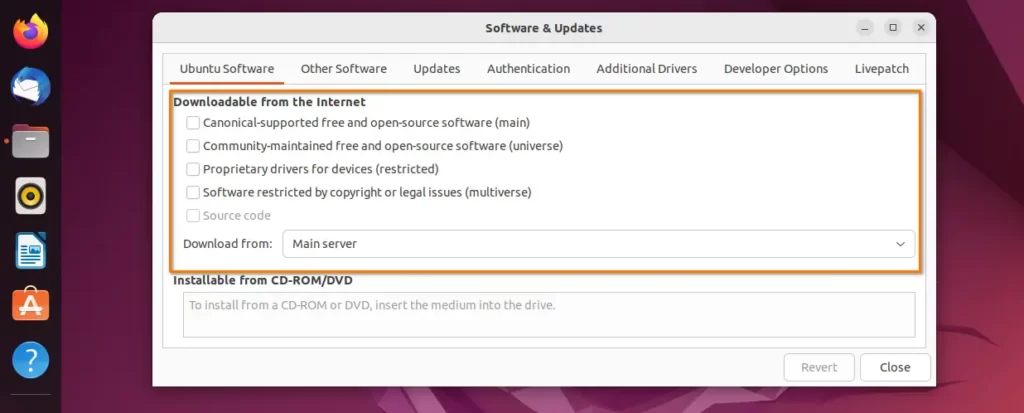
Then let me try to help with a simple explanation:
Types of repository:
- Canonical (main):- It is free and open source software that is the default repository, and you should definitely check this option.
- Community-maintained (universe):- You will find the most up-to-date free and open source software that is not yet available in the main repository; however, it may not be stable.
- Proprietary drivers (restricted):- Be sure to check if you have any proprietary hardware, such as an Nvidia graphics card, wireless network adapter, etc., that requires special drivers that are not widely available.
- Software restricted (multiverse):- If you’re looking for software that isn’t directly available in the repository due to licencing issues, you can search the “multiverse.”
After learning about the different types of repositories that Ubuntu offers, select it as shown below and close the application to reload the changes.
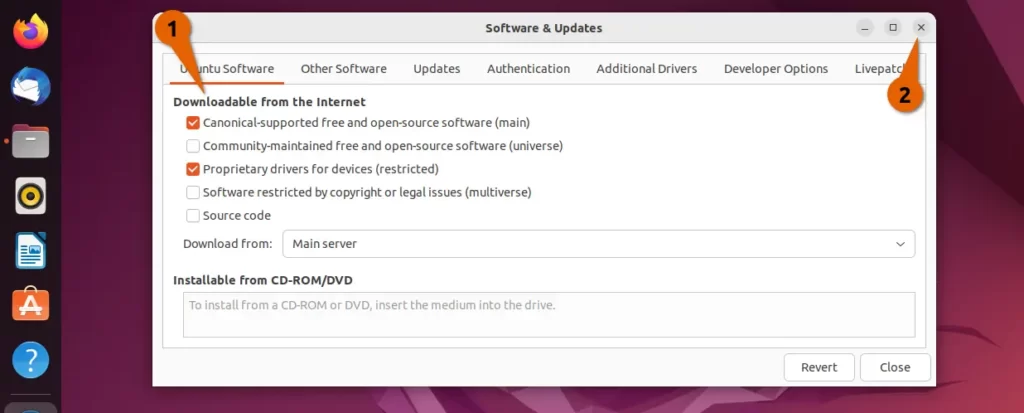
When you try to close the application, you will get a pop-up asking you to save changes. Simply click “Reload” and wait for the process to finish.

 Test Changes
You’re almost done with the steps, and now it’s time to put them to the test.
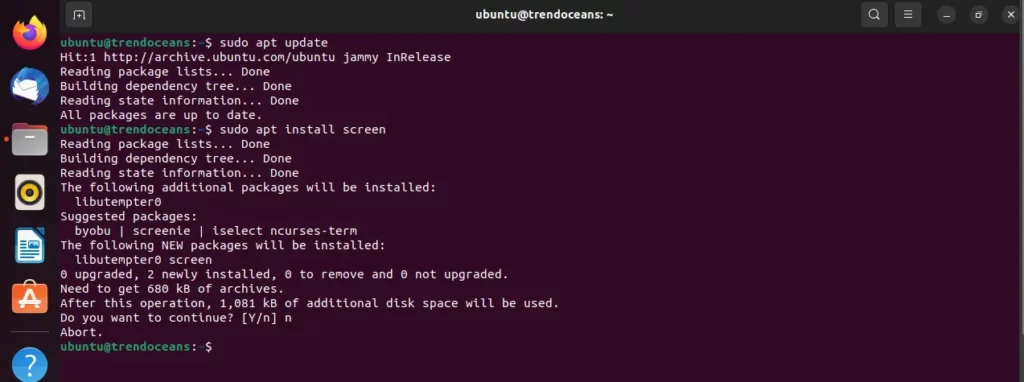
So open a new terminal window and try to update the repositories, and after that, try installing the application that had thrown the error.
As you can see, I have tried to update and install the application, which was not happening earlier, but thanks to the above method, it is now working.
If the issue persists, then I would recommend that you disable or remove PPAs because sometimes they may also clash while updating the repositories or installing applications.
$ sudo rm -rf /etc/apt/sources.list.d/replacewithppa.listAlso Read: How to Remove and Disable an Individual PPA in Ubuntu 22.04
How to Restore Default Repositories in Linux Mint
If you are using Linux Mint, then the above method described here will not work, so you have to follow the below step, which is more simple and easy compared to the above one.
So to start this guide, click on “Menu” and look for “Software Sources” and open it, which will ask for the sudo password, so please enter it to move ahead.
Once you open the “Software Sources,” you will find the first option “OfficialRepositories,” and on the left side of the application, you will find the “Mirrors,” which contain “Main” and “Base,” like shown in the below image.
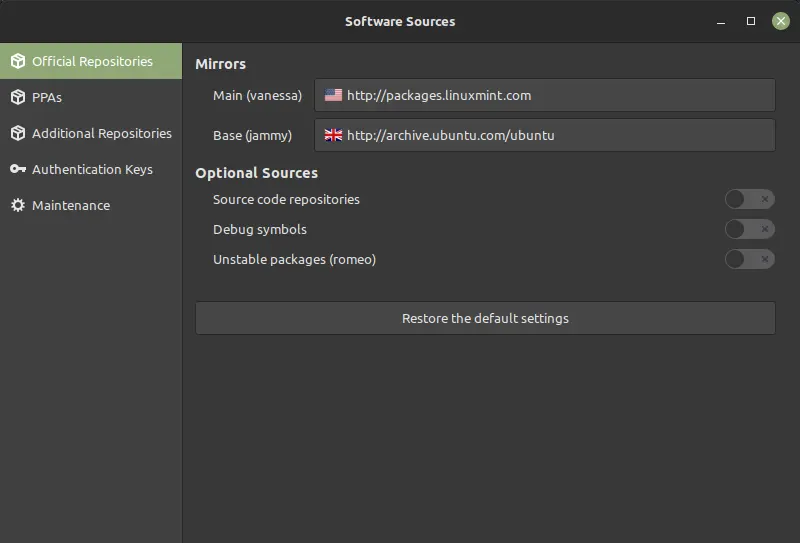
If you want, you can change the mirror link by clicking on the drop-down menu, which will show the mirror link with the connection speed, but I won’t recommend you make any changes.
Simply click on “Restore the default settings” to set the default repository information to /etc/apt/sources.list.d/official-package-repositories.list and click on “OK” to make changes.
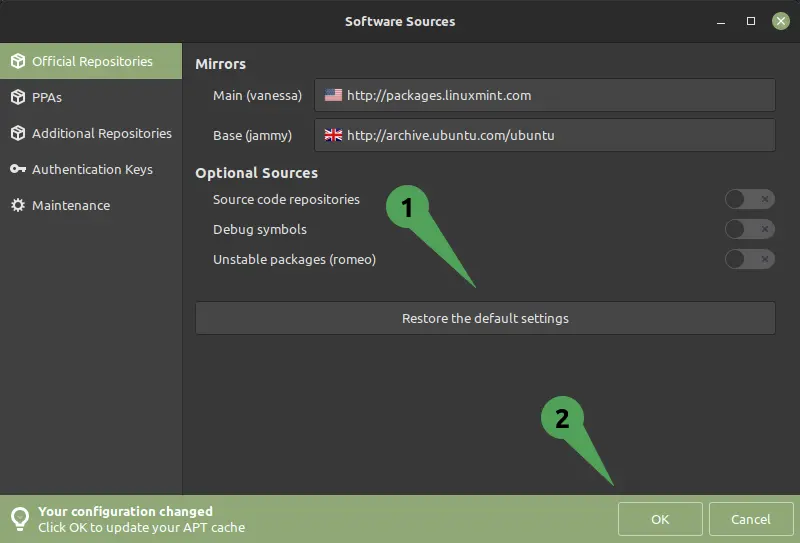
And once it is done, you can test the changes by updating or installing the application.
If the problem still happens after that, you can try updating the repository again by commenting out the line from /etc/apt/sources.list that is also one of the reasons for the error we just talked about.
Wrap up
After following the above guide, you will be able to successfully restore the default repositories and resolve any repository-related issues that may have arisen in your system
Additionally, it is important to remember to keep your repositories up-to-date and regularly check for any new changes, as it can help you maintain a stable system and install the latest updates
With that in mind, I’ll wrap up this guide. If you have any further suggestions, please share them below.
Thank’s but I do not have a graphic mode
I believe you are using Ubuntu focal. If not, then just replace the Ubuntu version codename and paste the following lines of code in /etc/apt/sources.list and comment out the previous lines.
deb http://archive.ubuntu.com/ubuntu/ focal main restricted universe multiversedeb http://archive.ubuntu.com/ubuntu/ focal-updates main restricted universe multiverse
deb http://archive.ubuntu.com/ubuntu/ focal-backports main restricted universe multiverse
deb http://security.ubuntu.com/ubuntu/ focal-security main restricted universe multiverse
After adding line save the file and run `sudo apt update` to refresh