Does your system report “Error 404 Not Found” when you try to update the repository? If this is the case, it’s likely that the repository you’re attempting to access is no longer supported, so let’s look at how to remove and disable PPAs from the system.
After installing a few different PPAs on your Ubuntu system, you may find that some of the PPAs are no longer supported because the developer or community member who made them is no longer actively maintaining the repository.
When this happens, you might get the Error 404 Not Found message when you try to update the repository or install new packages from that repository.
To fix this, you can either temporarily disable the particular PPAs from your system or else remove the PPA from the system, which will delete the application source address from /etc/apt/source.d.
There are two ways to turn off the PPA on the system.
- Disable and Remove PPA in Ubuntu Using the Command Line
- Graphical ways to disable and remove PPA in Ubuntu
Disable and Remove PPA in Ubuntu Using the Command Line
Disabling PPAs in Ubuntu can be done in just three easy steps, and you’ll also find out how to remove any additional PPAs in the next section.
Disable Specific PPAs in Ubuntu 22.04
You can remove the specific PPA from your system when you know where it is stored and how to manage it. So, we’ll first show you how to temporarily turn off the PPA on your Ubuntu-based computers before we show you how to remove the added PPA.
Step: 1 Find the PPA information
You can find PPA information by either running the apt update command or going to /etc/apt/sources.list.d/ and looking at what’s in the directory.
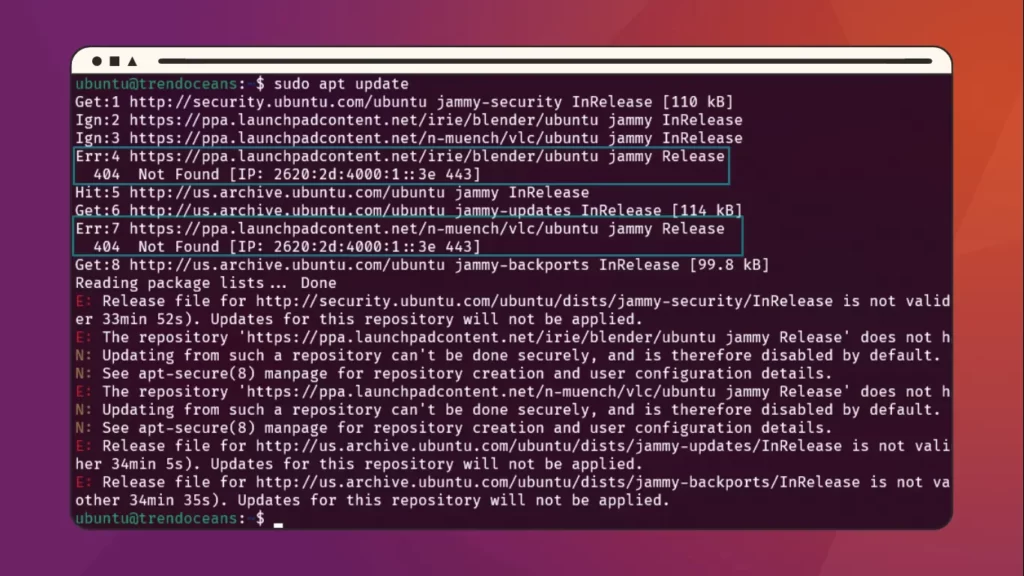
The best option I would suggest is to run sudo apt update, which will list out all the PPAs that you have added to your system. Along with that, you will also get to know which PPA is throwing an error while updating the repository.
On my part, I have tried to update the repository and found that a couple of PPAs are not working anymore, and because of that, the output looks messy, which you can clearly see in the below-attached image of my terminal window.
Step: 2 Modify particular PPA content
From the above output, I have selected "https://ppa.launchpadcontent.net/irie/blender/ubuntu", which is on the fourth line of the above attached image.
After deciding which PPA to uninstall, navigate to the /etc/apt/sources.list.d/ directory, which contains a list of all the third-party PPAs you’ve installed.
$ cd /etc/apt/sources.list.d/
$ ls
The output of the above command is shown below:
ubuntu@trendoceans:/etc/apt/sources.list.d$ ls
irie-ubuntu-blender-jammy.list  n-muench-ubuntu-vlc-jammy.list
According to the above output result, I do have two PPA information files, and from those I have selected the file irie-ubuntu-blender-jammy.list, which I’ll open for you using the nano command line editor with sudo privilege to modify the file.
$ sudo nano irie-ubuntu-blender-jammy.listOnce you open the respective file, you will find a similar kind of output as shown in the below image. As you can see, the second line of information is commented out, and for this reason, it will not show up while updating the repo.
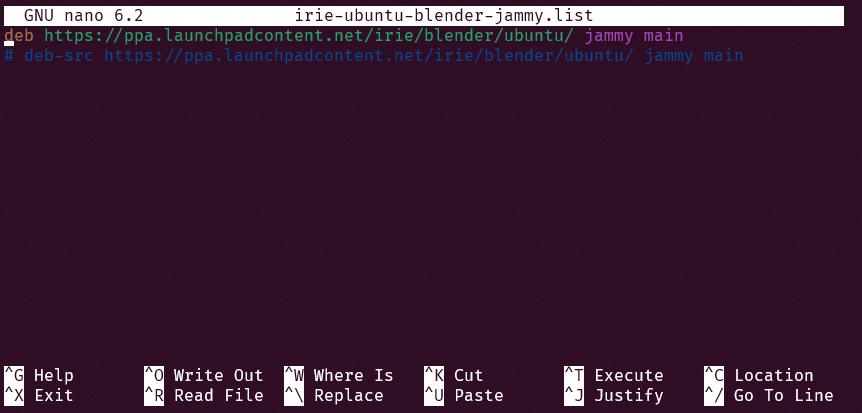
The same thing we will do with the uncommented line of information, so take your cursor to the start of the first line and append the “#” at the beginning of “deb” as explained in the below image.
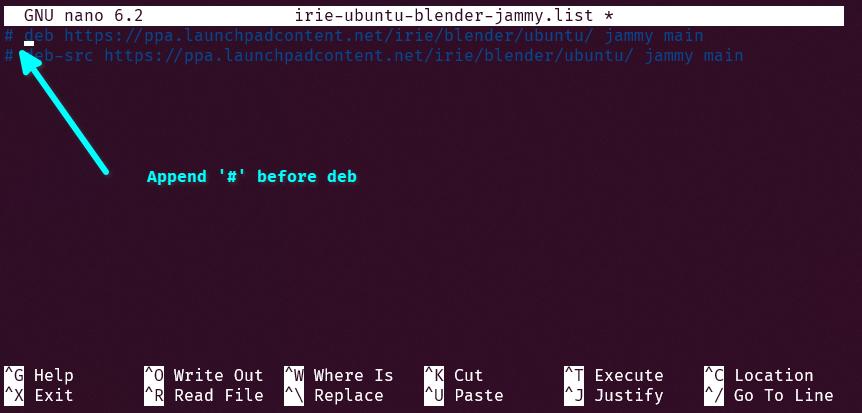
Once you have added the “#”, save the file by pressing Ctrl-O.
Step: 3 Update system to verify changes
After following the above steps, let’s update the repository to see the changes by executing the below command in your terminal window.
$ sudo apt updateAs a result, you will find the apt update command is not printing the disabled PPA information during the repository updates, which was the main objective of this section.
Remove specific PPA from Ubuntu based distributions
Well, I know you are aware of where the PPA is located in Ubuntu and other Ubuntu-based distros because you have followed the above steps where you learned how to disable the PPA.
Instead of turning off PPA, you can use the rm command to delete one or more PPA files from your system. This will remove the file from your system and permanently stop the error message about the deprecated PPA information.
Also Read: Where Do Files Go When the rm Command Is Executed?
Let’s say I want to remove "https://ppa.launchpadcontent.net/irie/blender/ubuntu" from the system, which is located in the /etc/apt/sources.list.d/ directory.
To know the exact filename of the respective PPA, let me first get into the directory by executing the following commands in the given sequence:
$ cd /etc/apt/sources.list.d/
$ ls
The output of the above command
ubuntu@trendoceans:/etc/apt/sources.list.d$ ls
irie-ubuntu-blender-jammy.list  n-muench-ubuntu-vlc-jammy.list
The final command you must run once you have determined the PPA filename is shown below.
$ sudo rm irie-ubuntu-blender-jammy.listAnd hence, you can update the repository to see the changes.
Those who don’t want to manually edit or remove the PPA information to avoid any unwanted changes can use the “Software & Updates” application to disable and remove the PPA, which we will see in the next section.
Remove specific PPAs using add-apt-repository
Alternatively, you can also use the add-apt-repository command to remove PPAs, which is also one of the most convenient ways to remove PPAs from your Ubuntu or Ubuntu-based system such as Linux Mint, Pop!_OS, and so on.
To remove a PPA’s repository, simply run the following command with the ppa name replaced, and the add-apt-repository command will clear the repository information from /etc/apt/sources.list.d.
$ sudo add-apt-repository --remove ppa:savoury1/ffmpeg4And once it’s done, you update the system repository to see the changes.
Graphical Ways to Disable and Remove PPA in Ubuntu
If you prefer a graphical method, you can use “Software & Updates” to disable and remove PPA from your Ubuntu system by following the simple instructions I’ve provided below.
Use the Software and Updates application to disable the PPA from Ubuntu
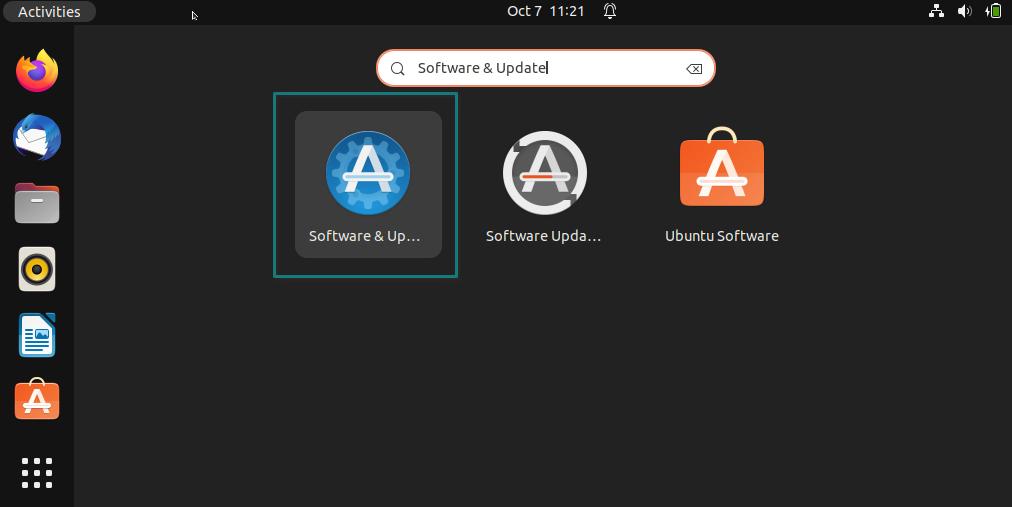
Step 01: First of all, press the super key or take your mouse to Activities and search for “Software & Updates,” which will be the first thing to open as shown in the below image.
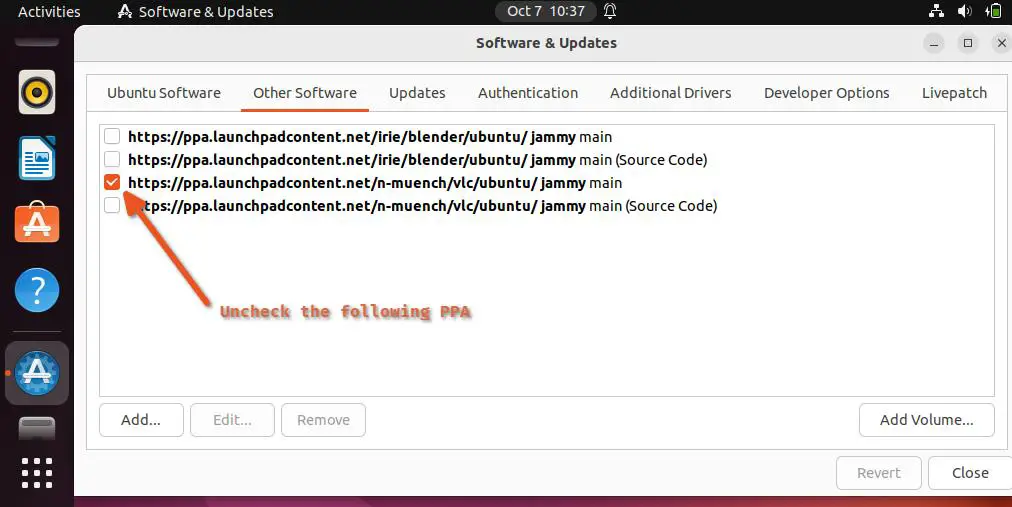
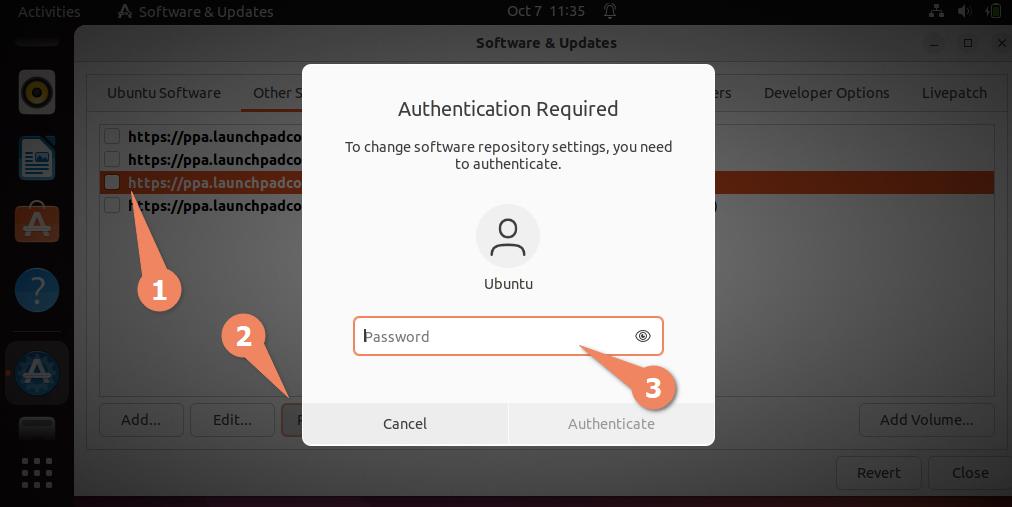
Step 02: Change the tab to “Other Software” and uncheck the PPA, which you want to disable. As you uncheck, the box, it will prompt you to enter a sudo password to authenticate the process.
Once the password is validated, you will find the output of the “Software and Update” as shown in the below image.
Quite simple, right?
Use the Software and Updates application to remove the PPA from Ubuntu
You may also remove the PPA from your system by using the same software, just like how we disabled the PPA in the above section. Open the “Software and Update” application and change the tab to “Other Software.”
As you can see, I have selected the third PPA, which is "https://ppa.launchpadcontent.net/n-muench/vlc/ubuntu". Once you select the PPA, the “Remove button” will become enabled for use, so simply click on it, which will ask for your sudo password to authenticate the process.
As soon as that is done, you will see the outcome.
When performing an update to the repository, you will no longer see the numerous errors that had been appearing previously.
Wrap up
To summarize, by following this guide, you have successfully learned how to disable and remove PPA from your Ubuntu-based system. In addition, you now have a better understanding of how to manage PPAs on your system and make sure that only the ones you need are enabled and the ones you don’t need are disabled or removed.
Please let us know if anything needs to be changed or if you have any suggestions in the comments section.