Not finding Cinnamon attractive enough? Switch to KDE Plasma
A corner of my heart has always been telling me to use the KDE Plasma desktop environment on Linux Mint because it has many features and customization options that are not available in Linux Cinnamon.
I believe if there is a Linux Mint + KDE combination, it will be a superb choice for KDE lovers, but unfortunately, Linux Mint doesn’t come with the KDE variant.
However you can install KDE Plasma Desktop along with Cinnamon, XFCE, or Mate, or you can just get rid of your current desktop environment and make KDE the default one by following a few simple steps.
So let’s start this guide with the choices that you can make to install KDE Plasma on Linux Mint.
Three Choices For You
You can install KDE Plasma on your Linux Mint system in three different ways:
- kde-full: It includes all the applications that come with kde-standard plus additional ones, which take up much more space on your system.
- kde-standard: has all the necessary applications (K*), including a
kde-plasma-desktop, and it takes up less space than kde-full. - kde-desktop-plasma: It contains all the necessary base applications, and the
kde-plasma-desktopno extra stuff, which is an ideal option if you don’t want to install any additional applications and want a lightweight KDE Plasma desktop experience on your Linux Mint system.
Now it’s upto you which version of KDE you want to install on your system.
Steps to Install KDE Plasma on Linux Mint
In three simple steps, you will go from a less intuitive desktop environment to the most appealing desktop environment, which always gives you more to discover.
 Install KDE Plasma
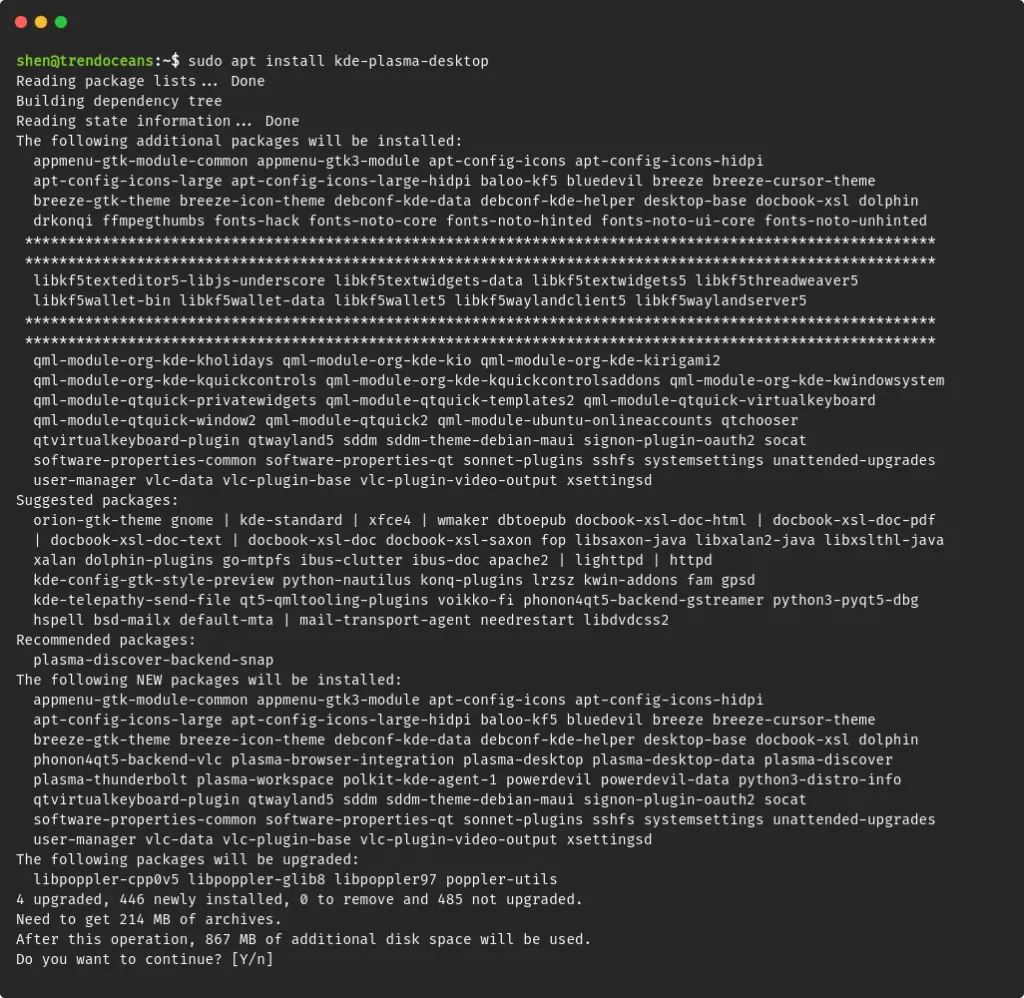
To install KDE desktop, open your system terminal and first update the system repository, so you can get the latest version of KDE that is available in the system repository.
$ sudo apt update -yOnce you are done with the upgrade, run the following command to install kde-plasma-desktop on your Linux Mint:
$ sudo apt install kde-plasma-desktopAnd when it prompts you for confirmation, type Y.
If you want to install the complete KDE desktop with the applications that come with KDE, then run any of the following commands:
$ sudo apt install kde-standard			# Minimal-Version
$ sudo apt install kde-full			# Complete package
After running the command, wait for a while to complete the process.
 Select SDDM
During the installation, you will be prompted to select a display manager.
To select the display manager, please use the arrow keys and select “sddm”, which is the default desktop manager in KDE.

If you don’t want to change lightdm, then press “enter” to move the process ahead.
 Restart
Once the installation is complete, you need to restart your machine to see the changes. To restart your Linux Mint system, run the following command:
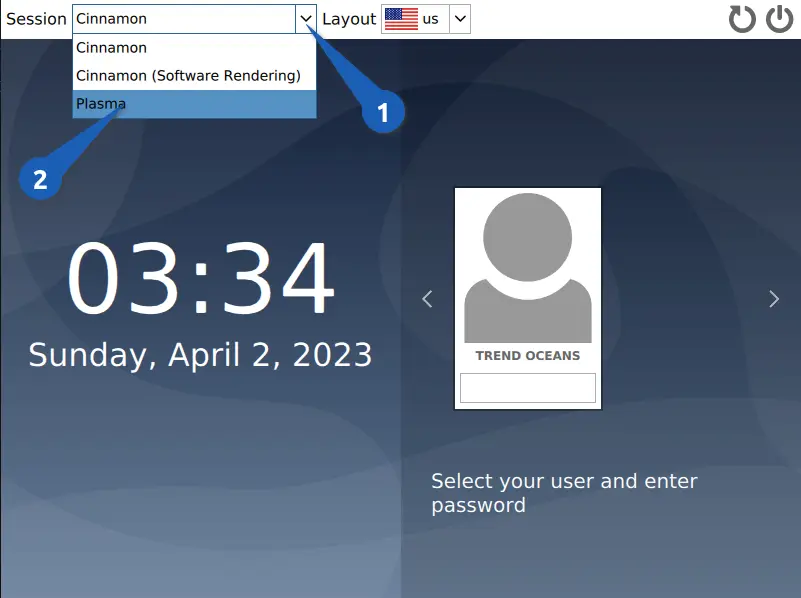
$ sudo rebootAfter restarting, you will find a completely different interface than what you get by default in Cinnamon, XFCE, and Mate. Here you need to select the “plasma” desktop environment from the drop down menu, as shown in the below image.
Next, you need to log into your account.
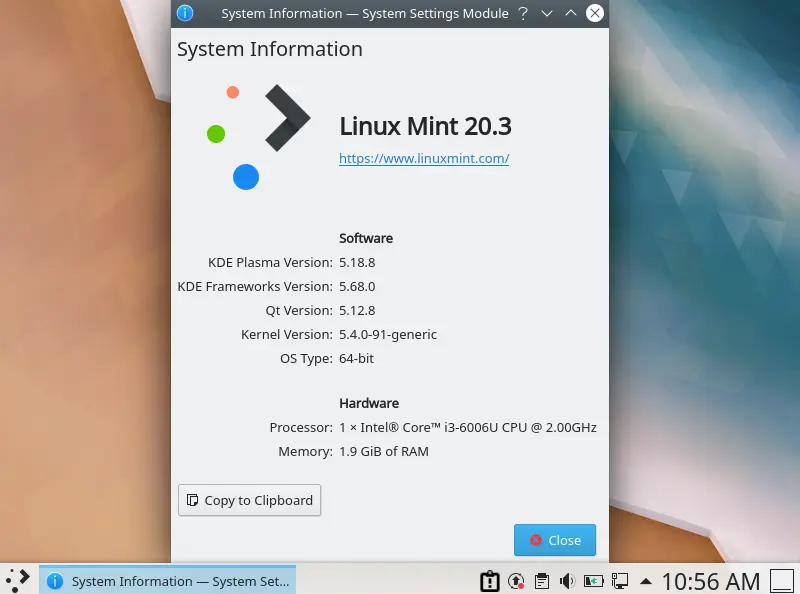
Congraulation! Welcome to the new desktop environment, where you can customise your desktop as per your preferences and enjoy the new features and functionalities offered by the Plasma desktop environment.
Also Read: How to Enable Matrix effect and Custom Image Screensaver on Ubuntu/Linux Mint
Remove Previous Desktop Environment from Linux Mint
This step is optional, so you can ignore it if you don’t want to remove Cinammon, Mate, or the XFCE desktop environment from your Linux Mint, but if you are interested, then run the below given command.
Remove Cinnamon
The default flavour of the Linux Mint is Cinnamon, which you can remove from your Linux machine by typing the below code:
$ sudo apt purge cinnamon Remove Mate
If you have installed the Mate desktop environment, then you can completely remove it from your system by executing the below command:
$ sudo apt purge --auto-remove mate-desktopRemove XFCE
To remove XFCE, copy and paste the following command into your terminal and press Y to confirm the removal of the desktop environment:
$ sudo apt purge xfconf xfce4-utils xfwm4 xfce4-session xfdesktop4 exo-utils xfce4-panel xfce4-terminal thunarTroubleshoot
Some of the problems I ran into after installing kde-desktop-plasma are described here so that you can use them if you run into the same ones.
Virtual keyboard shows up while logging in KDE
At a time of logging, if you are getting a virtual keyboard display on a screen like shown in the below image, then you need to add a parameter to /etc/sddm.conf.
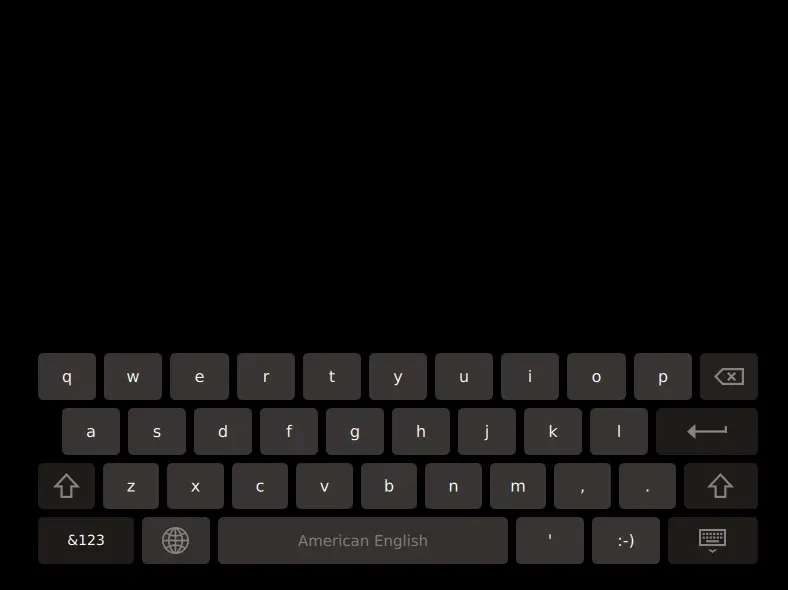
If the file /etc/sddm.conf is not available, then you can create a new one by editing or running the below command:
$ sudo nano /etc/sddm.confOnce the file is open, add the line from the below code snippet to /etc/sddm.conf and save the file.
[General]
InputMethod=
Now restart your computer to reflect the changes.
Missing Network Applet in KDE
If you are not getting the network connection applet on the task bar, you need to manually install the plasma-nm package on your computer by running the following command:
$ sudo apt install plasma-nm This error will not encountered if you install kde-standard it will occur if you install kde-desktop.
Wrap up
That’s all for this article, where I have shown you how you can install kde-plasma-desktop on your Linux Mint and the steps to remove the previous installed desktop environment.
and the solutions to the problem that I faced after installing the KDE desktop.
Also Read: Learn how to Customise the Linux terminal to make it look awesome!
Anyway, if you are having any difficulty following this guide, feel free to comment below or ask for help in the respective forum.