If you read the last article on How to create bootable Ubuntu 20.04 on windows 10 in that We have promised we’ll make a complete get started guide on Linux.
This is the second article on Get started guide on Linux. I’ll not cover the Ubuntu Operating System features rather than I’ll show you a simple way to install Ubuntu on your Windows PC.
Without taking any further moment, let’s start the Installation process first check the basics system requirement to Install.
System Requirements for Ubuntu 20.04
- 2 GHz dual-core processor or better
- 4 GB system memory
- 25 GB of free hard drive space
- ISO File
- Bootable USB Drive
- Internet access
Steps 1:- Download Ubuntu 20.04.01 LTS
If you already downloaded the Ubuntu ISO file, you can skip this part and read the Creating Bootable Image.
To Download ISO file we need to visit the Ubuntu Official Website through you can download various Ubuntu environments.
In this guided article we will use the Default Ubuntu which ship with a Gnome Environment to Download click on the below button.
When you clicked on the below Download Ubuntu 20.4 LTS, it will redirect you to the Official Website.
Once the Official page is a load, you need to click on Download Button on the right side of a screen and wait for the file to get the downloaded, File size is approx 2.6 GB.
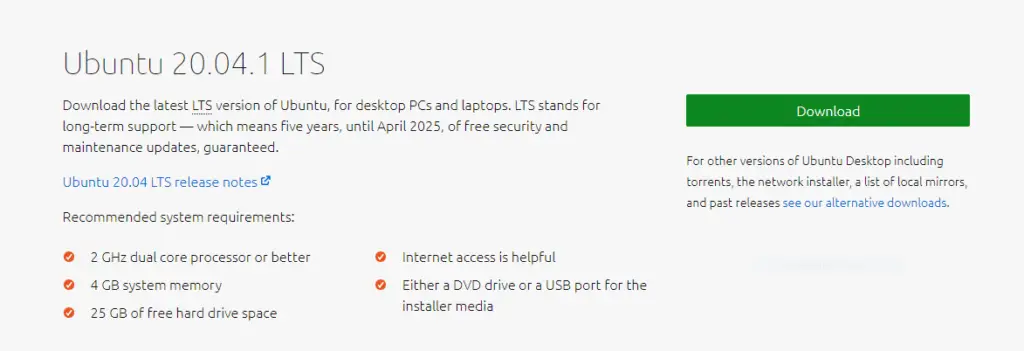
In case you have low bandwidth connection you should click on see our alternative downloads and download BitTorrent file to start the download.
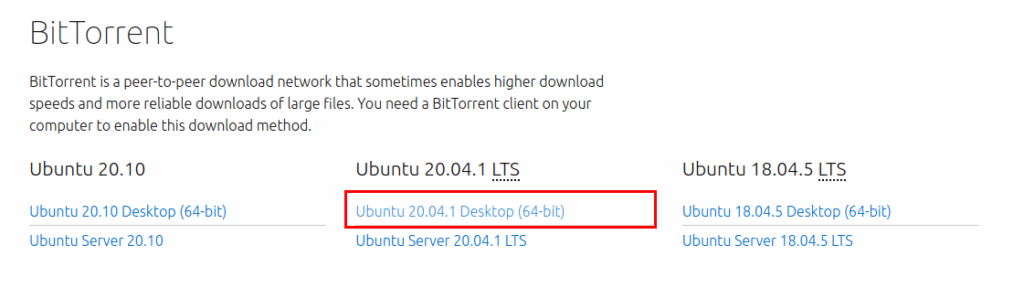
You can wait till file is downloading or else in the meantime you can download Bootable software balenaEtcher.
Steps 2:- Create Bootable Ubuntu ISO Image
Once the file is downloaded from the Internet, you cannot directly use ISO file to Install Ubuntu on your system for that, and we need some sort of tools like balenaEtcher, Rufus, Ventoy or any-other tools.
A bootable software will copy ISO file to your connected USB drive, and this will allow you to Install Ubuntu on your system or you can use Ubuntu without Installing on your system disk.
To get a complete guide on How to create bootable Ubuntu 20.04 on windows 10 follow the above link.
Boot from USB Disk
I assume you have completed the above method, and Now we will boot our System to Install Ubuntu.
To boot from USB Disk connect your Bootable USB disk to your system and make sure your PC should boot from USB Drive Instead of System Disk.
If you don’t know how to boot from USB, not an issue. It would be best if you made a few changes to your BIOS boot order sequence.
First, restart your PC when the brand logo appears to press the ESC or F2 or F9 or F12 with FN or without (It’s completely variable on the manufacturer). Still, you cannot boot please confirm with the respective brand manufacturer about BIOS key.
It will be kind help from your side if you share the Boot Options menu key in comment options.
Steps 3:- Start Install
The first screen you will see the grub Click on first option “Install”.
When you click on Install Ubuntu 20.04 LTS, you will get the series of the screen with Installation Wizard Follow the basic Instruction for the smooth installation process.
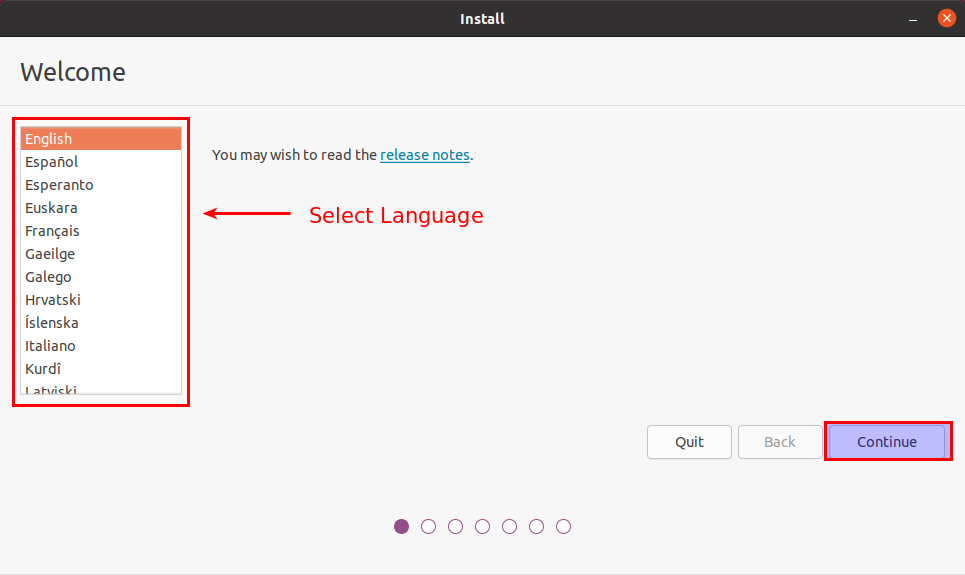
Step 3.A :- Welcome
This is the first screen where you need to select the language. By default, English will be the selected language. If you want to have different language scroll down and choose from the list, click on Continue.
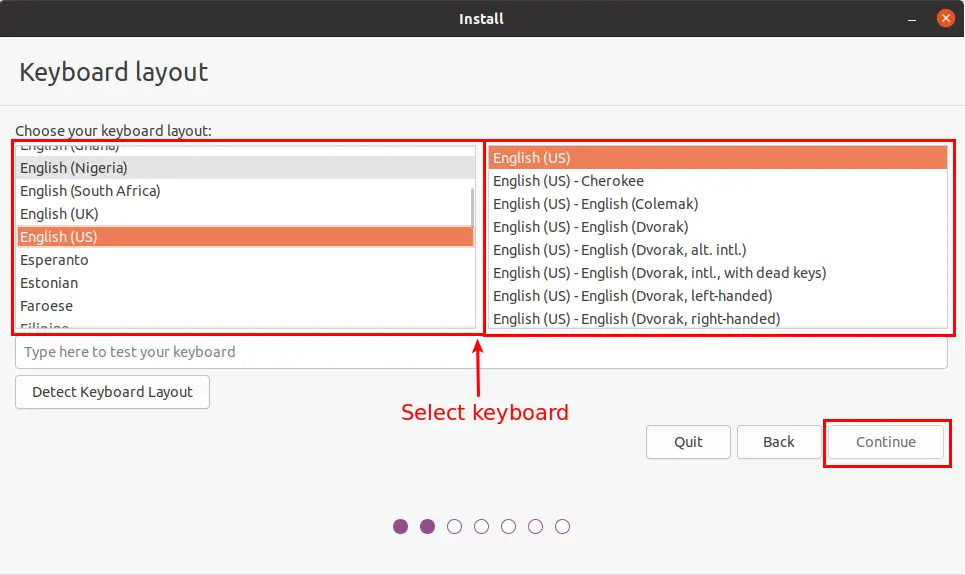
Step 3.B :- Keyboard layout
Ubuntu support several types of Keyboard layout you can even choose as per your region preference.
To change keyboard layout scroll up and down or you can leave these options as default and click on Continue.
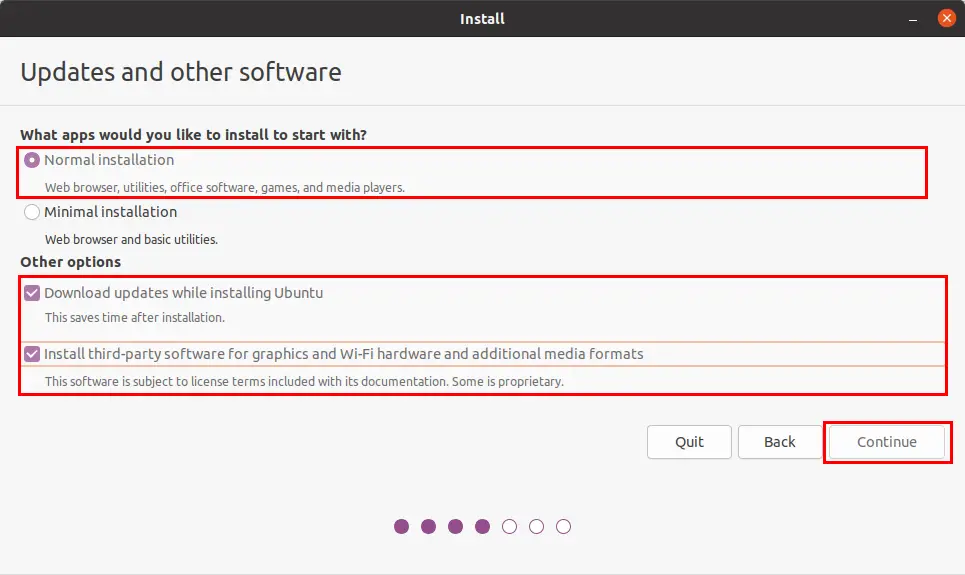
Step 3.C :- Updates and other software
In this screen wizard, you will ask, What apps would you like to Install to start with? Select the Normal Installation for complete Utilities, and when you choose the minimal installation, you will miss the important utilities as far as beginner concern goes with the Normal Installation.
It is optional to have an internet connection while Installation If you have an internet connection, please select both options, Download update while installing Ubuntu and Install third-party software.
Step 3.D :- Installation Type
This is it part where you have decide what type of Installation method you choose for the beginner. If you want to install Ubuntu along with Window, select “Install Ubuntu alongside Windows Boot Manager”.
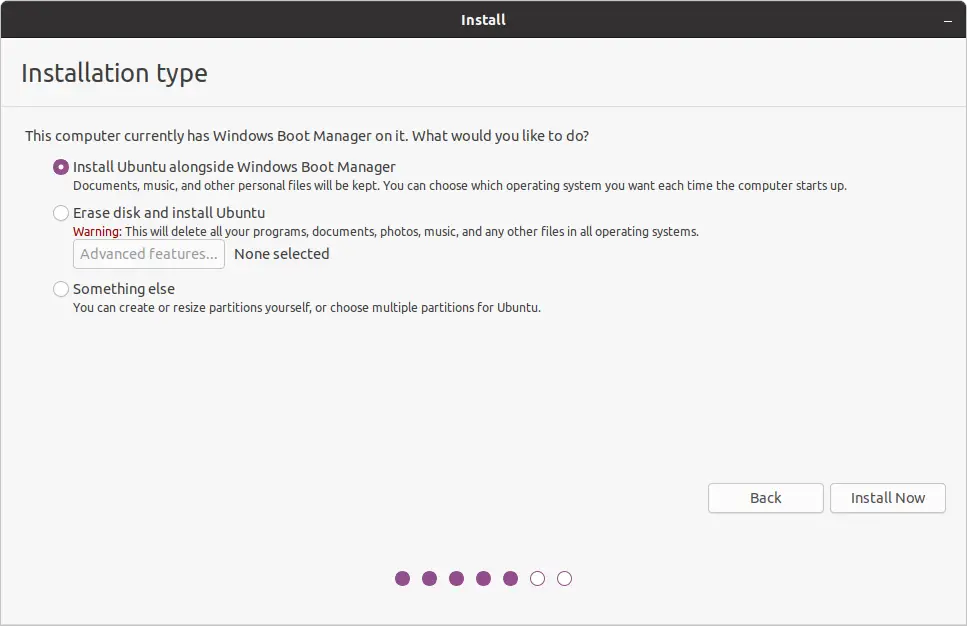
From the above screenshot, you can see we get three options to Install Ubuntu on our Windows-based system.
- Install Ubuntu alongside Windows Boot Manager
- Erase disk and install Ubuntu
- Something else
Install Ubuntu alongside Windows Boot Manager
In most of Windows PC user just have the single partition that is C drive because of that you will not be able to Install Ubuntu on your system.
So, you need to resize the partition, To resize partition use Gparted Utilities instead of using Installer Disk partitioner.
Press the Windows Key and search for Gparted open it.
In the Gparted you will see the following partition list from that you need to select the largest partition, do right-click afterwards select Resize/Move like the below screenshot.
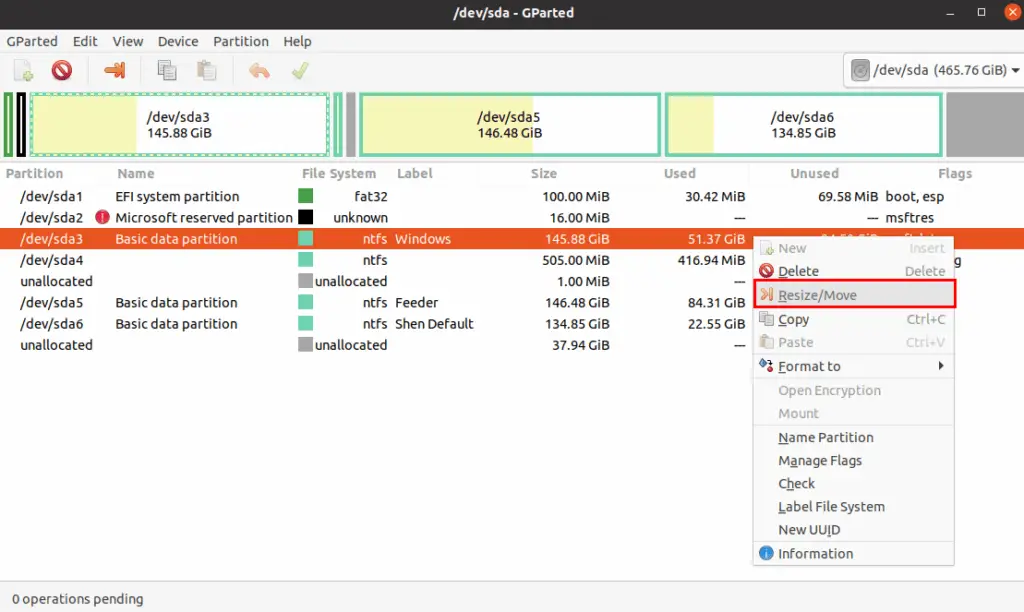
While making resize or make sure to have a minimum of 25 GB storage to Install Ubuntu.
To resize space type the size value in Free space following (MiB) or you can drag the slider form the back to avoid window OS crash after confirming click on Resize/Move.
In my case, I want space approx 35GB so, and I have simply drag the slider and Clicked on Resize/Move.
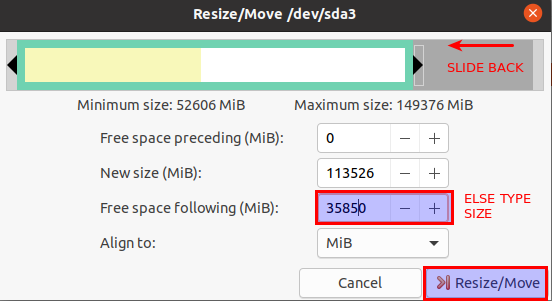
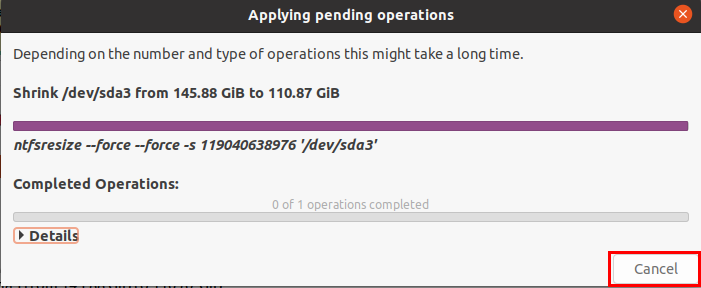
The last step is to click on ![]() to shrink the selected partitions.
to shrink the selected partitions.
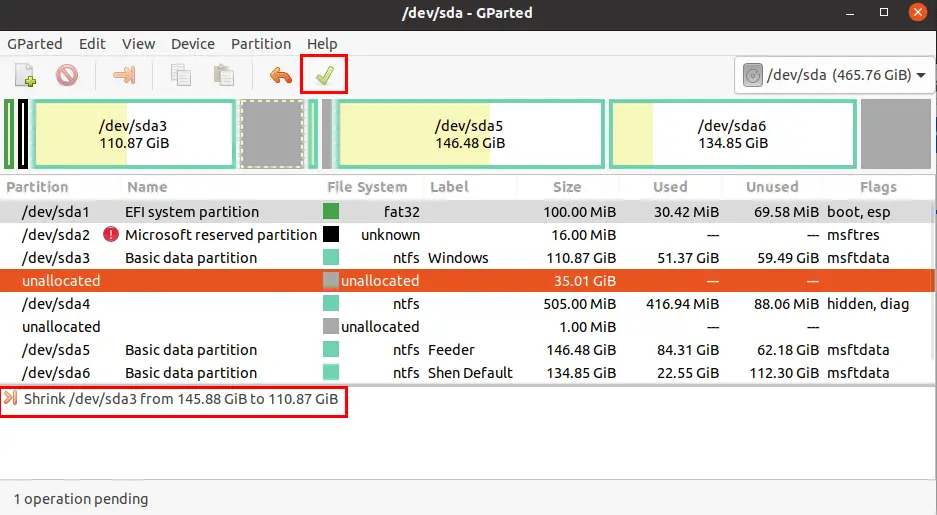
Once the process gets complete, free space will be available in your System Disk to use.
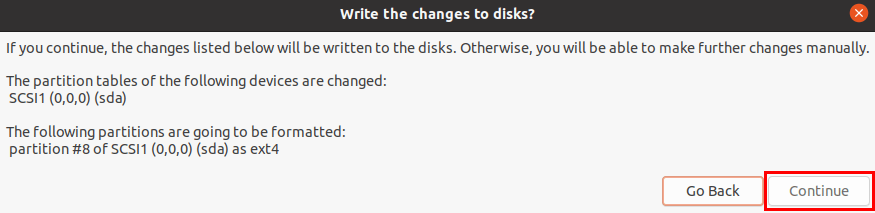
After this go to the Ubuntu Installer and select the 1st option and click on Install Now.
It just a consent selected partition data will be formatted Click on Continue to proceed ahead.
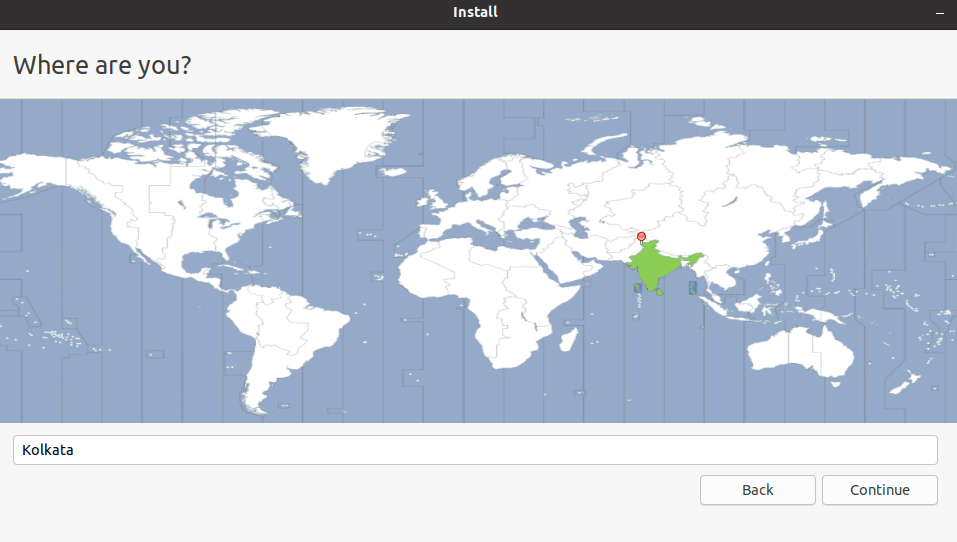
Step 4:- Choose Region
When the above process is complete, you need to provide your geographical location from the drop-down list or pinpoint your location in a map and click on Continue.
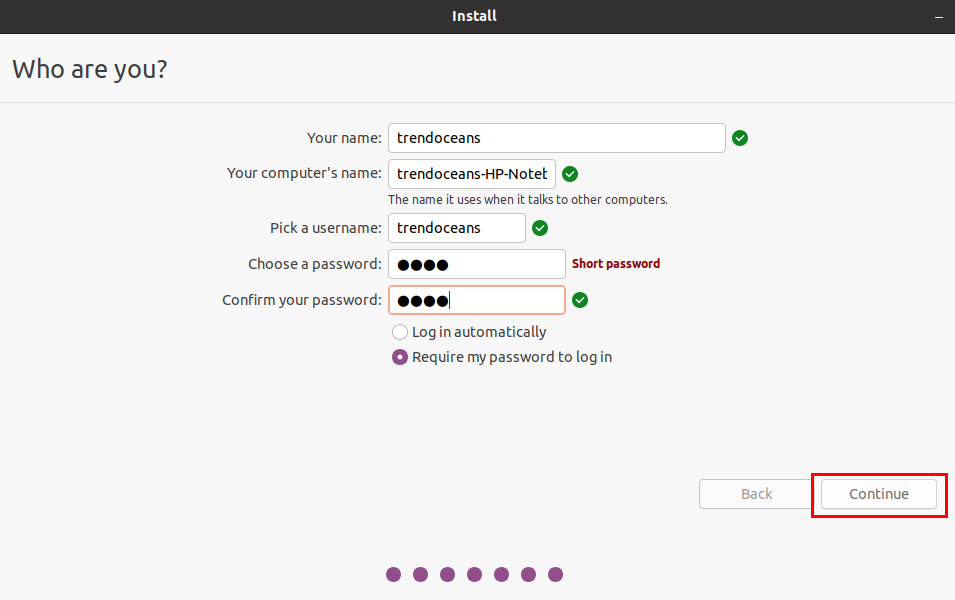
Step 5:- Choose Region
This is the last step where you need to provide basic details like your name, Computer’s name, username and passwords then click on Continue to start the installation process.
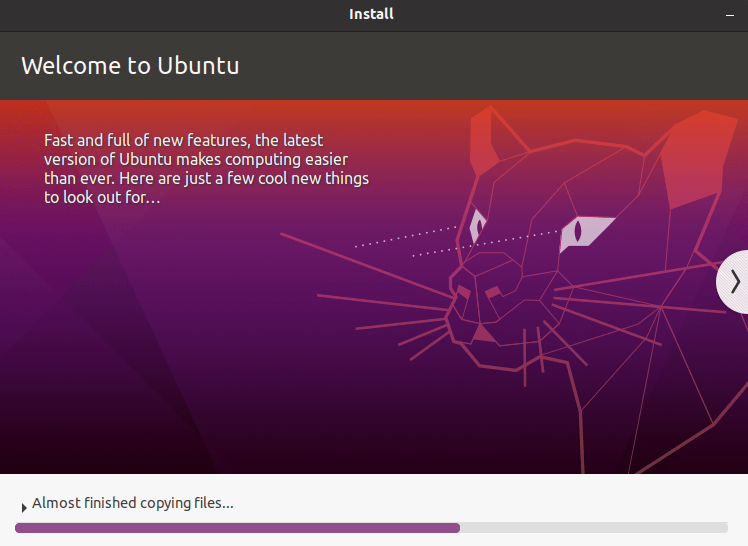
The installation process is started wait for some time to complete the process for me. It took to 5 to 10 minutes to complete installation it may vary according to hardware.
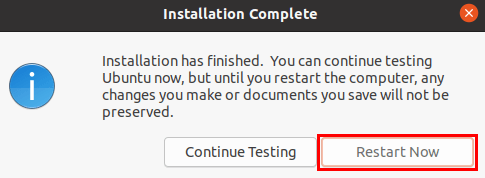
Installation is completed now click on Restart Now.
Troubleshoot
The common problem you may face. You will not be able to boot into the Ubuntu system, or else you will not find the Grub2 option to select between Ubuntu and Windows.
We need to restart the computer and press the ESC or F2 or F10 or F12 with FN or without FN key to resolve this issue.
In my case I have hp laptop in that BIOS options start with F10 key, I’ll go to the System Configuration inside that Boot Option to change the boot sequence.
If you have installed through UEFI Boot, go to the OS boot Manager and change the operating system’s sequence.
From the below snapshot you can see the sequence Windows Boot Manager is the first and second is ubuntu.

We need to change the boot order sequence. In hp laptop, you can use F5/F6 to move order after that save the change pressing F10.

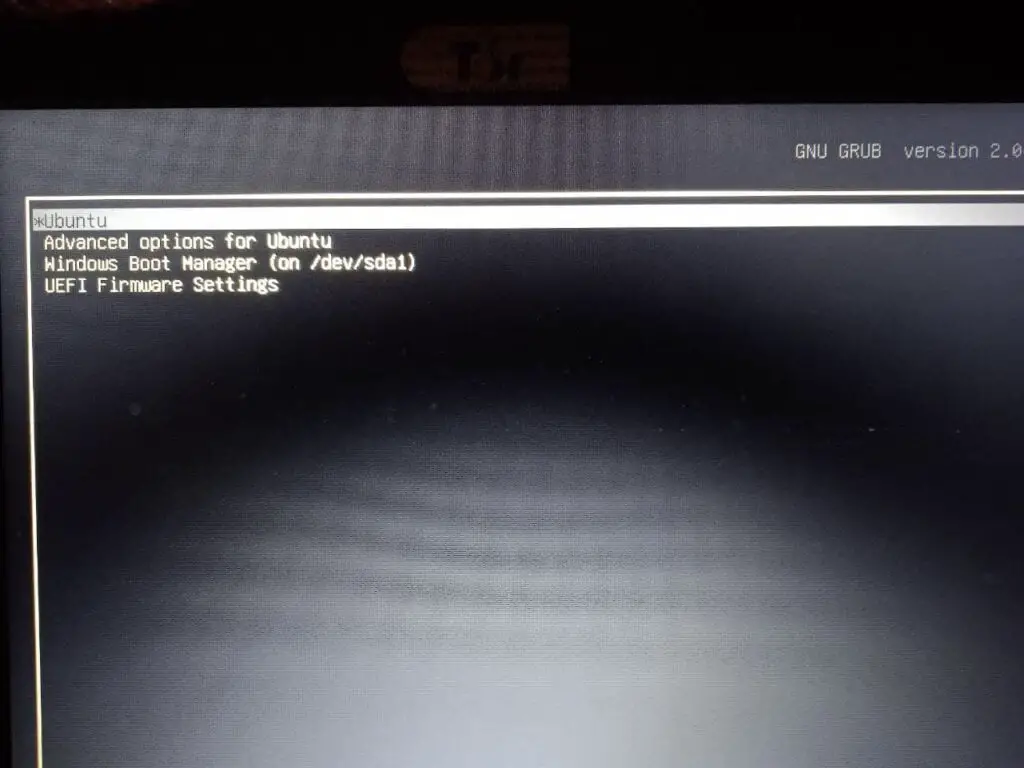
When the system gets boots-up, you will find Grub where you allow to switch between Ubuntu or Windows.
If the problem still persist please check the boot sequence in BIOS.
Wrap-up
That’s it to install Ubuntu along with Windows. If you stuck somewhere while installing, please drop the comment, and we will try to overcome or else leverage the vast community support forum Ubuntu.