Brief: In this article, you will learn how to upgrade or install the latest kernel version on your currently running system. This article is divided into two parts. If you are interested in CLI, you should click here. For GUI, you should mark your presence here.
As you know, the kernel is the core of the operating system. Without a kernel, your favourite Linux distribution is of no use. It is a completely dumb machine that doesn’t know how to perform low-level activities like memory management, process management, disk management, and many other crucial tasks that are necessary for computation.
And every day, the Linux kernel is getting better day by day, thanks to the dedicated community members who are developing kernels to efficiently handle all the processes on most hardware.
Sometimes you may face problems while connecting the latest hardware on your system because of missing drivers, which is not supportable in Linux, but after reading some solutions from online forums, it appears that the latest version of the kernel has included support for this particular hardware.
But your system is running an older kernel and you don’t want to wait for the distribution to update the kernel to the one you are currently using.
At that point, this article will be of great help to show you how to upgrade the kernel to the mainline kernel, which is still maintained by Linus Torvalds.
So let’s see how to upgrade the kernel in Ubuntu using the command line and GUI tool.
Will the kernel update replace the existing kernel?
Yes, while updating the kernel, the installer will replace the current kernel with the latest version of the kernel, which will be the default while booting up, and your previous kernel will also be there if something doesn’t work, then you can revert to the older kernel very easily.
Steps for updating the kernel in Linux
If you have never updated the kernel before, then you may get overwhelmed with the steps, but you don’t need to because I’m going to share with you the steps in a very subtle way, so just follow the steps as mentioned below.
You can update or shift to the mainline kernel using the following methods.
Install kernel using command line interface
In less than five steps, you will be able to upgrade your system kernel to the latest mainline kernel in Ubuntu or any other Ubuntu-based distribution.
One thing I’d like to say to you is that sometimes while or after updating the kernel, your system may not behave properly. In that case, don’t curse yourself, like why did you upgrade? Instead of that, you should take a deep breath and follow this step to boot normally.
OK, now let’s see the following steps.
Step 1: Check the currently running Linux kernel
Before installing the mainline Linux kernel on your Ubuntu machine, first check which version of the Linux kernel is running.
To check, type the below command into your terminal screen.
$ uname -rThe output shows us that my machine is currently running on 5.15.0-47-generic.
ubuntu@trendoceans:~$ uname -r
5.15.0-47-generic
Step 2: Download the mainline Linux kernel for your Ubuntu
After getting information about the kernel, let’s download the latest version of the mainline Linux kernel by downloading the required packages from the below button.
Once you click on the above link, you will be redirected to download the mainline Linux kernel. You will find multiple versions of the Linux kernel, so don’t get confused. Just select the latest version, or else you can choose a specific version according to your needs.
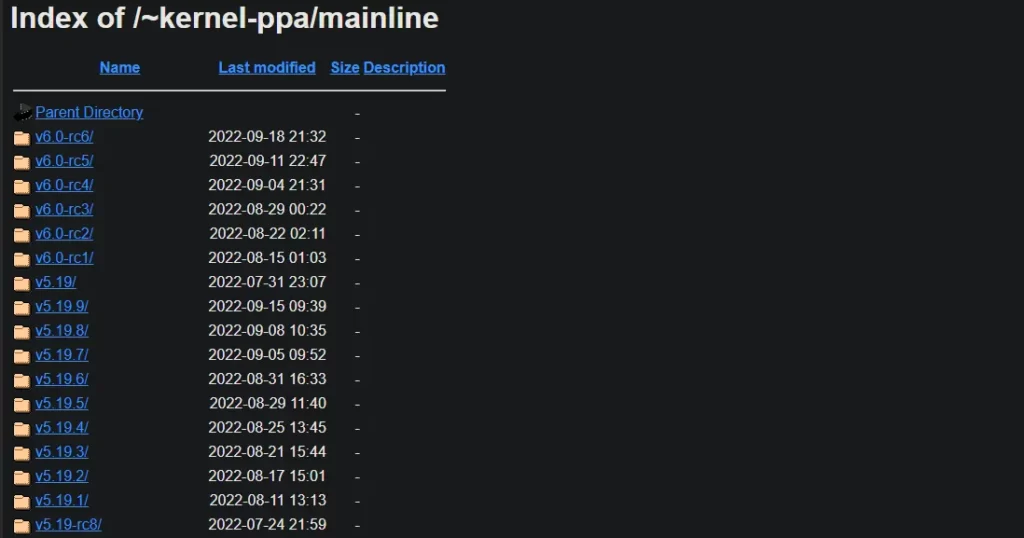
But I advise you don’t go with RC unless you don’t want to spend your time fixing problems by yourself.
For instance, let me select v5.19 to show you how to manually update the kernel, and once you click on the particular kernel version, it will redirect you to another page where you need to download the required packages according to your system architecture.
I have selected the amd64 architecture. If you do have a different architecture, then choose according to your system architecture.
And according to the below snip image, you need to download four different packages to upgrade the kernel in Ubuntu.

You can use the wget command to download the following files, or you can use the standard method to download files, but one thing I’ll advise you to do is download and move all these files into a new folder.
- linux-headers-VERSION-NUMBER_amd64.deb
- linux-headers-VERSION-NUMBER_all.deb
- linux-image-unsigned-VERSION-NUMBER_amd64.deb
- linux-modules-VERSION-NUMBER_amd64.deb
Step 3: Install Downloaded Kernel Packages
Once you have downloaded the required files, it means you are very close to updating your system kernel, so just be patient and follow the below steps.
I believe you have already moved the downloaded file to a separate directory, so I can show you the installation command that will install all the *.deb files that are located in one directory.
To re-confirm, let me run ls command that will show you all the files that are available in the current directory and remove any .deb file that is not related to the kernel.
The output of the above command.
ubuntu@trendoceans:~/kernel_files$ ls
linux-headers-5.19.0-051900_5.19.0-051900.202207312230_all.deb
linux-headers-5.19.0-051900-generic_5.19.0-051900.202207312230_amd64.deb
linux-image-unsigned-5.19.0-051900-generic_5.19.0-051900.202207312230_amd64.deb
linux-modules-5.19.0-051900-generic_5.19.0-051900.202207312230_amd64.deb
After confirmation, execute the command below to start the installation and wait for it to complete.
$ sudo apt install ./*.deb
or
$ sudo dpkg -i *.deb
Once the installation is over, you will find a similar kind of result on your terminal screen.
Step 4: Reboot your system
Finally, you are done with the steps. You just need to restart the system to reflect the changes. Once you have restarted the system, run the below command, which will ensure that you have successfully installed the latest mainline kernel in your Ubuntu distribution.
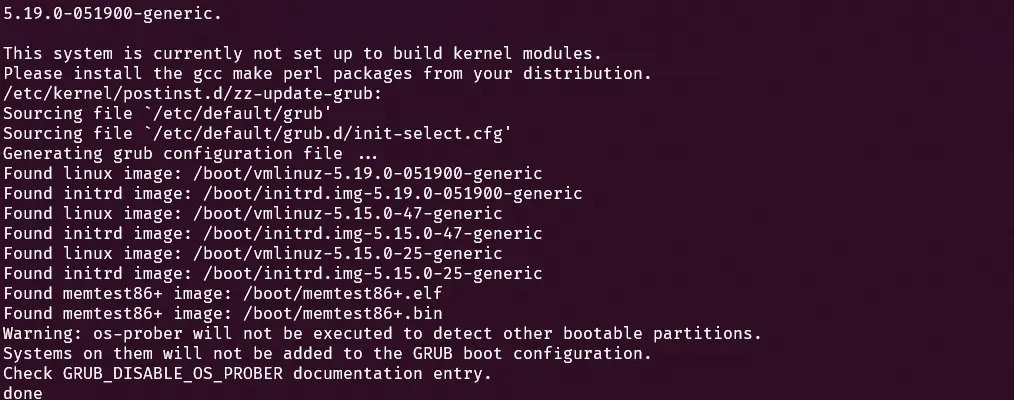
$ uname -rThe output of the above command shows us that the system is currently running on 5.19.0-051900-generic by replacing 5.15.0-47-generic.
ubuntu@trendoceans:~$ uname -r
5.19.0-051900-generic
That’s all it takes to install the mainline kernel on Ubuntu. After installing the kernel, if you are facing any issues or want to replace your old kernel, then read this section.
Install the kernel using graphical software.
Alternatively, you can take the help of a GUI tool when you don’t want to handle all the stuff by yourself. Hence, for this purpose, a small utility tool is available to download and use, which is named “mainline.” Don’t get confused by the utility name and mainline kernel. This is actually a forked app of the free version (ukuu), whose support was terminated by the original maintainer.
So let’s see how to install the Ubuntu Mainline Kernel Installer, a.k.a. mainline on Ubuntu 20.04, and after installing this tool, we will show you how to download the mainline kernel for Ubuntu and Ubuntu-based distributions like Linux Mint, Elementary OS, etc.
Step 1: Install the mainline utility on your Ubuntu machine
To install the mainline, run the following commands in the given sequence, which will install the Ubuntu Mainline Kernel Installer on your system, and after that, we will use this tool to install the latest kernel.
$ sudo add-apt-repository ppa:cappelikan/ppa
$ sudo apt update
$ sudo apt install mainline
The above command will most probably work on the amd64 architecture, but I’m not sure about the other architectures. If it’s working, then do let me know in the comment section.
Step 2: Fetch the kernel for your Ubuntu-based distribution
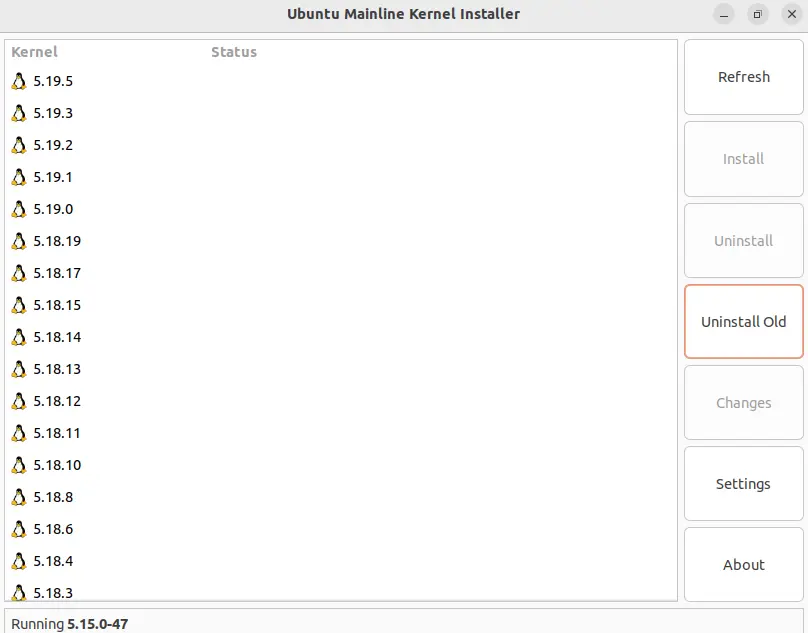
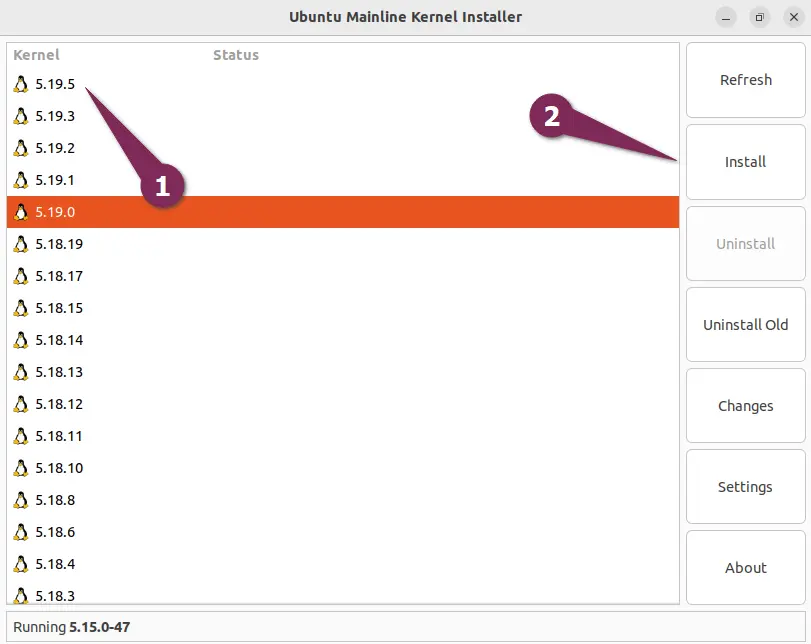
Once the installation is completed, press the super button and find the installed utility by typing “Ubuntu Mainline Kernel Installer”. And once you open the utility, it will refresh the main interface with the latest version of the kernel that is available for your system.
By default, you will not find the unstable release, which is also referred to as RC. To get an unstable release, you need to uncheck “Hide unstable and RC releases” in the app settings.
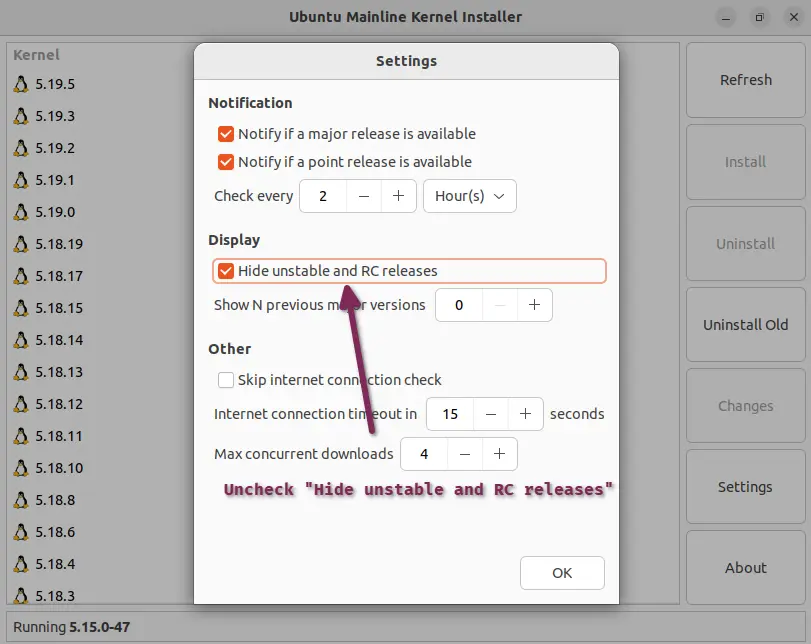
I would not recommend applying these settings to your workstation. Therefore, I’m keeping this setting as it is, and I’ll show you how to get the mainline update directly from the Ubuntu Mainline Kernel Installer.
First, select the version that you want to install, and then click on the Install button, which is on the right side of the application.
And to explain it to you better, let me download the 5.19.5 mainline kernel for my Ubuntu machine.
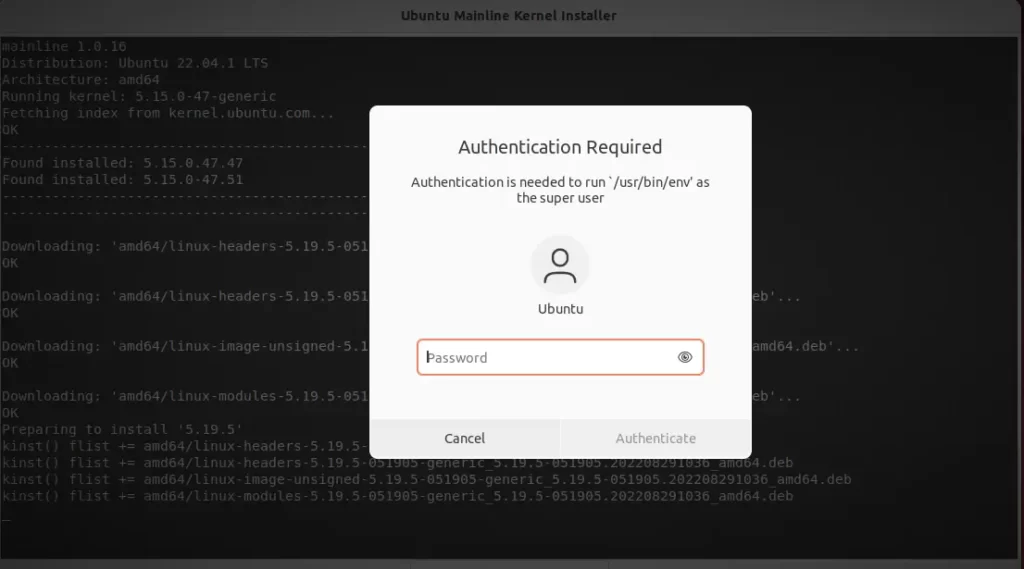
Once you click on the install, it will take you to another screen where you will see the logs of everything that is happening. The only thing you need to do is to enter your password to authenticate this process to ensure the utility that you are the right person to make these changes.
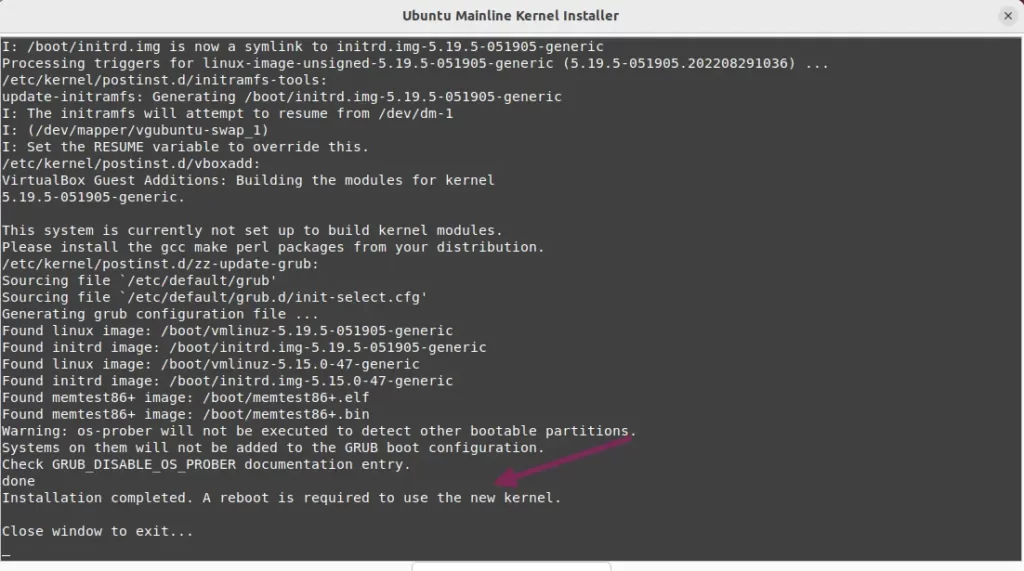
After entering the password, wait for a while for the process to complete, and once you get an output like the image below, don’t hesitate to restart your computer to see the changes.
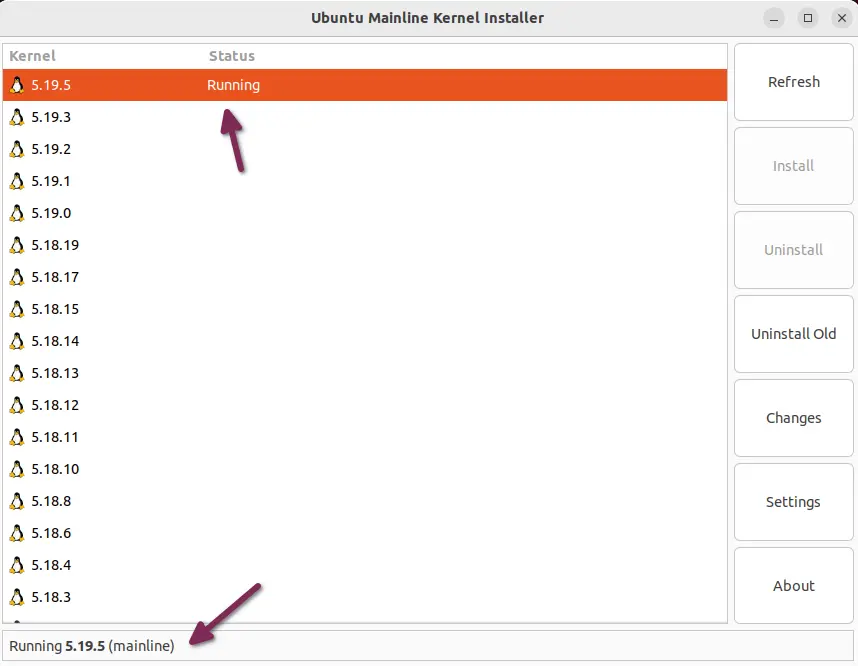
As I said, after reboot you will find that your system is using the latest mainline kernel version, but to check that you need to run the same application through which you have installed the mainline kernel, or else run the command uname -r in your terminal window.
Remove the kernel in Ubuntu
If after testing the mainline kernel, you have decided to remove the older kernel or you have faced a problem after installing the mainline kernel and want to revert these changes, then follow the below instructions.
Remove the old kernels in Ubuntu using the command line
To remove the old kernel, first of all, you need to open the terminal window and run a couple of commands which will remove the kernel from your system.
For instance, I have downloaded multiple kernels to my system and I want to remove one of them from the system to free some space.
For that reason, I have decided to remove the mainline Linux kernel version 5.19.1, which I do not need anymore.
So to remove it, I’ll execute the following command.
$ sudo apt remove linux-headers-5.19.1-051901*
$ sudo apt remove linux-image-5.19.1-051901*
$ sudo apt remove linux-modules-5.19.1-051901*
Once the process is completed, you can restart your system to see the changes in the grub menu.
Remove kernel using graphical way
Another way to remove an older kernel from your system is to use the Ubuntu Mainline Kernel Installer, which we have used above to install the latest mainline kernel on our system.
Yes, the same application is also capable of removing the kernel from your system without typing any commands.
Go to the application menu, open the “mainline” utility, and select the kernel version which you want to remove from your system.
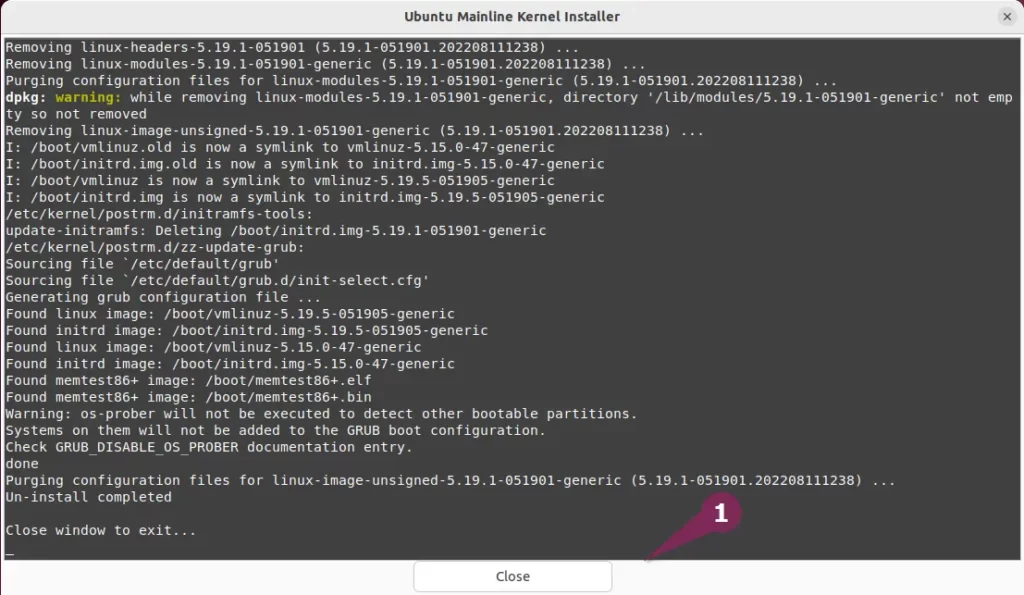
Once you select the kernel version, the “Uninstall” option will get highlighted, so simply click on it to remove the kernel from your system, as shown in the below image.

After that, it will ask you for your password, so just enter it and after that, you will get the below output on your part.
Remove the newly mainline-installed kernel in Ubuntu
As you know, the mainline Linux kernel is not a stable version. Although it’s more stable than the RC version of the kernel, after some regression testing, the mainline kernel will be declared as a stable
This is the reason why you may face some problems after installing the kernel on your system, especially if you have installed some proprietary drivers on your system.
If you face problems after installing the latest mainline Linux kernel, then your best option is to run your system on your previous kernel version from the grub menu.
If the problem does not occur, then you can remove the newly installed kernel by following the steps below.
Step 1: Boot into an older kernel from the grub menu
Although you can remove the currently running kernel from your system, but it’s not advisable to do so because it will remove the kernel from your system, which will leave you with an unbootable system if something goes wrong.
So, it is better to boot your system on an older kernel on which you are not facing any problems.
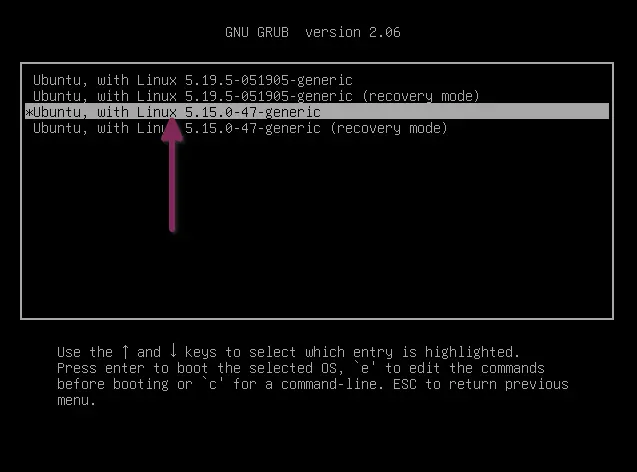
Restart your system and wait for the Grub menu to appear on the screen. If you are not able to get the grub menu interface on VirtualBox or VMware, then press Shift + Esc after starting the machine.
Using the navigation key, select “Advanced options for Ubuntu” as in the below image.

On the next screen you will find all the kernels that are available for your system, so select the older kernel version that you find fully compatible with your system.
After booting into the system, open the terminal and execute the same set of commands that you used to remove the older kernel from your system.
Just make sure to replace the kernel in the below command snippet to avoid any errors.
$ sudo apt remove linux-headers-[KERNEL-VERSION]*
$ sudo apt remove linux-image-[KERNEL-VERSION]*
$ sudo apt remove linux-modules-[KERNEL-VERSION]*
No matter if you have installed the kernel using the command line or via graphical software, the abovementioned command will work flawlessly on any installation method.
Wrap up
That’s all it takes to install the mainline kernel on an Ubuntu machine. I used the same instructions on my Ubuntu 22.04 LTS system and had no issues.
I strongly believe this guide will also work for other Ubuntu-based distributions, and don’t try to use this guide on a Debian-based system!
If this guide helps you, then do let me know in the comment section.