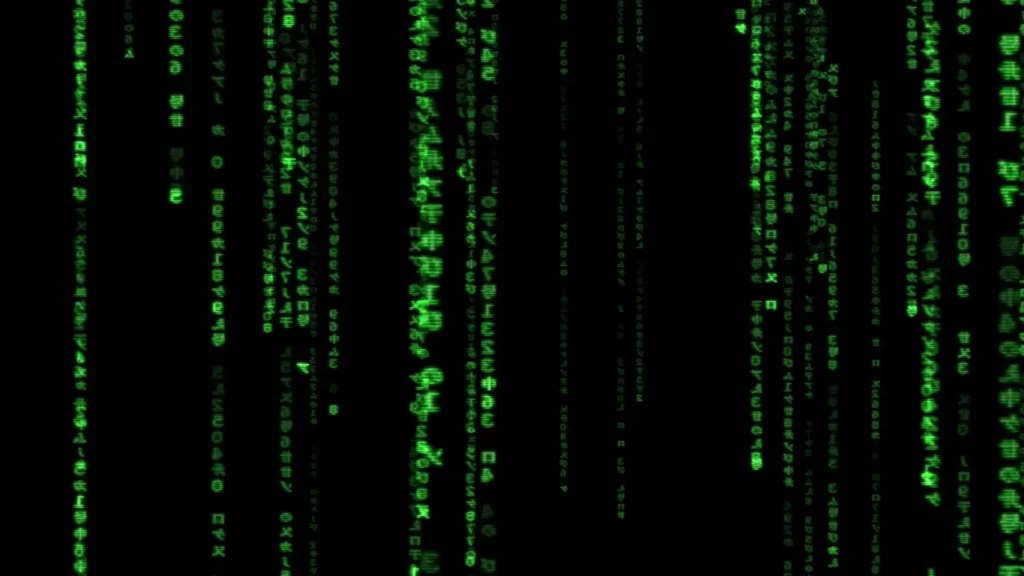
Are you interested in seeing the matrix effect in which text (glyphs) is raining on the screen? If so, you should definitely install Xscreensaver on your Linux computer.
This phenomenon was popularised by the 1999 film “The Matrix,” and its visual effects have captured imaginations ever since. By installing Xscreensaver on your Linux computer, you can take part in this trend and watch as the text (glyphs) on the screen seems to rain down.
Xscreensaver is an open-source programme that not only allows you to see the matrix effect but also comes with many other visually appealing screensavers that can be installed on your Linux computer.
It can be configured to allow users to select from a variety of screensavers with custom images, making their screensaver experience even more personalised.
So let’s see how you can install and configure Xscreensaver on your Ubuntu or Linux-based system.
How to Install Xscreensaver on Linux
Xscreensaver is easily found in the Ubuntu repository, so it makes the installation process pretty simple. First, open a terminal window and run a couple of commands.
 Install Xscreensaver and extra packages
Run the following commands to install Xscreen and the additional package, which will let you choose screensavers from the Xscreensaver library.
$ sudo apt install xscreensaver xscreensaver-data-extra xscreensaver-gl-extraOnce the above app is installed, you can get rid of the screensaver that came with your computer.
 Remove previous installed Screensaver
To ensure a seamless experience, please disable any screensavers you may have installed previously.
If you are using cinnamon-screensaver, then it’s not possible for you to remove cinnamon-screensaver because cinnamon will also get removed, and due to that you will face the error “cinnamon-session-cinnamon” not found“
In that case, you disable the screensaver setting by going into: Menu -> Screensaver -> Screensaver settings -> Choose “Never” to start.
But if your distribution uses gnome-screensaver, it’s easy to get rid of by typing the following command:
$ sudo apt remove gnome-screensaverThen, go to the next section to start setting up Xscreensaver to create the perfect atmosphere.
 Launch and Configure Xscreensaver
When you launch XScreensaver from the Applications menu by searching for “Xscreensaver-demo” or “screensaver,” then things will start getting interesting because you will finally be able to customise your screensaver to get the desired visual effect.
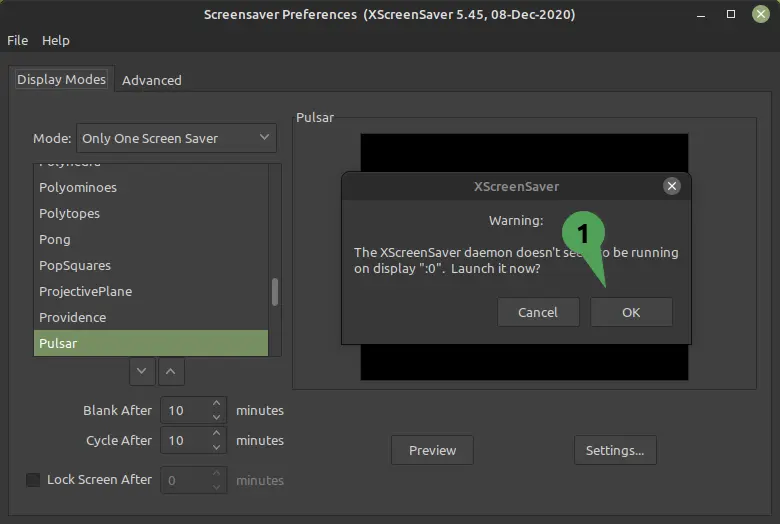
So when you open it for the first time, you will find the warning message: “XscreenSaver daemon isn’t running on display 0.” Click on “OK” to launch it now.
In the main interface, you will find two tabs from which you need to stick on “Display Modes,” where you will find the number of screensavers that you can set on your system, with customization options like the speed of the objects and whether to enable or disable them according to your taste.
You can also preview the screensaver you choose to see how it will look before you use it.
Configure system to get Matrix
Let’s set up our screensaver to display the matrix effect by first changing mode to “Only One Screen Saver” and then selecting “GLMatrix” from the list of screensavers.
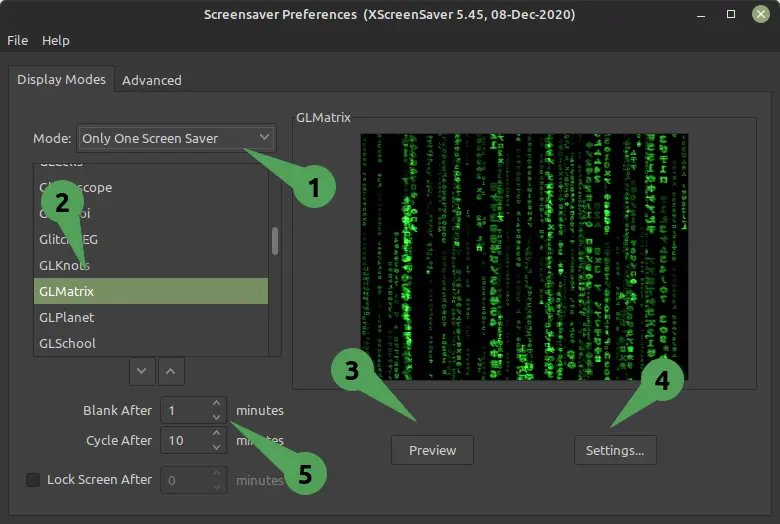
And click on “Preview” to test the screensaver. If you find that the glyph density or speed is low, then you can increase it by getting inside the settings.
Change the time in “Blank After” minutes to set a timer to start the screensaver, and then read the following section to automatically start the screensaver after every system boot.
Configure system to set own photo as screensaver
If you don’t find anything useful in the library, you can download and install your own custom image to use as a screensaver on your Ubuntu- or Ubuntu-based machine.
You can do this by going to the library and choosing the “GLSlideshow” effect, which lets you add your own image with some effects.
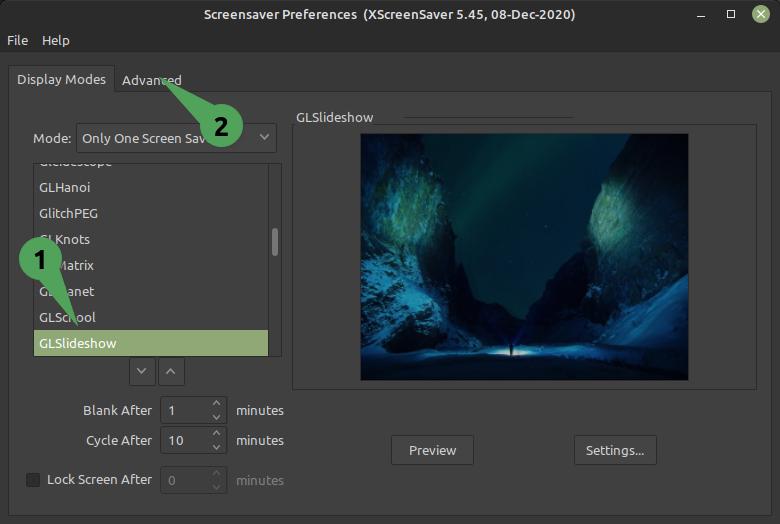
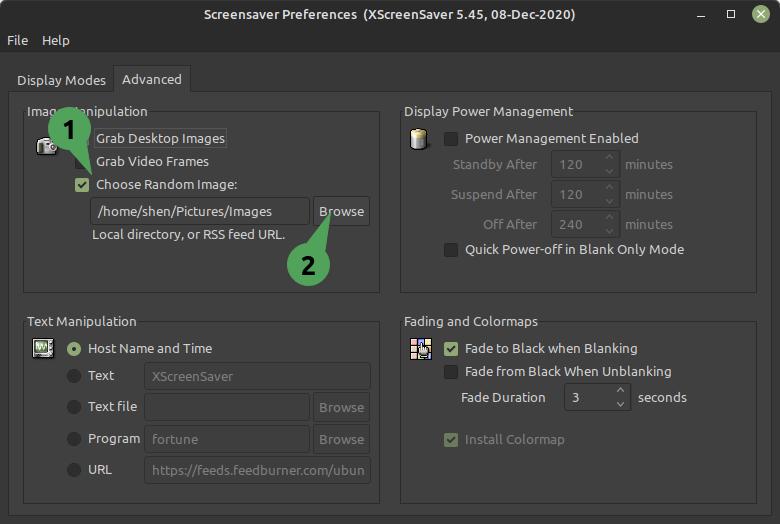
And after that, you need to switch the tab to “Advanced,” and under “Image Manipulation,” check “Choose Random Image” and provide the path where the image is located.
Then, you can test the changes by clicking on “Preview” from the Display Modes.
 Autostart Xscreensaver
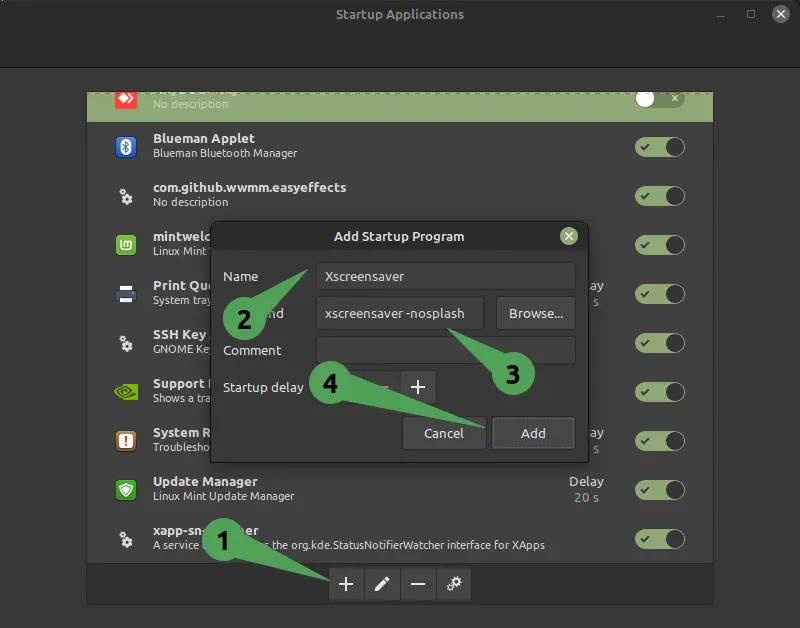
It would not be a great experience to manually start the xscreensaver daemon every time you restart your system, so to fix this, you can put this application into the autostart start list by getting into “Startup Applications” from the application menu.
The xscreensaver -nosplash command is a convenient way to autostart the Xscreensaver, allowing you to avoid having to manually start it.
Click on the “+” icon and choose “custom command,” which will open the prompt where you need to fill in the details as shown in the below image.
With this change, you can ensure that the xscreensaver daemon starts automatically whenever you boot into your system and no longer worry about manually starting it.
After that, close the window and wait for the screensaver to start according to the timer.
Wrap up
After following the instructions listed above, you should now have the Matrix screensaver set up and running on your system.
It is important to remember that these instructions will work for any other screensaver you would like to add as well, allowing you to customise your system with whatever visuals best suit your preference
With that in mind, you can now sit back and enjoy your Matrix screensaver in all its glory.
Thank you very much!
Thanks, this is a great tip!