Let’s learn how to create and configure a 404 error page in NGINX to improve the user experience on your website.
When you host your website on the NGINX web server, it will handle the client request, but when the request is not fulfilled, it will return an error.
This error will be displayed to a user via a basic HTML page with the error codes (404, 403, 500, and 503) as shown below.
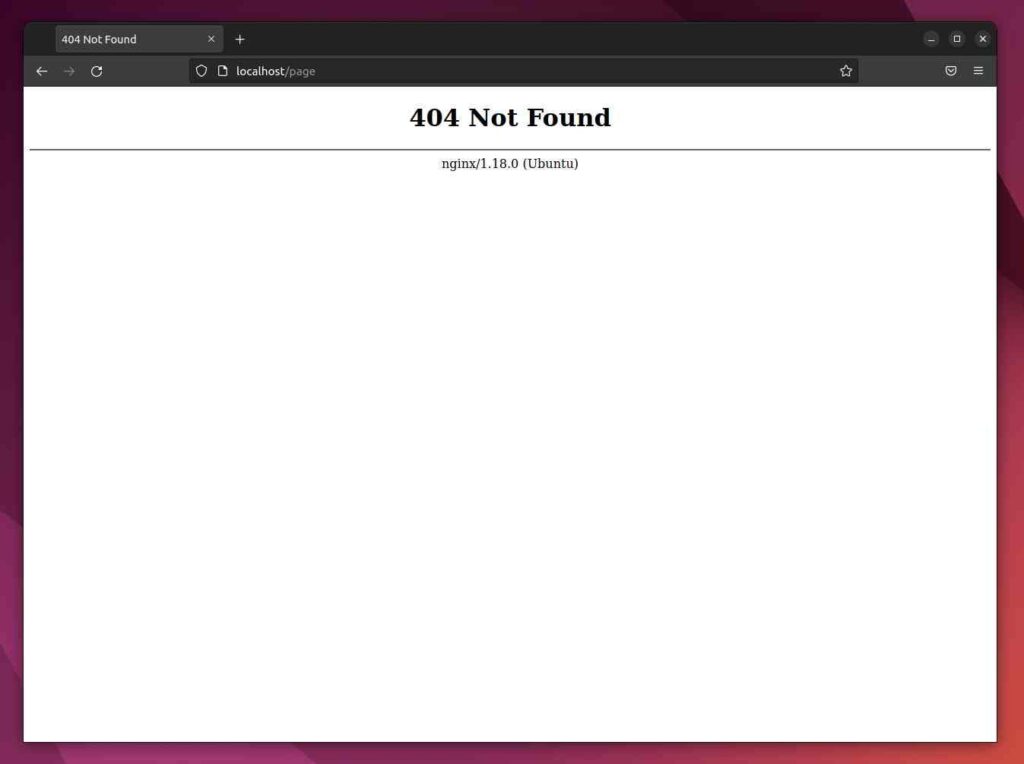
Having a dynamic site with such an ugly-looking page will reduce the UI/UX impression of your site. However, NGINX provides you with the option to configure a custom error page for your site.
To do that, you need to create a custom HTML page and specify it in the error_page directive of the NGINX configuration file, which will be used as the URI to serve the custom error page for the specified error in the configuration file.
Today, you will learn how to create and configure NGINX to handle single or multiple errors, like 404 pages in nginx with custom HTML pages.
Prerequisites
- Nginx web server installed on your system
- Either you have root access or sudo privileges
- Custom template for error pages (source will be provided)
- Browser to test the result (Chrome, Firefox, etc)
Creating Your Custom 404 Error Page
First, we will learn to handle the 404 response code with a custom HTML page. For that, we will create a custom page that will be shown to the users in place of the default NGINX response for status code 404.
For demo purposes, I’ve already created a sample HTML template page that displays the error message “Error 404: The requested page is not available, please contact the administrator.” when viewed.
<!DOCTYPE html>
<html lang="en">
<head>
    <meta charset="UTF-8">
    <meta http-equiv="X-UA-Compatible" content="IE=edge">
    <meta name="viewport" content="width=device-width, initial-scale=1.0">
    <title>Access denied</title>
    <style>
        * {
            margin: 0;
            padding: 0;
            border: 0;
        }
        body {
            padding: 10px;
        }
        .container {
            margin-top: 10rem;
            text-align: center;
        }
        .container .error {
            font-size: 10rem;
        }
        .container .description {
            font-size: 1.2rem;
        }
        @media screen and (max-width: 600px) {
            .container .error {
                font-size: 5rem;
            }
        }
    </style>
</head>
<body>
    <div class="container">
        <div class="error">
           Error 404
        </div>
        <div class="description">
            THe requested page is not available, please contact to administrator.
        </div>
    </div>
</body>
</html>
You can copy the above HTML code, paste it into your text editor, and save the file with the name “error-page.html“. Later on, you can change it to something different.
Now copy the “error-page.html” file into the NGINX document root directory located at the /var/www/html path using the below command.
$ sudo cp error-page.html /var/www/html/The next part will be creating a config file (snippets) and configuring the nginx.conf file.
Configuring NGINX to Use Your Error Pages
First, we will create a new configuration file within the snippet directory located at the /etc/nginx/snippets path with name error-page.conf.
For that, create a snippets directory. If it does not exist in the /etc/nginx path, the below command will create a new directory with the name snippets.
$ sudo mkdir -p /etc/nginx/snippetsThen execute the below command to create the error-page.conf configuration file within the snippets directory.
$ sudo nano /etc/nginx/snippets/error-page.confOnce the file is open for editing, then copy and paste the below code into the configuration file and save it.
error_page 404 /error-page.html;
location = /error-page.html {
        root /var/www/html;
        internal;
}
From the above snippet code, whenever NGINX encounters a 404 response from the user end, it will return the error-page.html as the response.
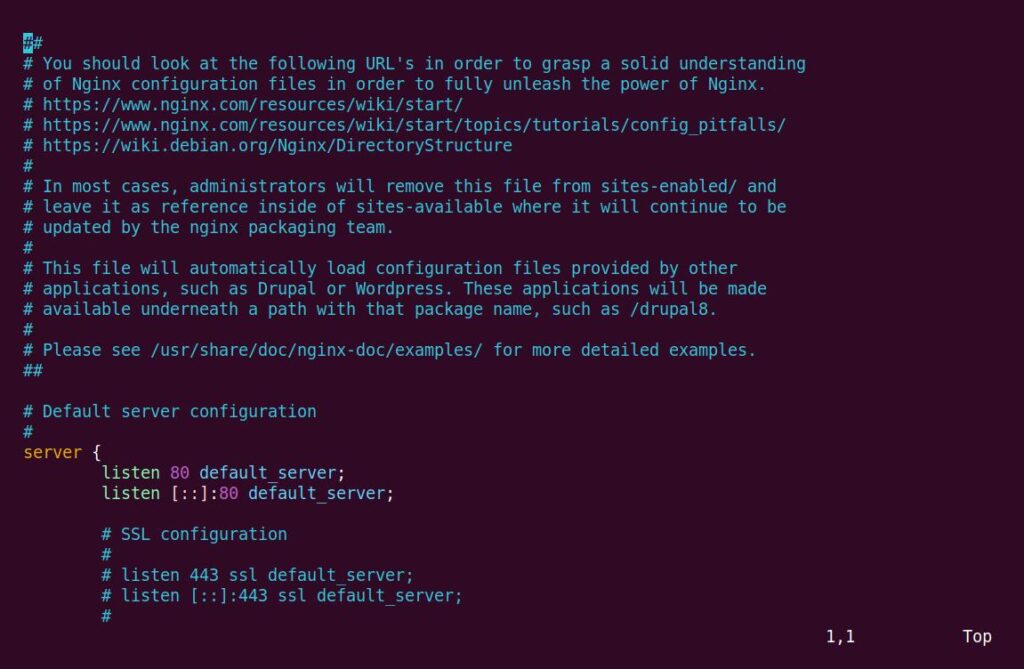
Next, we have to include error-page.conf inside the NGINX configuration file. For that, execute the below command to open the NGINX configuration file.
$ sudo nano /etc/nginx/sites-enabled/default         # For Ubuntu/Debian-based distro's
OR
$ sudo nano /etc/nginx/nginx.conf                    # For RHEL/Fedora-based distro's
Below is the output of the above command.
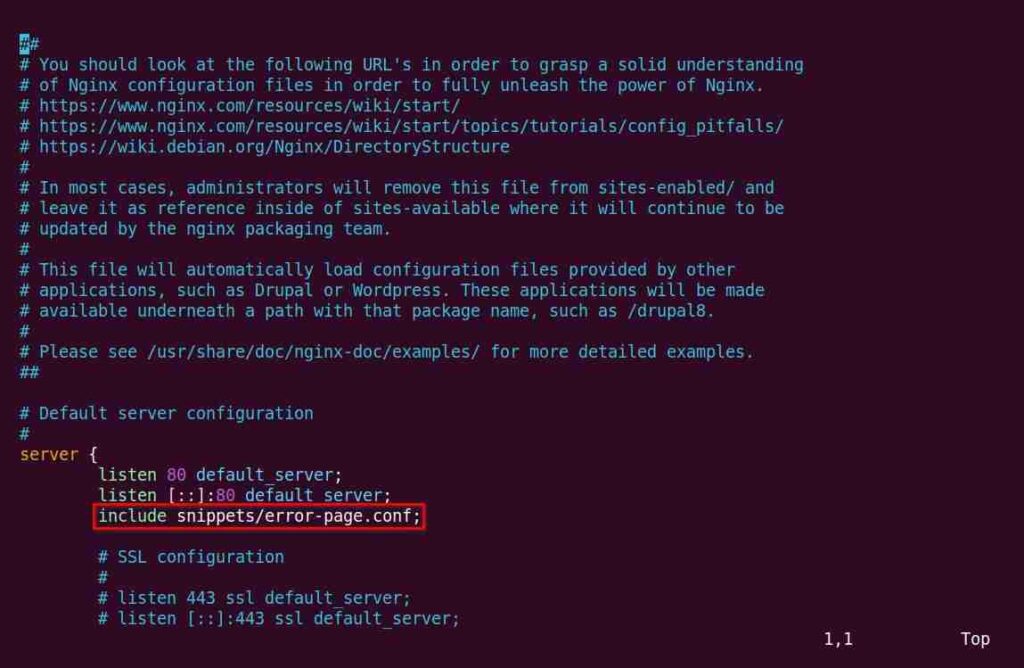
Copy the below line to include the absolute path of the snippet file and place it within the server container in the NGINX configuration file.
include snippets/error-page.conf;
Below is the output after the changes.
Finally, you can restart the NGINX web server and test your page.
Restarting NGINX and Testing Your Page
Once all the required configuration changes are made, reload the NGINX web server using the following command.
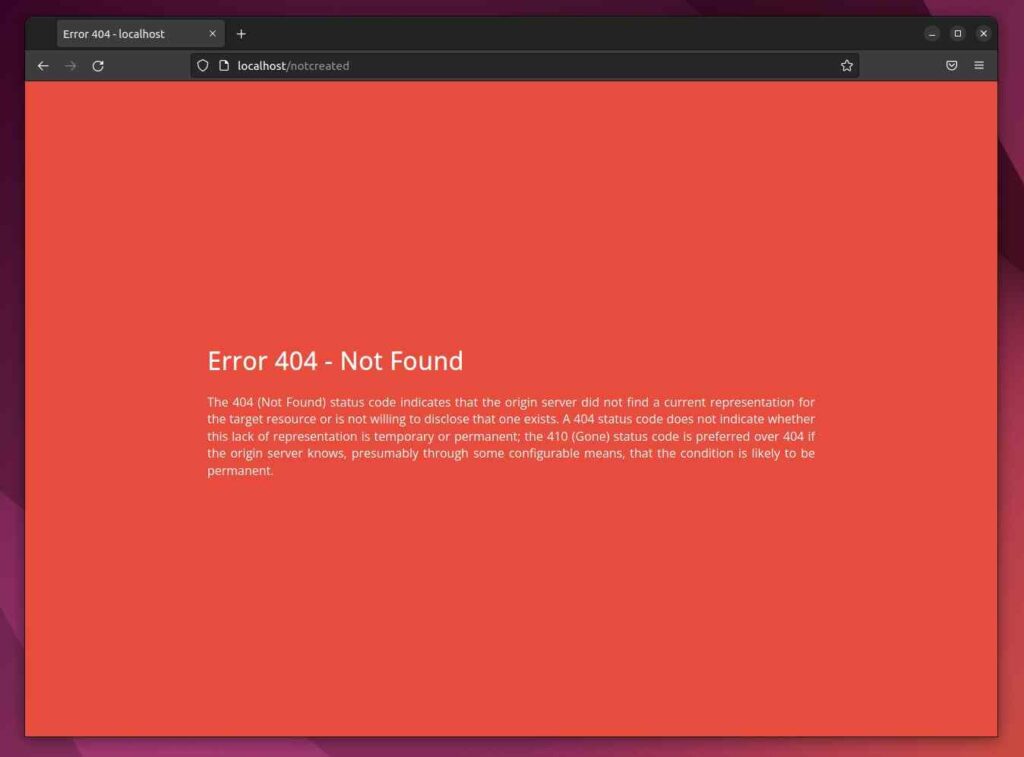
$ sudo systemctl reload nginxFinally, open your browser and visit any page that does not exist to view the error page, as shown below.

Create Different Custom Pages for Each NGINX Error
NGINX allows you to easily set up multiple pages for different HTTP errors.
Instead of creating a separate page and configuring each error page for the custom errors, we are providing you with a GitHub repository with premade custom error pages with a configuration that can be configured within seconds.
Execute the below commands step by step.
$ sudo mkdir -p /srv/http/default
$ sudo git clone https://github.com/denysvitali/nginx-error-pages /srv/http/default
$ mkdir -p /etc/nginx/snippets/
$ sudo ln -s /srv/http/default/snippets/error_pages.conf /etc/nginx/snippets/error_pages.conf
$ sudo ln -s /srv/http/default/snippets/error_pages_content.conf /etc/nginx/snippets/error_pages_content.conf
Also read: How To Change the Nginx Web Document Location in Linux
Now open the NGINX configuration file with your choice of text editor.
$ sudo nano /etc/nginx/sites-enabled/default         # For Ubuntu/Debian-based distro's
OR
$ sudo nano /etc/nginx/nginx.conf                    # For RHEL/Fedora-based distro's
Add the below line inside the configuration file.
include snippets/error_pages.conf;
Last, reload your NGINX web server to apply the changes.
$ sudo systemctl reload nginxNow you can simply visit any unknown page to check the error page, as shown below.
Also read: How to Change Nginx 80 Port in Linux
Wrap up
That’s all for this article, where you learned how to create a custom error page to handle requests beautifully and effectively to your web server.
I hope this article might be useful for your journey to learning the NGINX web server. If you are still facing any issues, the comment section is open for you.
See you in the next article….