To tackle your navigational pain with a long path in Linux, we again came up with another tool.
Again? You heard it correctly. In recent times, or if you are regular reader, then you might have heard about nnn (terminal file manager) and pls (a modern alternative to the ls command) commands.
No doubt, both are great tools. However, nnn can be a little complex and unnecessary for those who are just interested in their problems with navigation, and pls command only list the content with some sugar on top.
So, to achieve your goal with just navigational issues over a long path, we came up with another tool named tere.
What is the Tere Tool in Linux?
Tere is a terminal file explorer (not a terminal file manager) alternative to the cd and ls commands to help you speedily navigate through directories from your terminal.
Its goal and functions are simple and minimal without offering any unnecessary features like creating, renaming, or deleting a directory.
Inspiration for the development of this tool came from the “type-ahead search” functionality found in many GUI file managers, whose job is to navigate through file systems with a few keystrokes and search through the file names.
I don’t think it requires any further explanation. So let’s move into the installation section.
How to Install the Tere Tool on Linux
The easiest way to install it is by using the homebrew package manager (a great tool to install packages without sudo access). If you randomly dropped here, then do check out our detailed guide on the installation of the Homebrew package manager on Linux.
If you already have it installed, then launch your terminal app and pass the following command to install the tere utility on your Linux system.
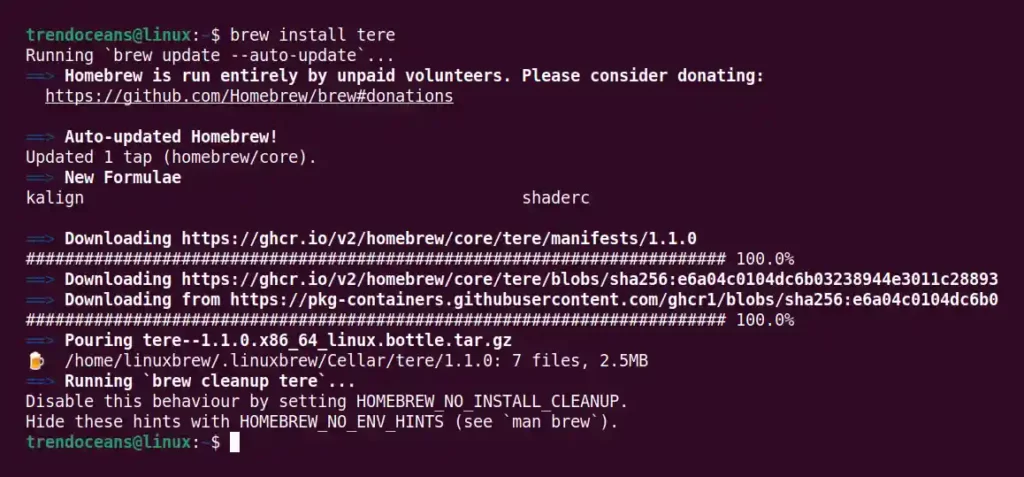
$ brew install tereBelow is the output of the above command.

However, if you have Rust & Cargo installed on your Linux system, then you can easily run the following command to install it using the cargo package manager.
$ cargo install tereBelow is the output of the above command.

For the Nix system, pass the following command to install.
$ nix-env -i tereAfter you have installed it by following any of the above-mentioned methods, let us move to the configuration section.
Configuring Tere Tool on Linux
Now, you need to configure your shell with an tere alias to let it cd into your navigated directory when it exits. This process is necessary and you can do it by adding the following alias to your shell configuration file.
The first step is to find out your current shell by using the following command.
$ echo $0
#OR
$ echo $SHELL
Below is the output of the above command.

After knowing your current shell, add the following alias to your shell configuration file.
For Bash/ZSH
Add the following alias to your.bashrc or .zshrc configuration file.
tere() {
    local result=$(command tere "$@")
    [ -n "$result" ] && cd -- "$result"
}
For Fish
Add the following alias to the config.fish configuration file.
function tere
    set --local result (command tere $argv)
    [ -n "$result" ] && cd -- "$result"
end
After adding the alias to the configuration file, source the config file or restart the terminal session to apply the changes.
Tere Tool Usage
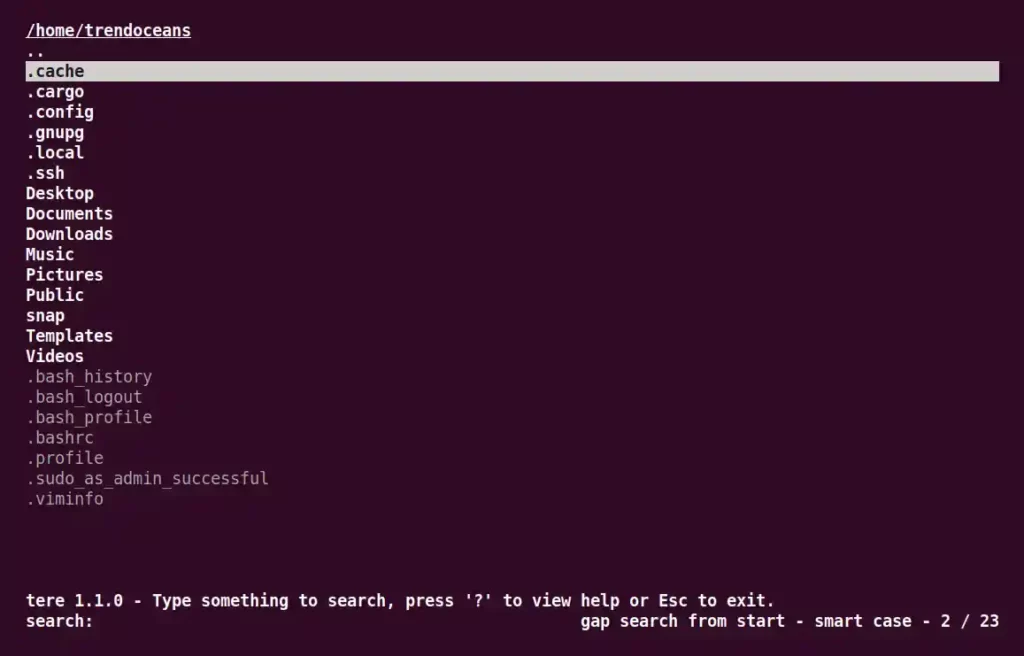
The usage is pretty simple. First, execute the tere command that will open the following interface.
$ tereBelow is the output of the above command.

As you can see above, your current home directory is listed with the hidden files.
From here, you can navigate through any directory by using the left and right arrow keys and then pressing the Esc key to cd into the currently navigated directory.
To demonstrate it, I will navigate from my home directory to /etc/nginx/conf.d using the tere file explorer.
To make it easier for you to understand, you can check the keyboard shortcuts section.
Keyboard shortcuts
The list of useful tere keyboard shortcut keys.
| Action | Shortcut(s) |
| Move cursor up | ↑ or Alt+k |
| Move cursor down | ↓ or Alt+j |
| Enter directory | Enter or → or Alt+↓ or Alt+l or if not searching, Space |
| Go to the parent directory | ← or Alt+↑ or Alt+h or if not searching, Backspace or - |
Exit tere | Esc or Alt+q |
Exit tere without changing the directory | Ctrl+c |
| Go to the home directory | ~ or Ctrl+Home or Ctrl+Alt+h |
| Go to the root directory | / or Alt+r |
| Refresh current directory | Ctrl+r |
| Move cursor up by one screen | Page Up or Ctrl+u or Alt+u |
| Move cursor down by one screen | Page Down or Ctrl+d or Alt+d |
| Move the cursor to the top | Home or Alt+g |
| Move the cursor to the bottom | End or Alt+Shift+g |
| Change case sensitivity mode | Alt+c |
| Change gap search mode | Ctrl+f |
| Show help screen | ? |
Now I’m going to have my cup of tea. Until then, you can explore the tools and let me share your opinions or thoughts in the comment section.
Till then, sayonara!