LibreWolf (fork of Firefox) promises to protect your privacy, security, and freedom on the Internet by removing unnecessary tracking and fingerprinting technologies from the Firefox browser without breaking stuff.
You must be wondering why not to remove all unnecessary tracking elements from Firefox manually. It’s true, Firefox is a highly customizable browser and gives you a bunch of options to modify it in different ways.
Also Read: How to Install Tor Browser on Linux with Security Guide
Initially, it feels good, but doing repetitive tasks every time you install Firefox becomes very boring. Also, you must be aware of the next release to know the changes and modifications in the settings. Otherwise, you might break your browser.
So, what’s wrong with having another browser that removes all the telemetry, data collection, and annoyances, as well as disables anti-independence features like digital rights management (DRM).
Features Removed from LibreWolf to Maintain User Integrity
Below is the list of things LibreWolf removes from Firefox to protect your privacy, security, and freedom on the Internet.
- Firefox cloud sync is removed
- “Add to Pocket” button is removed
- Removes telemetry and fingerprinting technologies
- uBlock Origin included blocking scripts and advertisements
- Firefox recommended and sponsored shortcuts were removed from the home screen
- Private search engines are provided like DuckDuckGo (default), Searx, and Qwant
- The website scheme is disabled (LibreWolf will force web content to display in a light theme)
- The digital rights management (DRM) feature is disabled
- Enhanced Tracking Protection is set to “Strict” mode by default
- Auto delete cookies and site data when LibreWolf is closed
- It will not ask you to save logins and passwords for websites
- Enable HTTPS-Only Mode in all windows by default
For more details, read the full feature list.
How to Install LibreWolf Browser on Linux
Sadly, LibreWolf is not available in the Ubuntu, RHEL, or Arch-based distribution repositories. However, it provides its own repository which can be linked to, and it also comes in the form of AppImage and Flatpak packages.
Also Read: How to Install Latest Mozilla Firefox on Linux Desktop
And the best part is that you will learn both methods. So, open your terminal using the Ctrl+Alt+t or Ctrl+Shift+t keyboard shortcuts and follow the below steps depending upon your distribution.
For Debian, Ubuntu, Pop!_OS, Linux Mint, etc.
Whenever you download a package from the distribution’s default repositories, the source is verified by the GPG key that is stored at /etc/apt/trusted.gpg.d/ path.
Since LibreWolf is not available by default in the default system repositories, you need to add the LibreWolf-provided source repository, including its GPG key.
Also Read: What is APT Command in Linux?
Execute the below commands to add its source repository.
$ distro=$(if echo " bullseye focal impish jammy uma una " | grep -q " $(lsb_release -sc) "; then echo $(lsb_release -sc); else echo focal; fi)
$ echo "deb [arch=amd64] http://deb.librewolf.net $distro main" | sudo tee /etc/apt/sources.list.d/librewolf.list
Below is the output of the above command.

LibreWolf repository is added to your system. Now, execute the below command to add the GPG key and then update your source list.
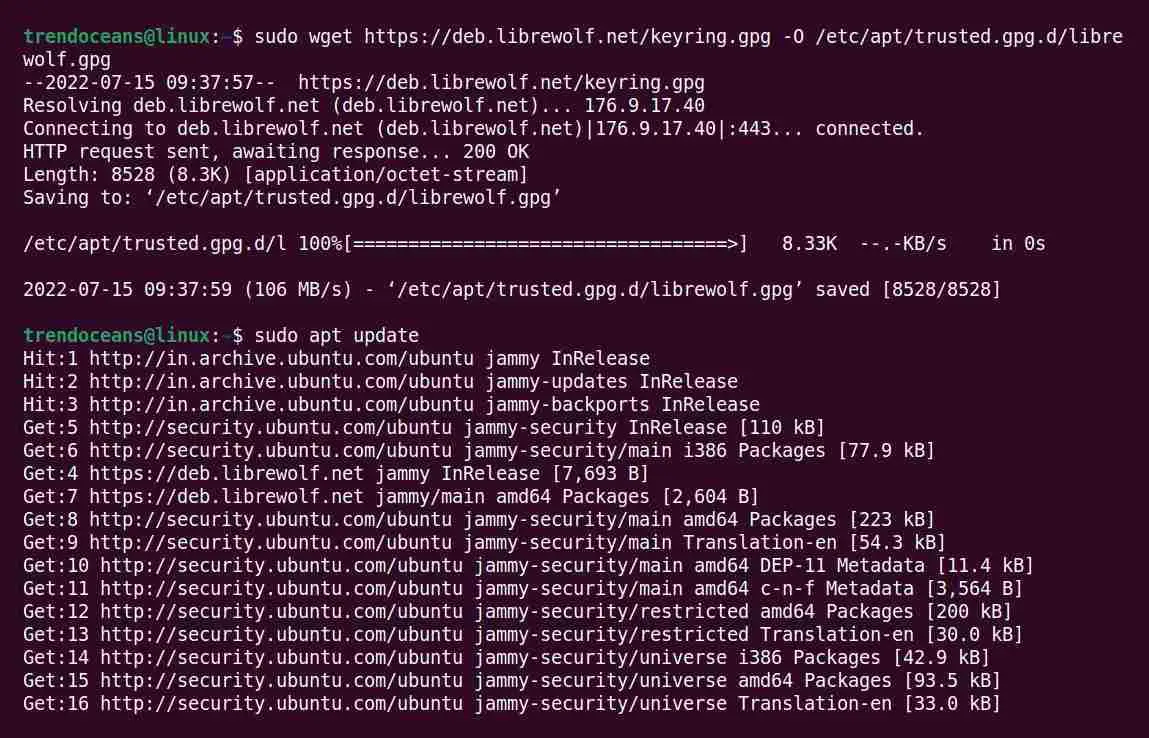
$ sudo wget https://deb.librewolf.net/keyring.gpg -O /etc/apt/trusted.gpg.d/librewolf.gpg
$ sudo apt update
Below is the output of the above command.
Finally, you can execute the below command to install LibreWolf on your Debian-based distributions such as Ubuntu, Pop!_OS, Linux Mint, etc.
$ sudo apt install librewolf -yBelow is the output of the above command.
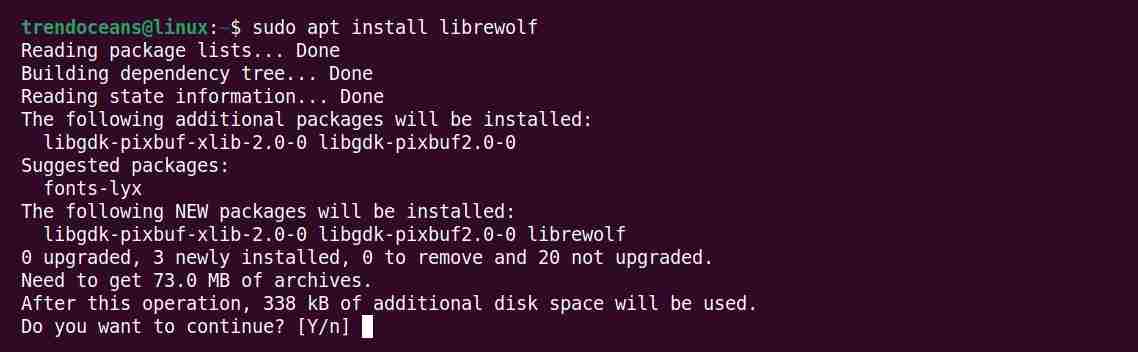
Congratulations!!! LibreWolf browser is successfully installed on your system.
For RHEL, Fedora, AlmaLinux, CentOS, etc.
To install LibreWolf on RHEL-based distributions, you need to first add its repository using the dnf config-manager command, as shown below.
Also Read: How to use DNF Software Package Manager with Examples
$ sudo dnf config-manager --add-repo https://rpm.librewolf.netBelow is the output of the above command.

Now it’s time to add the PGP key which will be used to verify the source package using the following command.
$ sudo rpm --import https://keys.openpgp.org/vks/v1/by-fingerprint/034F7776EF5E0C613D2F7934D29FBD5F93C0CFC3Below is the output of the above command.

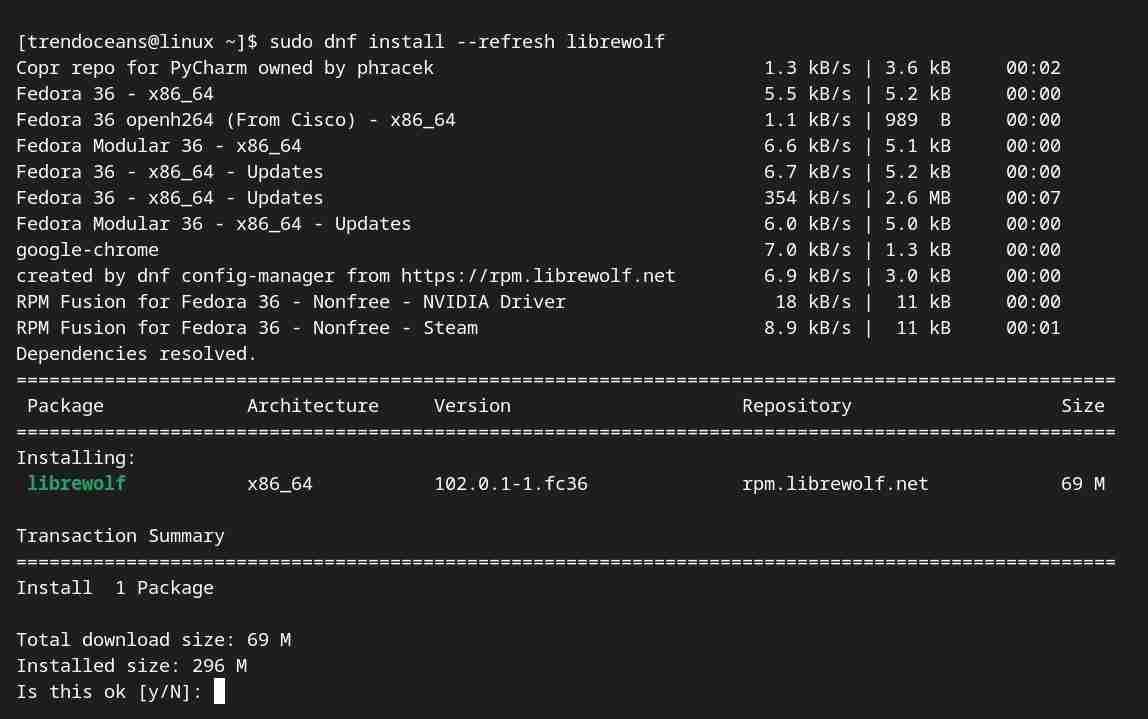
Finally, you need to execute the below command to install the LibreWolf browser on your RHEL-based distributions such as Fedora, AlmaLinux, CentOS, etc.
$ sudo dnf install --refresh librewolfBelow is the output of the above command.
LibreWolf will install on your system and will appear in the search menu.
For Arch, Manjaro, EndeavourOS, etc.
Arch users do not have to worry about adding a repository and GPG key. You guys can easily install it using the AUR package manager like yay, as shown below.
$ yay -S librewolfBelow is the output of the above command.

If yay is not installed on your system, then you can easily compile and install LibreWolf on your system using the following command.
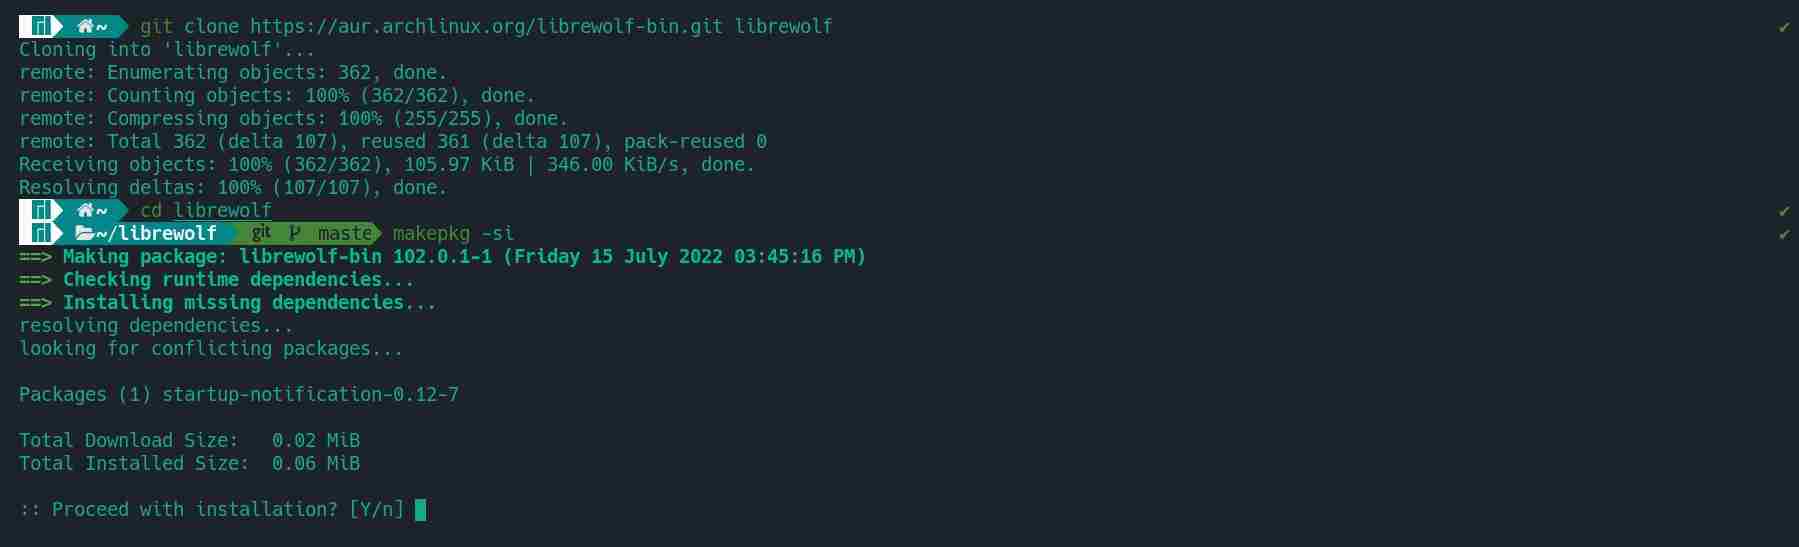
$ git clone https://aur.archlinux.org/librewolf-bin.git librewolf
$ cd librewolf
$ makepkg -si
Below is the output of the above command.
While installation, if a PGP signature verification error occurs as shown below.
==> Verifying source file signatures with gpg...
    librewolf-102.0.1-1-x86_64.pkg.tar.zst ... FAILED (unknown public key 2954CC8585E27A3F)
==> ERROR: One or more PGP signatures could not be verified!
Below is the output of the above command.

Then you need to add a PGP signature for verification using the following command.
$ gpg --keyserver hkp://keyserver.ubuntu.com --recv-keys 2954CC8585E27A3Below is the output of the above command.

Lastly, re-execute the makepkg -si command to start the installation process.
LibreWolf Flatpak
I would mostly prefer you to install LibreWolf as a flatpak package. It does not require adding a custom repository and GPG/PGP keys.
If you have Flatpak installed on your Linux system, then execute the below command to install the LibreWolf browser.
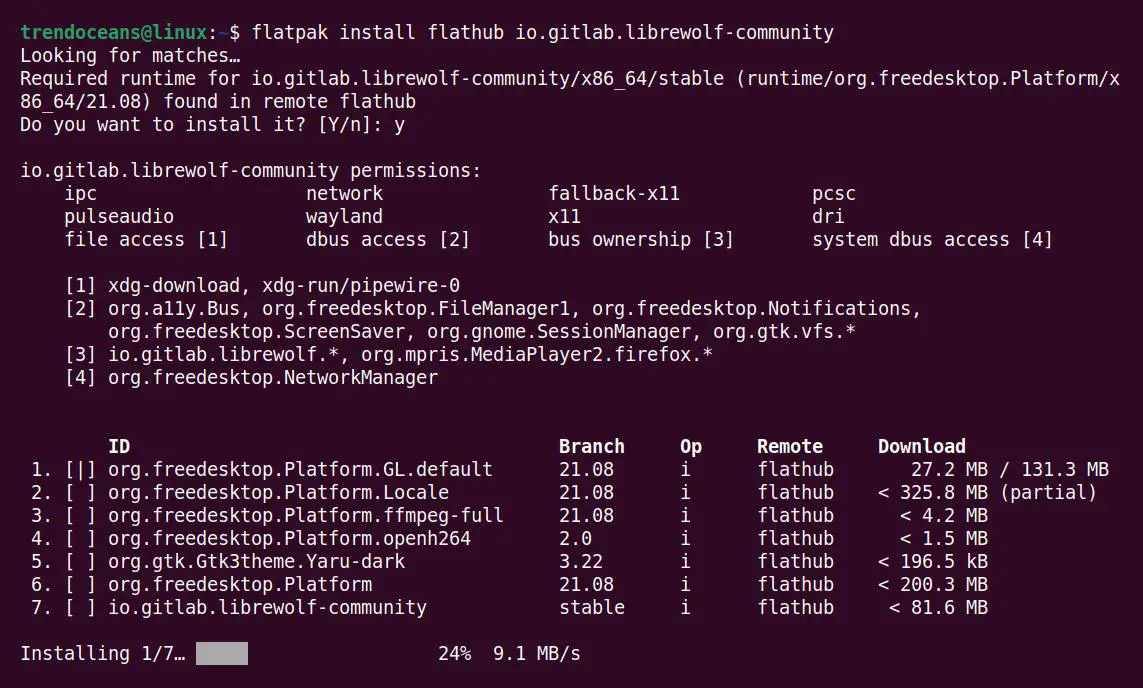
$ flatpak install flathub io.gitlab.librewolf-communityBelow is the output of the above command.
Execute the below command to launch the LibreWolf browser after the installation is complete.
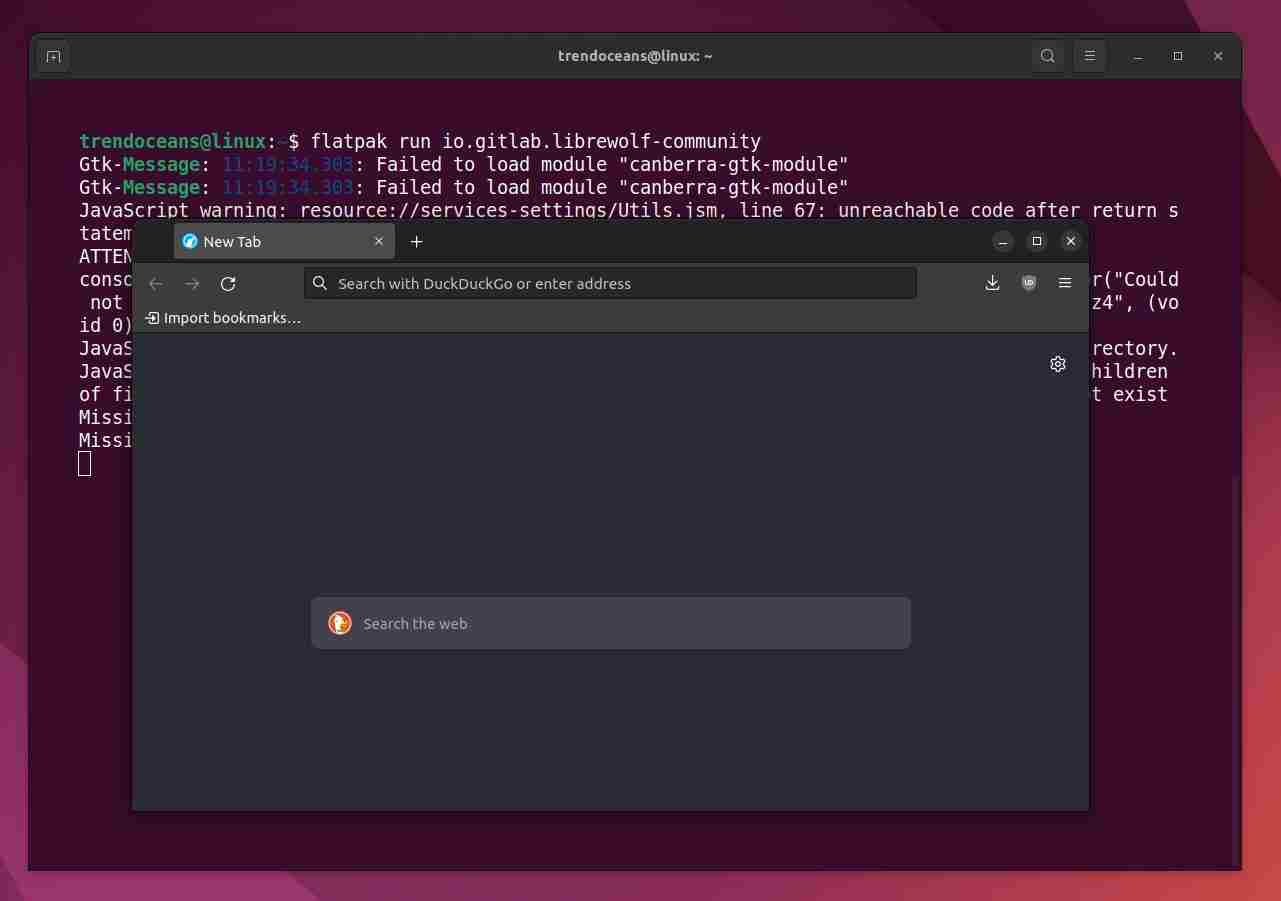
$ flatpak run io.gitlab.librewolf-communityBelow is the output of the above command.
LibreWolf AppImage
LibreWolf AppImage is a portable way to install LibreWolf on any Linux system. However, when LibreWolf next release comes, you’ll need to manually download the AppImage to use the latest version.
Also Read: How to create .desktop shortcut Icon to App Manager in Linux
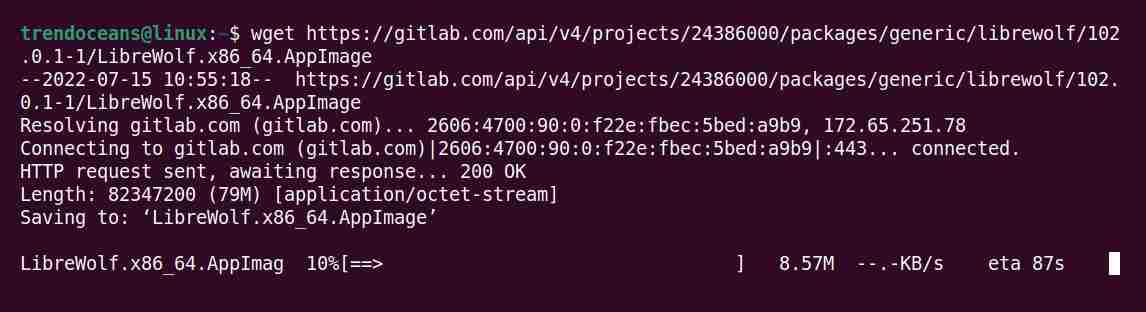
If you are happy with AppImage, then you can execute the below command to download the current latest release (v102.0.1) of LibreWolf AppImage using the wget command.
$ wget https://gitlab.com/api/v4/projects/24386000/packages/generic/librewolf/102.0.1-1/LibreWolf.x86_64.AppImageBelow is the output of the above command.
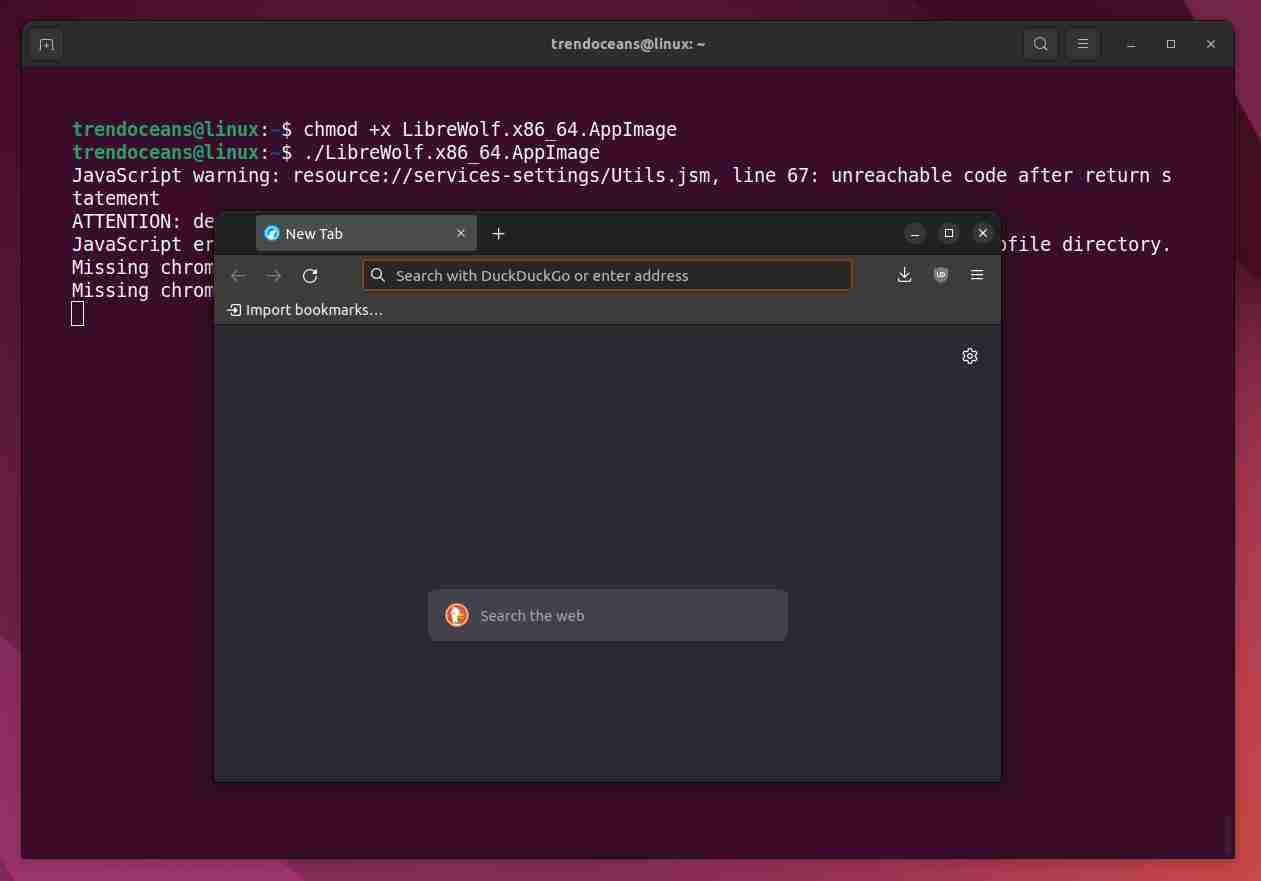
Then apply executable permission using the chmod command and run the application using the following command.
$ chmod +x LibreWolf.x86_64.AppImage
$ ./LibreWolf.x86_64.AppImage
Below is the output of the above command.
How to Run the LibreWolf Browser on Linux
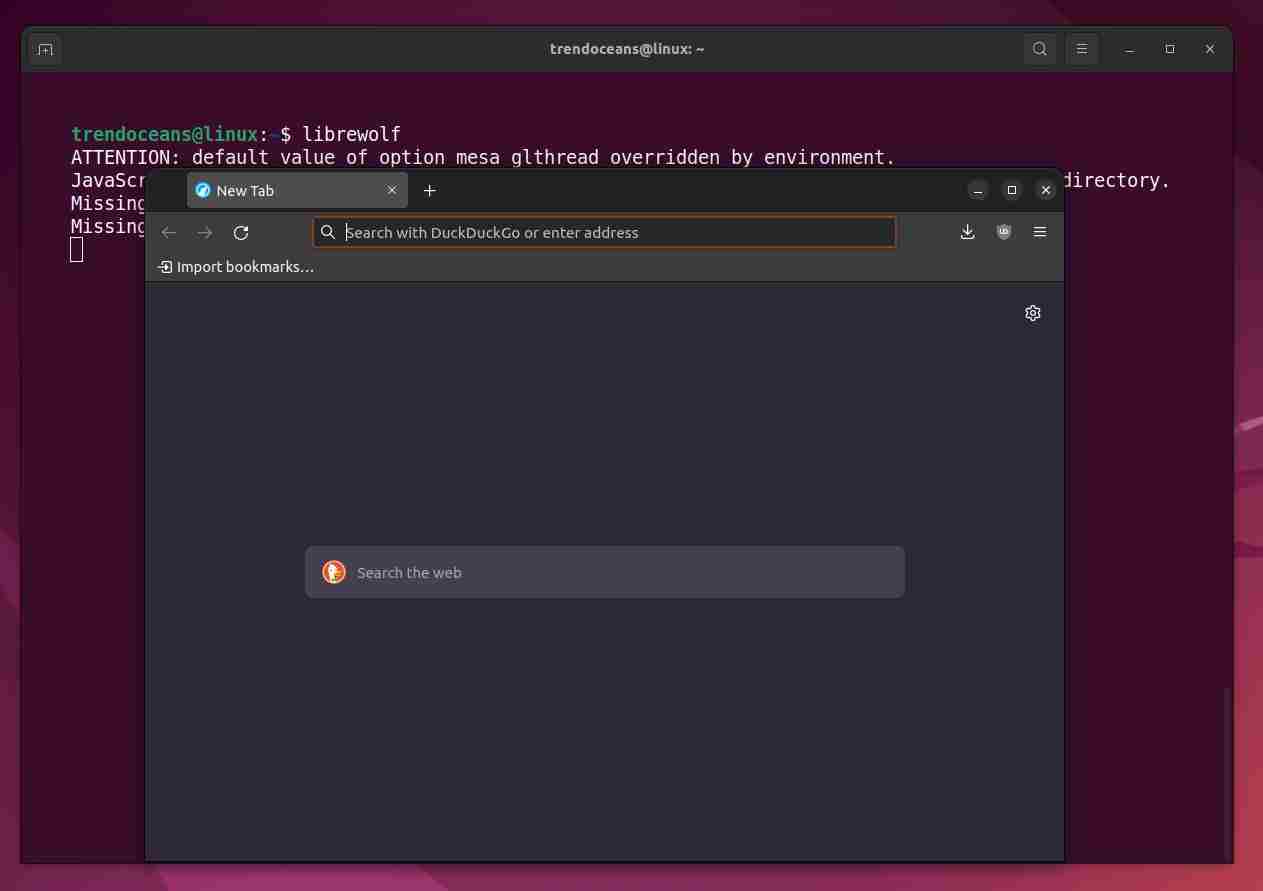
After the LibreWolf browser is successfully installed on your system, you can launch it by executing the below command into the terminal.
$ librewolfBelow is the output of the above command.
Or, go to the application launcher and search for LibreWolf. Click on it to run, as shown below.

How to Uninstall LibreWolf Browser on Linux
For any reason, if you want to remove the LibreWolf browser from your system. Then follow the below method depending upon the type of installation you have used.
Also Read: The Right Way to Remove Apt, Deb, Snap, and Flatpak Packages on Ubuntu
For Debian, Ubuntu, Pop!_OS, Linux Mint, etc.
Execute the below command to remove the LibreWolf browser from your Debian-based distribution system.
$ sudo apt remove librewolf -yThen execute the below command to remove its repository and update your source list.
$ sudo rm /etc/apt/sources.list.d/librewolf.list
$ sudo apt update
For RHEL, Fedora, AlmaLinux, CentOS, etc.
Execute the below command to remove the LibreWolf browser from your RHEL-based distribution system.
$ sudo dnf remove librewolfFor Arch, Manjaro, EndeavourOS, etc.
Execute the below command to remove the LibreWolf browser from your Arch-based distribution system.
$ yay -Rs librewolfLibreWolf Flatpak
Execute the below command to remove the LibreWolf browser installed from Flatpak package manager.
$ flatpak uninstall flathub io.gitlab.librewolf-communityAlso read: Looking for VSCode without telemetry? Then you should install VSCodium.
Wrap Up
Although LibreWolf is a perfect browser for privacy-oriented users. However, you may find it unfriendly while doing some tasks.
For me, syncing bookmarks from one system to another is required. Due to the removal of Firefox sync, I’ve had to install the xBrowserSync extension on my browser.
Overall, it’s a good browser, and I use it daily as my default browser. Let us know your opinion in the comment section.
Your site is very good, I liked the information. Grateful.
Glad to hear!