Having problems while installing mysql-server? Check this guide to completely uninstall mysql-server and reinstall MySQL on Ubuntu.
It’s quite common for developers to get some problems while installing MySQL, and it’s a wise thought to reinstall MySQL, but the problem is that MySQL doesn’t get removed very easily from the system.
Even if you run the apt purge command to remove MySQL, some configuration files and logs still exist on your system, which may interfere when you are trying to re-install MySQL.
So, it’s better for you to follow this guide, where I’ll show some of the common steps to completely remove MySQL from your Ubuntu or Linux machine.
This guide will not only help you resolve installation issues but also show you how to re-install MySQL on Ubuntu.
And you can also follow this guide if you just want to completely uninstall MySQL and don’t wish to leave any trace of it on your system.
Note: One thing I like to make clear is that after following the below steps, everything will be wiped from MySQL, so if you have any kind of data, make sure to take a backup of it.
Uninstall MYSQL Sever Package
First of all, you have to check whether MySQL is running on our system or not.
If it is already running in our system, then your foremost step is to stop MySQL to avoid any unwanted errors during the uninstallation process.
And here is the command that you can use to check the running status of mysql:
$ sudo systemctl status mysql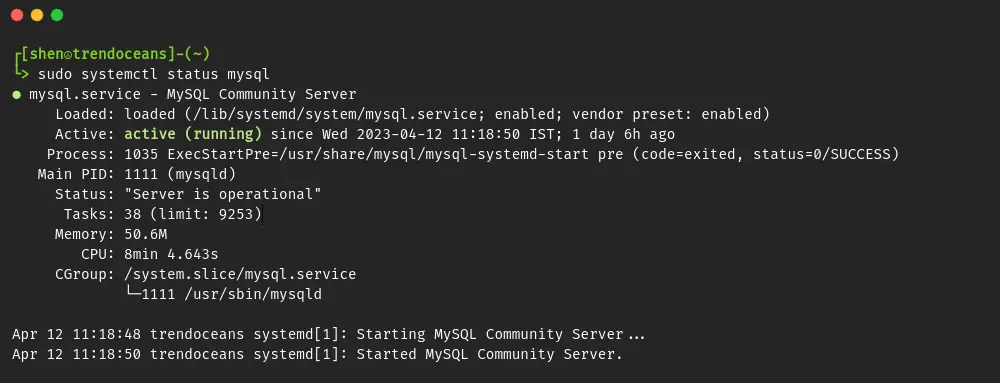
As you can see, MySQL is currently running on my system, and even if it’s running on your end, then stop the service by running the following command:
$ sudo systemctl stop mysql
$ sudo systemctl status mysql
The result of the above commnad.
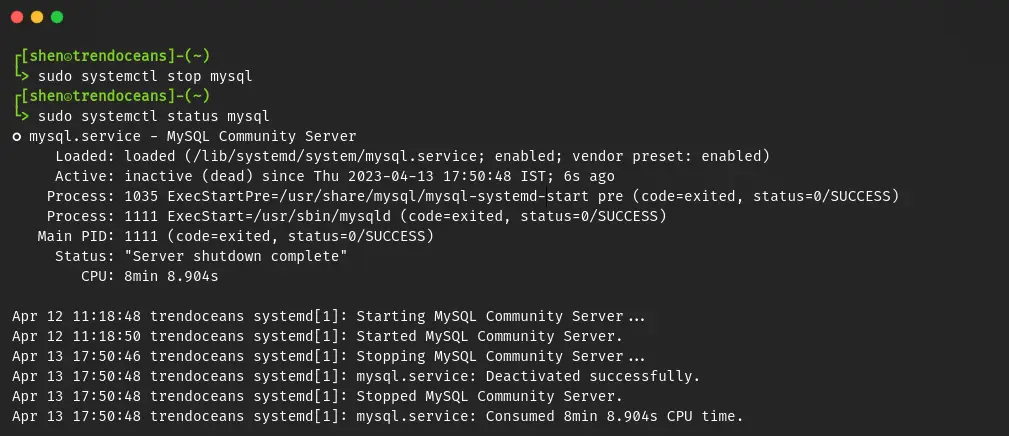
After verifying the status, you can remove the MySQL server without any errors. Not only that, but you can also remove the dependencies that were installed.
For that, we have to use the apt-purge command, which will ensure that no dependencies should be left over on your system.
Also Read: List of apt command’s which many users still don’t know
To uninstall the MySQL server and the related packages, which usually get installed while installing mysql-server, pass the following command:
$ sudo apt purge mysql-'*'
or
$ sudo apt purge mysql-server mysql-client mysql-common mysql-server-core-'*' mysql-client-core-'*'
Once you run the above, it will expand and check all the packages that start with mysql, and if the apt command finds that command, then it will prompt you to confirm the action of removing the packages.
Please press “y”, and wait for the process to complete.
Backup or Remove the MYSQL Directory
Once you complete the above steps, we need to remove the residual or so called orphan files that are present in the /etc/mysql/ and /var/lib/mysql/ directories.
It’s optional, but I strongly recommend you to rename the directory instead of removing it. If you wish to recover any piece of information in the future, it will be easy for you to look into backup.
To take a backup of the respective directory, pass the below command:
$ sudo mv /var/lib/mysql /var/lib/mysql_bk
$ sudo mv /etc/mysql /etc/mysql_bk
Or else, if you don’t want to hold onto your past data, you can delete it by typing the below command in your terminal:
$ sudo rm -r /etc/mysql /var/lib/mysql Auto Remove & Clean Leftover Dependencies
The last step is to run one final command, which will clean and remove all the necessary packages that were installed while installing MySQL in our system but are now no longer required:
$ sudo apt autoremove
$ sudo apt autoclean
Your work is done if you are here just to remove MySQL, but if you want to reinstall mysql-server, then read the next section.
Installation of MYSQL Package
After a complete uninstallation and removing the configuration file from your system, you may proceed to install MySQL on your Ubuntu/Debian machines.
For the fresh installation of mysql-server on your Ubuntu machine, then do copy-paste the following line of code into your terminal screen:
$ sudo apt install mysql-server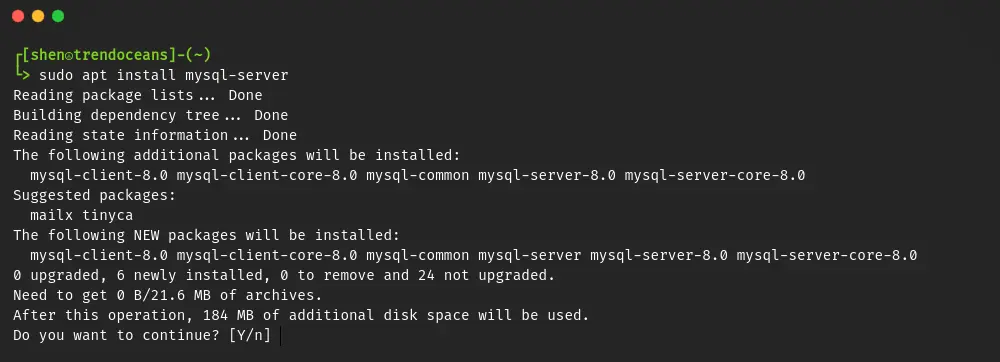
Wrap up
That’s all for this article, where you learn how to completely uninstall or remove mysql server and related files from your Ubuntu system.
For any reason, if you are still facing difficulty while removing and reinstalling MySQL in your system. Then feel free to ask your query in the comment section.
Until then, spread love and peace.