You have Installed VMware Workstation but you don’t know how to Create New Virtual Machine on VMware?
No problem we will cover how to create and install a new Virtual machine using VMware workstation.
Prerequisite
- Vmware Workstation
- ISO file
Create a new Virtual Machine on VMware
We will install Garuda KDE Dragonized on VMware 16 Workstation pro. If you have not Install VMware on your system refer to the below link
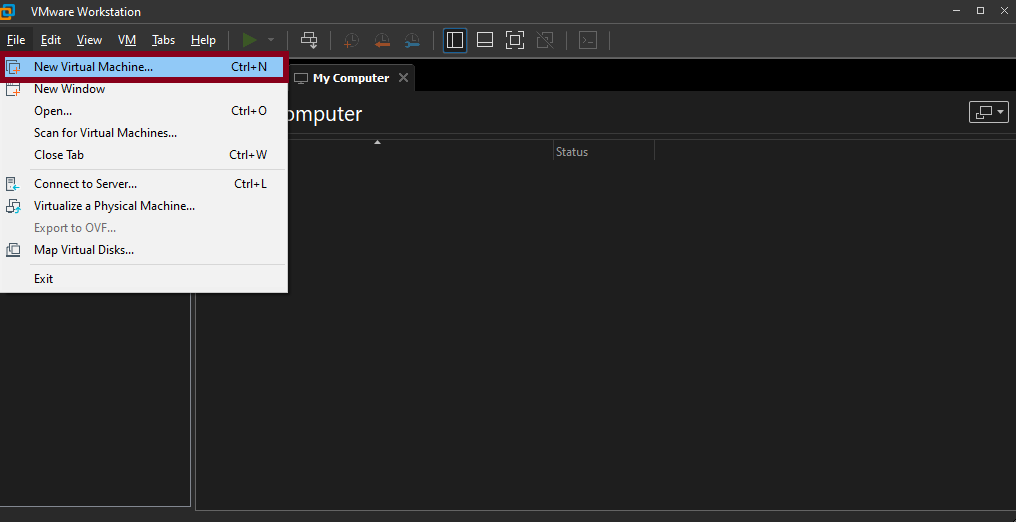
When you open the VMware Workstation you will see the same Interface as the below output screen.
To start or create New Virtual Machine you need to click on File and select the First options New Virtual Machine or you can use the shortcut Ctrl + N.
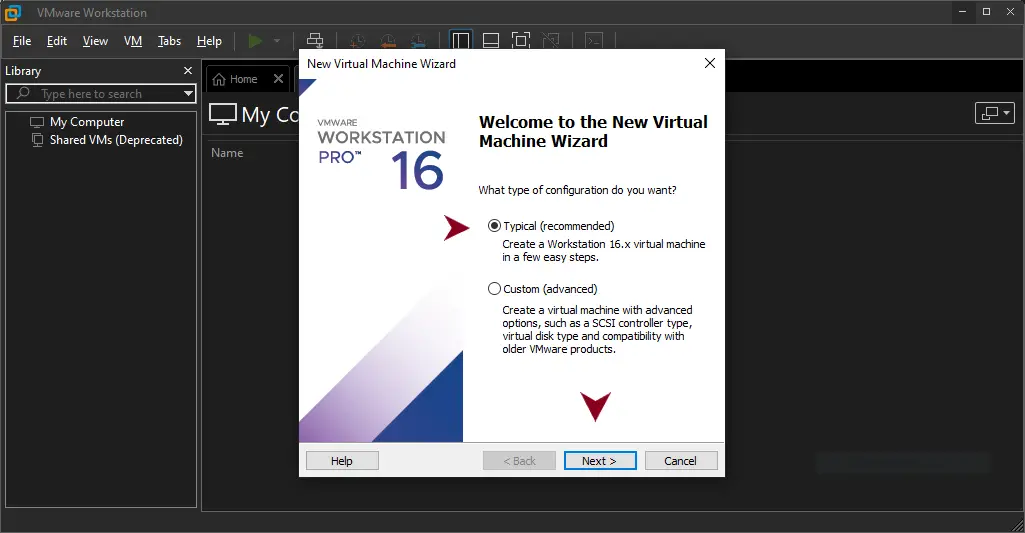
The New Virtual Machine Wizard presents you with a series of the screen you need to follow steps.
In the first screen, you will ask you “What type of configuration do you want?”
- Typical (recommended)
- Custom (advanced)
If you are a beginner it’s advised you to go with the Typical (recommended) because it will configure Default VMware settings.
In advance option, you will able to choose older VMware products, Hardware Compatability, SCSI controller type and other tweaks.
For this guide we will go with the Typical method.
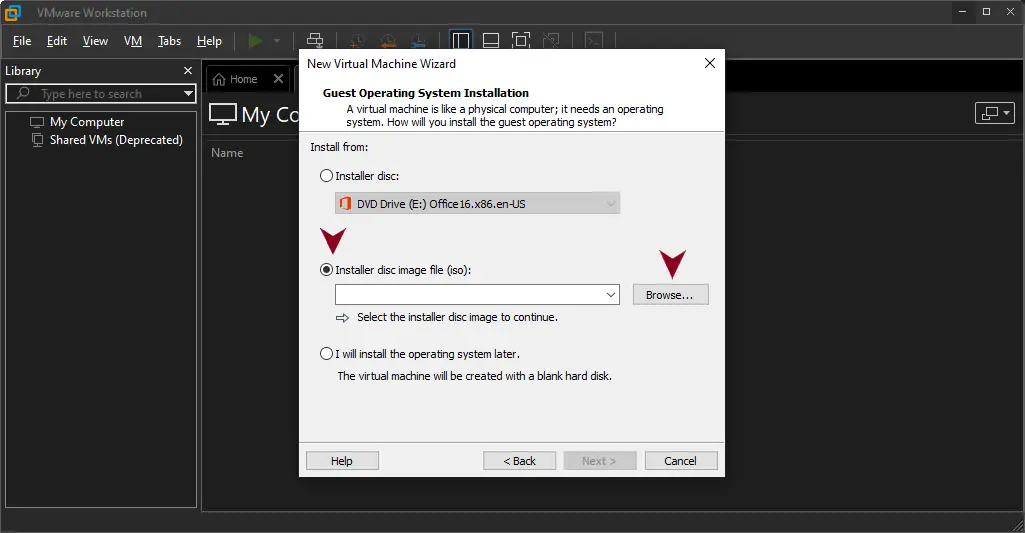
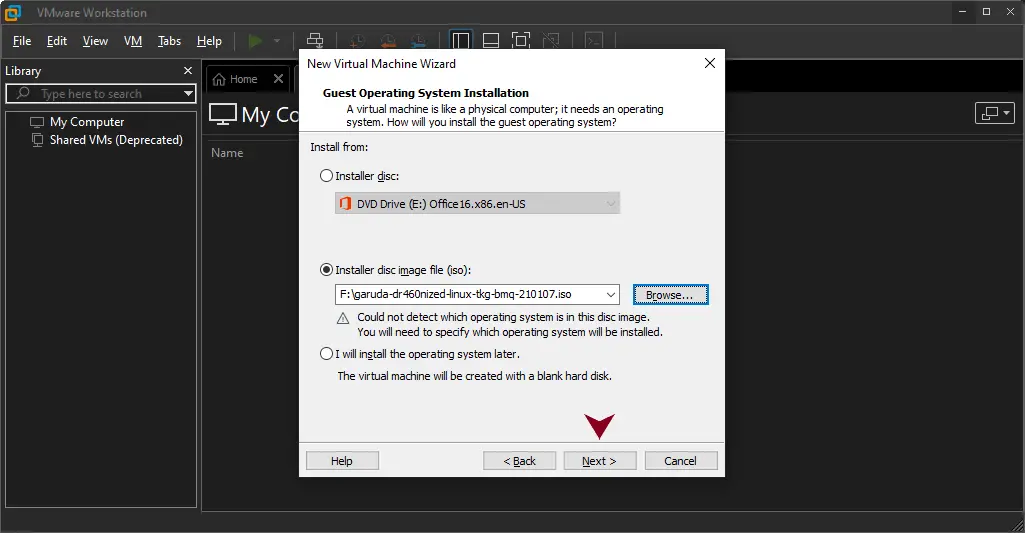
This is the second screen where you need to provide Installation Disc Image file ISO location you will get the three different way to assign ISO file such as
- Installer Disc
- Installer Disc Image File (iso)
- I will install the operating system later
Over here you will select the second options and we need to click on Installer disc image file radio button then click on Browse.
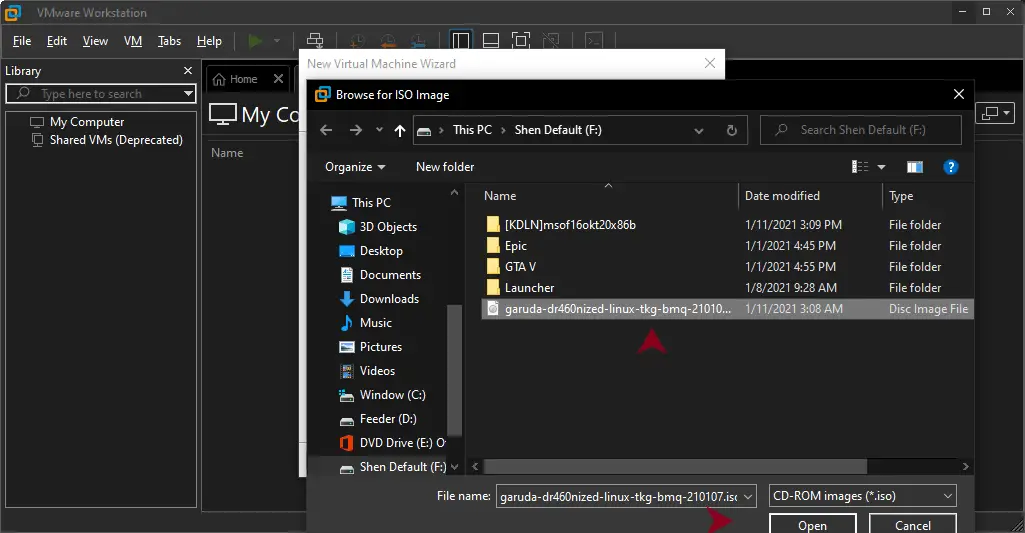
Go to the directory where you have kept the iso file. For demo purpose, We have already downloaded the garuda iso file from the official website.
Click on the iso image file then click on Open button.
You will get back to the last screen, and most probably VMware Wizard will fetch the Operating System name from ISO file sometimes VMware not able to fetch OS name.
After providing iso file details click on Next button.
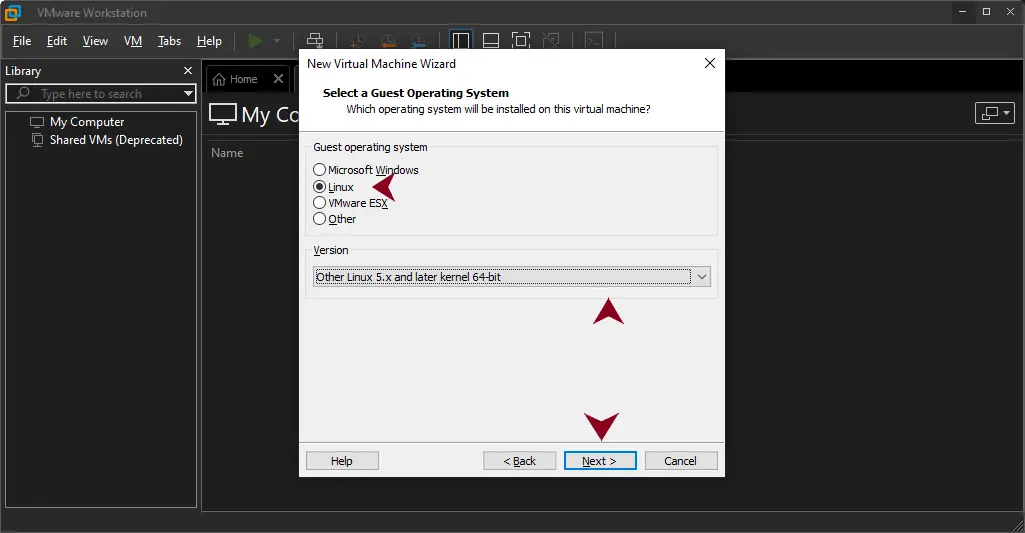
In this screen, you will ask you to choose which type of Guest Operating System you are trying to Install on your VMware.
We are trying to Install Linux so select the Linux, then click on the drop-down menu and select the appropriate version
For major Linux distribution or windows you will able to see the exact name but some of the Linux distributions you will not find the name in the drop-down menu.
What to do now? Select the Kernel Version with the Operating System Bit, If you don’t know the kernel version go to the iso documentation or most probably major Linux build on latest kernel so select the latest version.
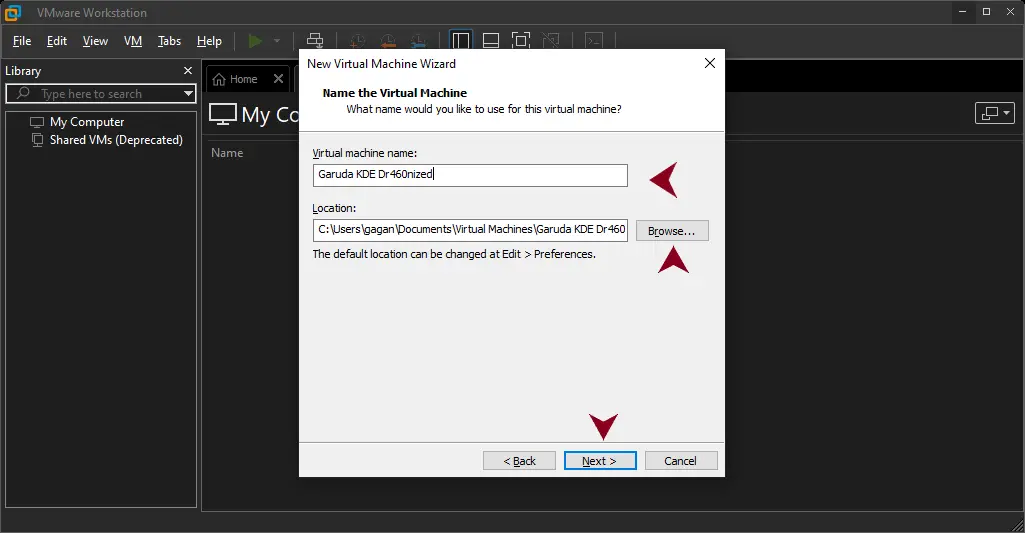
You need to provide Virtual name, most probably this space will be occupied with the last selected “Guest Operating System name”.
In my case default name was “Other Linux 5.x and later kernel 64-bit” So I changed to “Garuda KDE Dr460nized”.
After this, you need to provide Location where you need to store VMware machine file “vmx”.
If you want to change location then click on the Browse button and select the location.
In this screen you need to Specify Disk Capacity, A virtual machine will create a virtual disk from your physical disk.
So, make sure you have required space available to your physical disk to create virtual disk.
I’m using Garuda Distribution based on Arch Linux they have specified minimum disk requirement is 30 GB.
Somehow disk storage is full if you want to increase disk that you can easily do with this guide How to Increase Disk Size of VMware Machine

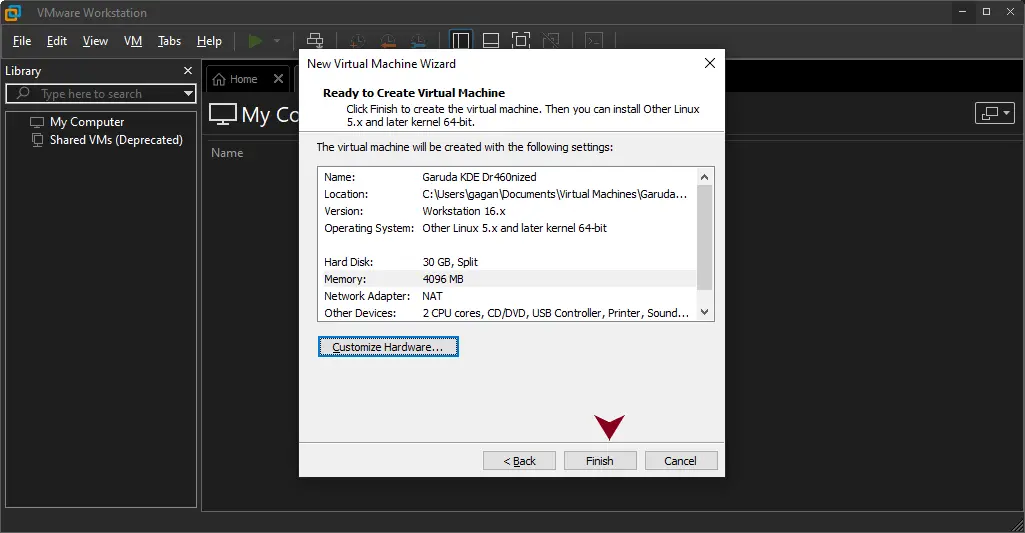
This is the final step when you click on the Finish button New Virtual machine will be created.
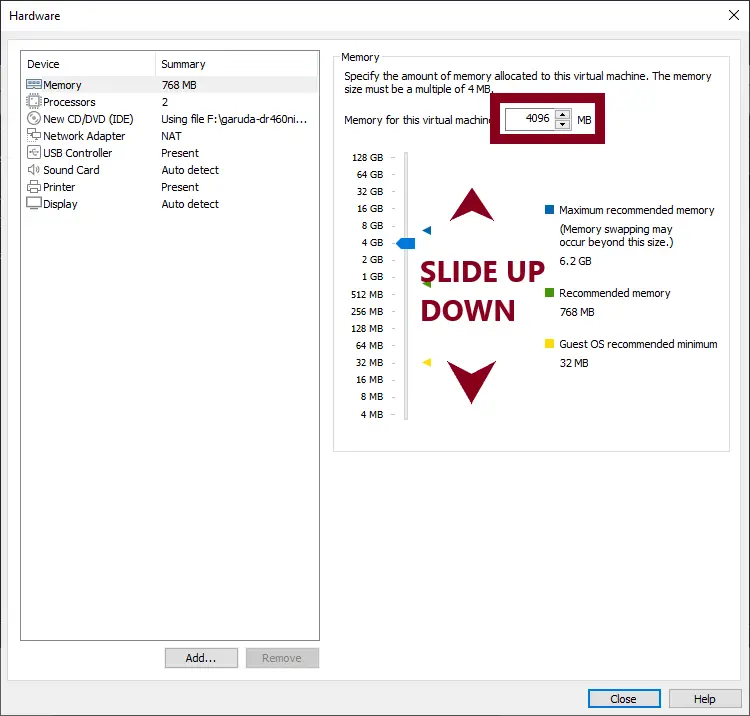
If you want to customize hardware for example you need to increase RAM size then click on Customize Hardware button.
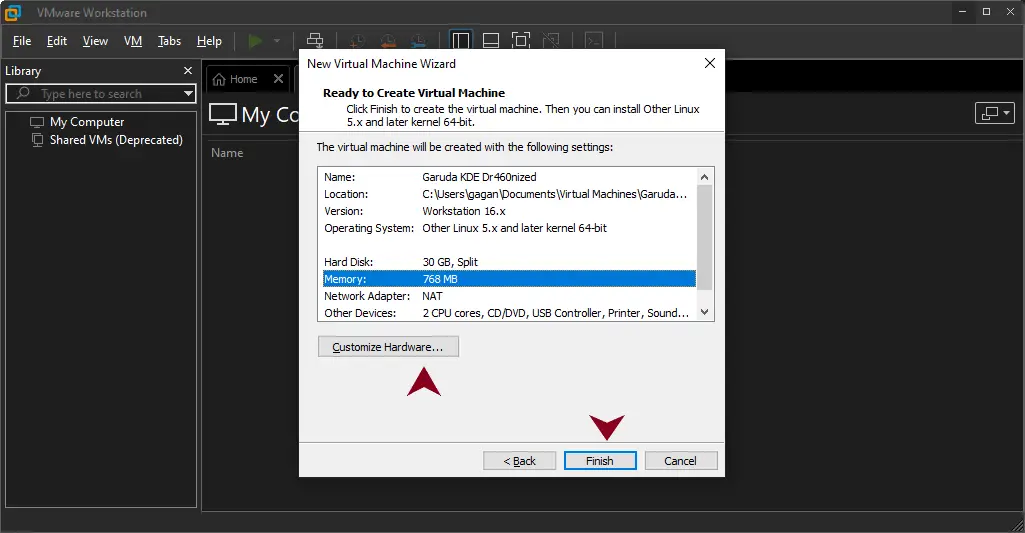
When you click on customize hardware you will get the number of options to customize hardware like memory, processors, etc.
In this example We’ want to increase RAM capacity for that we have to click on Memory, You can slide up to increased RAM size and down for reducing RAM size.
When you done with the customization click on Close button.
This is last screen for the New Virtual Machine Wizard Click on Finish button to create Virtual Machine.
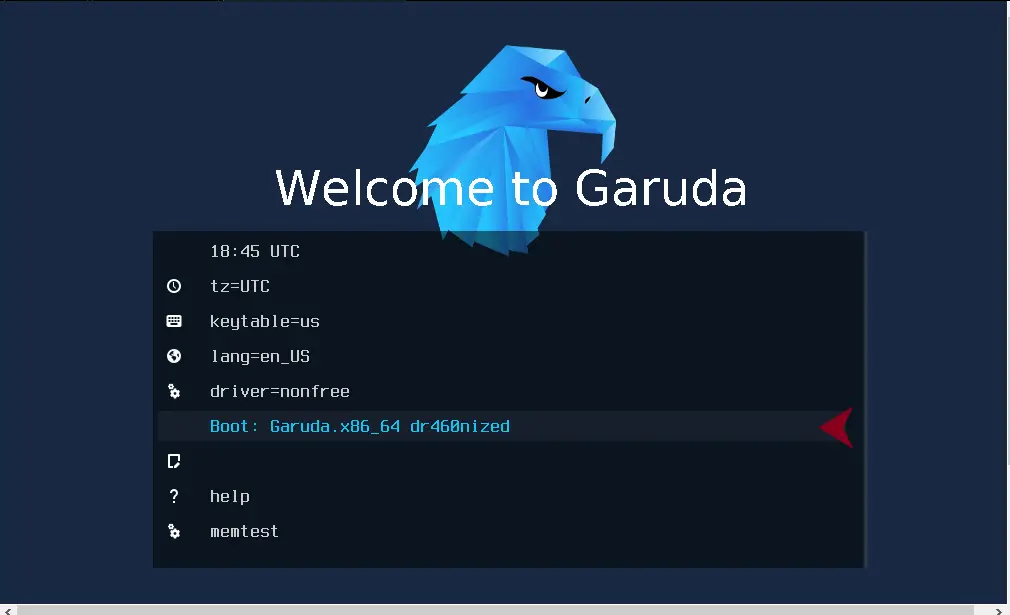
After completing Wizard you will able to See Virtual Machine Name Click on ![]() Power on the virtual machine.
Power on the virtual machine.

When you power On Virtual Machine It will open Installation Setup. If you want to Install Centos Stream on VMware follow the below link
That’s it to Create New Virtual Machine on VMware Workstation. If you need any assistance please let me know in comment section.