It happens many time to me. When I have to use windows for MS Office or Photoshop. Then suddenly, I get the need for a Linux system. In between work, I have to switch back to Linux.
So, I set up my Linux machine on VMware, and during installation, I set it up with disk size 20GB. However, it would be required much more now.
Today, I will guide you on how to increase defined disk size in VMware machine.
Check Current Disk Size
First, let us check how much disk space is assigned to our current VMware machine before increasing it.
I will show you two different way to check disk space of your VMware machine.
Way 1:
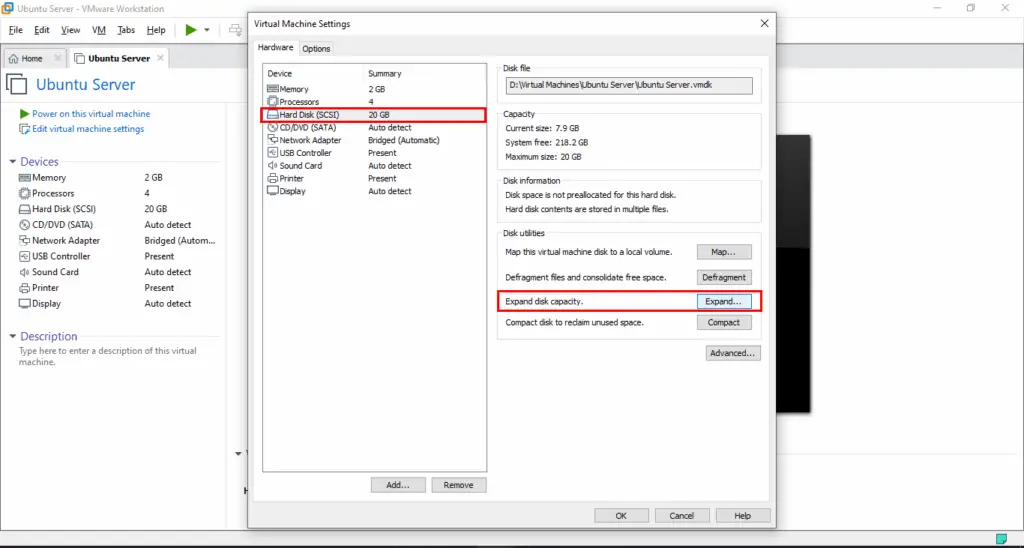
Open VMware workstation and go to your VMware machine-like shown below to check your disk space.
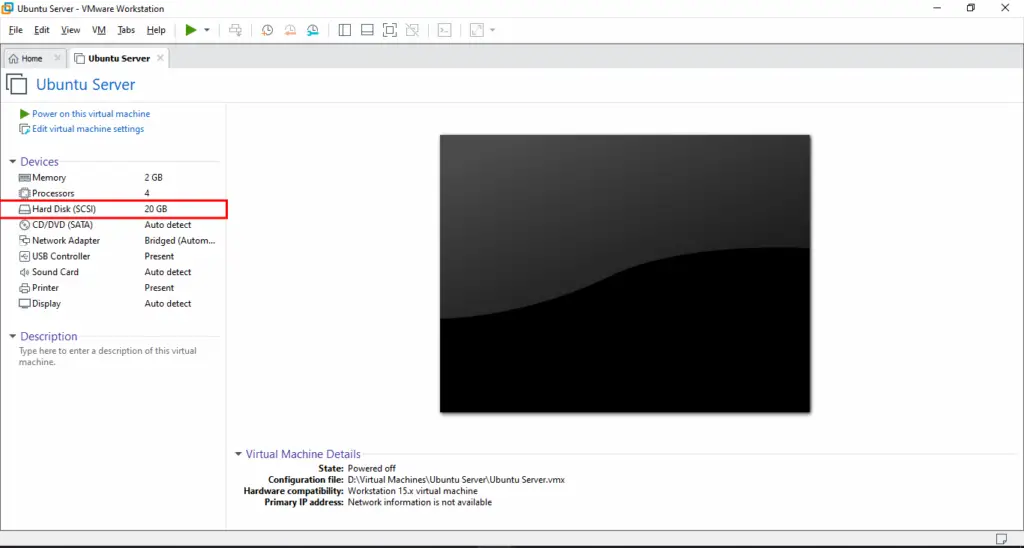
As you see above, my current disk size of the machine is 20 GB. Another method to check the machine’s disk size will only work if you used a Linux system in your VMware machine.
Way 2:
This method of checking disk size will only work if you were on a Linux system installed in your VMware. For that open VMware workstation and then Power on your virtual machine.
Open your terminal and enter following command in your Linux terminal.
$ df -hdf gives you an overview of your filesystem disk space and how much each partition occupies and how much space left in your machine.
-h: This syntax is defined along with df to get an output of disk Size in a human-readable format.
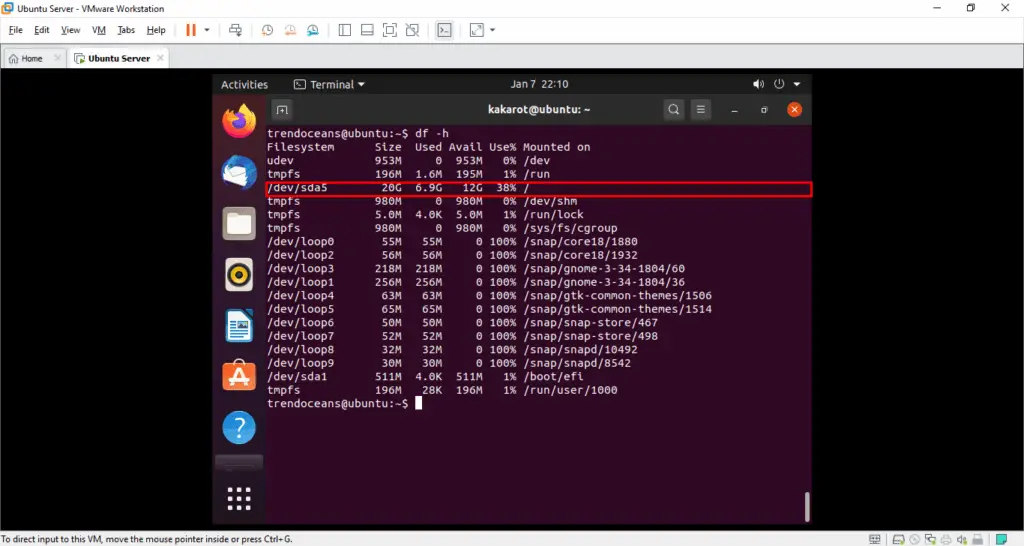
Only note the partition’s disk size, which is mounted on (/) like shown in the above example. (/) is for the root partition which is in the top of the all other partition.
Now you know how much amount of disk space assigned in your VMware machine time to increase it.
Increase Disk Size of VMware Machine
In my case, I am demonstrating in Ubuntu 18.04 Server Edition, but it will work the same for all major Linux distribution.
Step 1:
Open your VMware workstation by searching it in the Activity manager search bar. Then Power on your machine and open your terminal.
Once again make sure to check your current disk size in your VMware machine. Type following command in your Linux terminal to check your current disk size of VMware machine.
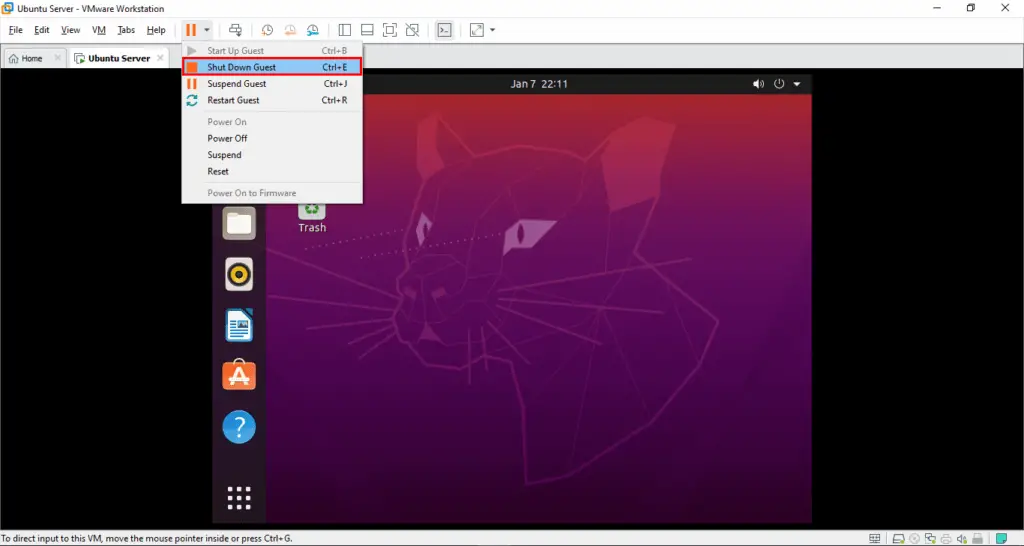
$ df -hAfter that power off your machine now we are going to increase our disk size.
Step 2:
Now here we are going to edit our VMware machine settings. For that click Edit virtual machine settings like shown below.
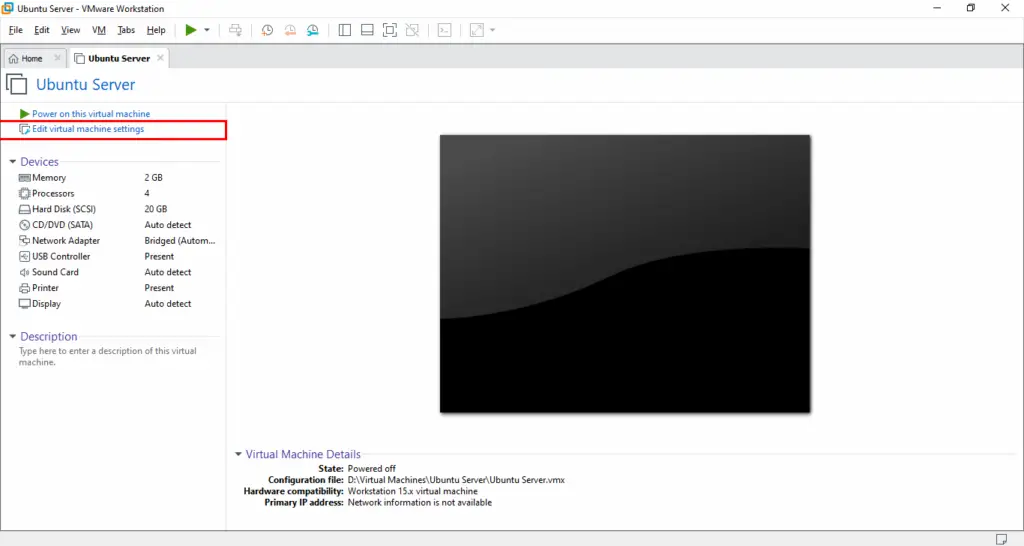
Now Virtual Machine Settings window will popup here go to the Hard Disk (SCSI), and there you will see option Expand disk capacity click on in.
Another window with title Expand Disk Capacity will be popup. Here you have to specify your Disk size which you wish to have, but before that make sure that your host operating system has that much amount of disk space left in it, otherwise you cannot increase.
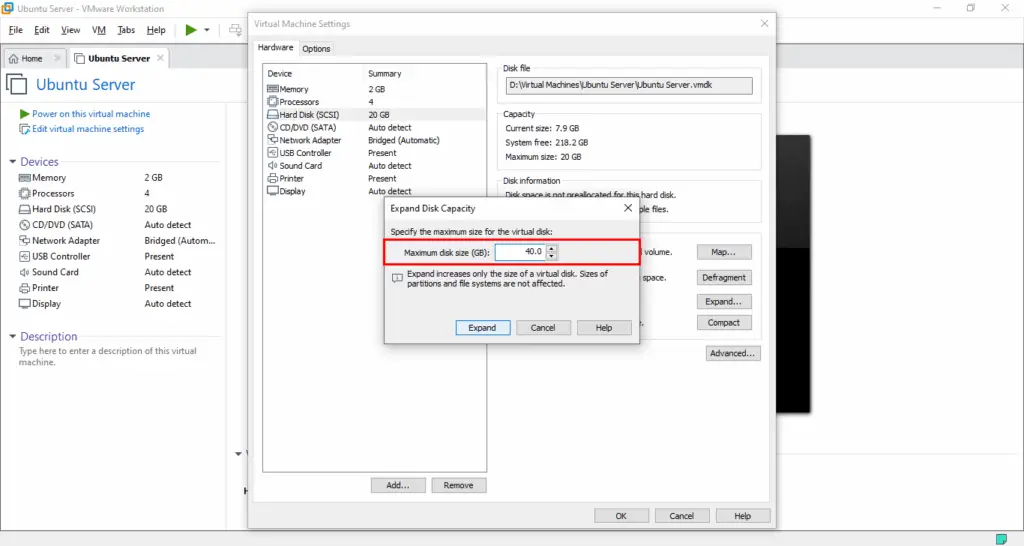
In my case, I am going to increase my disk space from 20GB to 40GB. After you are done with yours, click on Expand and OK on Virtual Machine Settings.
Wait; still, one thing is left to do here. The additional space which we have added is unmounted. So, we have to mount it with the root partition for that I will use one of the most popular disk utility names GParted.
Please turn on your machine again and open GParted from your Linux terminal using the following command or search it in Activity manager search bar.
$ sudo gparted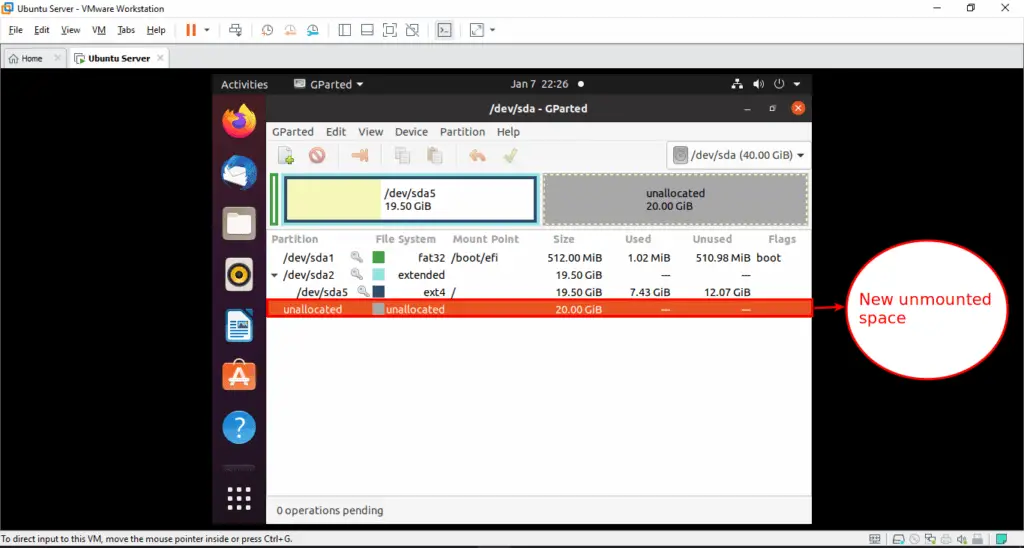
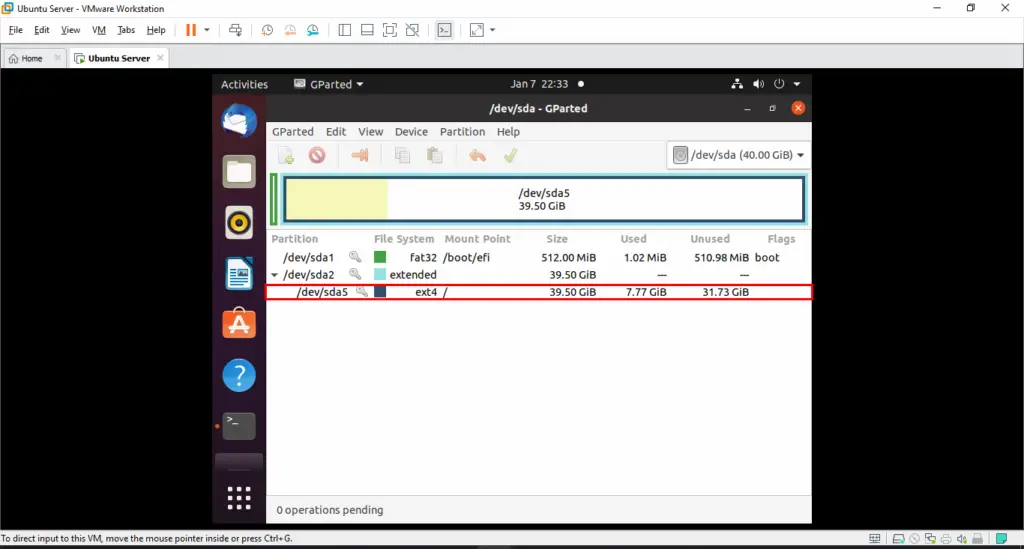
As you see above is new unmounted disk partition created which we have added it just a few minutes back. Now we will expand disk size of our Partition /dev/sd5 which is pointed to root partition.
Right-click on partition /dev/sd5 and click on Resize/Move option from the context menu like show in below picture.
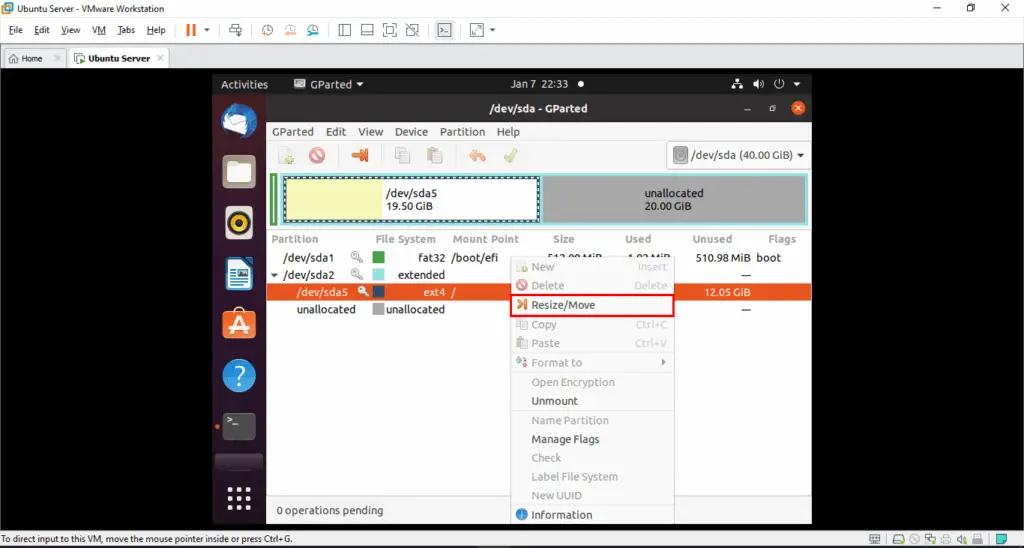
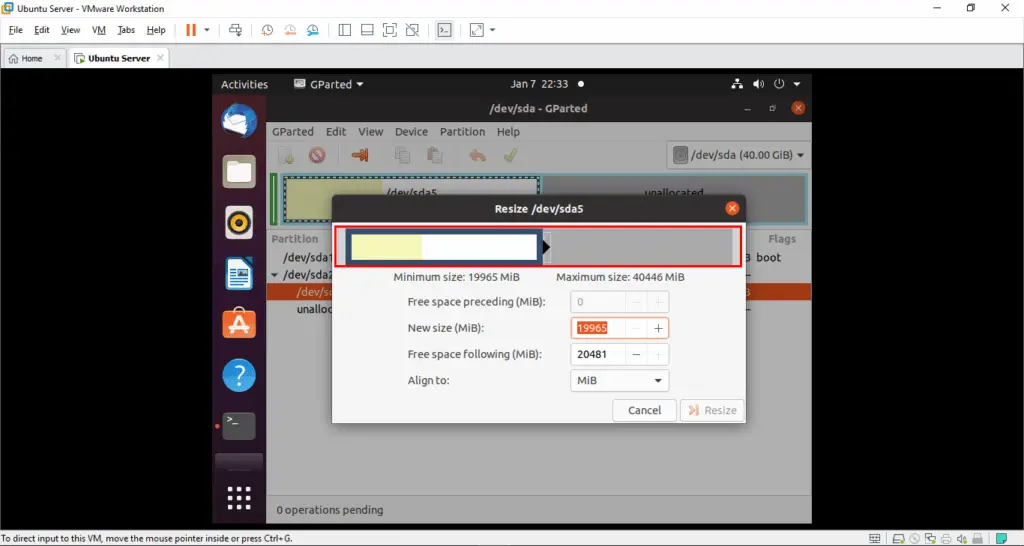
Now, the Resize window will be popup here drag below the highlighted bar to the end to get all unallocated space from new disk partition we have created earlier.
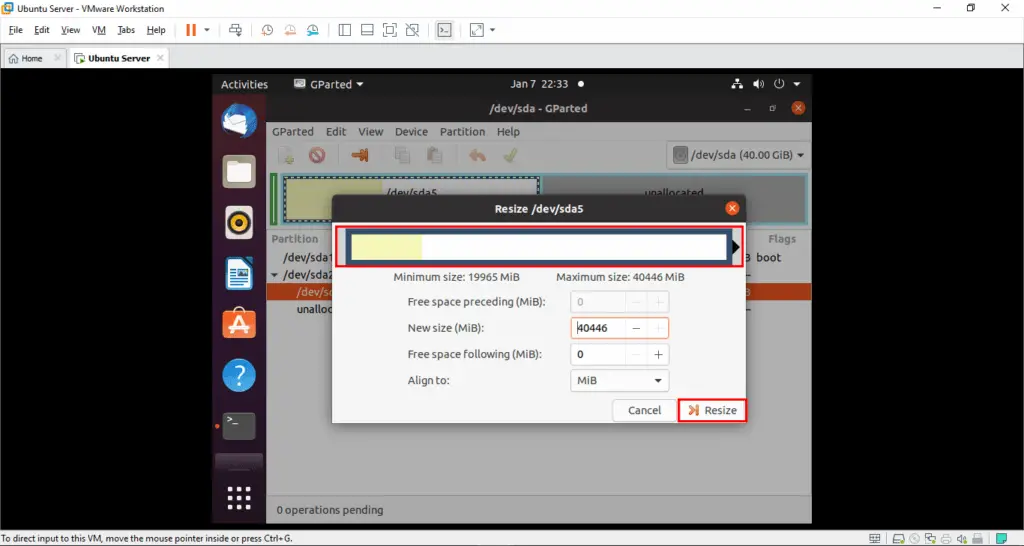
After you gave done dragging click on Resize button as shown in below picture.
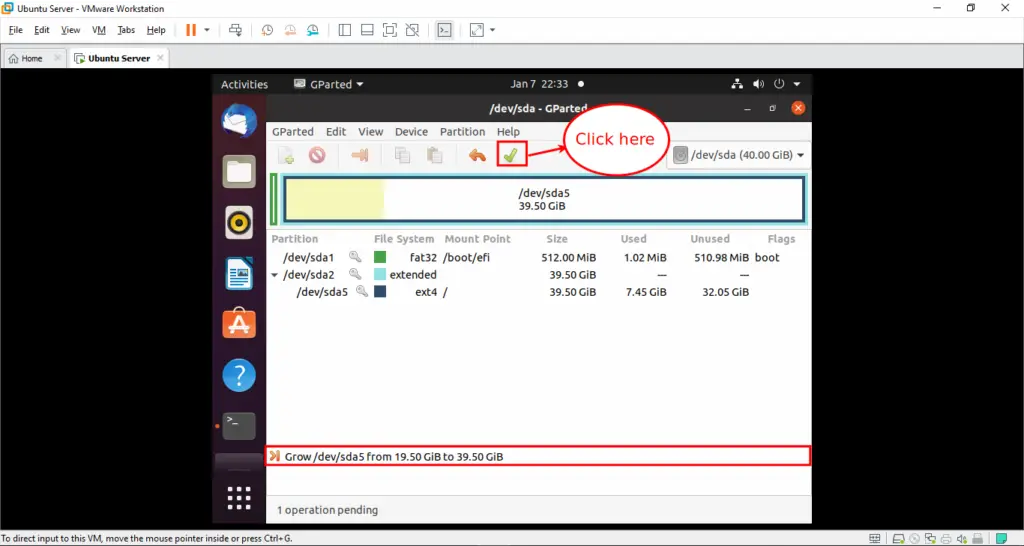
After that click on the green check button to start mounting unallocated partition to root partition.
Click on the Apply button to start the process of merging.
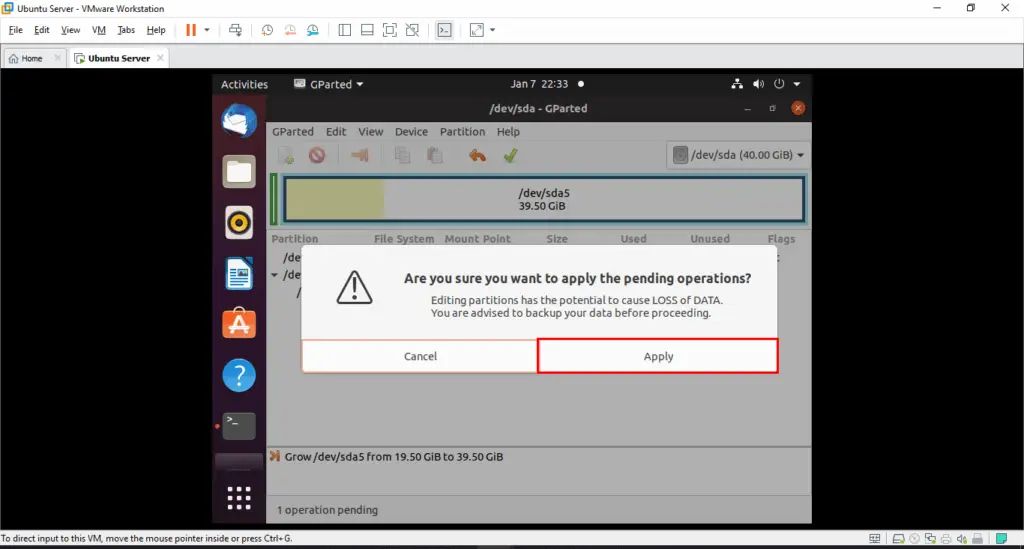
Please wait for a second. It takes sometimes depending on the size of new unallocated disk partition and how much files exist in the root partition.

After you are done you can see your root partition size increases in my case it is 40GB.
You can also check new partition on your Linux terminal using the following command.
$ df -h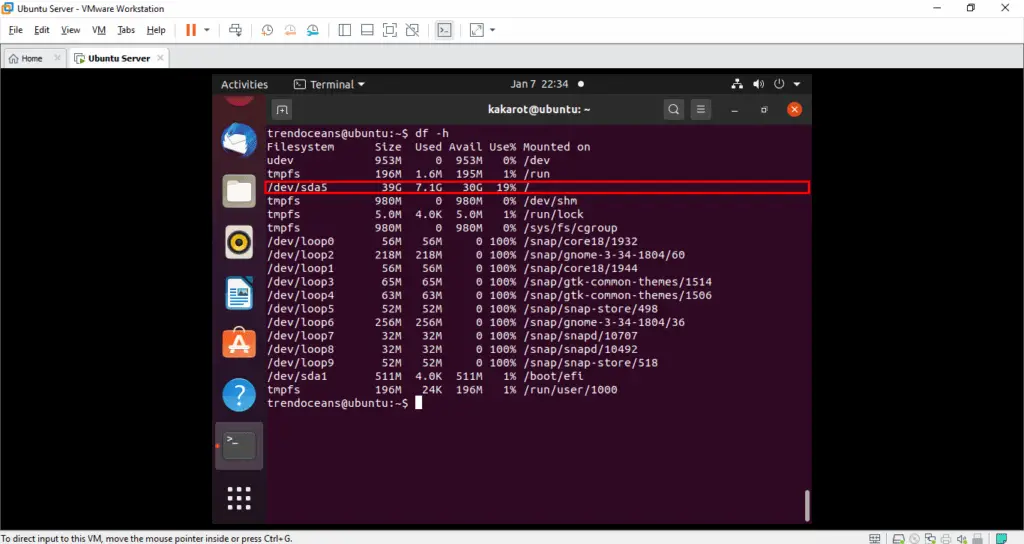
If you still getting some issues or facing difficulty while expanding or merging. Let us know in the comment section.