To install a MySQL server on your Linux machine, follow this article step-by-step, which provides you with clear instructions on how to download and install MySQL as well as how to configure and secure it.
MySQL is a relational database that is used in most programming languages to store and retrieve data from the database server through running SQL queries.
While setting up a LAMP server, you need to install a MySQL server, but due to some old configuration, you may not be able to install MySQL properly on your system
In such cases, you can completely remove any existing MySQL installation and then try installing it again on your system by following this article: Completely uninstall MySQL Server in 3 Simple Steps
So, let me show you the step-by-step guide to installing MySQL clients and servers in your Ubuntu and other Linux distros in the following article.
Methods for Installing MySQL
There are a couple of methods you can use to install the MySQL server and client on your system, such as:
- Installing MySQL from the system repository
- Installing MySQL by adding official repository information to the system
Both methods are easy to follow, but I’ll recommend that you go with the second method, which will ensure that your system gets the latest updates automatically.
Installing MySQL from the System Repository
One of the simplest and easiest ways to install MySQL is to use a system package manager like apt or dnf to install it on your Linux distribution.
1
Update your System Repository
The first and foremost step is to update the system repository to fetch the latest information about the meta-data of the software packages.
$ sudo apt update		// Ubuntu and Debian based distros
$ sudo dnf update		// RedHat based distros
2
Install MySQL Server Pacakge
Now run the following command to install MySQL Server on your system according to the system package manager:
$ sudo apt install mysql-server -y		// Ubuntu and Debian based distros
$ sudo dnf install mysql-server -y		// RedHat based distros
Once the installation is over, you can move ahead to configure the MySQL server by running the mysql_secure_installation command to set a root password and secure the installation.
If you don’t want to do that right now, then skip step 3 and directly login to MySQL by running the following command:
$ sudo mysql -u root3
Run MySQL to Change Password and Strengthen Security
In the latest MySQL version, the authentication method has been changed to auth_socket.
Because of that, you might face the error “Error: SET PASSWORD has no significance for user root@localhost” while setting up a password.
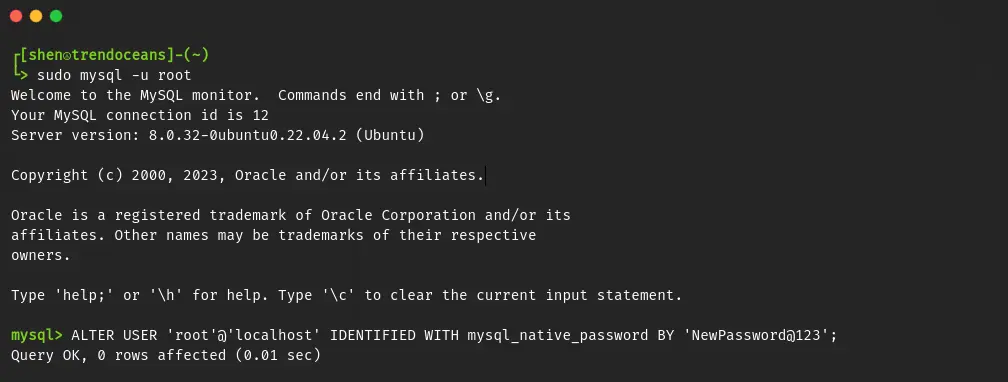
To avoid this, first login to MySQL and, using the ALTER USER query, change the password mechanism to mysql_native_password.
Now run the following command in the given sequence:
$ sudo mysql -u root
mysql> ALTER USER 'root'@'localhost' IDENTIFIED WITH mysql_native_password BY 'SET_PASSWORD';
The result of the above command:
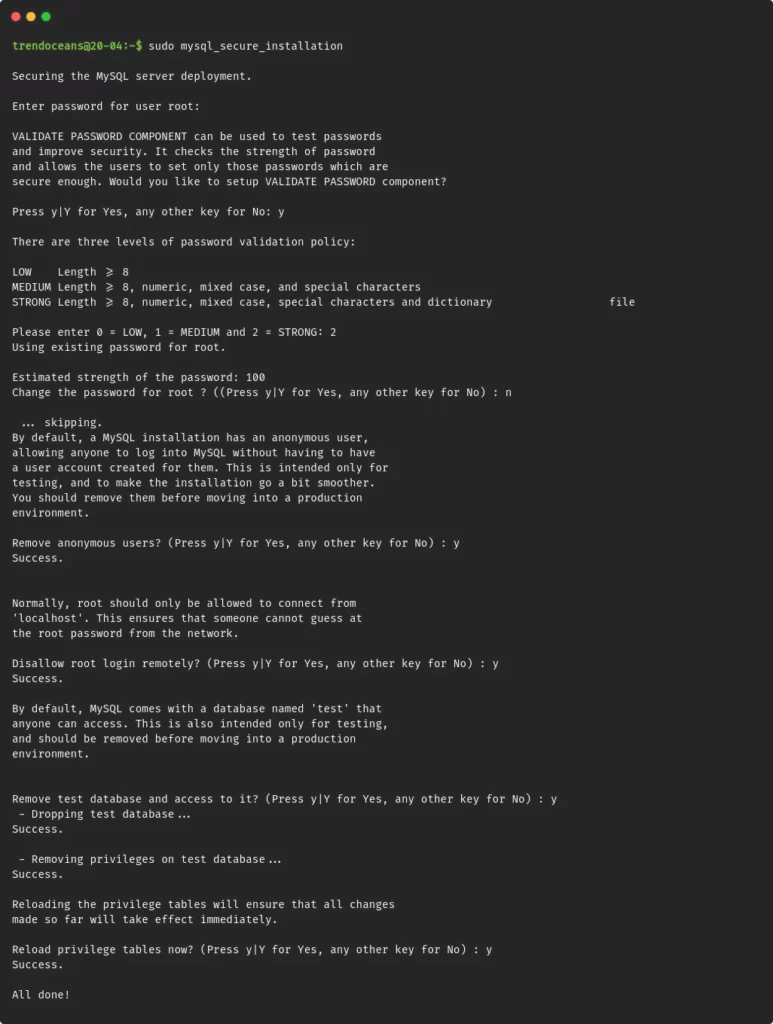
Once you are done with the above changes, you can run the mysql_secure installation to remove unwanted users, tables, and databases to harden the security of your MySQL server.
So first, exit from the MySQL console and run the following command:
$ sudo mysql_secure_installationAfter running the above command, it will ask for the new password that you have set, and after successful authentication, it will throw a set of security-related questions to secure your MySQL installation, such as removing anonymous users, disabling remote root login, and removing test databases.
Once you’re complete with the process, you can now login to your MySQL server using the following command:
$ sudo mysql -u root -pThe output of the above command is shown below:
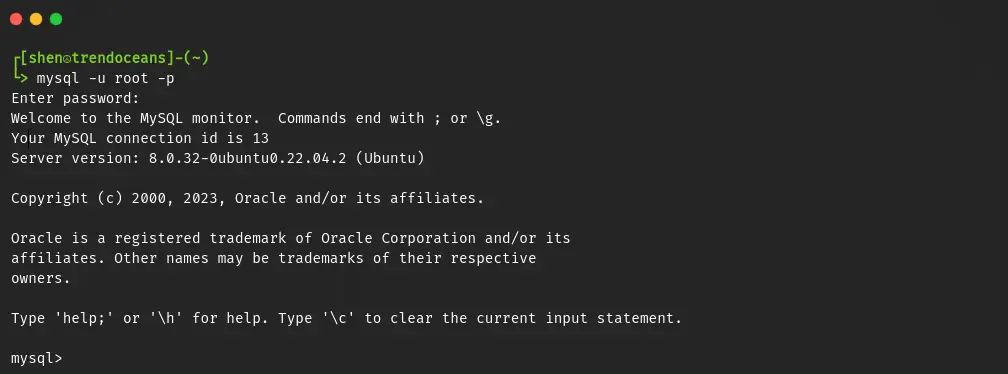
Congratulations! You have successfully installed the MySQL server on your Linux machine.
Installing MySQL by Adding Official Repository Information to the System
Alternatively, you can install the latest version of MySQL by adding the official repository information to the system to ensure that you have access to the latest and older versions of MySQL.
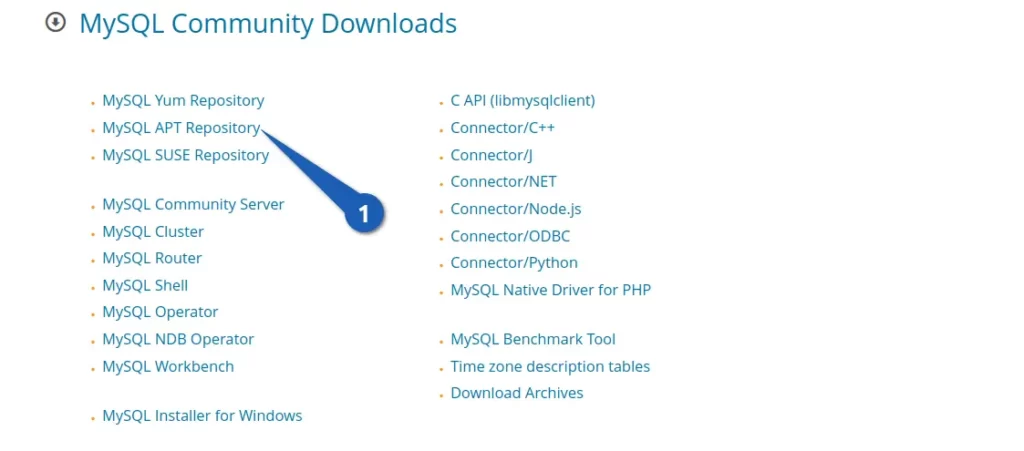
To start with this method, you need to first download the repository information for your Linux distribution by clicking here.
Once you redirect to the Oracale website, select the Distributions package manager (apt, yum) and download one of the available files, as shown below:
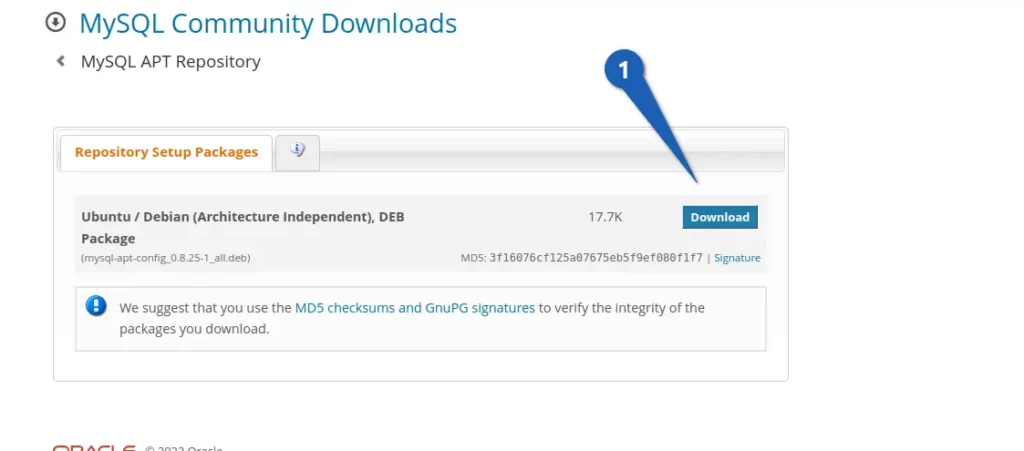
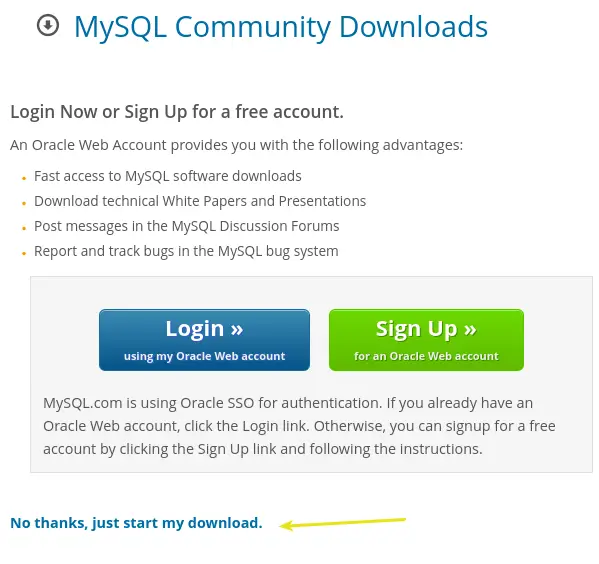
Once you click on the “Download” button, it will ask you to “Sign Up and login”. Ignore that message and click on “No thanks, just start my download.”
Next, you need to install the downloaded file by running the following command:
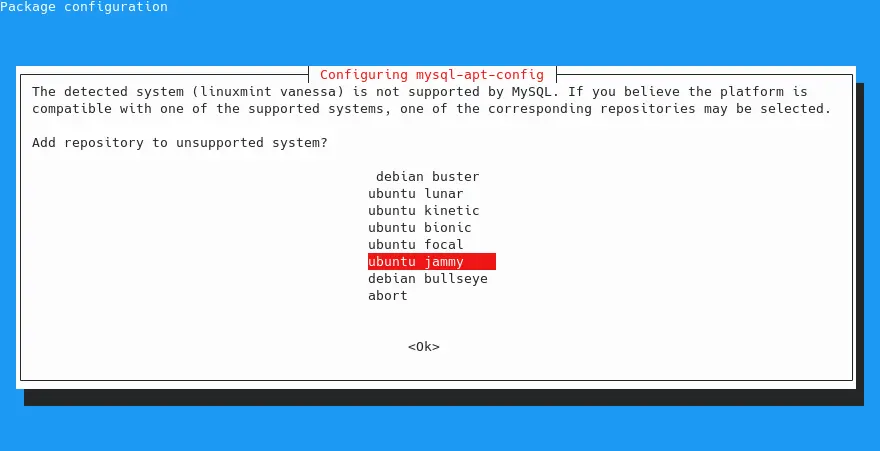
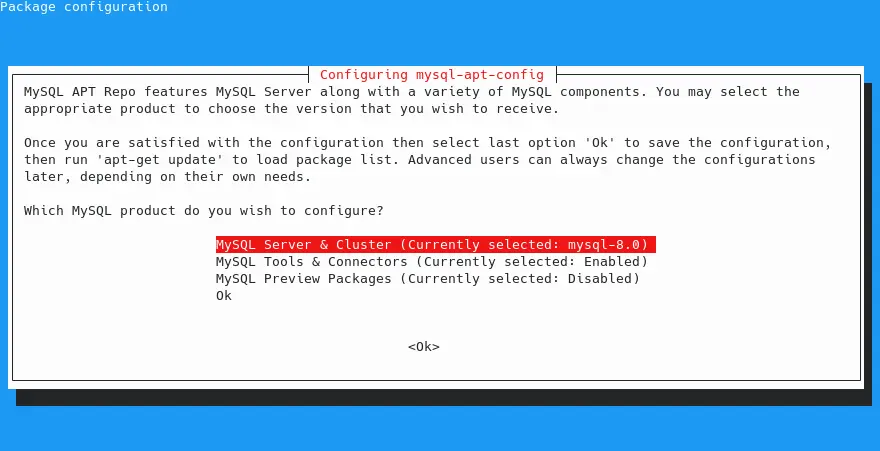
$ sudo dpkg -i ~/Downloads/mysql-apt-config_0.8.25-1_all.debDuring the installation, it will prompt you for the Ubuntu version information, so select the right version and click “Ok”.
If you are good to go with the default option, click on “Ok”.
After completing the steps, you will find the mysql.list file in /etc/apt/sources.list.d/ directory, which is responsible for adding the MySQL APT repository to your system.
So first, update the system repository to reflect the new changes.
$ sudo apt updateNext, you need to run the following command to install the MySQL server package:
$ sudo apt install mysql-server -yOnce the installation process is over, you can start MySQL in no time, but if you want to harden security, you can follow step 3 of the above method.
I don’t think the above step is complex, is it?
Wrap up
That’s all for this article, where I showed you how to install a MySQL server on your Ubuntu and other Linux distros like RedHat, CentOS Stream, AlmaLinux, and Fedora.
With the above command, the MySQL client also gets installed with the server, but if you just want to install the client, run sudo apt install mysql-client
Suggestion: How to Change MySQL port in Ubuntu Linux
I’m sure this article has helped you successfully install and configure the MySQL server and client on your Linux system.