Installing LAMP on Ubuntu is simpler than you might think. Check the complete guide to know how you can easily install Apache, MySQL, and PHP on your Ubuntu machine and start building web applications in no time.
LAMP stack solution is popular among web developers to run their web applications on a single server, as it is open-source and provides flexibility and scalability to the developers.
So, let me show you how to install and configure Apache, MySQL, and PHP on your Ubuntu machine.
What is LAMP Stack
When anyone says LAMP, don’t understand it as a table lamp or something; it is an acronym for Linux, Apache, MySQL/MariaDB, and PHP, which is the basic set of software that is used to run most of the websites on the internet today.
It is divided into four core parts:
- One is the operating system, which is based on Linux.
- Second is the Apache web server to handle HTTP requests
- Third is the MySQL server holds data for your dynamic or static site.
- Last is PHP to handle webpages written in PHP.
Apart from LAMP, there is also another open source stack, LEMP, which uses Nginx as a web server instead of Apache for better performance and scalability.
After getting the basic introduction to LAMP, let’s move on to the next section for the installation.
Steps to Install LAMP Server on Ubuntu
The LAMP stack can be installed in various ways, such as:
- Installing LAMP server using tasksel
- Install LAMP Server Stack Automatically on Ubuntu from the apt command
- Install LAMP Server Stack Manually on Ubuntu from the apt command
Not getting which option you should select? then let me help you.
I won’t recommend you choose the tasksel method if your current version of Ubuntu is 22.04 or later because of the missing “lamp-server” option in tasksel.
If you are in a hurry and want to test the project, then you can go with the second option, and if you are serious about the installation, then choose the last option.
Install LAMP Server on Ubuntu 20.04 with tasksel
This method is pretty simple; you just need to first install tasksel and then use the tasksel to install LAMP server on Ubuntu or any other Ubuntu-based distribution like Linux Mint, Pop!_OS, and so on.
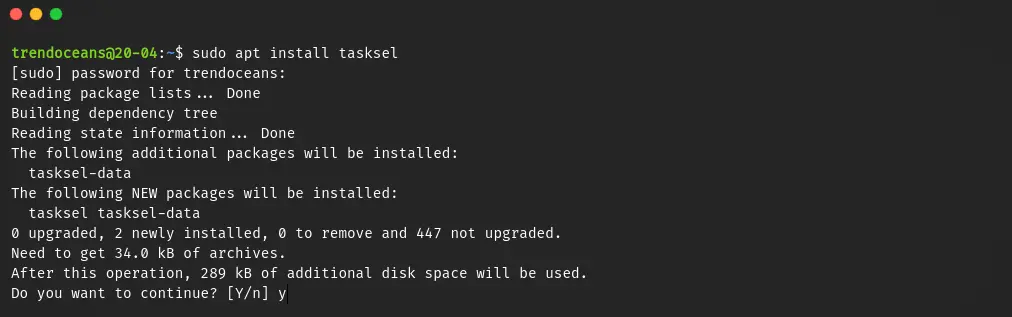
To move ahead, I request you to bring up the terminal window and run the following command to install tasksel on your computer:
$ sudo apt install taskselWhen it prompts for confirmation, press “y”.
Do note that if you are trying to install tasksel on Ubuntu 22.04 or later, then you won’t find the “LAMP server” on the tasksel. However, there is a workaround to install an older version of tasksel in Ubuntu 22.04, which will bring the option back.
Once the installation is complete, run the final command to automate the installation of LAMP.
$ sudo taskselWhen you invoke the above command, it changes your terminal screen to text based user interface where you have to choose “Lamp server” from the menu using the arrow keys and press the “space button” to confirm choices.
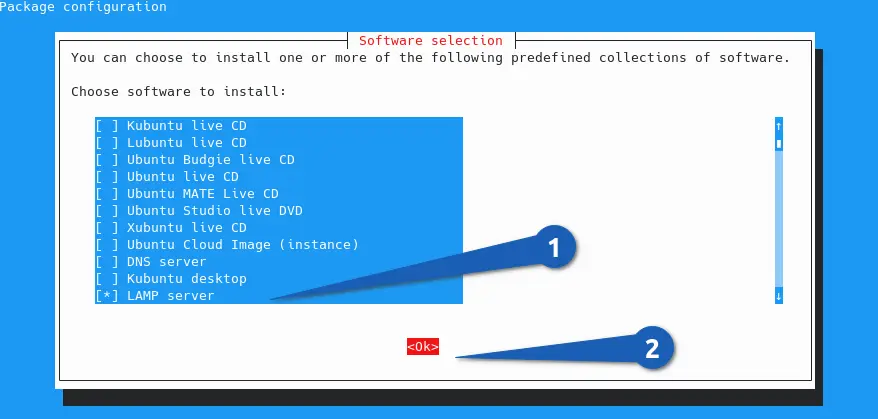
Now press the tab button and press enter on “Ok” to start the installation process.
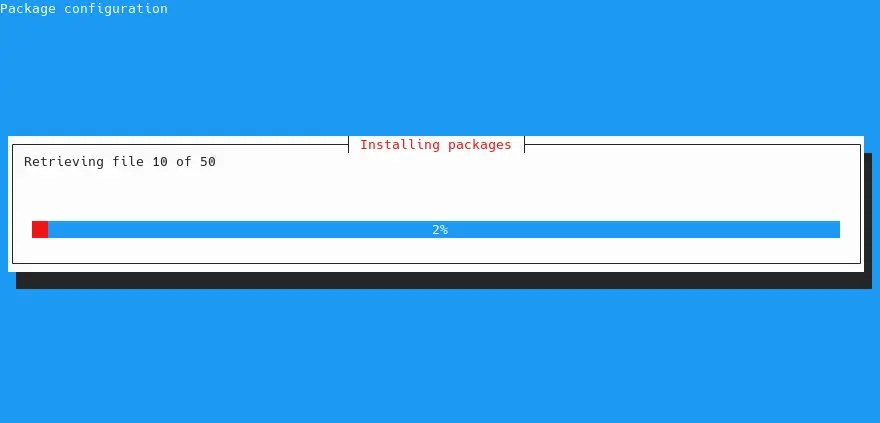
Once the process is started, wait for several minutes to complete the activity, and once the process is complete, screen will return to shell.
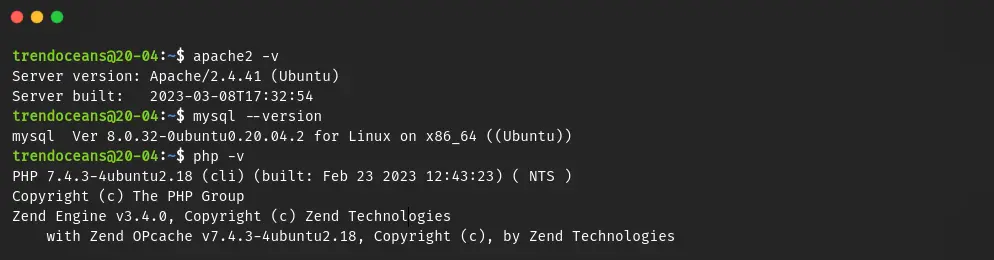
Now you need to run the following command to check the presence of Apache 2, MySQL, and PHP. If the version is displayed on your screen, it means you have successfully installed LAMP server.
$ apache2 -v
$ mysql --version
$ php -v
The output of the above command
Congratulations on installing your first LAMP server!
Install LAMP Server Stack Automatically on Ubuntu from the apt command
Another simple way to install all the components of LAMP server is using the simple command that even doesn’t require you to install tasksel on the latest build of Ubuntu.
Intresting, right?
Open the terminal window and invoke the following command to install the LAMP stack:
$ sudo apt install lamp-server^Once you run the following command, it will install all the recommended packages that are included in the lamp-server, so when it asks for confirmation, type “y”.
After the installation is over, you can verify the service status or version of apache2 and mysql using the below command:
$ apache2 -v; mysql --version; php -v
or
$ sudo systemctl status apache2.service mysql.service
I know know you thought installing a LAMP server is a tedious task, but that is no longer true.
Also Read: How to Install XAMPP On Ubuntu / Debian
Install LAMP Server Stack Manually on Ubuntu from the apt command
With the above method, you can install all the components of LAMP server in a minute, but sometimes it would be preferable to perform all the steps manually.
Install Apache, MySQL, and PHP
Some users like to configure everything manually to have more control over the installation process and ensure that everything is set up exactly as they want it.
If you too, then run the following command in the given sequence:
$ sudo apt install apache2
$ sudo apt install mysql-server
$ sudo apt install php libapache2-mod-php php-mysql
Don’t think your work is over; there is more to do.
Check apache2 and mysql service status
Once the installation is complete, our real work will begin by checking the status apache2, mysql, allowing the firewall to accept and send traffic, and configuring MySQL.
So let’s first check the status of apache2 and mysql-server using the below systemctl command:
$ sudo systemctl status apache2 mysql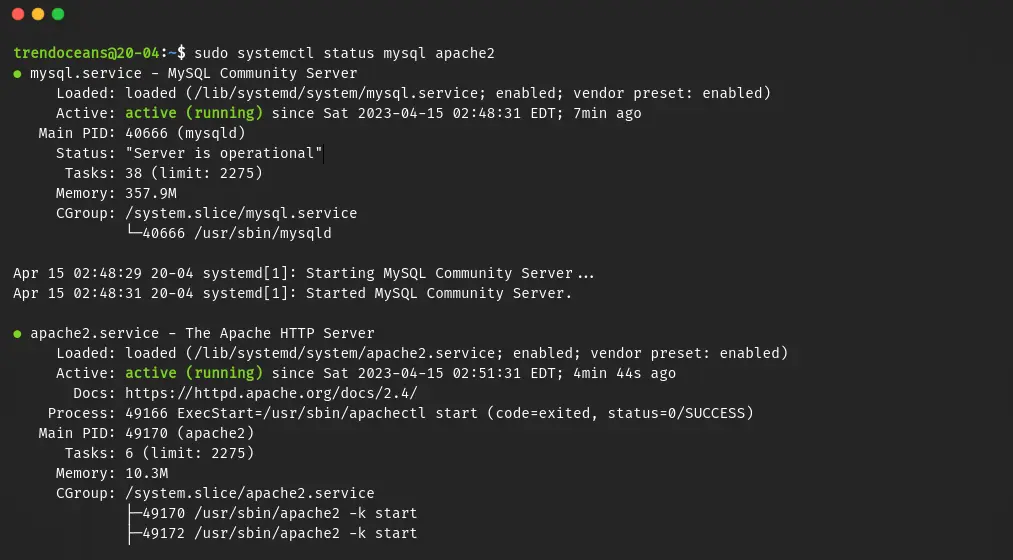
If for some reason it is in an “inactive” state, then try to bring the service into an active state by running the following command:
$ sudo systemctl start apache2
$ sudo systemctl start mysql2
While enabling if you are getting any error or service is not getting start for any reason then find the error information for apache2 in /var/log/apache2/error.log and for mysql in /var/log/mysql/error.log
After verifying the status, go to your browser and type localhost or the machine’s IP address to get the following page.
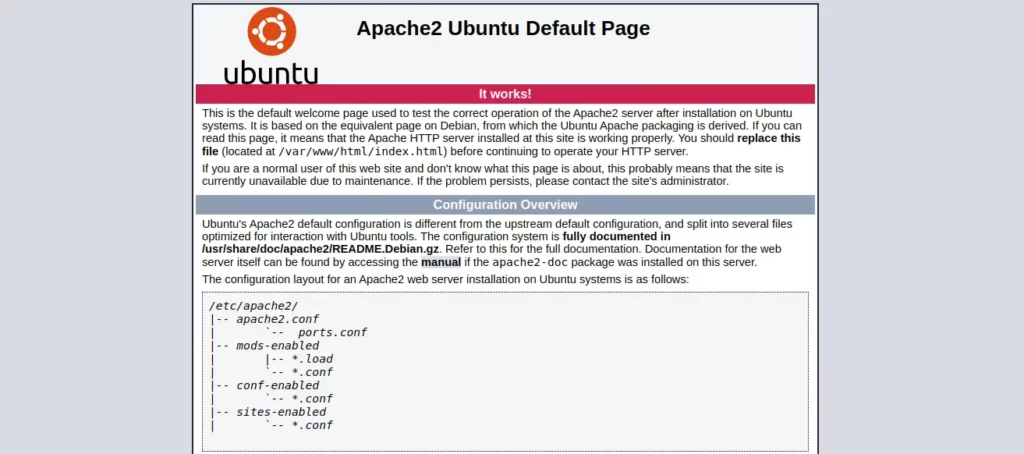
Everything is so far so good.
Configure Firewall
Now let’s configure the UFW firewall, which is available out of the box, so please run the following command to check the status of the firewall.
$ sudo ufw statusAs you can see now, the firewall is currently in an “inactive” or disabled state.

Before changing the status, let’s add some rules or profiles so we can control the incoming and outgoing traffic on specific ports and protocols to ensure that our system is secure.
When you run the sudo ufw app list will show the three distinct profiles of Apache server like a
- Apache: Accept only port 80 (http) for incoming and outgoing traffic.
- Apache Secure: Accept only port 433 (https) for incoming and outgoing traffic.
- Apache Full: Accept both ports 80 (http) and 433 (https) for incoming and outgoing traffic.
I run the following command to add a rule for “Apache Full”, which enables traffic for both the http and https protocols.
$ sudo ufw allow in "Apache Full"If you are accessing your server through ssh, then don’t forget to also add a rule for OpenSSH, otherwise, you will be in lock state.
$ sudo ufw allow OpenSSHNext, enable the firewall with the below code:
$ sudo ufw enableWe are done with the firewall setup. Now let’s secure MySQL.
Secure MySQL
It’s good to run sudo mysql_secure_installation on a fresh installation of MySQL/MariaDB to remove the anonymous user account, test the database, and setting up mysql root password.
This will harden the security of your MySQL/MariaDB to prevent the exploit.
Now let me run sudo mysql_secure_installation and share the image with you.
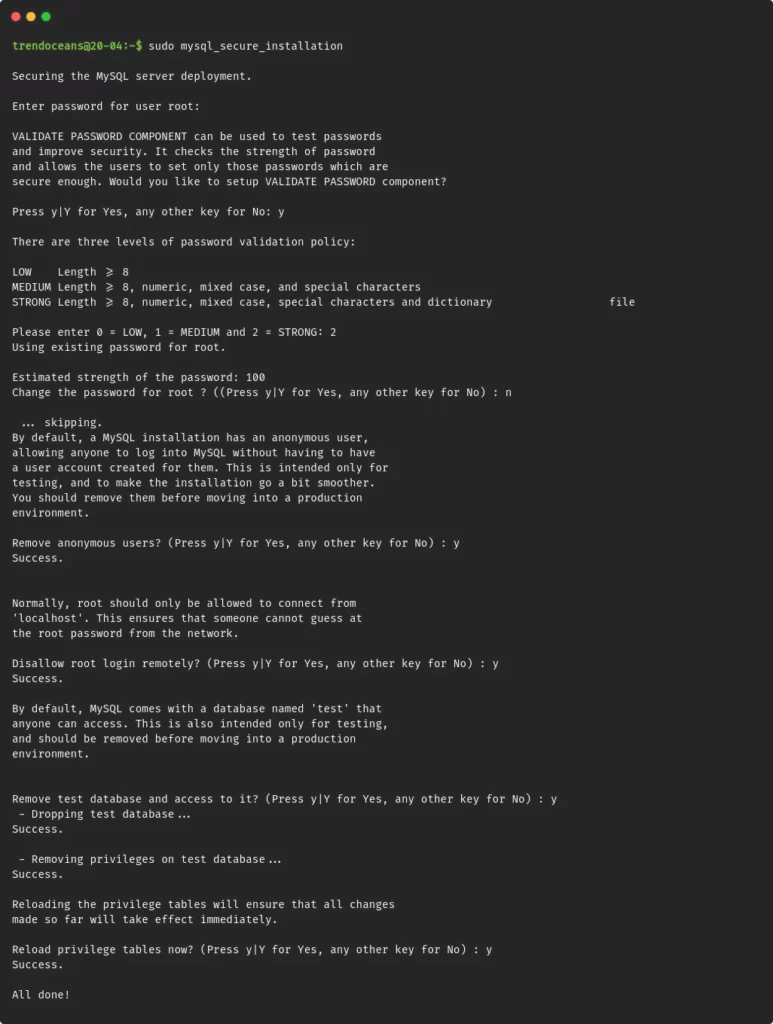
I have been interrupted with “Error: SET PASSWORD has no significance for user ‘root’@’localhost’ as the authentication method used doesn’t store authentication data in the MySQL server. Please consider using ALTER USER instead if you want to change authentication parameters.”
So I have set the password using the below command and restarted the MySQL service.
mysql> ALTER USER 'root'@'localhost' IDENTIFIED WITH mysql_native_password by 'my-secret-password';Again, I run myssql_secure_installation to complete the process, and this time I have successfully secured my MySQL installation by setting a root password, removing anonymous users, disabling remote root login, and removing test databases.
Verify PHP
This step is optional, but I recommend you to verify the PHP installation to ensure that everything is working properly.
To verify, you can create a PHP file in the /var/www/html/ directory and access it through your web browser. If the PHP file displays the PHP version information, then your installation is working correctly.
Now let me create a test.php file and copy the following code and move the file to /var/www/html
<?php>
phpinfo();
?>
After writing and moving the file, open your browser and type localhost/test.php to view the PHP information on your browser.
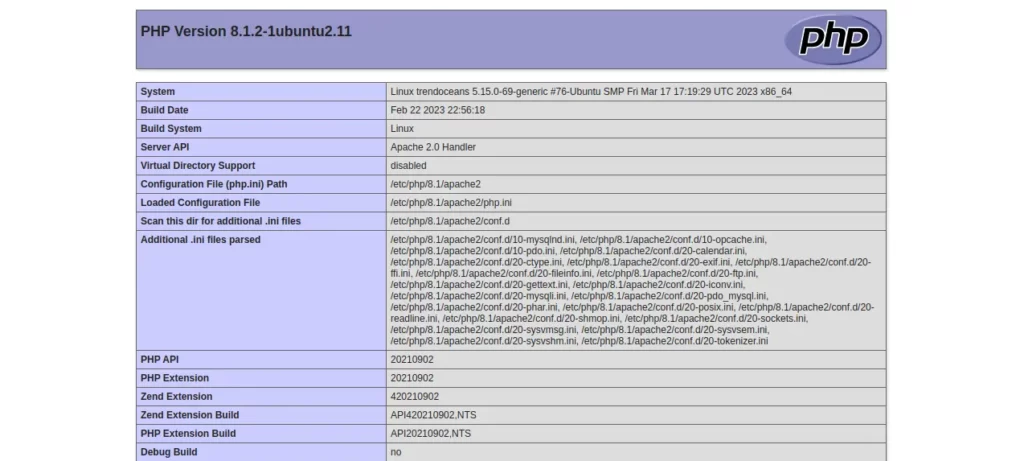
If it is showing the PHP version, then your work is done, and you can now pat yourself on the back for successfully installing LAMP server on your system.
Wrap up
That’s all for this article, where you learn how to install LAMP (Linux, Apache, MySQL, and PHP) on your Ubuntu machine with three different methods.
I’m eager to know which method you have chosen to install the LAMP server.
Anyway, if you are encountering any issues while installing the server, then do let me know in the comment section. I’ll be glad to help you out.