Have a pet who loves to mess with a keyboard like a playground? Actually, they love to write their love story! Aha, by bad.
To be honest, we all are in the same circumstances, or some ignorant who do not belong to computer line, especially kids, love to finger in keyboard button. That’s how I found a tool that can disable/lock the keyboard’s working whenever pressing the shortcut key in series.
Today, you will learn to disable/lock the keyboard for a temporary on both Linux and Windows systems.
Lock Keyboard on Linux using Xtrlock
Xtrlock is a small utility added to all Linux repositories. A default package manager is enough to install this package in all major Linux distributions.
Installation
While installation, makes sure to connect with an active internet and update and upgrade your system.
Debian and Ubuntu
$ sudo apt install xtrlockRHEL and CentOS
$ sudo yum install xtrlockFedora
$ sudo dnf install xtrlockArch and Manjaro
$ sudo pacman -S xtrlockXtrlock Usage
After installation, type the below command in your terminal to lock your keyboard instantly.
Note: While using
xtrlockcommand without any flag in KDE DE make me hard to unlock my system. For that I repetitively used to click mouse and then type password and press enter to unlock. To avoid doing this, use-fflag to unlock immediately.
$ xtrlockTo unlock immediately, type your root or normal user password.
Attach Keyboard Shortcut to Xtrlock Command
Every time to lock your keyboard, you need to type the xtrlock command in the terminal. To use the shortcut key for that job, follow the below method.
for Gnome Desktop Environment
Open settings ⚙️ from app dash or menu, and navigate to the Keyboard shortcuts tab.
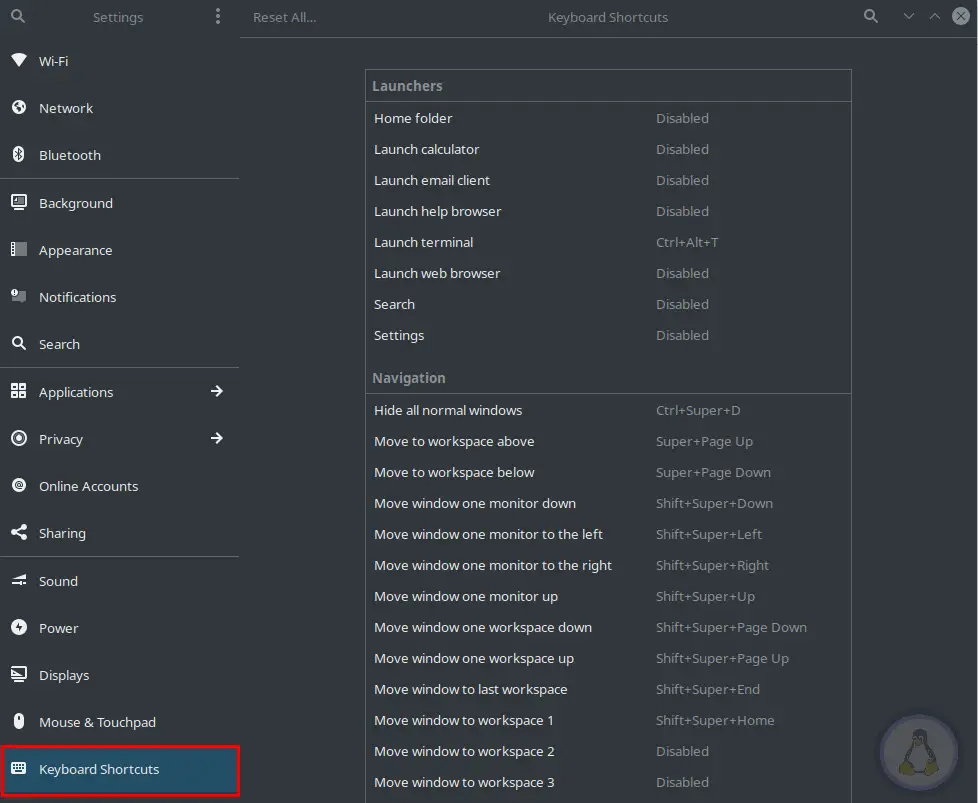
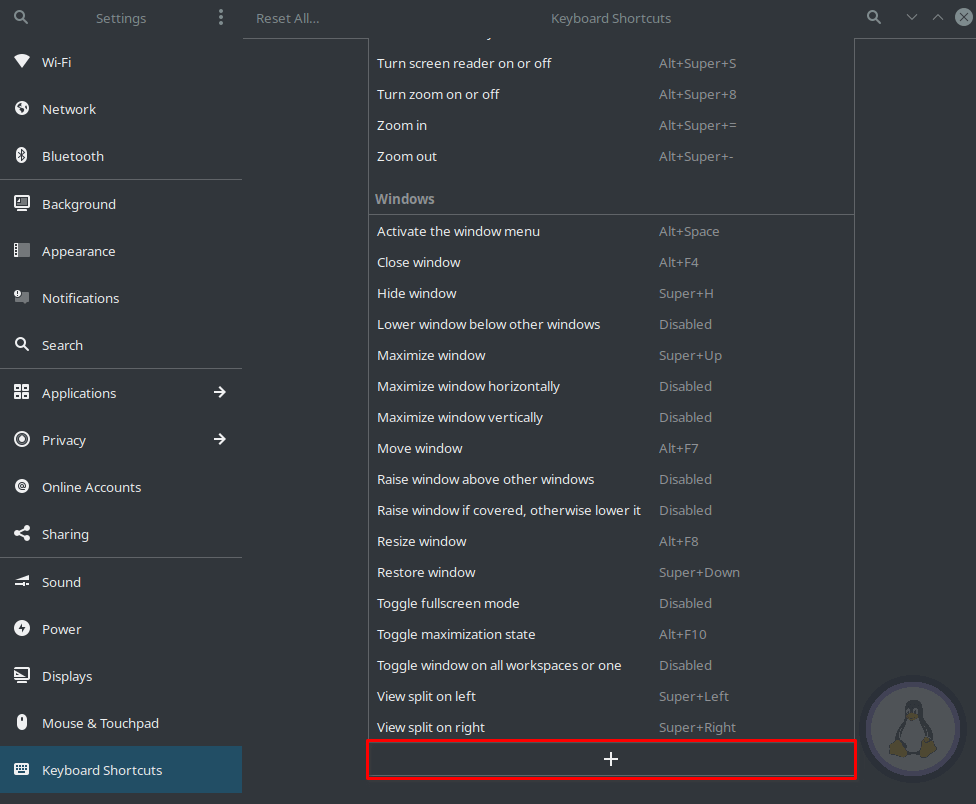
Scroll to the bottom, and click on the + symbol to create a new shortcut key.
Now Add Custom Shortcut window will appear with two input boxes. Type the name for your shortcut on the first input box and the command to be executed (In this case, xtrlock) on the second input box.
Finally, add a custom shortcut key relevant to you. In my case, I used Ctrl+Alt+L as a shortcut key.
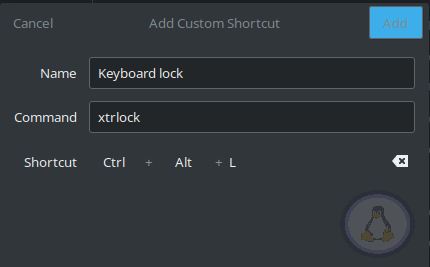
Once done, click on the top right Add button and close the setting windows. Now you are ready to use your shortcut key to activate xtrlock.
for KDE Desktop Environment
Open system settings ⚙️ from app dash or menu, and navigate to the Keyboard shortcuts tab.

Once you are into the shortcut settings, navigate to the Custom Shortcuts tab.
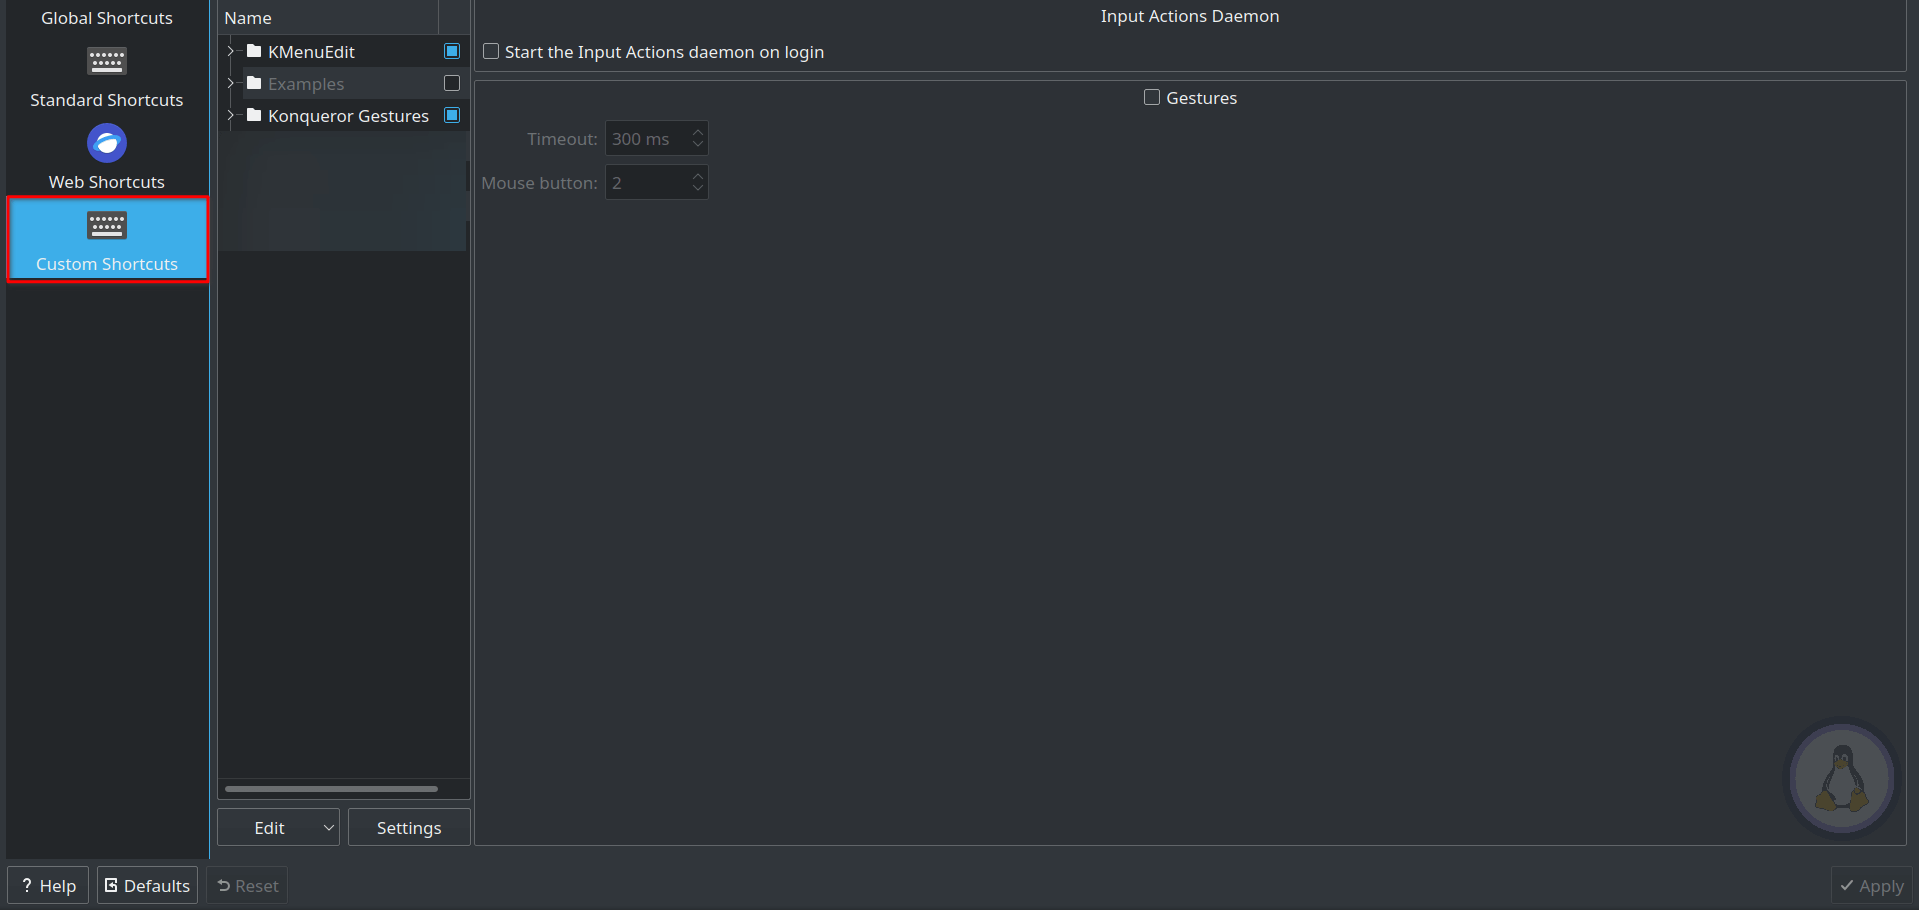
Now click Edit -> New -> Global Shortcut -> Command/URL to create new shortcut key in the KDE DE.

Now give a name to your shortcut key, and go to the trigger tab to assign a new shortcut key.
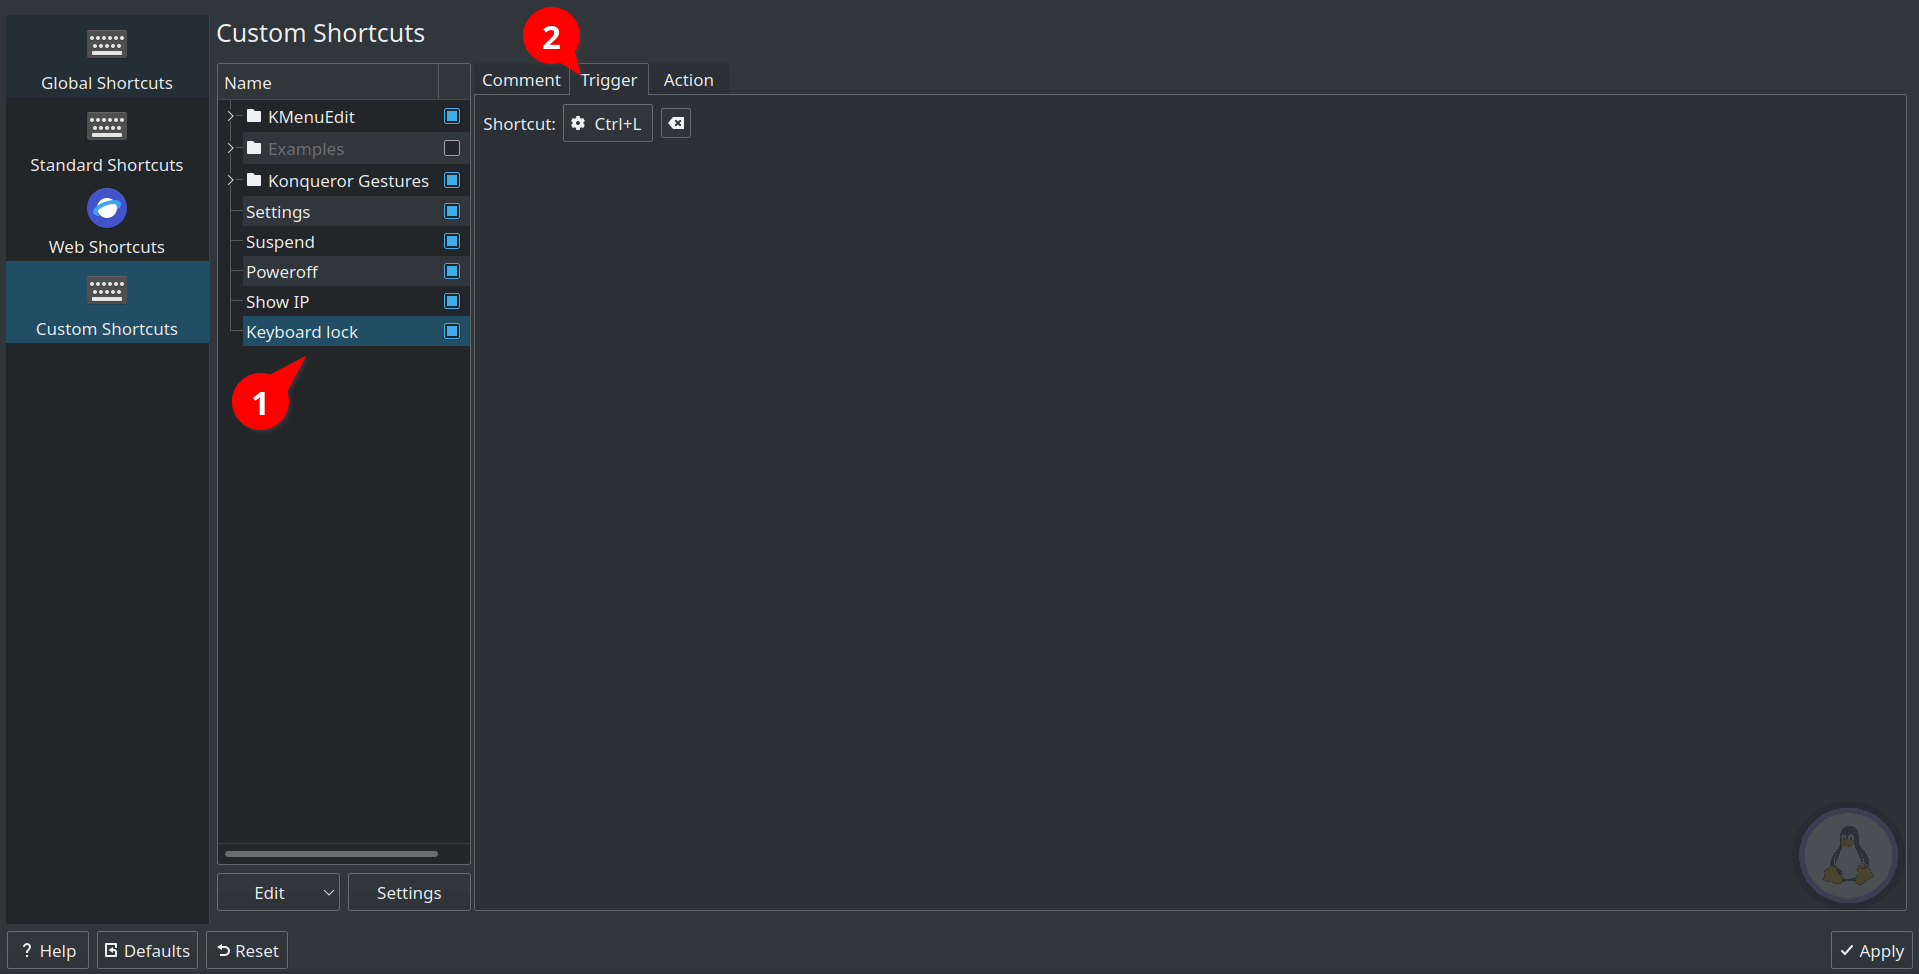
Next, go to the action tab, supply the xtrlock command, and click on the Apply button in the bottom right corner.

Now you are ready to use your shortcut key to activate xtrlock.
Lock Keyboard on Windows
Windows has another utility named keyboard locker, initially started as AutoHotKey script turned into a standalone application. It is a small tool without needing to install the AutoHotKey application in your system.
Installation
To get started, first download the Keyboard Locker application. The downloaded file will be in zip format uncompress it with any tool (Ex: 7zip).
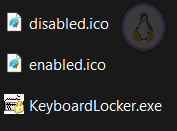
After the extraction Keyboard-Locker folder will be created containing three files, as shown below.
Usage
To use double-click on the KeyboardLocker.exe, and it will open as a tray application. To lock your keyboard immediately, use the Ctrl+Alt+L shortcut key.
Once you have done, time to unlock your keyboard for that type unlock on your keyboard to release the lock from the keyboard.
Autostart
Instead of clicking application on every reboot to activate the keyboard locker. You can place all the files inside the startup folder to start the application with the system.
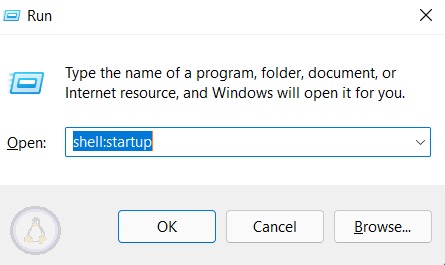
Use the Win+R shortcut key to open the Run window and type shell:startup.
Window startup folder will appear. Place every file inside that folder and close the windows.
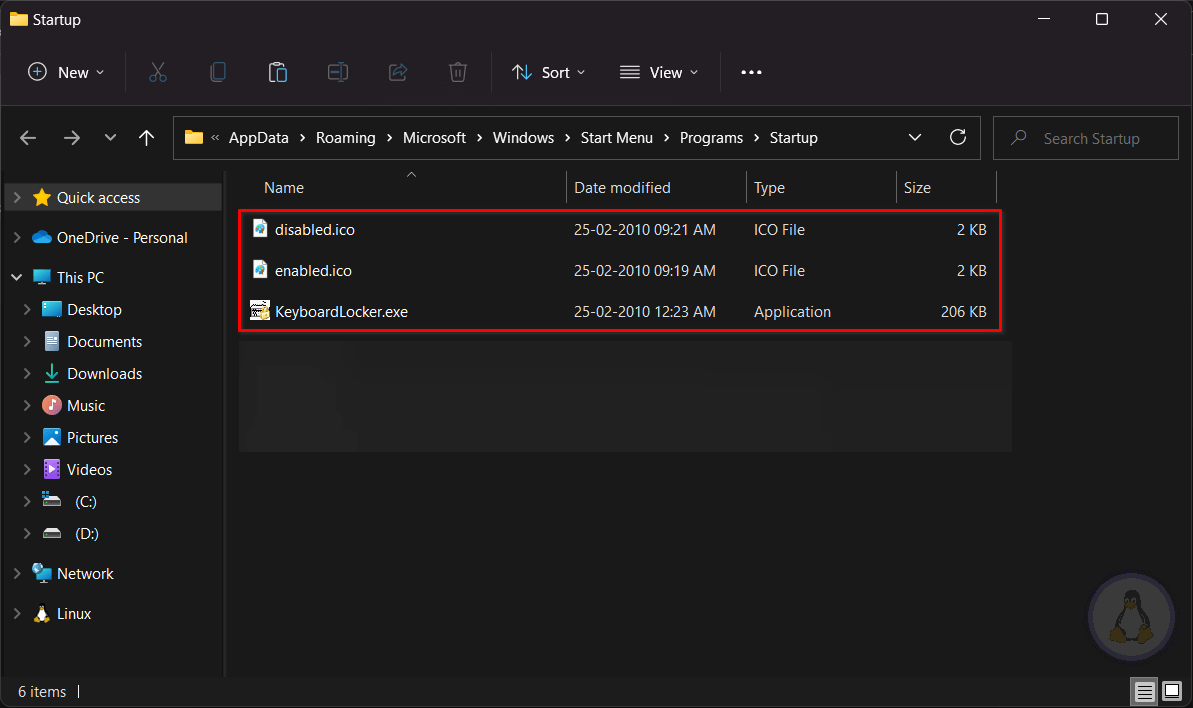
Next, open your task manager to disable autostart for the images. Otherwise, disabled.ico and enabled.ico will autostart along with the application on system boot.
To disable, right-click on disabled.ico and enabled.ico and click on the disable option to disable them.

Once you have done, close the Task manager, and you are ready to go.
Final Thought
Hey! this is Jake Redfield; I hope you enjoyed reading this article and hope this will protect your system from typing “qweoqweihoqwiehqoiwehqwe”.
If you have any more questions, then feel free to ask in the comment section.
or, if it is a USB keyboard, just unplug it. same for the USB mouse.
Ya, you can do that. 😁
How can I configure it to lock the keyboard only?