If you want to use an operating system that is close to RedHat, then Fedora should be on top of your list because it has the same package manager that RedHat does use, and apart from that, you will get the same experience.
So let’s see how you can install Fedora 36 on your VirtualBox with the following steps, and after that, you can enhance your skills with an enterprise-grade OS.
Prerequisites
The basic things you need to have are “VirtualBox” and “Fedora” ISO images. I believe you have already installed VirtualBox on your operating system, but you may don’t have the ISO image.
No big deal, we will show you how to get an ISO image of Fedora 36.
Download Fedora 36
If you already have an ISO file, then you can skip the download step and read how to start with VirtualBox. For those who don’t have an ISO file, click on the below button to redirect to the official download page.
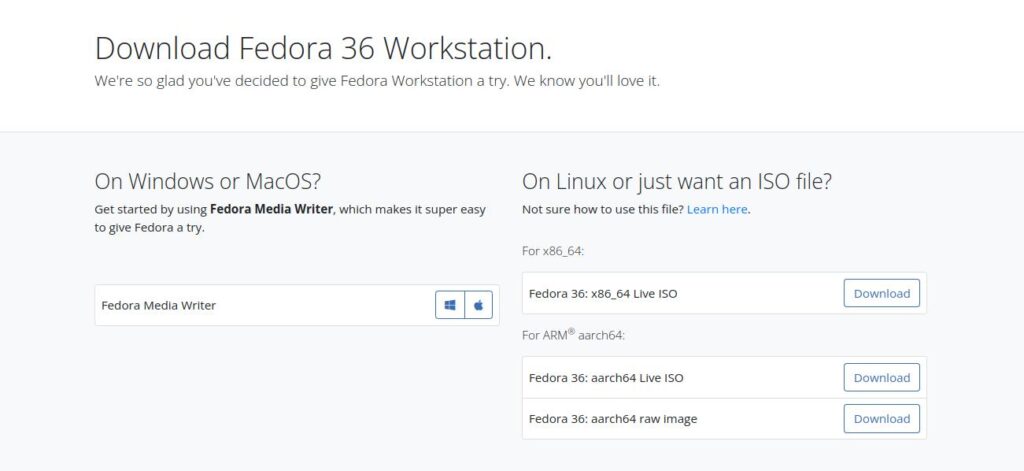
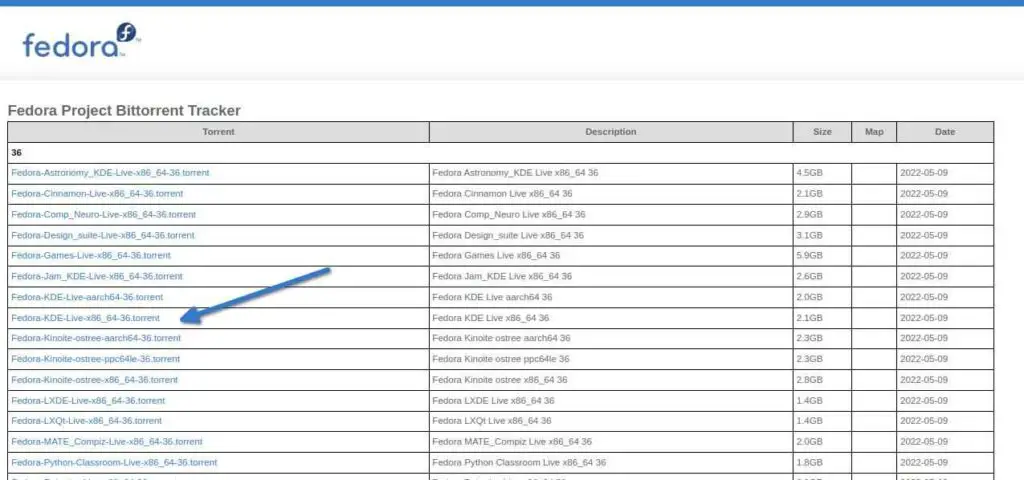
Once the page loads, select the Fedora 36: x86_64 Live ISO, which has a size of around 2.0 GB. If you want to download Fedora from a torrent, then use this link.
The default Fedora 36 Workstation ships with GNOME. If you don’t want to use the GNOME version, then use the torrent option where you can choose an ISO image according to your choices, like KDE, XFCE, LXDE, LXQT, and other flavors of Fedora.
I’m interested in having the KDE version, so I’ll select the “Fedora-KDE-Live-x86_64_36.torrent”. You can choose any other version. Just make sure that you select the x86_64-bit architecture ISO.
Steps to Install Fedora 36 on VirtualBox
The steps are pretty simple. If you have tried to install any Linux distribution on VirtualBox, then it might be a bit easier to follow the steps.
Fedora uses the same Ananconda system installer to install the operating system on your disk, which is very intuitive to use.
Step 1: Open Oracle VM VirtualBox
Once you have completed the above prerequisites, you are ready to install Fedora on your VirtualBox.
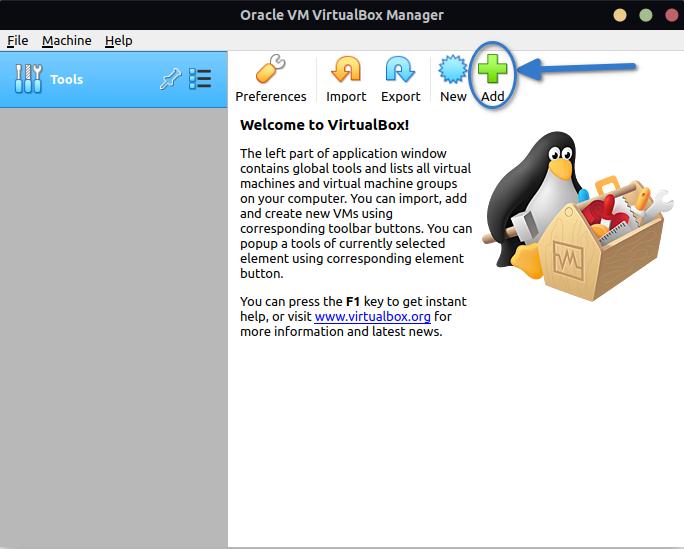
For the first time, if you use VirtualBox, you will find the same interface as mine. VirtualBox is not looking good without any virtual machines, so let us create our first Fedora virtual system.
Click on the Add button to create a virtual machine.
Step 2: Create a Virtual Machine
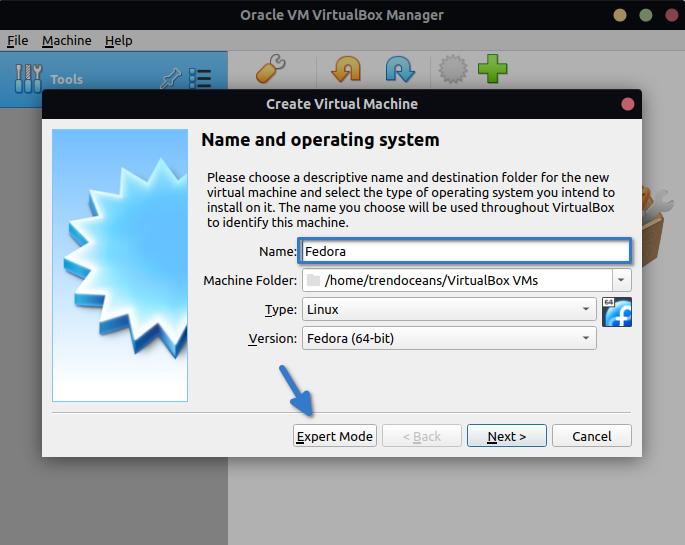
There will be a couple of screens where you need to provide configuration details for your virtual machine. On the first screen you need to enter the machine name, so simply type “Fedora” and keep the virtual machine name unique if you are planning to install multiple virtual machines.
If you want to change the default location (“Machine Folder“) of your VM, then click on the drop-down arrow to specify a different path.
If you mention “Fedora” on the top as a machine name, then the “Type” section will automatically change it to “Fedora”, and keep the rest of the thing as it is.
After that, click on Expert Mode to go to the next screen.
For optimal performance, you can change the Memory size to at least 2 GB or more according to your usage and availability. To change the RAM size, scroll back and forth to increase and reduce the size.
In the “Hard disk” section, click “Create a virtual hard disk now” and click on “Next” to create a new virtual disk on the next screen.
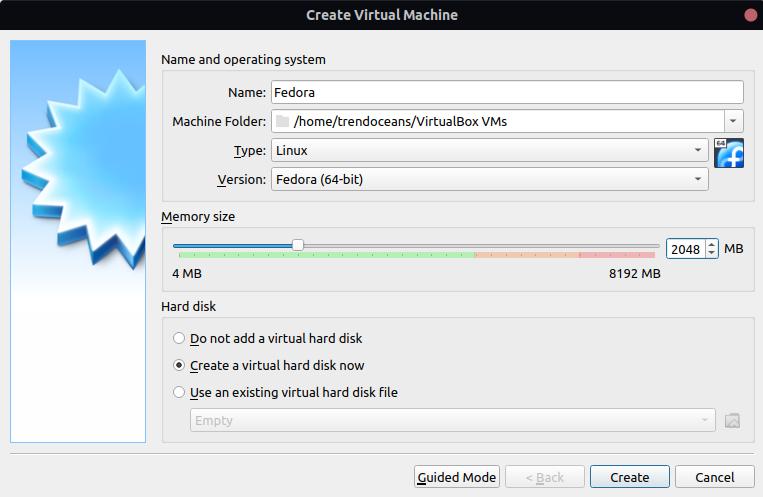
As per the official documentation, you should at least give 10 GB of space for Fedora installation. I’m giving 20 GB. You can add more as per your usage by dragging the scroll bar back and forth.
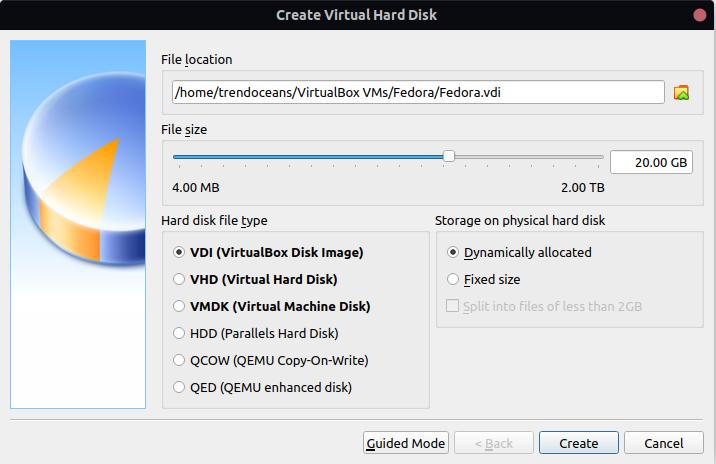
And once it is done, click on “Create”.
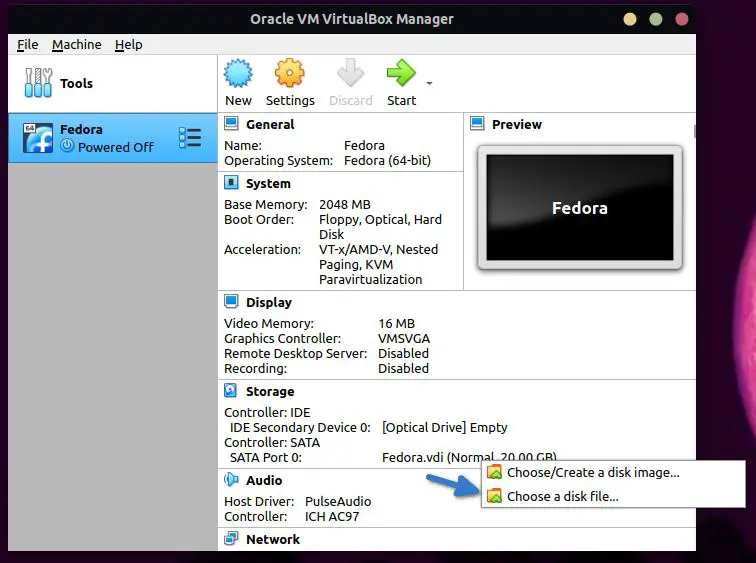
Step 3: Attach Fedora ISO Image
In this step, you need to attach the Fedora image to VirtualBox. It is similar to attaching a USB to the USB port. To specify the ISO image, click on “Optical Drive” and select the ISO file.
After that, click on the Settings gear icon, which is in the top section of the screen, which will show you virtual machine settings.
From here you can configure virtual machine resources like memory, CPU, storage, network, and other peripheral resources.
On the left side of the Settings window, go to the “System” section. In the first option, you will find the option to change the memory capacity. If you haven’t changed it yet, then you can change it now.
After that, have a look at the “Processor” tab, and change the CPU core as per your requirements.
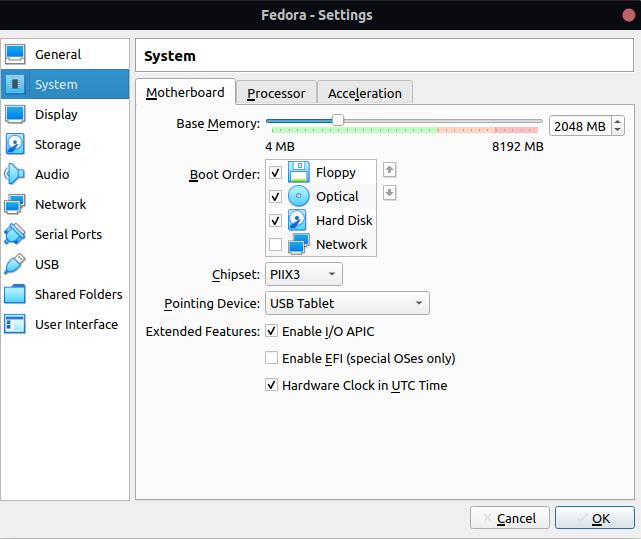
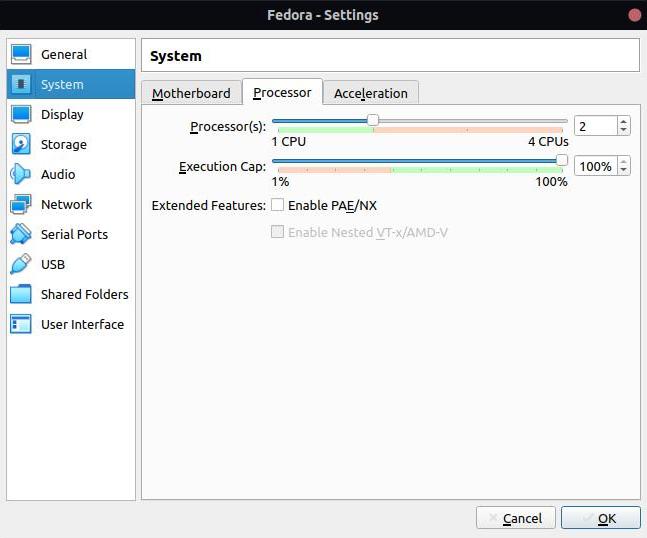
And once you are done with the changes, make sure to click on “OK” to save them.
Step 4: Boot Virtual Machine
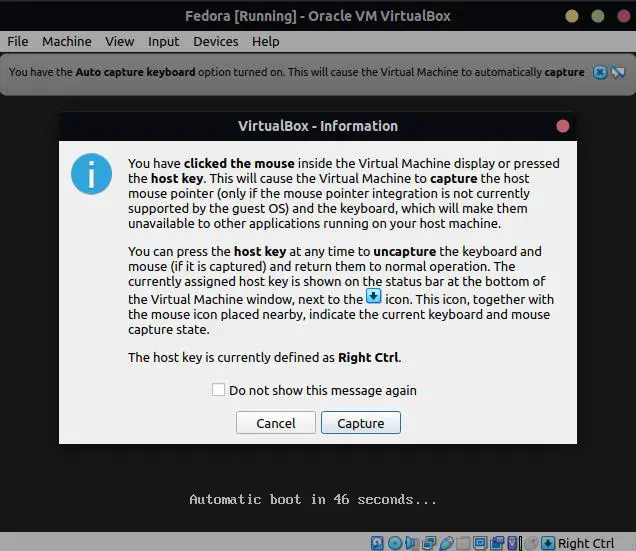
After following the above procedure, click on ![]() start button to power on the machine. Once you start the machine, you will be prompted with a mouse integration message. Simply click on “continue”. Basically, it instructs you to get out of the machine using the “Right Ctrl” key.
start button to power on the machine. Once you start the machine, you will be prompted with a mouse integration message. Simply click on “continue”. Basically, it instructs you to get out of the machine using the “Right Ctrl” key.
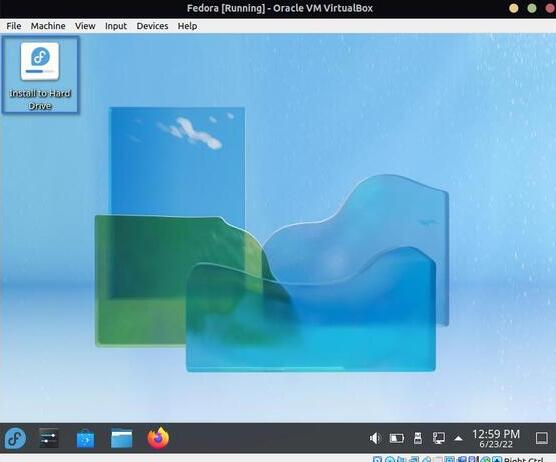
Next, you will find the boot option. Simply press enter on “Start Fedora-KDE Live 36”.

And once you get the screen like the below image, double click on “Install to Hard Drive” to start the installation process.
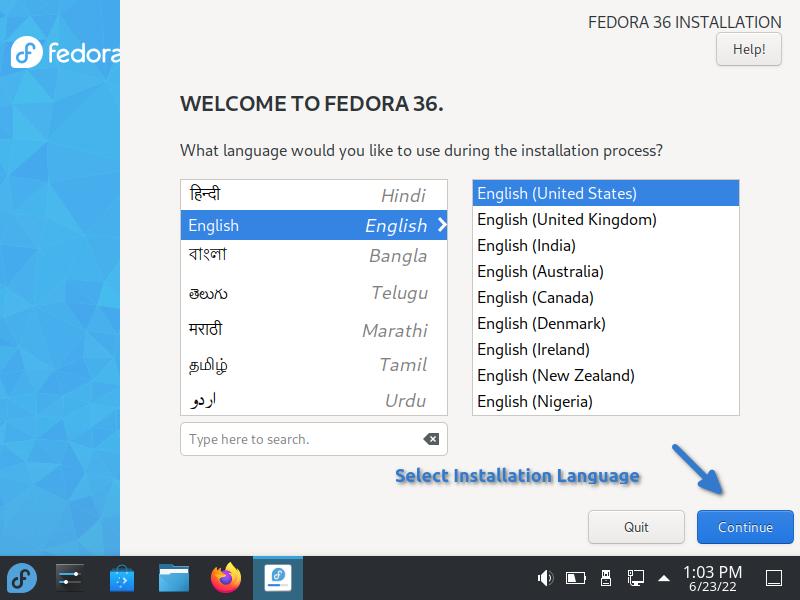
Step 5: Select Languge
The first screen will prompt you to select a language, so choose the language as per your preference and click on Continue to proceed ahead.
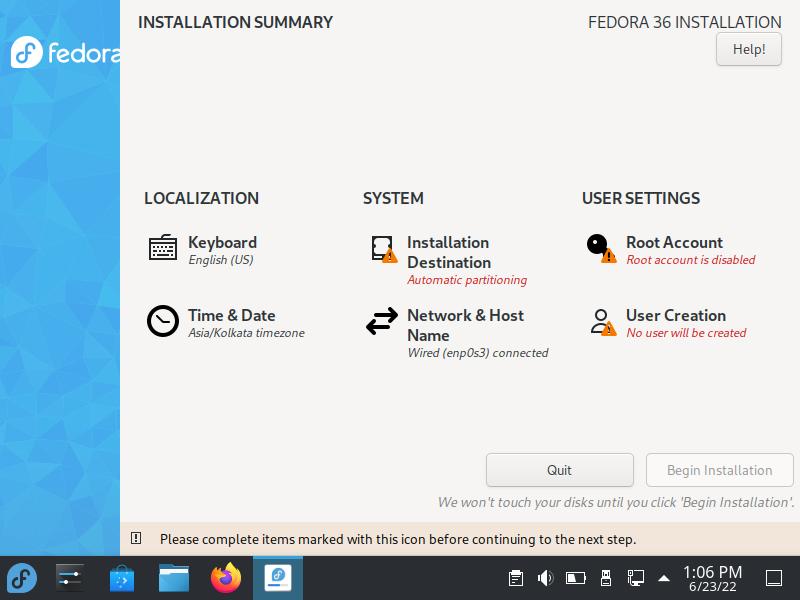
Step 6: Installation tasks need to be completed
You can use the below screen as a checkpoint to complete the installation.
Three items are highlighted. Let me finish the task in the following sequences: Installation Destination -> Root Account -> User Creation.
If you want to change the keyboard layout, then click on Keyboard and select Keyboard as per your preference.
In my case, the system automatically detects the time and date, so I don’t think I need to change it. But it is not like that in your case. Then click on Time & Date to set it according to your region.
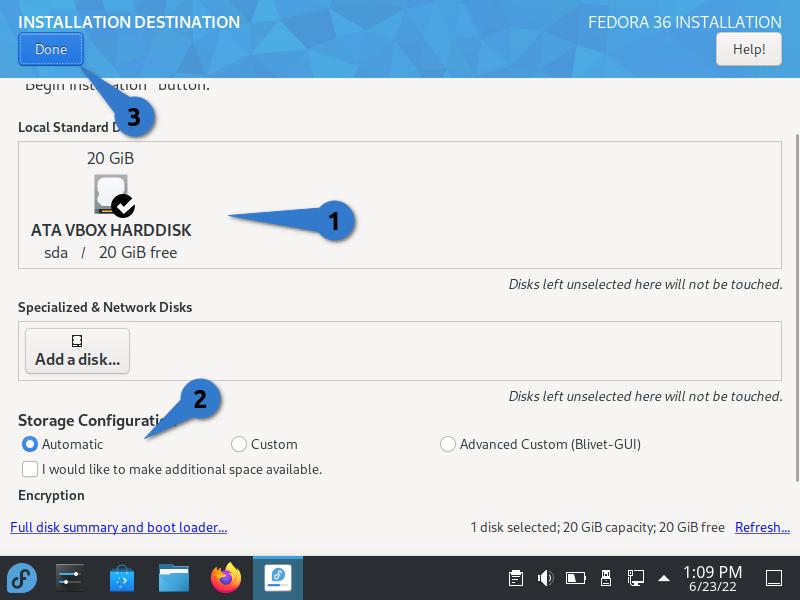
Step 7: Installation Destination
In this step, you need to select the disk where you want to install Fedora.
From the initial steps, you have already created the disk, so first select the disk and then choose “Automatic” Storage Configuration for the sake of simplicity.
If you want to keep a separate partition, then choose the custom option and specify the separate space home, /, swap.
I’m good with the following configuration, so let me click on “Done” to save the changes.
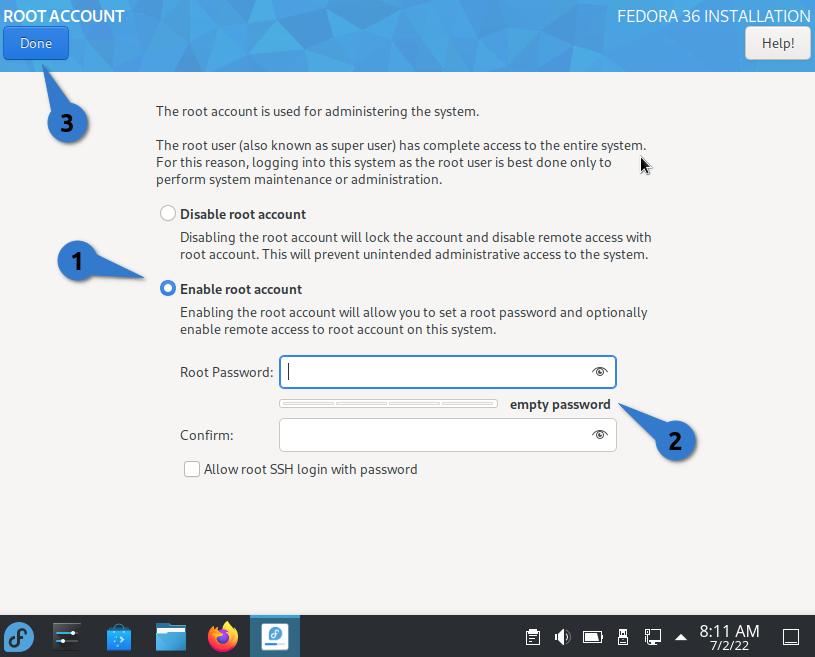
Step 8: Enable root account
Now you are left to enable the root account to manage the system. By default it is disabled. Click on “Enable root account” and set the root password.
Once you have entered the password, click on Done.
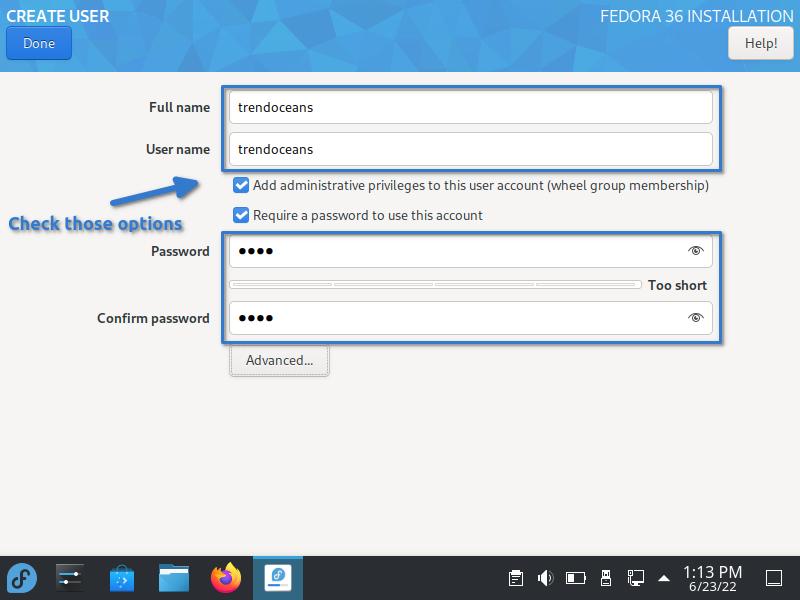
Step 9: Create a User
The last step is to create a user to perform regular tasks. You should not use your root account for general purposes. To create a new user, click on “User Selection”.
And fill in the following details like Full name, User name, you can mark a check on the “Add administrative privilege to become a super user”, and to make the account secure, also check on “Require a password to use this account” and type the password.
To save the following changes, click on “Done”.
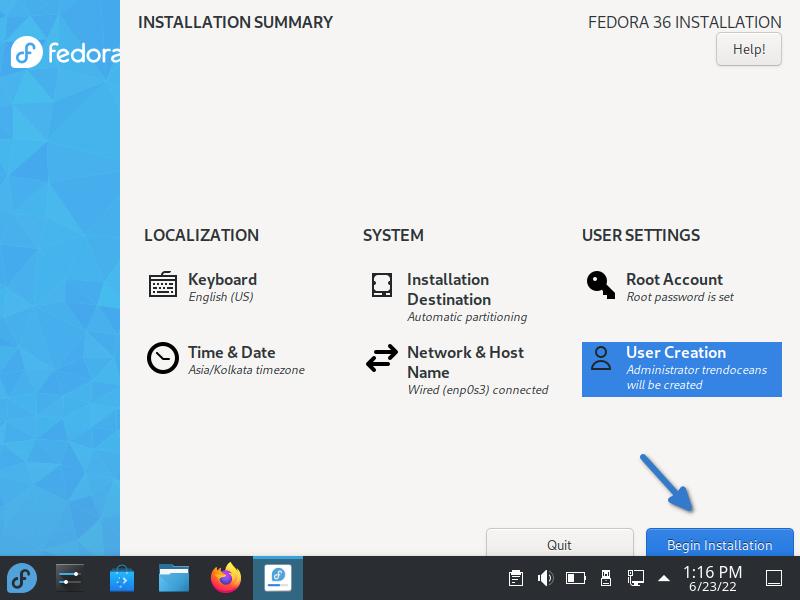
Step 10: Installation Summary
Final checkpoint! You can still make any changes if you want to, and once you are satisfied with the configuration, click on “Begin Installation”.
Meanwhile, you can grab a cup of coffee for yourself and wait for the installation to be finished.
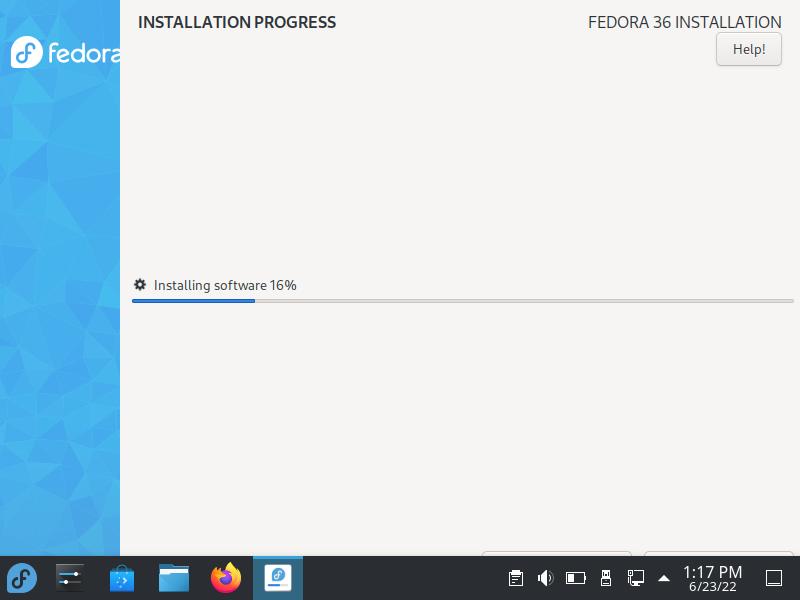
Once the installation is finished, restart your virtual machine to get a hand on a fresh installation of Fedora.
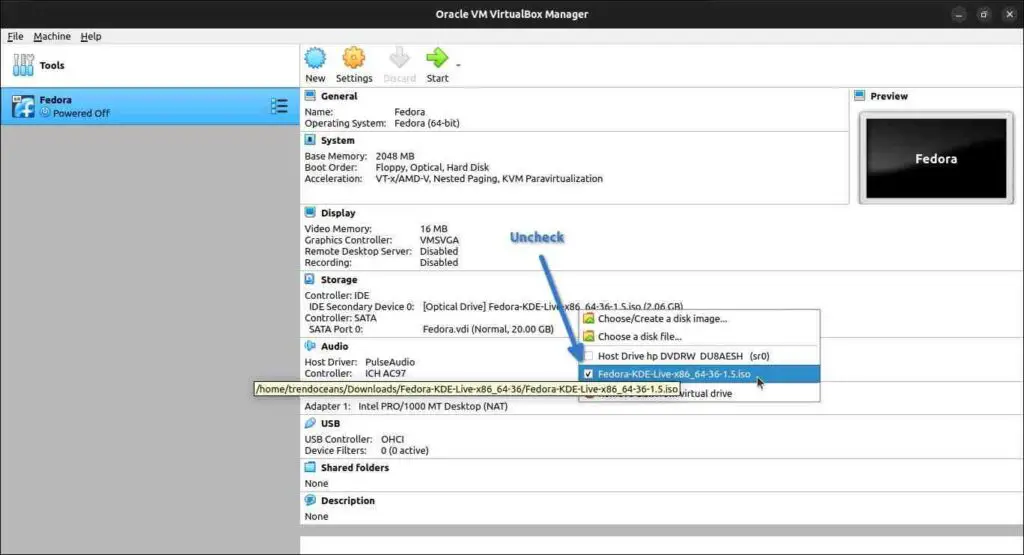
Troubleshoot
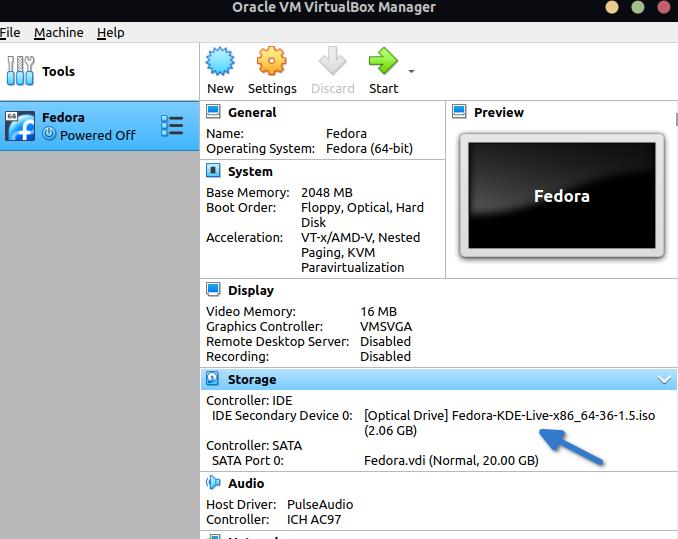
When you try to run Fedora, it may take you to the boot menu, and to avoid that, you need to detach the ISO file from the Storage section like the below-attached image.
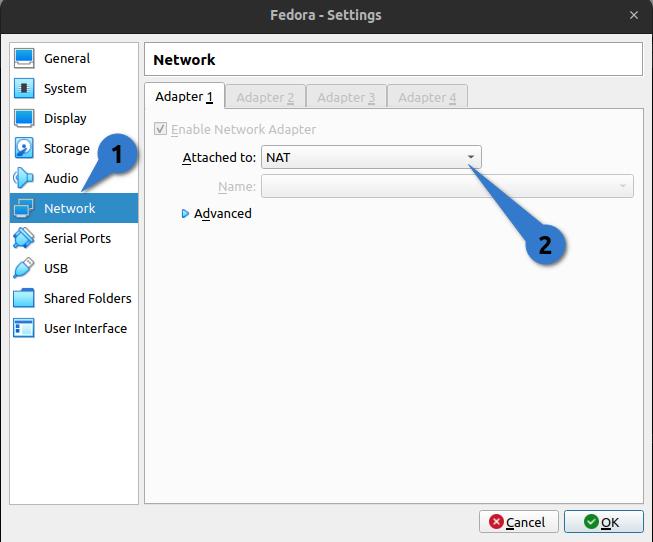
If you are not able to connect your Fedora machine locally through an SSH connection, then you need to change the Network Adapter setting, or else you can check the SSH service status before that change the type of network adapter in VirtualBox.
To change, first go to the settings of your Fedora Virtual Machine and change the tab to the Network section. Under the Network Section by Default, you will find NAT. Change it to “Bridge”, and specify the active network interface of your current host.
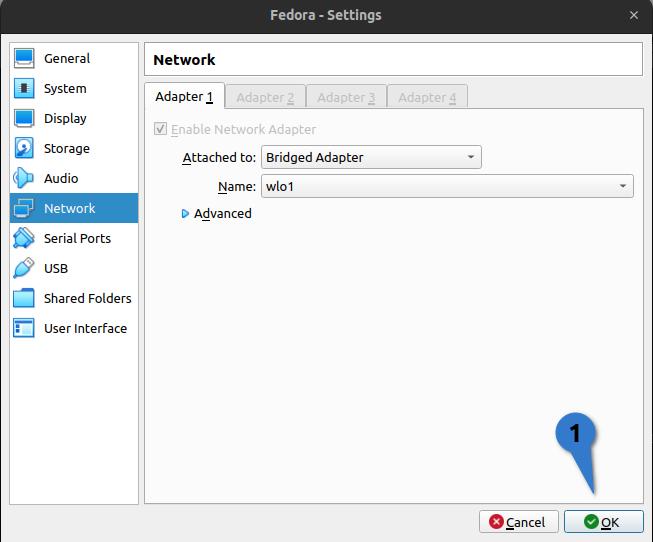
After following the above changes, you can use VirtualBox on your local network, and still, if you face some issues while starting, you can refer to this link:
Watch Video
Wrap up
That’s all to install Fedora on your VirtualBox.