Installing Fedora won’t take much time on your system, so let’s see the steps that you can take to install Fedora 39 on your system.
Fedora brings up a new version every six months for its users to bring up new features with the improvements from the last release, and in November, Fedora came up with 39.
I’m excited to install Fedora 39 on my system. If you do too, then come up with me so we can both install the new Fedora on our systems side-by-side.
Also, if you have never installed Fedora on your system, then you can use this article as a reference to install Fedora on your VMware machine.
Now, if you’re all set, the next step is to acquire the ISO file necessary for the installation process.
Download Fedora 39 ISO
Fedora 39 comes in different flavors, from default GNOME to KDE, Budgie, LXDE, Mate, and the list goes on, and it’s up to you now which flavor you want to choose.
If you are not sure which desktop environment is good for you, simply download the GNOME desktop environment, which typically meets all the user’s needs.
To get the Fedora 39 ISO file, you can use the torrent link or else go to the official site to download the GNOME-based Fedora 39 Workstation.
Installation
After getting the Fedora 39 ISO, we are good to go with the installation part, but if you haven’t yet installed the latest version of VMware Workstation 17 Pro, then take a moment to install it on your system.
Create a New Virtual Machine
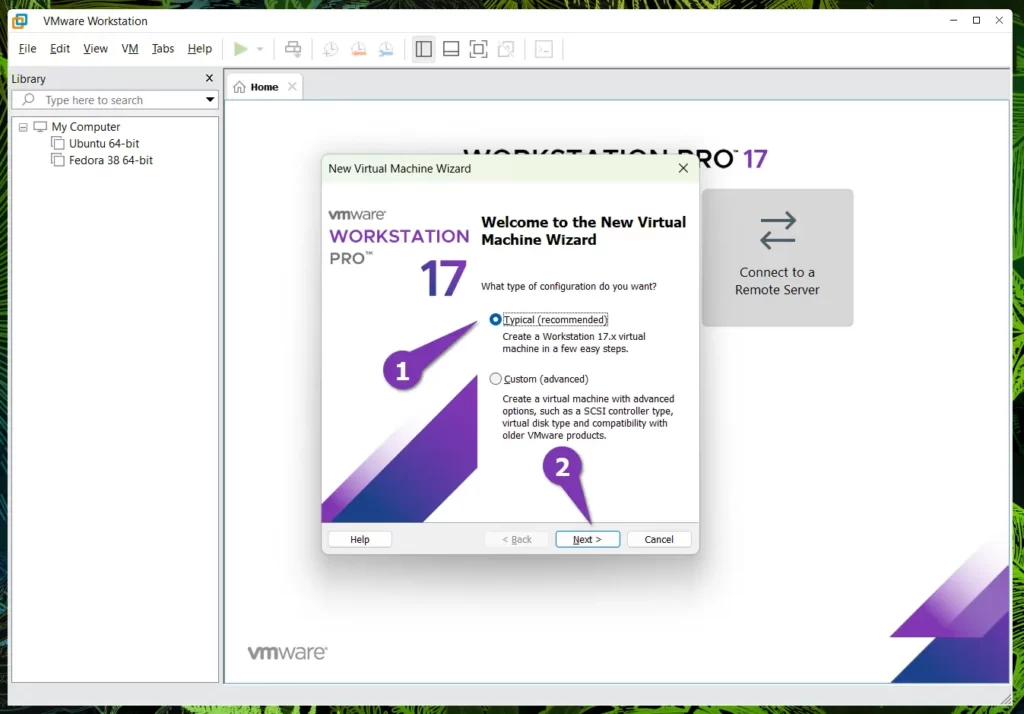
Once you are ready to follow along with me, then start the VMware workstation and use the shortcut Ctrl + N to create a new virtual instance.
1
Select “Typical (recommended)” and click on the Next button.
2
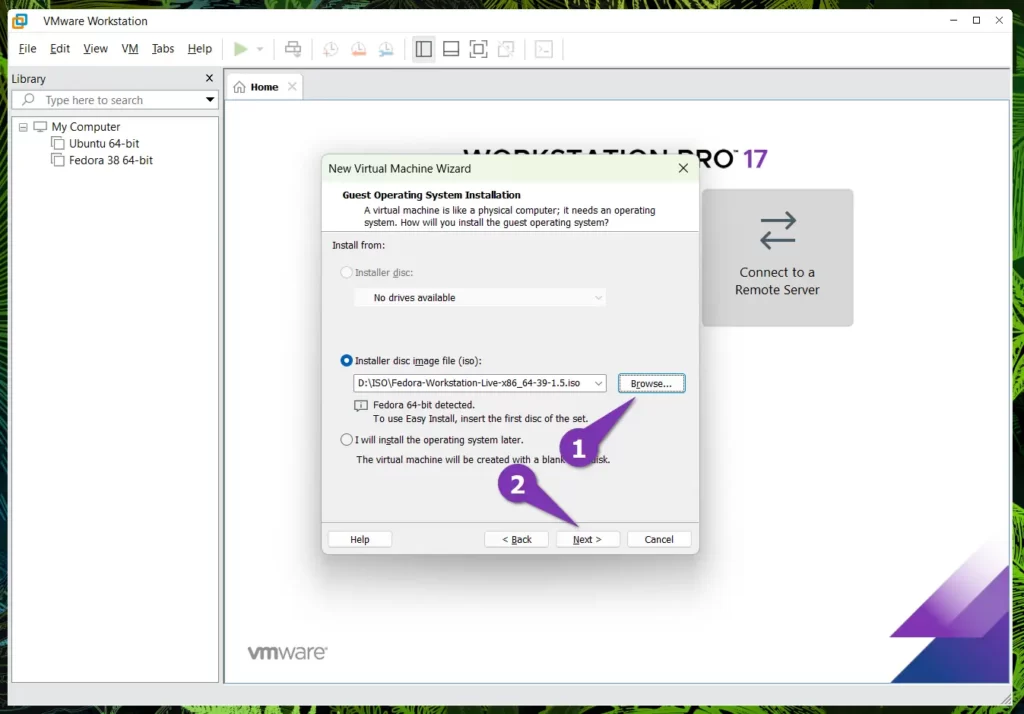
Select the “Installer disc image file (iso)” and click on Browse to provide the ISO file, like shown below.
3
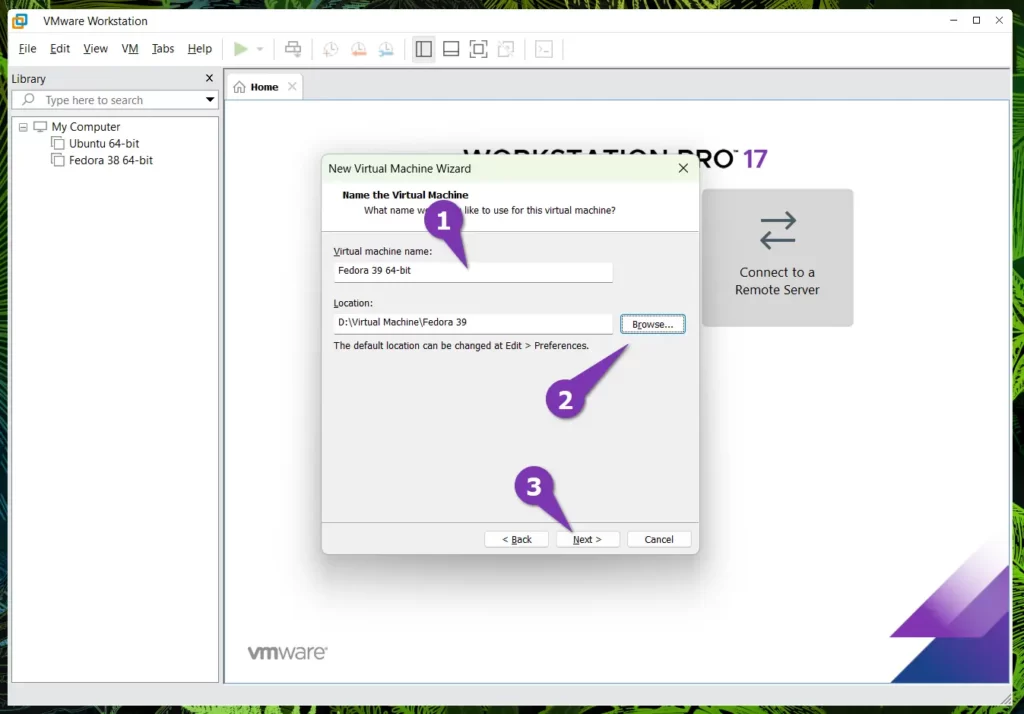
Now give a unique virtual machine name and also set the location where you want to store the virtual files.
4
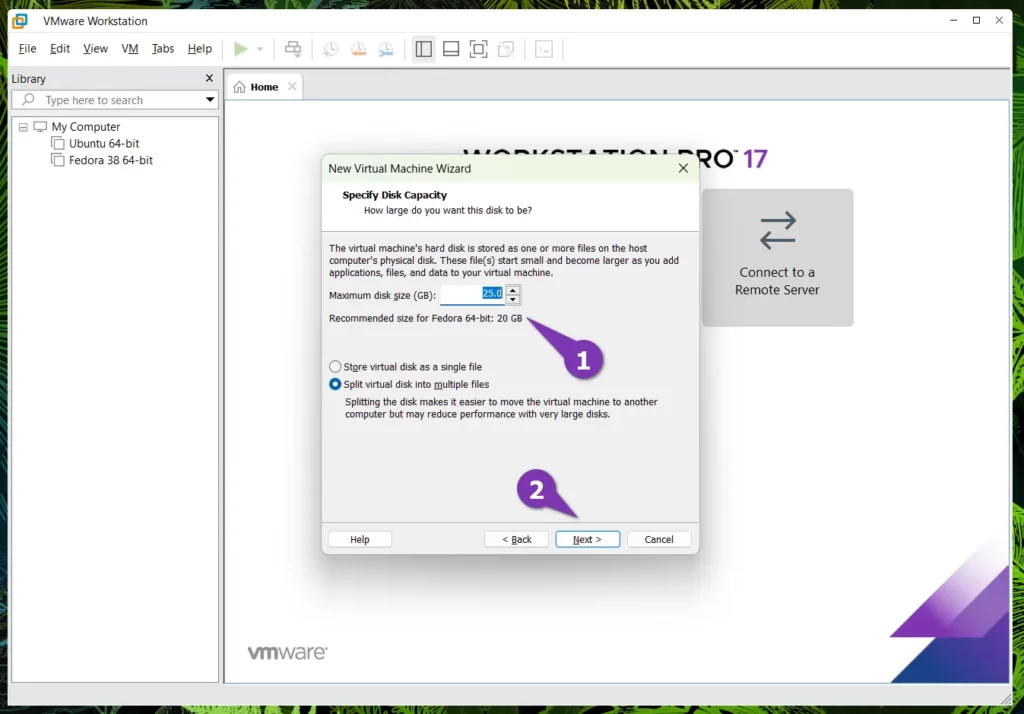
I have set the disk size to 25 GB; if you want, you can increase the size as per your needs, as shown below.
5
Everything is setup, and you are now ready to boot into the system for the installation. However, if you want to customize some hardware settings, then click on “Customize Hardware.”
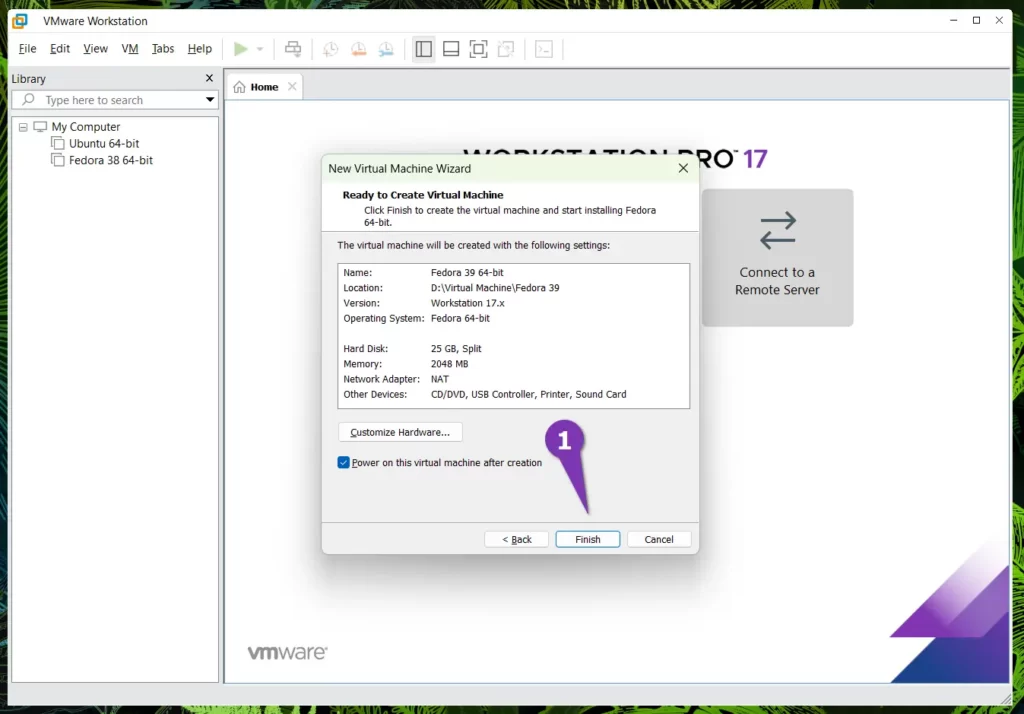
If you are happy with the default options, click on Finish to start the virtual machine.
6
Start Installation
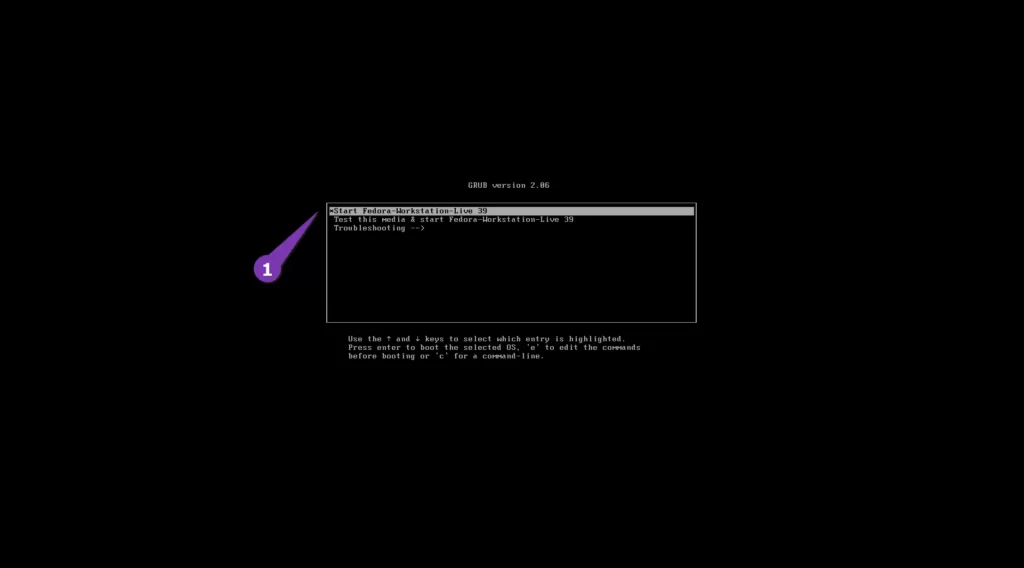
This will boot the virtual instance and will be presented with the GRUB, where you have to select the first option, “Start Fedora-Workstation-Live 39.”
Once the system is operational, you will be welcomed with the option to install Fedora and explore the live boot so you can test the system without installing it.
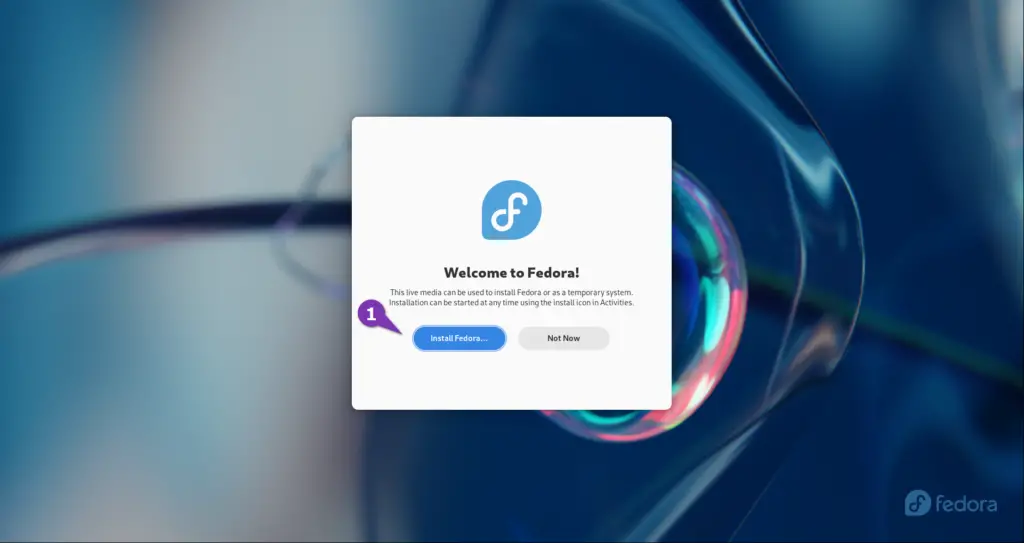
I’m good with the first option if you are too, then click on Install Fedora to start the installation process
7
Select Language
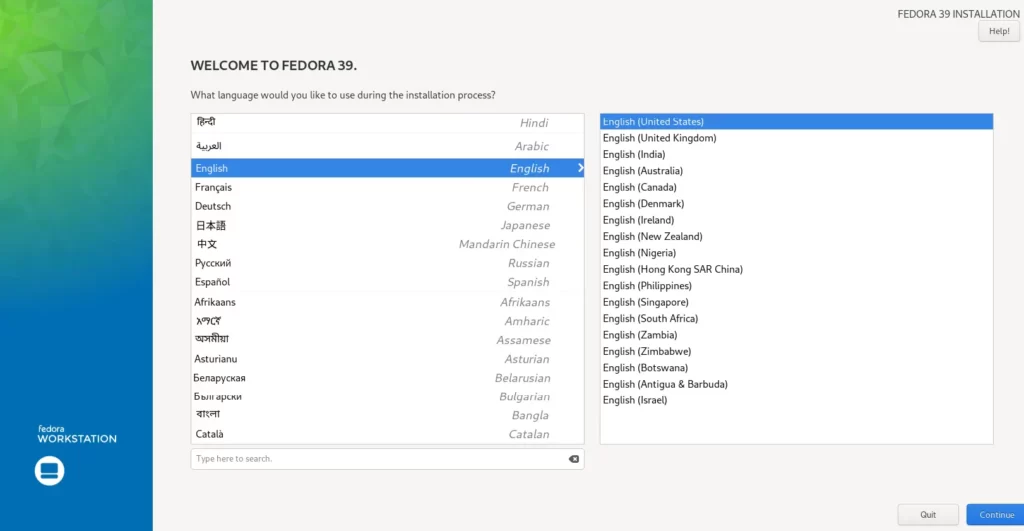
Now you will be presented with a series of screens to install Fedora 39 on the system, and thus the first option is presented on the screen to select the preferred language.
So choose the right language and localization.
8
Choose the Partition Type to Install Fedora
After selecting the language, you will be directed to the installation summary window, where you have to complete the pending action.
Here, as you can see, I have been marked pending for “Installation Destination”.
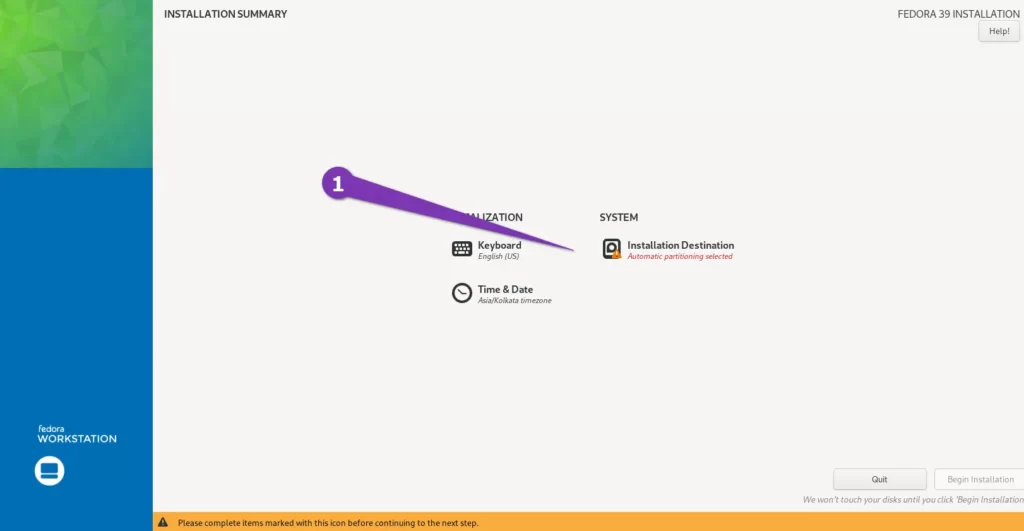
Most likely, you will have the same screen as mine, so click on “Installation Destination” and select the storage device.
For the sake of simplicity, we are going with the “Automatic” storage configuration, so you don’t have to manually create a partition on your system.
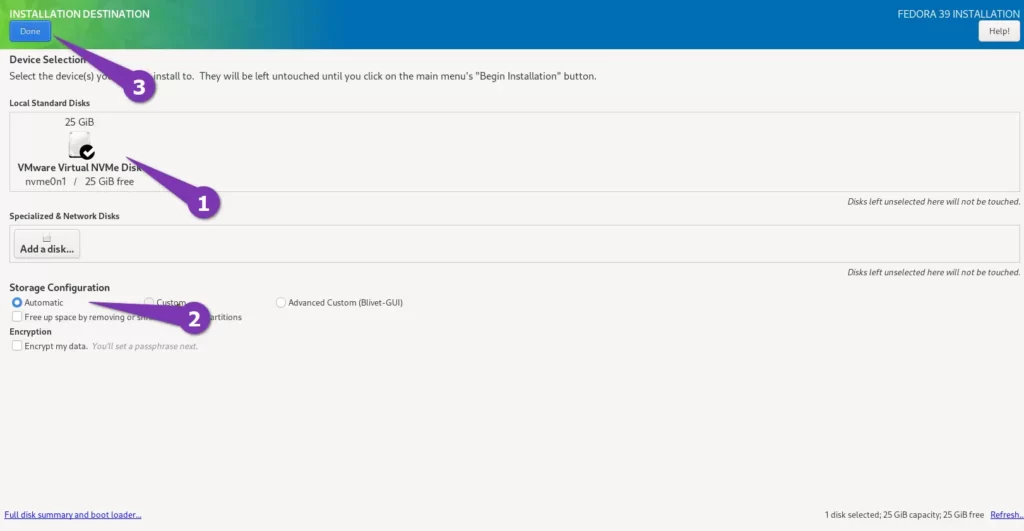
Next, you need to click on “Done” to go back to the installation summary.
9
Final Step
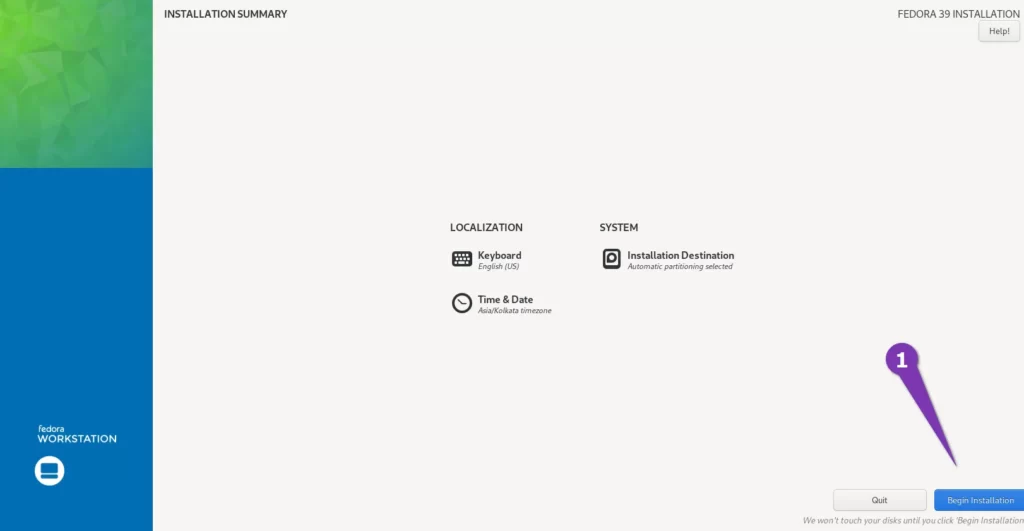
As you can see from the below image, everything is done, so it means we are good to click on the “Begin Installation” button to start installation.
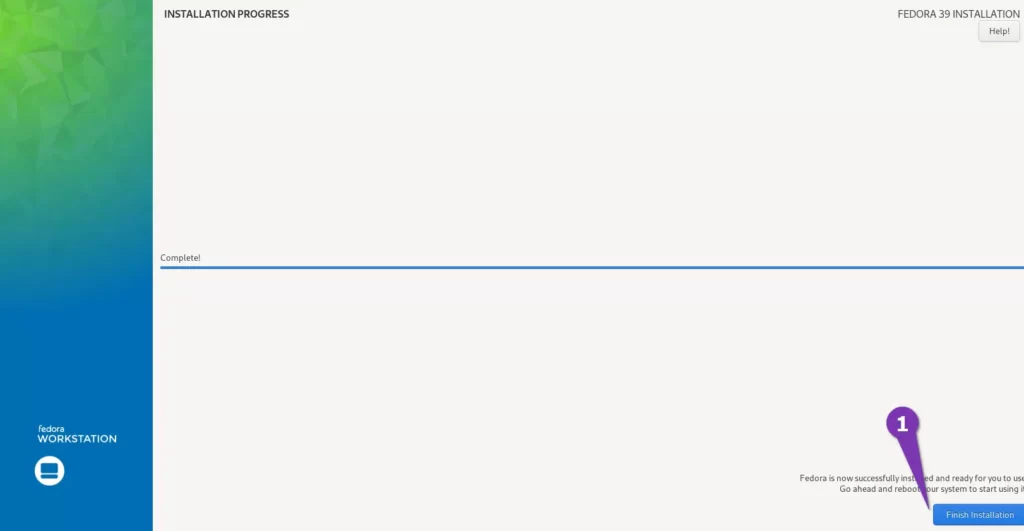
It will take some time to complete the process, and once it’s over, you just have to click on the “Finish Installation” button to exit from the installer and reboot the system.
Inital Setup After Reboot
There are a few things left for us to do, such as enabling third-party repositories, creating users, and a few options to disable, which I don’t prefer to use.
So, when you start your system, the first thing you will see is the following image:
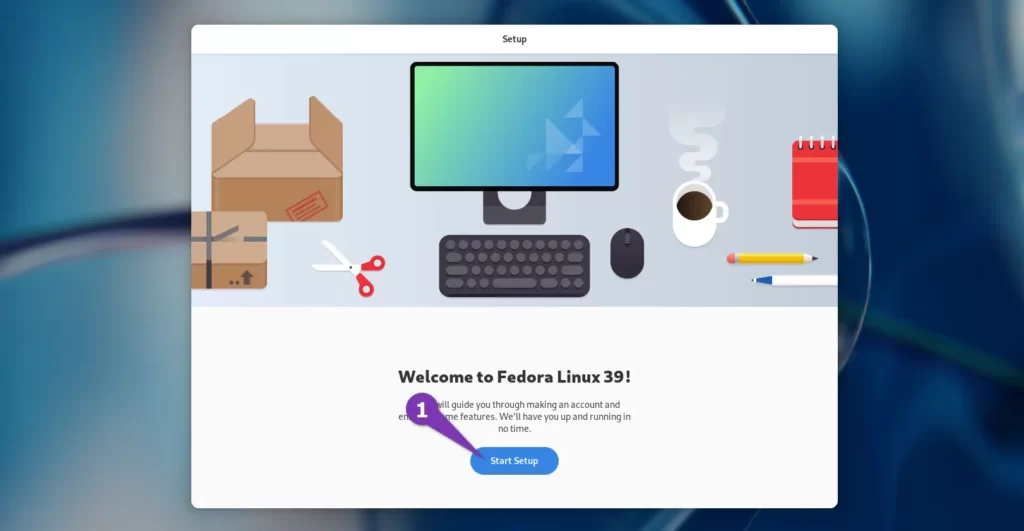
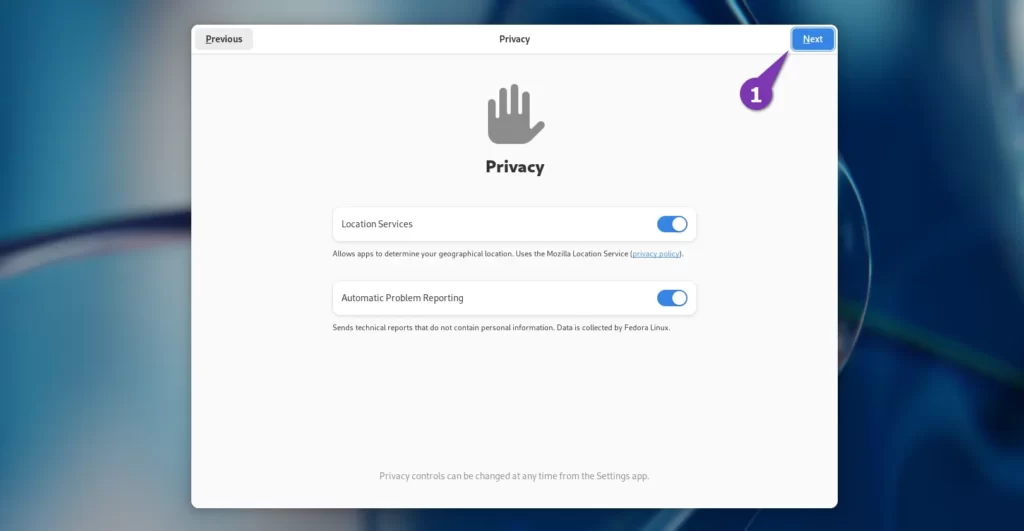
After clicking on “Start Setup,” you will be first asked to keep the default location services and automatic problem reporting enabled.
If you don’t want to keep it enabled, you can opt out and click on “Next” to move to the next screen.
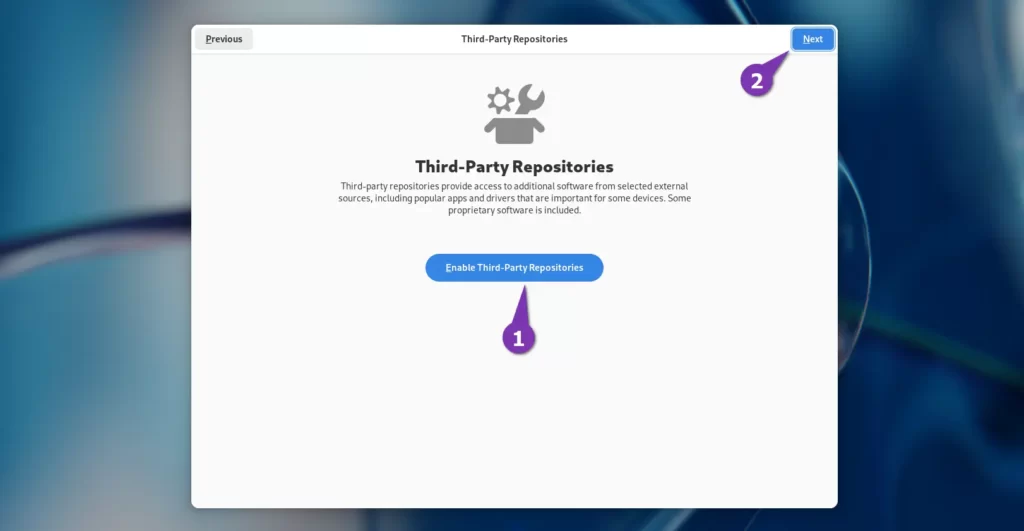
Thereafter, you will be prompt to enable third-party repositories for the extra support of the system so you can install additional software and packages.
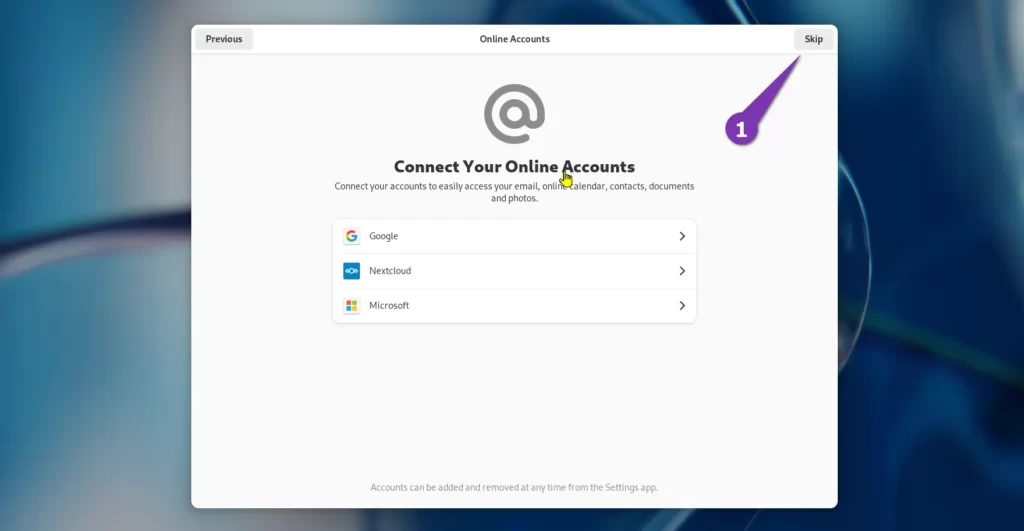
After that, if you wish, you can connect your online accounts using the three different providers, but if you don’t want to, then click on “Skip”.
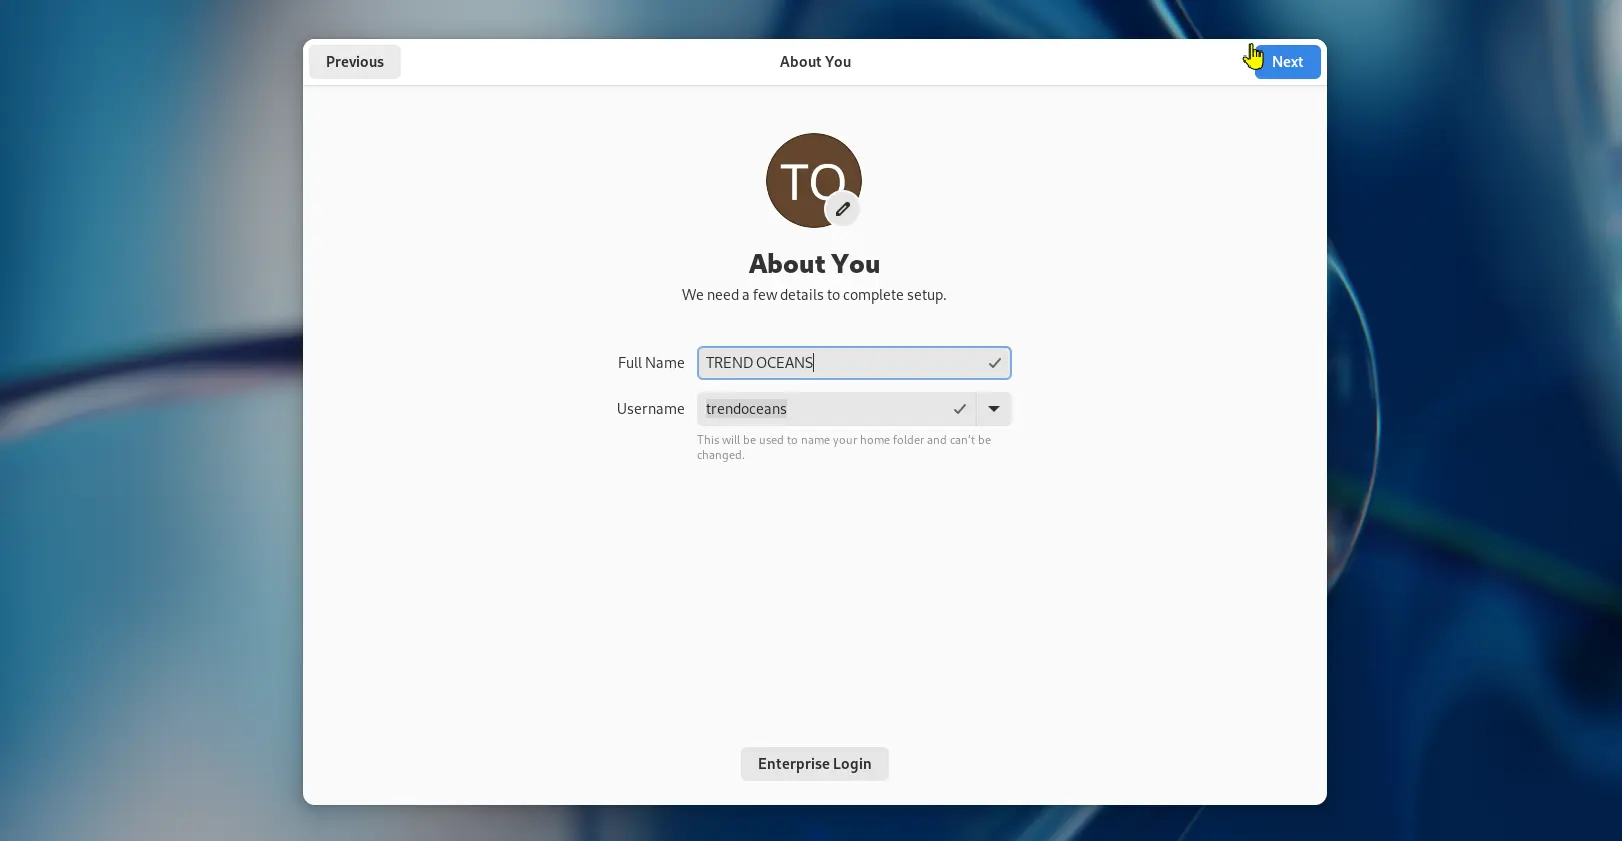
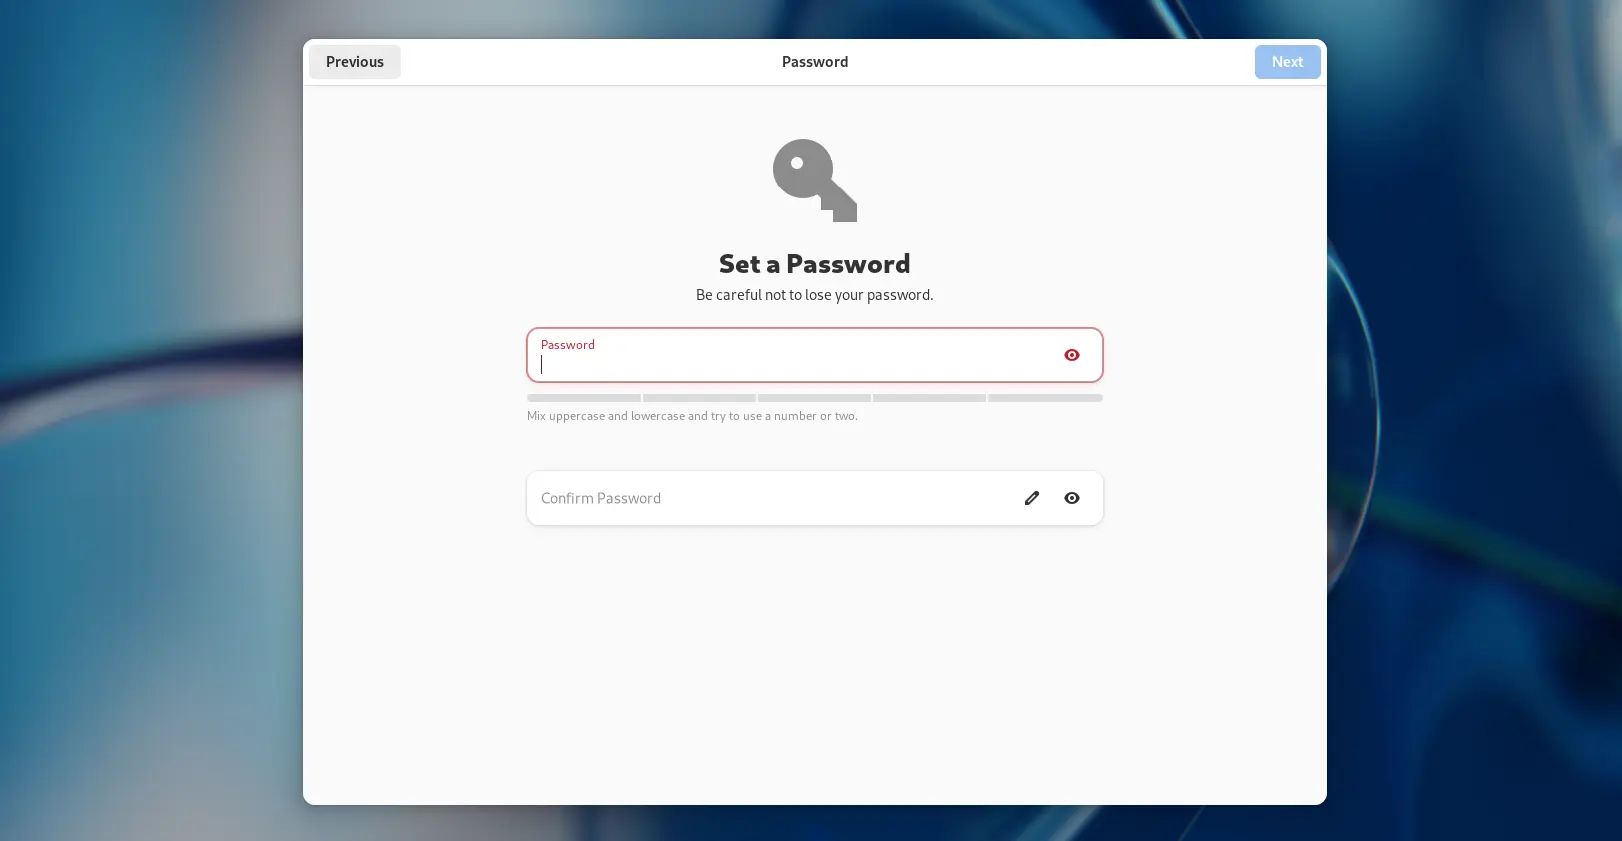
Now you have to provide a detail to create your account with your personalization, and then click on Next to enter your password in the next window.
After all this, you just have to click on the “Start using Fedora Linux” button to get started with the new Fedora.
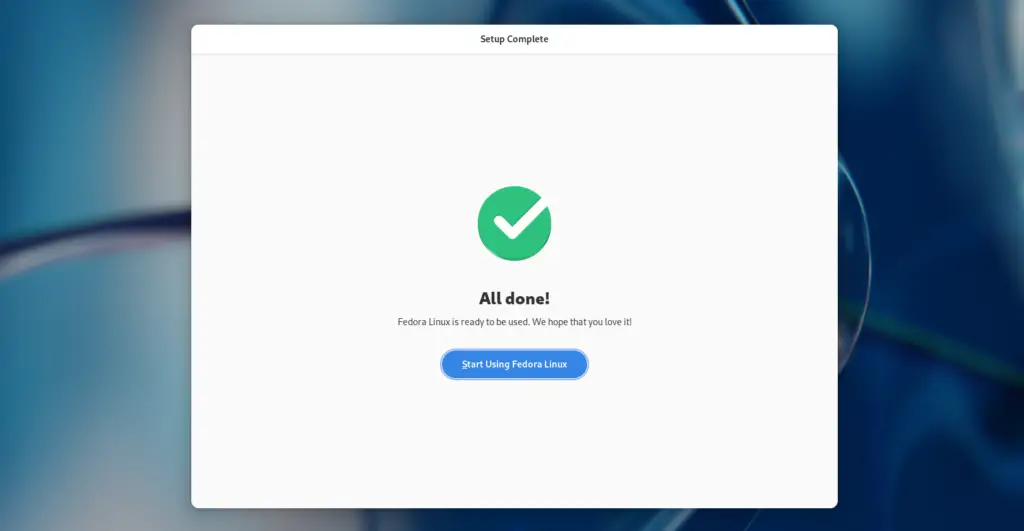
Voila! Welcome to your freshly installed Fedora system to explore the new features of GNOME.

I recommend you read the things you need to do after installing Fedora 39 on your system to make the most of it from the start.
Wrap up
That’s all for this article, where I demonstrate how to install Fedora 39 on your virtual machine, so you can easily go through the steps when you are not sure.
Also Read: How to Install and Start an SSH Server in Fedora 38 and Later
I hope you like this article…See you in the next article!