Linux gives you complete freedom to experiment with the user experience. For this reason, one can try to change the desktop environment to any window manager like i3wm, bspwm, xmonad, etc. Not only that, but you can also change your display manager and audio manager from what you have received from the installed distribution.
But we are not here to change any of these things except the font, because after the installation you may not be able to view some of the fonts in Devanagari like Sanskrit, Hindi, Marathi, and Dravidian languages like Telugu, Tamil, Kannada, and Malayalam.
Because of that, you might face problems reading content in your regional languages.

So to overcome this problem, you have to download the required font from the internet and, after that, you can follow the below steps to install the font on your Linux machine. No matter whether you are following this guide on Ubuntu, Debian, Fedora, AlmaLinux, or any other distribution, most probably, these steps will work out for you.
Otherwise, we are there for you.
Install Fonts on Linux
There are multiple ways through which you can install fonts on your Linux system, such as:
- Install fonts using GUI tools like GNOME Font Viewer, Font Manager
- Extract and move fonts to ~/.local/ share/fonts or /usr/local/share/fonts
Install fonts using GUI tools like GNOME Font Viewer, Font Manager
I believe you have already downloaded the font from the internet if you haven’t yet, then you can follow along with me, or else you can skip the download process by making click here.
Download Fonts
For downloading the font, you can choose multiple platforms. For the sake of this guide, I have chosen fonts.google.com, where you can find a large number of fonts that are available to use.
Step 1: Go to the fonts.google.com webpage.
Step 2: Search for the font name that you would like to have on your system.
Step 3: In the top right-hand corner, you will find the button to download a font, and once you click on that button, it will start downloading the font in zip format, which you need to extract, which we will see in the next part.
Extract and Install Fonts
Once you download the zip file, you need to extract the file to get the ttf (TrueType Font) or otf (OpenType Font) format, which is a supported font type to set on your system.
Some of the public sites will give you both files, but I suggest you go with TTF if you are a regular user, and if you are a designer or font-oriented person, then you are well aware of the uniqueness of OTF.
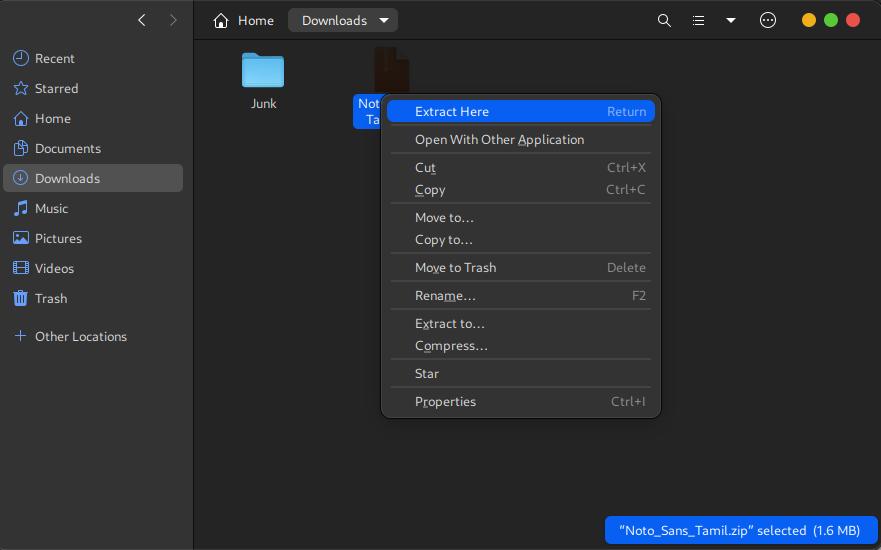
So to extract, go to the location where you have downloaded the file and double click it, or else press the right button and extract the file with the given option like in the below image.
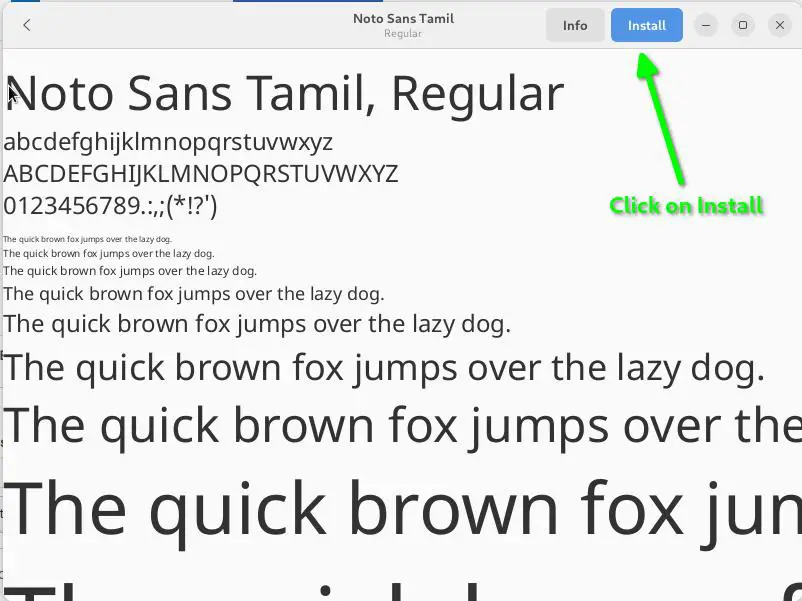
Now go to the location where the file is extracted, and make double click on the file name that ends with the .ttf extension. In my case, it is “NotoSansTamil-VariableFont_wdth, wght.ttf”,which will open another window, as you can clearly see in the below image.
Simply click on Install to install the respective font.
Most likely, you will find a similar interface if you are following this guide on the GNOME desktop environment, but for other distributions, the interface will be different.
For any reason, if you are not able to get the above options, then you need to install the GNOME font viewer on your system by using Flatpak, which is an ideal package installer for all major Linux distributions.
If you do have Flatpak installed on your system, then execute the below command, which will install the GNOME font viewer.
$ flatpak install flathub org.gnome.font-viewerThose who don’t have Flatpak need to install it first by following this corresponding guide.
Instead of the GNOME Font Viewer, you can also use the GNOME Font Manager, which has a lot of extra features compared to the GNOME Font Viewer, like font removal, adding new fonts from the local system, downloading new fonts from Google Fonts, and many more.
$ flatpak install flathub org.gnome.FontManagerAfter installing the above utility, you can try to install a font on your Linux system and, after that, restart your computer or application to see changes.
Extract and move fonts to ~/.local/ share/fonts or /usr/share/fonts
Above you have learned how to install fonts using GNOME Font Viewer, but if you don’t want to install any application just for installing the font, then you can follow the subsequent steps where you will find the manual way to install fonts on your Linux system.
The steps are similar to the above, just you don’t have to download any utilities, but don’t forget to download the new font to experiment with your system.
I believe you have downloaded and extracted the font to your system and are waiting for our next instruction, so I’ll not take much time to show you where you need to move the extracted font file.
So first of all, open your terminal window and create a directory at ~/.local/share/fonts to store fonts for your local or current user, which means this font will not be shared among the other users.
$ mkdir ~/.local/share/fonts/After that, copy or move the extracted file to the newly created directory.
$ cp -r ~/Download/Noto_Sans_Tamil ~/.local/share/fonts/If you want to share this particular font around your system, then use the below code instead of the above one, which will make the font available system wide.
$ sudo cp -r Downloads/Noto_Sans_Tamil /usr/share/fontsThe next step is to build the font-cache. You can either reboot your system or else run the below command, which will build the font information cache by scanning the respective path.
$ fc-cache -f -vThe list may get longer if your system has multiple fonts installed on it.
After the completion of the above command, you can invoke the below command to verify whether the fc-cache has successfully built a cache of the font.
$ fc-list | grep "<name-of-font>"The last step is to close and start the application to see the changes.
Wrap up
That’s all for now!
In this article, you have learned how to install a font on Linux distributions like Debian, Ubuntu, Fedora, AlmalLinux, or any other major Linux distribution.
If you face any problems while following the guide, do let us know in the comment section.