OpenSUSE acronym (Software und System–Entwicklung “Software and systems development”) It is a german-based operating system, and you all know german quality is astonishing.
OpenSUSE is not popular around the general user because it mainly focuses on Enterprise and It sponsored by SUSE Software Solutions.
If you purchase tuxedo computers, you will receive openSUSE preinstalled to use In some of the models you need to upfront ask for openSUSE to get Installed.
Recently OpenSUSE Leap 15.1 support has ended on 2nd Feb 2021. If you want to upgrade, you can follow the instructions from an Official site before that make sure to take a backup of your Systems.
Prerequisites
- A system with AMD64/Intel* EM64T processor
- You can install OpenSUSE with 1GB Physical RAM for optimal performance it is recommended to have a minimum of 4GB or more.
- 10 GB disk space for minimal installation, 16 GB for Graphical Installation, Incase of btrfs format minimum storage required 40 GB.
- ISO Image
- USB Drive
Download OpenSUSE ISO
OpenSUSE comes up with the two versions to use. If you are kind of person who wants to experience the latest features without concern of stability, go for the Tumbleweed and for those who don’t want to compromise stability, and don’t want to end with undesirable circumstance then choose LEAP.
In this guided article, we will Install OpenSUSE Leap to download visit Official site and click on Installation tab.
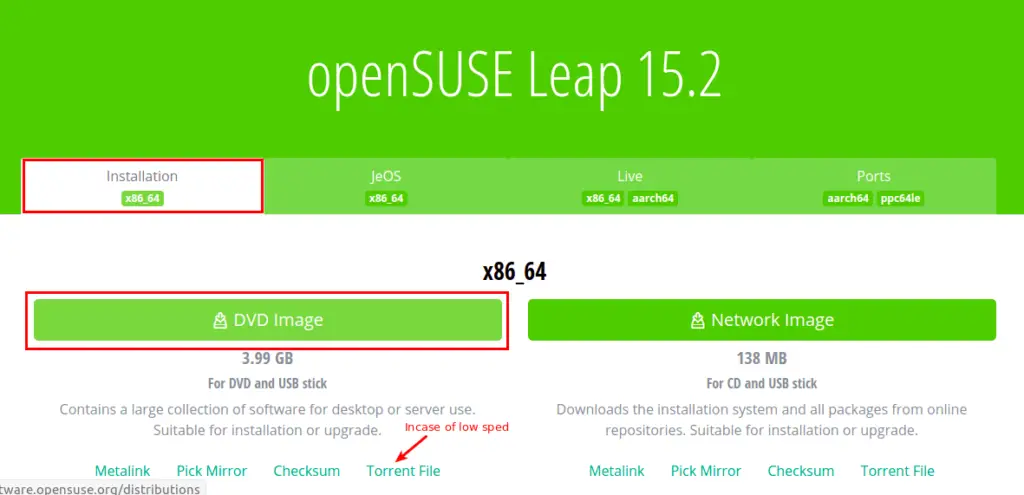
Start to download OpenSUSE Leap 15.2, click on DVD Image and wait for the ISO file to get downloaded.
Read this:- If you want to know How to Download ISO file using wget command
If you are facing or having low bandwidth connection select Torrent File to start download file else choose different Pick Mirror.
Create a Bootable USB
Once you have downloaded ISO file successfully, we need to create Bootable Image to install OpenSUSE on real hardware.
To create bootable USB drive you can use balenaEtcher, ventoy or dd command in Linux and for windows user, you can use Rufus.
We will create a bootable image in Ubuntu system using dd command before that attach your thumb drive to a Linux system.
Note:- This step will format you Pendrive so it requests you to make a backup of your USB drive else you may lose your valuable data.
Step 1:- Find location of attached disk
When you attached USB to your system, it automatically gets the special location in a System to check location use lsblk or fdisk command:
$ sudo fdisk -lThe above command will list out all the disk location name from the Systems, and you need note the down the right disk location to avoid any data loss.
Disk /dev/sdc: 14.33 GiB, 15376318464 bytes, 30031872 sectors
Disk model: Dual Drive
Units: sectors of 1 * 512 = 512 bytes
Sector size (logical/physical): 512 bytes / 512 bytes
I/O size (minimum/optimal): 512 bytes / 512 bytes
Disklabel type: dos
Disk identifier: 0x3f046fe3

Device     Boot Start      End  Sectors  Size Id Type
/dev/sdc1        2048 30031871 30029824 14.3G  c W95 FAT32 (LBA)
In my instance /dev/sdc1 is the right USB disk, a name can differ if you have attached multiple Disks.
Step 2:- Creating bootable DISK
Once we know the USB disk location let’s create the bootable image, To create bootable type the following command and make sure to replace ISOFILE-LOCATION and USB drive location :
$ sudo dd if=/[ISOFILE-LOCATION] of=/dev/[PARTITION NAME] status=progress This process will take some time to get complete. It usually depends upon USB and files size.
Once you have completed the above procedure, you are ready to install OpenSUSE on your hardware.
Installation OpenSUSE Leap 15.2
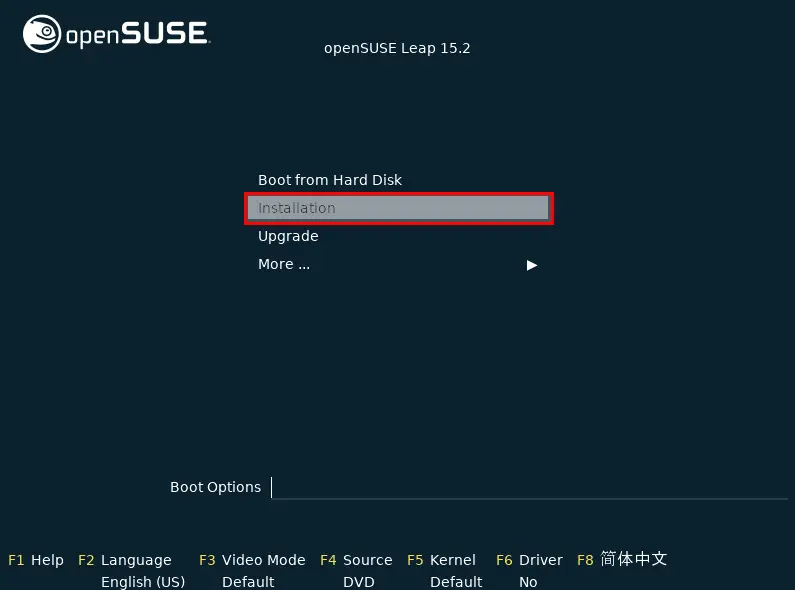
Step 1:- Restart System to access Boot Menu
When the system gets boot press the ESC or F2 or F9 or F12 to access the boot menu options button may differ as per the manufacturer.
To know the boot menu options confirm with your respective brand. In HP laptop F9 button will show a boot options menu, readers If you know the boot menu option button, please share with us in comment sections.
Once the system gets boots from the boot menu, select the Installation and press enter to proceed Installation part.
Step 2:- Language, Keyboard and License Agreement

This is the first screen you will able to interact and make changes. Over-here you need to choose Language, Keyboard Layout and accept the License Agreement.
I’ll choose the default options and click on Next button. If you want to read terms and condition in regional language click on License Translation I don’t think so anybody seriously ready, didn’t you? 🙂
Step 3:- Network Settings
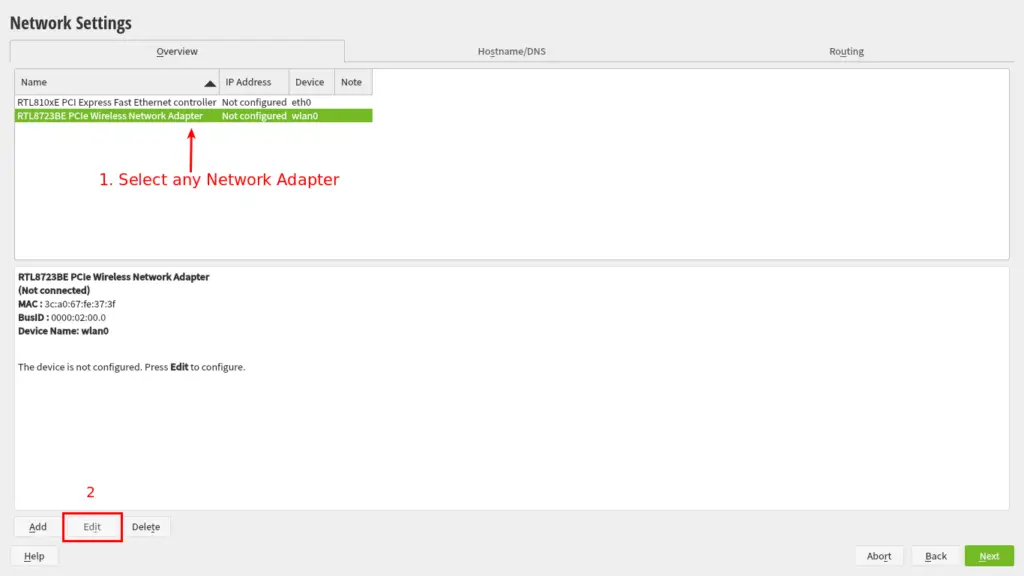
In this installer screen, you are asked to choose any Network adapter to connect with the Internet.
If you don’t want to connect the Installer with the internet, you can simply skip this step and proceed for the next screen. However, it is better to connect the Installer with the internet to get the latest libraries or packages to Install.
In my case, I have a wireless connection in my place anyway I have to choose Wireless Network Adapter, after that click on Edit to configure selected wifi network card.
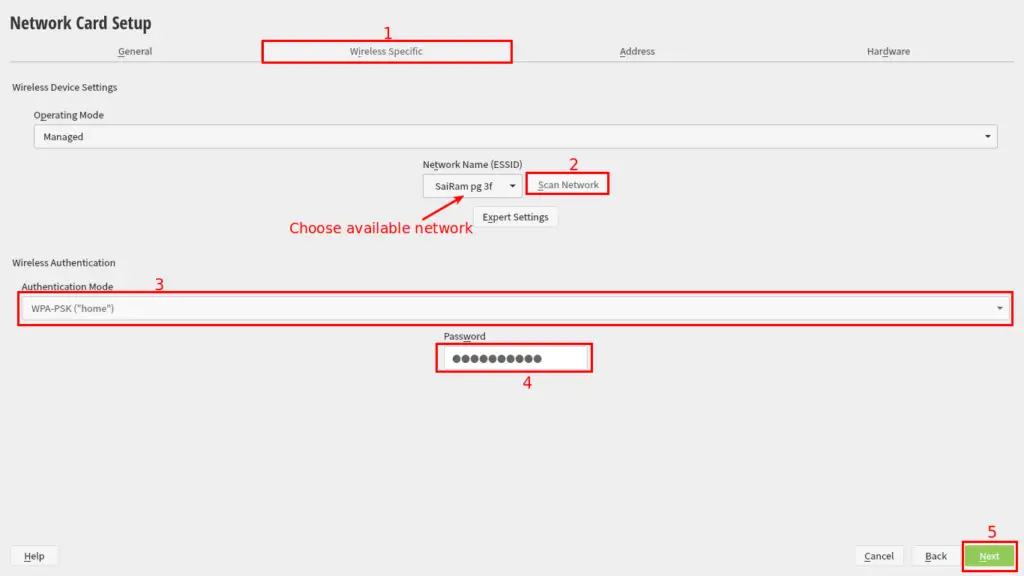
In this Network Card Setup, you need to switch to Wireless Specific Tab and click on Scan Networks to check available Wi-Fi network around you.
Once the Scan Networks is completed Click on drop-down menu box that is the right side of Scan Networks and choose SSID which you want to connect.
After that, click on the Authentication Mode drop-down menu to choose the security mechanism for your selected SSID.
In case of a home, network chooses (WPA-PSK “home”) and provide the password on the below password field, Click on Next get connected with internet.
Step 4:- Install Additional Software
This will be the pop-up window will show up when the Internet get connected to YaST Installer, Click on Yes to download additional software if you don’t want to download simply click on NO.
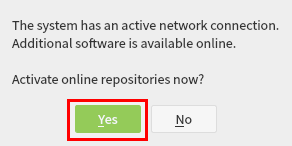
In my case, I have selected Yes to Install additional software like Libre Office and many other packages because of that installation process will be longer. It’s up to you whether you want to install additional software right now, else you can download software later from an internet still click on Yes.
There will be an additional step for the user who had selected Yes, options like to choose Online Repositories.

Please select the above four options to add fetch new security patches and additional software’s.
Update Repository(Non-OSS):- It is used to download proprietary software license.
Non-OSS Repository:- This must be enabled to get the latest security patches and updates while installing OpenSUSE 15.2
Main Update Repository:- It’s recommended to choose Main Update Repository to get an update for (Main Repository) software and other packages.
Main Repository:- When you enable this option, it will download additional software packages for your systems. If you enable these options, make sure to enable (Main Update Repository) to get the latest features and security patches.
Step 5:- System Role
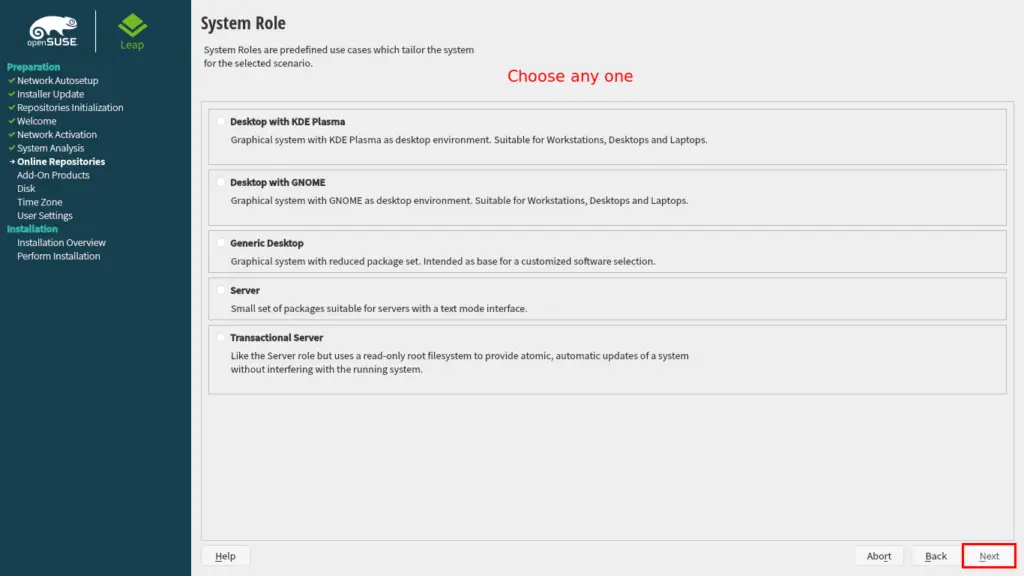
I personally like this option YaST installer will ask you to choose which type of Desktop environment you want to use and what will be your workspace type.
List of Desktop Environment available to use such as
- Desktop with KDE Plasma (Prefer to use close the Windows experience)
- Desktop with GNOME (It is also one of the best Desktop environment)
- Generic Desktop (In the next screen you will choose between XFCE, LXDE, MATE and other)
- Server (Command Line Based No GUI)
- Transactional Server (Read-only root system) no write permission are allowed.
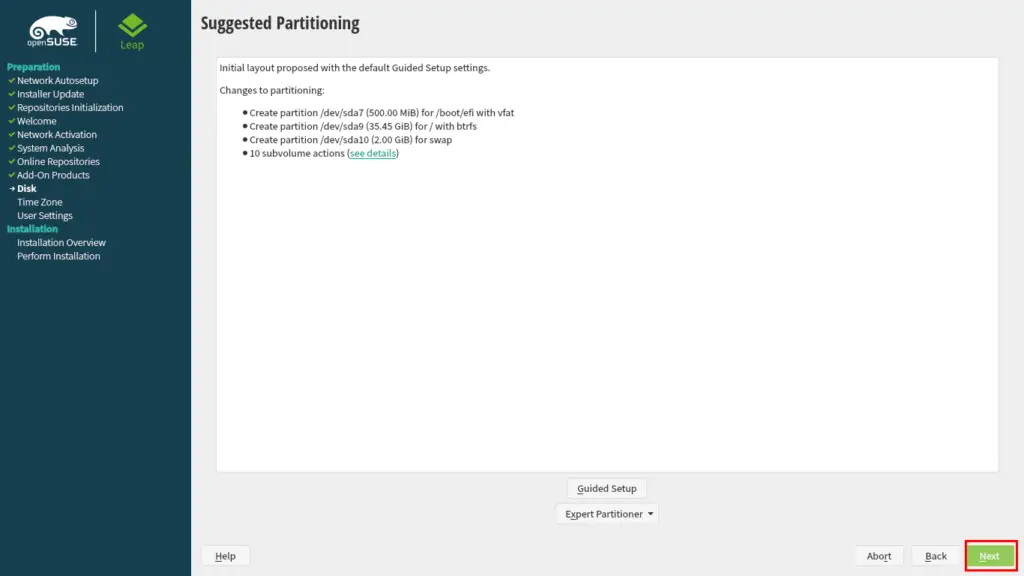
Step 6:- Suggested Partitioning
This is a step where you need to choose how you want OpenSUSE to get Install on your system.
In this screen, YaST Installer will setup the available storage to Install OpenSUSE on your system disk. If you want to change the default suggestion, you can choose the following options.
- Guided Setup
- Expert Partitioner
Guided Setup:- This guided setup analyzes your system Disk and suggest partition according to available space. In case of multiple Disk, you need to select disk manually.
If you want to encrypt your disk or want LVM support click on Guided setup and choose the following options.
Expert Partitioner:- It is used to create advanced disk partitions like a separate partition for / /home /var /usr with custom space.
When you click on Expert Partitioner it will ask you to choose the following options:
- Start with Current Proposal
- Start with Existing Partitions
If you select Start with Current Proposal, It will ask you to modify the suggested Partitions.
In case of Start with Existing Partitions, you will have full control to set up partitions as per your choice. If you are new to Linux, it is not advisable to use these options.
For easy and simple process choose the default Suggested partitions from YaST Installer and click on Next to Setup Time zone.
Step 7:- Clock and Time Zone
Over here you need to select Region and Timezone from the drop-down menu, and even you can select the location with the help of a map.
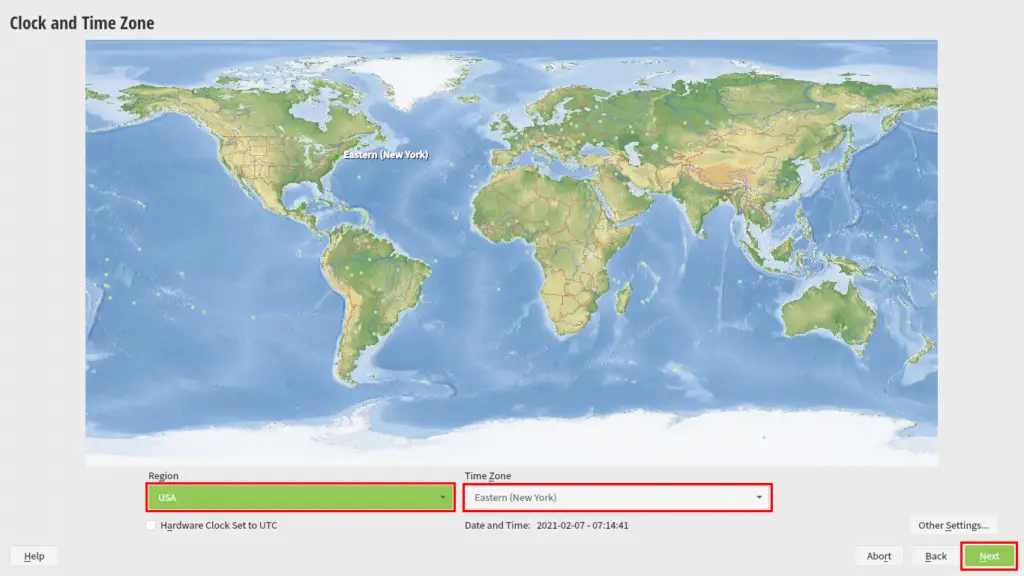
In case of multi-boot make sure to select Hardware Clock Set to UTC to avoid conflict between System time and If you want to manually configure an NTP server for synchronisation, click on Other Settings.
Step 8:- Local User
We need to create a New local User with the following details like User’s Full Name, Username, Password and Confirm Password.
To set a password you can use combinations of at least 8 characters with Numeric, lowercase and uppercase letters along with special characters.
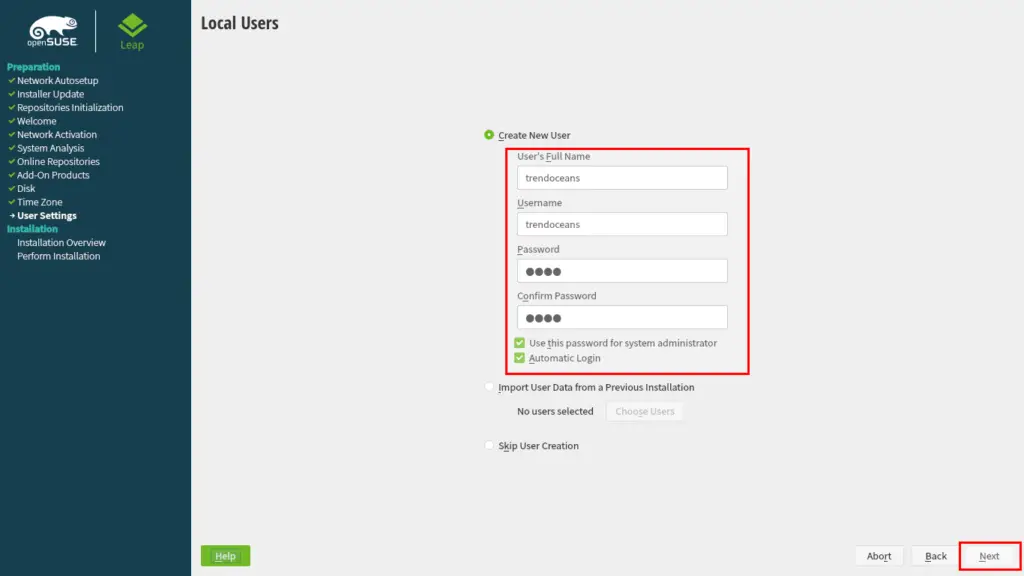
For robust security, you can uncheck Use this password for system administrators, and Automatic login.
This is an extra screen when you choose a different password for the administrator (root)account and provide a strong password as per the above password policy.
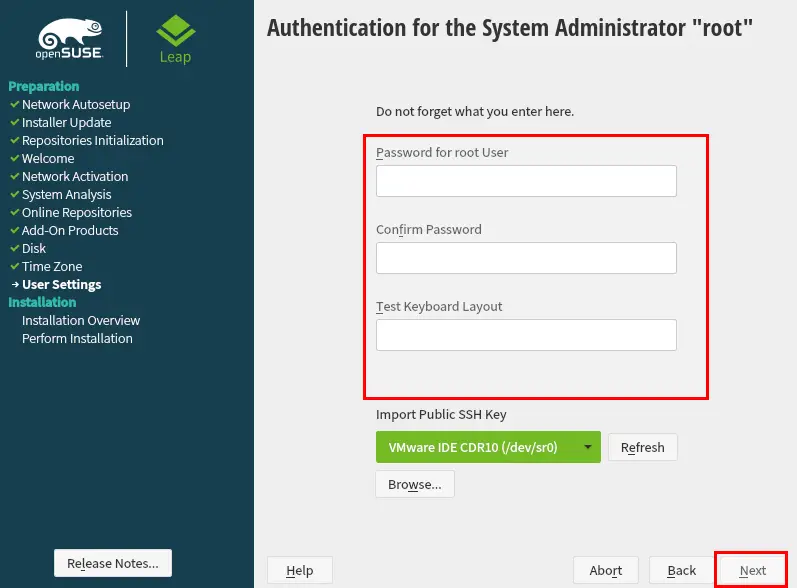
It is fascinating that the YaST installer provides an option to Import Public SSH Key from the installer itself. This will help if you set up password-less authentication, Click on Browse to choose a location to Import key.
Click on Next to Finalise Installation Setup.
Step 9-: Installation Settings
It is the last check to verify the selected options If you want to make any changes Click on the respective heading and make changes.

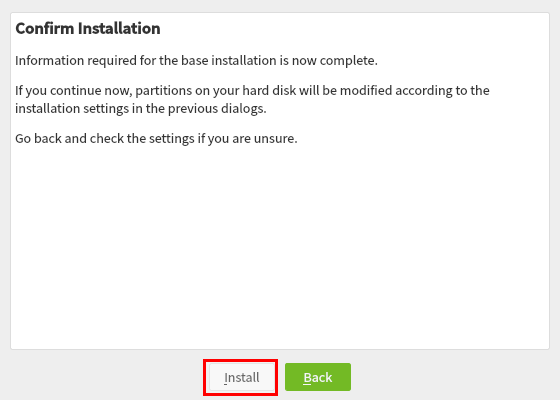
One final call to Install OpenSUSE Leap 15.2 on your system, If you are unsure click on back and make changes.
I’m sure what I have selected so, I’ll click on Install to proceed Installation steps.
Step 10: Performing Installation
Finally, we reached the point to Install OpenSUSE 15.2, and This process takes some time to complete till that you can comment us how useful this article was or any feedback If you want to give us.
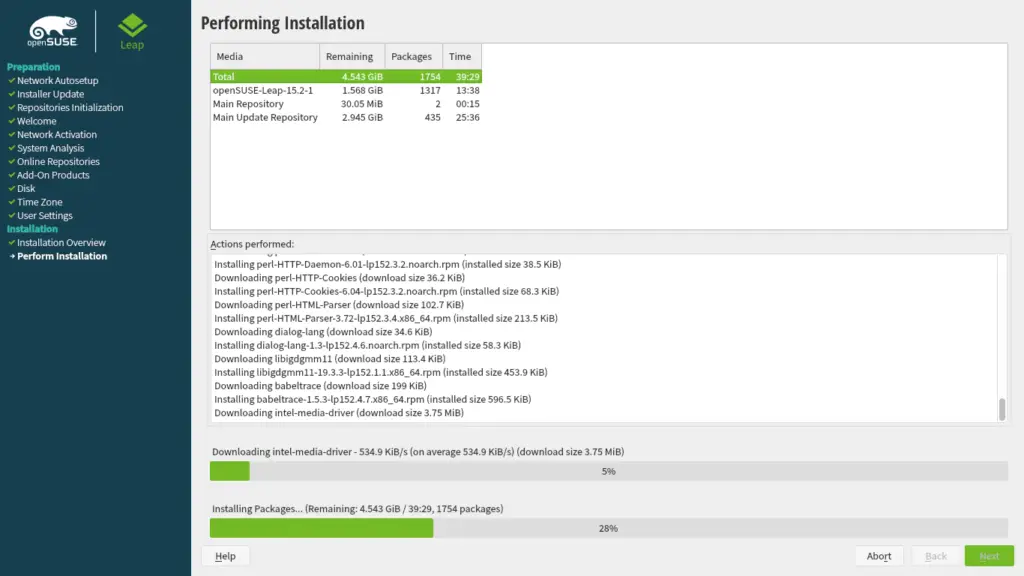
When the Installation Process gets, the complete system will get restart to grub menu select the OpenSUSE from grub to experience Leap 15.2.
Wrap-Up
That’s all to Install OpenSUSE Leap 15.2, If you stuck somewhere, please feel free to comment down else you can ask Question in OpenSUSE Official forum.
If you like the article, or somewhere I missed something, please let me know to make this article more amazing.
If you would like to increase your knowledge only keep visiting this site and be updated with the most recent gossip posted here.
This post is worth everyone’s attention. When can I find out more?
in the twinkling
I just want to say thank you for this great forum. I found a solution here on trendoceans.com for my issue.
We are glad to hear.
Good info.
It was possibly the most special time of my past and your content somehow reminded us of that.
Thank You
Thanks for the guide!