SSH, or Secure Shell, is a gem for the Linux administrator to manage the remote system via a Linux terminal. It provides you with access control over the remote machine with or without root privileges.
Logged-in users can easily perform admin tasks such as updating the system or managing system packages. However, when you leave a terminal session on a system update for a certain period of time, the session becomes inactive after the update is complete.
Also Read: How to install OpenSSH server in Ubuntu
Apart from system updates, if you leave the terminal session without an event for a certain time, your terminal session terminates itself and the next time it asks you to re-initiate a new SSH session. It is frustrating that your SSH sessions end too soon while you are preparing to perform the next task on the remote server.
In this article, you will learn how to keep SSH terminal sessions alive as long as possible in a few simple steps.
Prerequisites
- OpenSSH Client: Ensure you have this tool on your client system to establish the remote connection.
- OpenSSH Server: Ensure you have this tool on your remote system to receive the client connection.
How Do I Keep an SSH Terminal Session Alive in Linux?
Before you understand different ways to prevent SSH terminal sessions from disconnecting, you need to understand the workings behind this mechanism and how they get disconnected after a certain time.
When you establish an SSH connection between the client and remote machine, they are active until the connection becomes idle. However, this is a default nature of the SSH to prevent unauthorized access in case the client left the session open for a long period of time.
To resolve this issue, you can make configuration changes either on the client machine located at ~/.ssh/config or on the server machine located at /etc/ssh/sshd_config or /etc/ssh/ssh_config.
Keep SSH Terminal Session Alive from Client Machine
Open your terminal using the Ctrl+Alt+t keyboard shortcut and check the SSH configuration directory present on your system by executing the below command.
$ ls -la  ~/ | grep .ssh
OR
$ ls ~/.ssh/
Below is the output of the above command.

If the directory is present, then it is good; otherwise, create a new configuration directory with the config file using the touch command, as shown below.
$ mkdir -p ~/.ssh/                       # Create SSH configuration directory (.ssh).
$ touch ~/.ssh/config                    # Create config file for SSH client (config).
Below is the output of the above command.

Currently, the SSH configuration file (config) is a public file and can be easily accessed and modified by other users. Use the following command to restrict the config file from direct access by other users using the chmod command.
$ ls -l ~/.ssh/config             # Check the current permission assigned to config file.
$ chmod 600 ~/.ssh/config         # Restrict config access for the group and other users.
$ ls -l ~/.ssh/config             # Re-check the permission is assigned properly.
As shown below, the above command reserves the read and write operations for the config file only for the current user.

Now open the SSH config file using your choice of text editor to add the rules to this file.
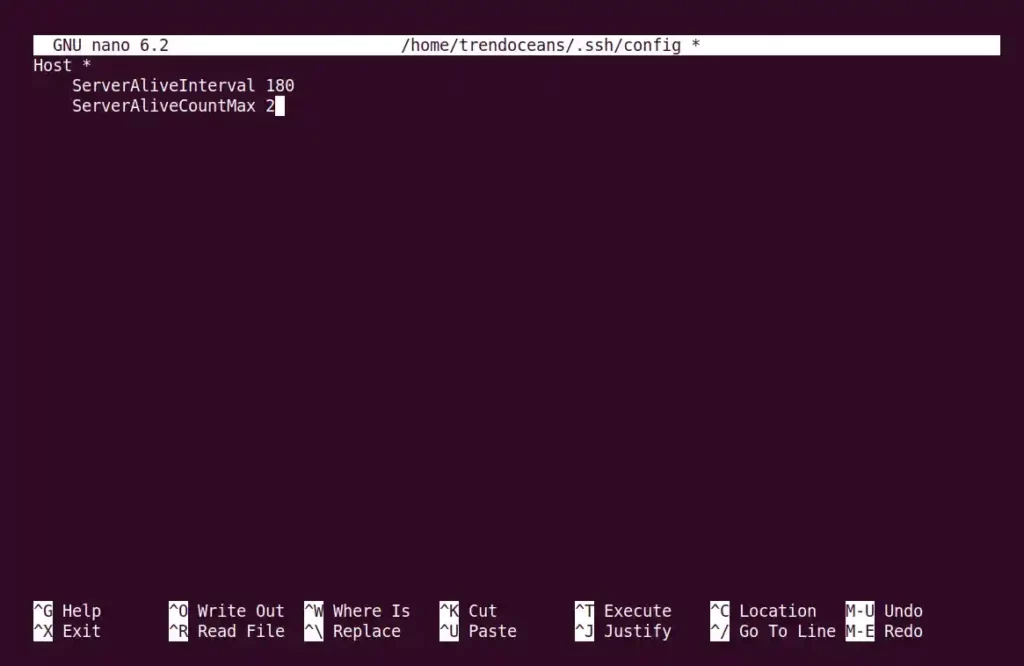
$ nano ~/.ssh/configAdd the following rules to the config file, then save and close.
Host *
    ServerAliveInterval 180
    ServerAliveCountMax 2
Below is the output of the above command.
Whereas;
Host *defines the configuration that is applied to all host.ServerAliveInterval 180It defines the number of seconds to wait before closing the connection in (180) seconds.ServerAliveCountMax 2It will be the number of retries attempted before closing the connection (in this case, it will attempt 2 times before closing).
If you want to specify the rules for the specific host, then modify the host value as shown below.
Host hostname.com
    ServerAliveInterval 180
That’s all you need to do to keep the SSH terminal session alive from your local machine.
Keep SSH Terminal Session Alive from Server Machine
If you are operating the SSH daemon from the remote machine, then you might prefer to extend the session timeout from the remote machine for the client connection.
To achieve this, open and edit your /etc/ssh/sshd_config or /etc/ssh/ssh_config configuration file depending upon the distribution type.
$ sudo nano /etc/ssh/sshd_configAdd the following rules to the configuration file, then save and close.
ClientAliveInterval 180
ClientAliveCountMax 2
Below is the output of the above command.
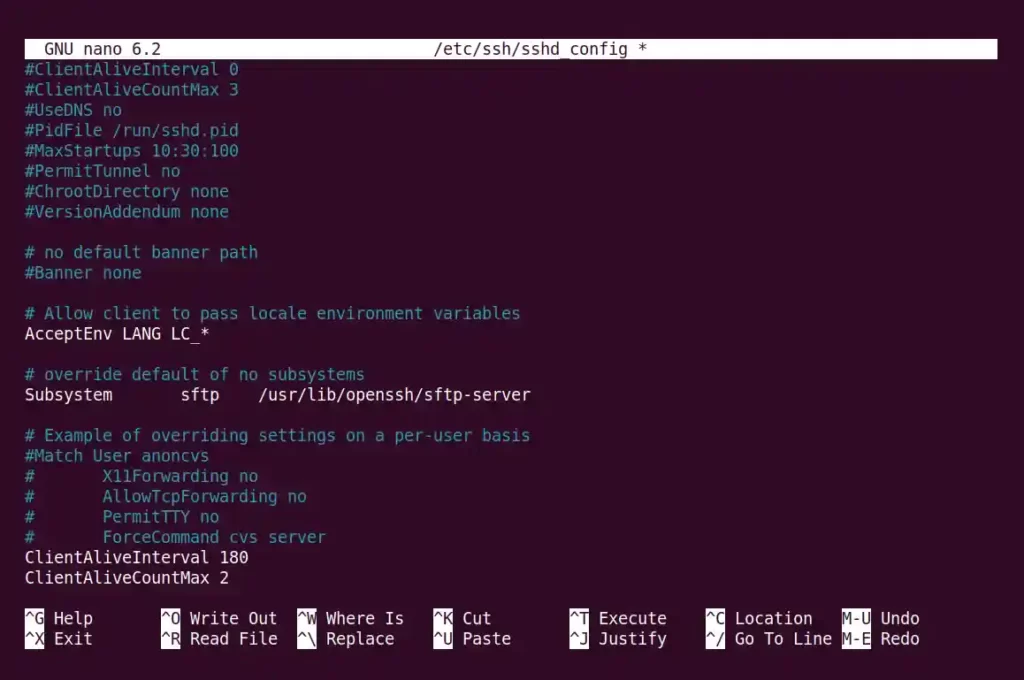
It will send a packet to the server every 180 seconds (3 minutes), and it will try two times before it closes the connection after getting no response from the client.
Lastly, restart your server’s SSH daemon to apply the changes using the following command.
$ sudo systemctl restart sshBonus Tip! Quickly Prevent the Server from Closing the Session
There is an easier way to prevent the server from closing the session for a defined number of seconds in the parameter. You can easily define the ServerAliveInterval parameter with the ssh command and specify the number of seconds to wait before closing.
$ ssh -o ServerAliveInterval=60 [USER]@[HOSTNAME]Below is the output of the above command.

It will send a packet to the server every 60 seconds to keep the server session alive by running the above command. However, you have to specify this parameter every time you make a connection to the remote server.
Also Read: SSHFS Command to Mount Remote File Systems Over SSH
It would be way better if you followed either of the above two methods to permanently keep the SSH terminal session alive until the rules are manually removed from the configuration file.
Wrap Up
Now you can freely access an SSH server without a session timeout. I hope you liked this article. Feel free to share your thoughts in the comment section.