Tired of losing content from the clipboard? If yes, then you should use Pano Clipboard Manager.
If you are the type of person who opens a text editor and pastes clipboard contents over and over again, then you should stop doing that.
Because today I’m bringing up a new tool that will make your life easier with the Pano Clipboard Manager tool, which will save your time without having to constantly switch between applications and copy-paste repeatedly, allowing you to focus on your work and increase productivity.
So let’s see what is Pano and how you can install and use it in your system for day-to-day tasks.
What is Pano?
Pano Clipboard Manager is a powerful tool that allows you to save and manage all your copied content, including text, images, and links, in one place for easy access, so you can always get what you have copied to your system clipboard.
Not only that, but you will be notified if you place the following items in the clipboard for a cut/copy operation: link, image, color, emoji, text, code, and file.
Interestingly, all can be accessed through a number of keybindings that are available out of the box, so you just need to know the keybinding for the action you want to perform, and you can quickly retrieve any previously copied content without worrying about losing anything important.
To understand what you can do with Pano, let me list out some of its features for you.
Features
- Navigation can be performed with a number of keybindings
- Auto-ware of types of contents like the copied item are image, link, text, code, colour, emoji, and file
- The content will be copied if you highlight the text
- Highly customizable
- Filter items on the basis of type of content
- Add exclusions for applications like password managers like KeepassXC, Bitwarden, etc
- And many other interesting features you will find once you start using it
Installation
After reading the features, I can’t say much about you, but I’m impressed with the capabilities of Pano, so let’s see how you can install Pano on Ubuntu 22.04 or any other latest GNOME based distribution.
To install Pano, you can use the GNOME Extension, which will install it automatically. Alternatively, you can download the Pano package from the official website and install it manually using the terminal.
So before moving ahead, let’s fulfil the required dependencies as per your distribution’s package manager to ensure a smooth installation process.
$ sudo apt install gir1.2-gda-5.0 gir1.2-gsound-1.0
$ sudo dnf install libgda libgda-sqlite
$ sudo pacman -S libgda
$ sudo zypper install libgda-6_0-sqlite typelib-1_0-Gda-6_0 typelib-1_0-GSound-1_0
Once it is done, you need to click on the below button, which will redirect you to the GNOME Extension webpage, and from there, you need to click on “switch” to install Pano.
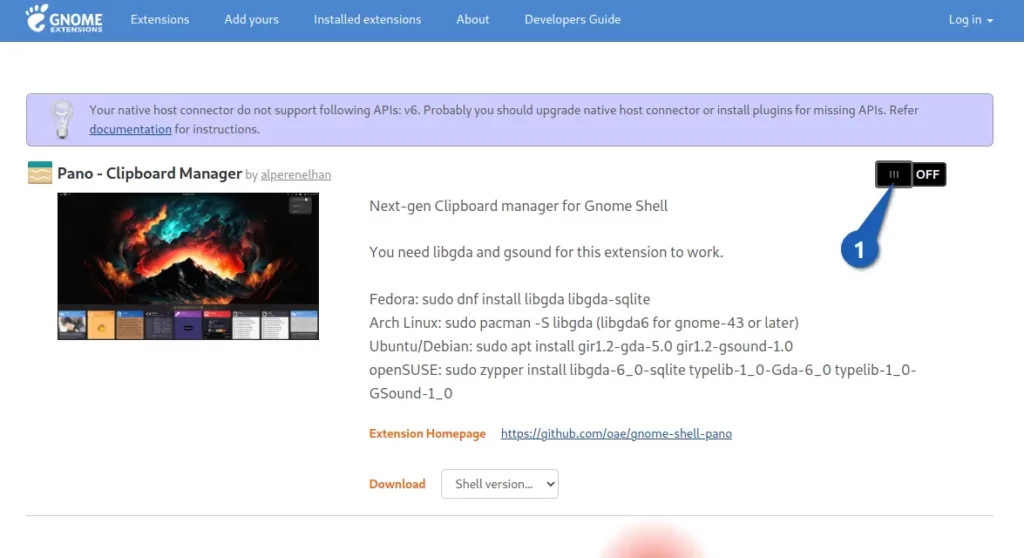
After that, it will prompt you to install, so simply click on “Install” and wait for the installation to complete.
And if you are not getting the “off” button like shown above, then you need to install GNOME Shell integration, which can be done by following steps from the official guide.
Once you have completed the above step, then move on to the interesting part where I’ll show you how to use Pano Clipboard Manager to save content to the clipboard for later use.
Get Started with Pano
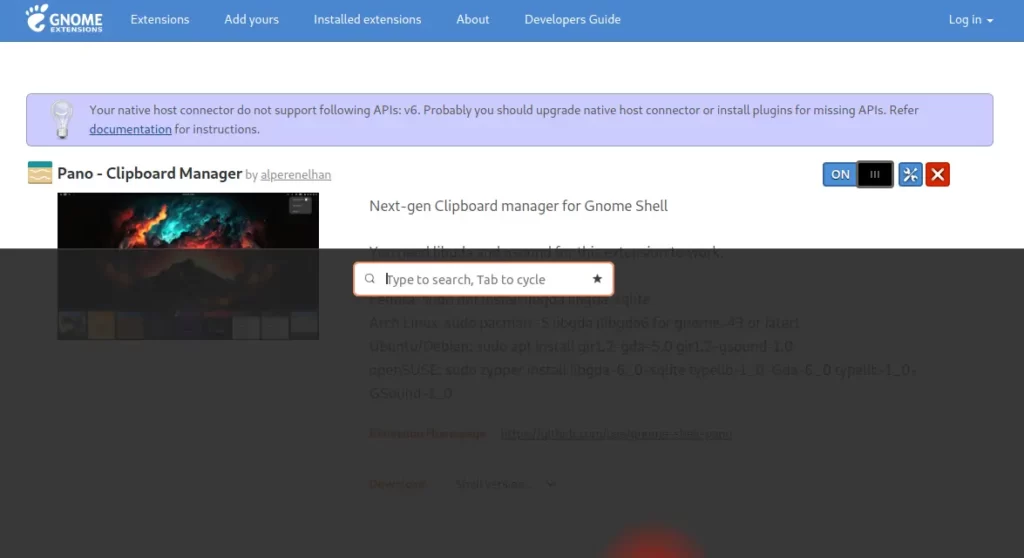
Have you noticed some icons that have appeared on the top panel? If yes, then Pano is ready to use, so just invoke Shift + Super + V to pop out the screen, where you will find the content that was earlier there in your system clipboard.
There is nothing here to show you; let me populate here with some text, an image, an emoji, and a link.
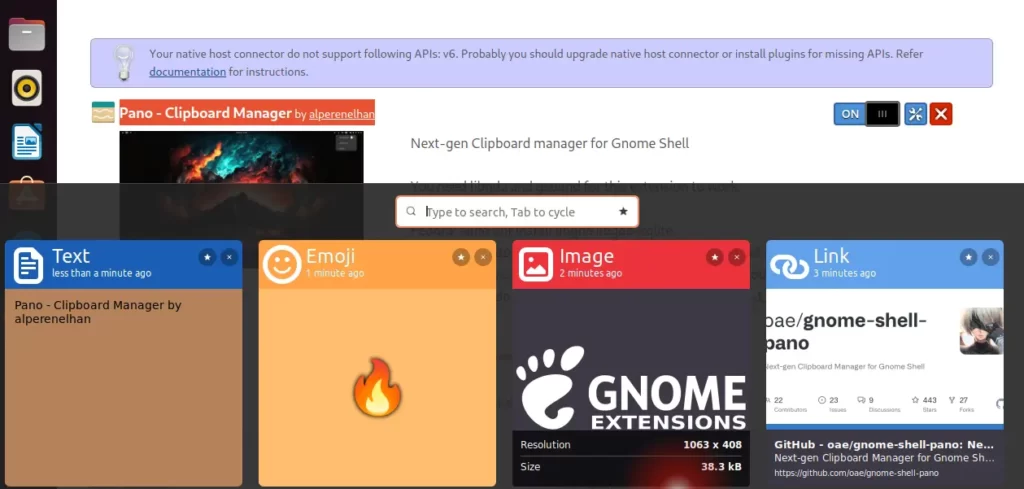
You can see how beautifully the application was identified and displayed to you, as well as how the link appeared in preview mode.
Navigations
To navigate, you can use the mouse or arrow keys to move back and forth, and use the icon to remove or add items to the favourites list, but you can do more with the following keybindings or shortcuts:
- Shift + Super + v: To toggle “off” and “on” Pano
- Ctrl + Super + Shift + v: To start Pano incognito mode, so it will not hold any clipboard content
- < : Right arrow key to switch to highlight right side of content
- > : Left arrow key to switch to highlight left side of content
- enter: Copy the highlighted content to clipboard
- delete: It will remove the focused content from the list
- tab: Filter content to show only image, text, code, etc
- alt + s: Mark item as favourite and unfavourite
- ctrl + click : On hyperlinked items, a link will open in your default browser
Customization Options
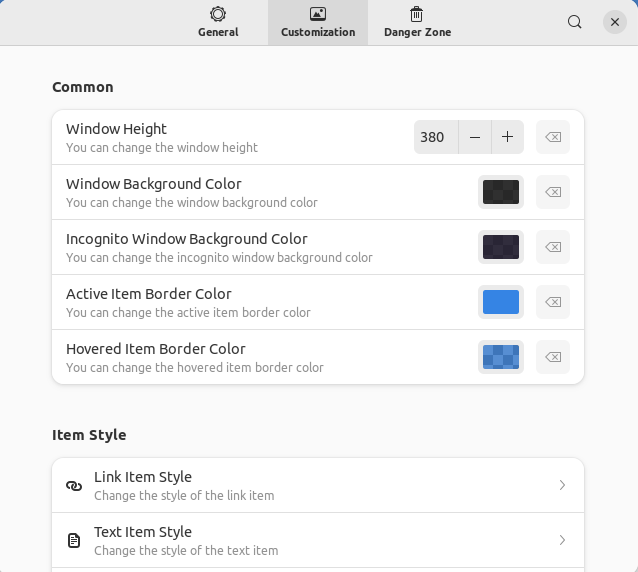
There are many things you can customize in Pano like database location, no of item should stored, enable or disable notification, and set different colors block for text, code, image, emoji, as well as the Pano background.
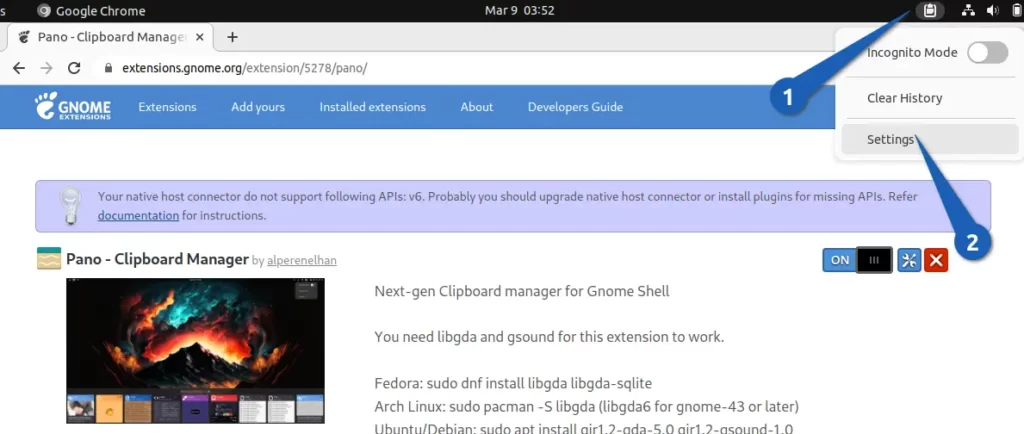
For this, you need to get into the settings of Pano, which you can access by following the below image.
Once you get into the settings menu, you will find the three tabs “General”, “Customization”, and “Danger Zone”.
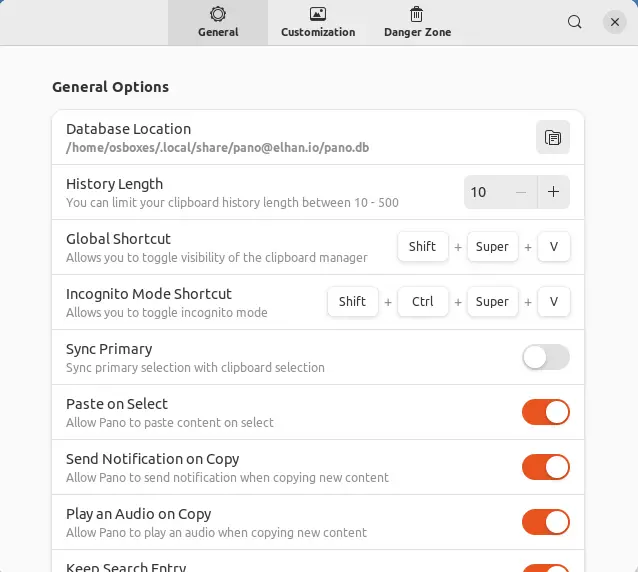
History Length
By default, Pano will hold only 10 items at a time. If you want to increase the capacity of holding clipboard items, then under the “General” tab, look for “History Length” and change the default value as per your requirements.
App Exclude
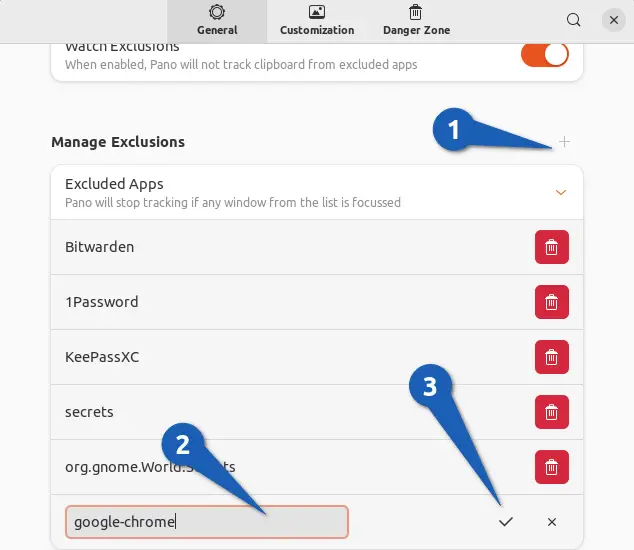
Of course, no one wants a clipboard manager to save passwords, especially when you extract passwords from KeePassXC, Bitwarden, or any other password manager tool.
Therefore, by default, the Pano will not work with Bitwarden, 1Password, KeePassXC, and secrets.
If you want to add any other app to the exclusion list, then under the “General tab,” look for “Manage Exclusions,” click on the plus (+) icon, and add the command that invokes the application as shown below.
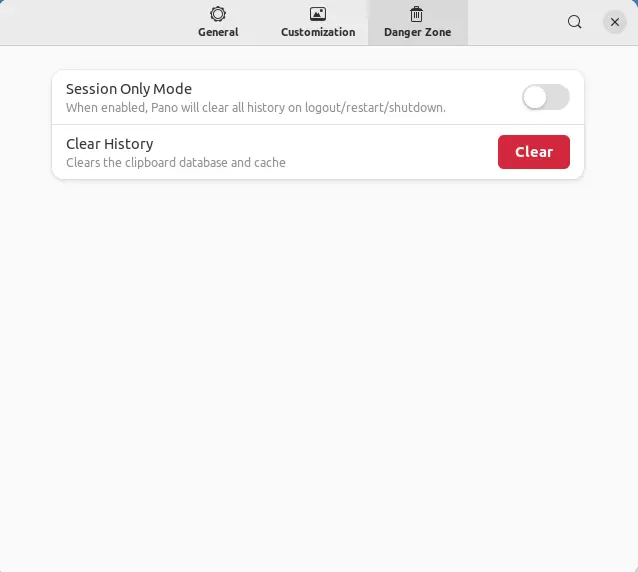
Clear History
If you want to clear all the items that are stored in the database, then you need to navigate to “Danger Zone,”, where you will find the option to clear the database and cache, which will ultimately delete all the content that is stored in Pano.
And if you want all records wiped out once you log out, restart, or shut down your PC, then enable “Session Only Mode”.
Wrap up
That’s all for this article. If you want to get more information about this application, then you should install and use it. Anyway, I have left the “customization” option for you because it’s all your choice, like how you want your Pano to look.
If you like the project, make sure to star it on Github.