It is very frustrating when you see this ERROR 2002 (HY000): Can’t connect to local MySQL server through socket on your terminal when you try to open MySQL.
This error message “2002 (HY000): Can’t connect to local MySQL server through socket” usually appears. When MySQL isn’t running because the configuration file is corrupt, or if an old configuration file conflicts with the new installation.
It can also happen if the socket file is missing, or if you don’t have the right permissions.
So let’s find out the solution to the “ERROR: 2002 (HY000): Can’t connect to a local MySQL server through a socket” in your Linux machine.
Fix Error Can’t connect to the local MySQL server through the socket
I’ll go over each method for resolving the ERROR: 2002 message on your Linux computer, such as checking the service status, resolving an installation issue, and creating a missing socket file.
Install MySQL server
If you have just installed the mysql-client package, then you won’t be able to connect to a MySQL server unless you also install the mysql-server package.
To fix the error, you can use the following command to install mysql-server on your Ubuntu system:
$ sudo apt update
$ sudo apt install mysql-server
Once you have installed the MySQL server, run a couple of more commands to start and make the MySQL service automatically start at boot time.
$ sudo systemctl start mysql.service
$ sudo systemctl enable mysql.service
After performing the above step, you can now access MySQL by running sudo mysql -u root.
Check MySQL Service Status
One of the common reasons for this error is when the MySQL service is not running or has stopped unexpectedly. And because of this, you may not be able to connect to the MySQL server and access your database.
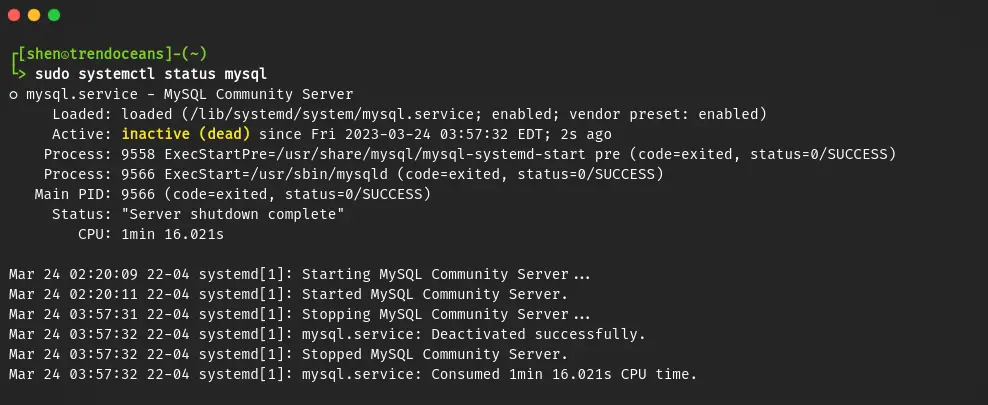
To resolve this error, first run the following command to check the status of MySQL:
$ sudo systemctl status mysql.serviceAs you can see, MySQL is in an inactive state, and due to that, I’m receiving the error.
If the status is inactive in your case too, then you need to restart the MySQL daemon and enable the MySQL service to auto start at boot time using the commands
$ sudo systemctl restart mysql.service
$ sudo systemctl enable mysql.service
Next, verify the status.
$ sudo systemctl status mysql.serviceIf there is no problem, the service will be in “active” mode, and you should be able to access your MySQL databases and perform necessary operations without any further issue.”
MySQL Socket file missing or corrupted
Sometimes the mysqld.sock file becomes corrupted for unknown reasons, and when this happens, you will see the “Can’t connect to local MySQL server through socket ‘/var/run/mysqld/mysqld.sock'” error on your screen.
To fix this issue, you can remove the socket file and restart the MySQL service, which will create a new mysqld.sock file automatically.
$ sudo rm -f /var/run/mysqld/mysqld.sockHowever if the above message throw file not found, then please check the path of mysqld.sock in MySQL configuartion file which is usally located /etc/mysql/my.cnf or etc/mysql/mysql.conf.d/mysqld.cnf, and use the specified path with the above rm command
Then, after removing the file, you need to restart mysql.service.
$ sudo systemctl restart mysql.serviceShortly after that, you can run the mysql command to access the MySQL server.
Clean up and reinstall MySQL-Server
Still issue persist? Then the only option you have is to delete MySQL and the associated file that was installed along with the configuration file at the time of installation.
We’ve written a separate article about this topic, so I’ll ask you to read this article for detailed instructions on how to properly uninstall MySQL from your system and make sure that all related files are removed completely.
Wrap up
These are the few steps that you can use to solve “ERROR 2002 (HY000) Can’t connect to local MySQL server through socket”.
Also Read: How to Reset MySQL Root Password in Ubuntu and Fix Error 1045 (28000)
Please leave a comment if this article helped you resolve this problem.