If you’re looking for a terminal-based BitTorrent client that should do all your work with the essence of a GUI, then Stig BitTorrent Client is for you.
Stig is a Python-based tool that, under the hood, uses the Transmission Client for handling downloads and offers an intuitive user interface for torrent management, both through a TUI (Terminal User Interface) as well as a CLI (Command Line Interface).
Without a doubt, transmission cli is the best tool when you are not able to use GUI tools for any reason or else you don’t like to use GUI tools because of the beauty of performing the same task with just a few keystrokes.
With Stig, you can quickly access and control the popular Transmission BitTorrent client via a command-line interface or TUI (text user interface), which is much easier to use than the command line because you can run commands and navigate the program using Emacs/Vim keybindings.
So let’s see some of the features of the Stig BitTorrent TUI/CLI-based client.
Features of Stig command
- Colour theme supports 16 bits and 256 colours
- Filters can be used to list out torrents on the basis of start, stop, delete, etc.
- Multiple tab options to get information about torrents, peers, and files
- Emacs/Vim keybinding support for easy navigation
- Accept CLI arguments, and if you’re not sure how to use a particular option, you can use --help to learn more
- Customize settings like host, update, list of tabs, and all for your custom needs using the rc file, which is similar to the ~/.vimrc file
And many more features will be revealed once you start using it.
Installation of the Stig TUI/CLI Client
Once you are aware of the features of the Stig TUI/CLI Client, let’s look at how to install Stig on your computer and use it to manage torrents.
But for this, you first need to download transmission-daemon, transmission-cli, and transmission-common tools, which you can get by executing the following command on your terminal window:
$ sudo apt install transmission-daemon transmission-cli transmission-commonAfter performing the above step, you can now install Stig.
If your system is running on Ubuntu or any other Debian-based distribution, then you won’t find Stig in your repository, so you can simply use the Python PIP or PIPX repository to install Stig.
$ pipx install stig         # Install in isolated environment
OR
$ pip3 install stig         # Installs in /usr/local/
$ pip3 install --user stig  # Installs in $HOME/.local/
But if you’re using any Arch based distribution, NixOS, and Alpine Linux, then you can get it simply from the official system repository by executing the following commands:
Arch Linux
$ sudo pacman -S stig-git
OR
$ sudo pacman -S stig
NixOS
$ nix-shell -p stig
OR
$ nix-env -iA nixos.stig
Alpine Linux
$ sudo apk add stigOnce the installation is done, you can start using Stig, but as a first time user, you need to make some changes to /etc/transmission-daemon/settings.json, which you will see in the next section.
A Few Basic Modifications Before Launching Stig
It is essential to make some modifications to the /etc/transmission-daemon/settings.json file, which is the configuration file for underhood transmission, and if you don’t make the changes here, you will end up with the connection failed or authentication failed error.
So to make changes, bring up your terminal screen and execute the below command into:
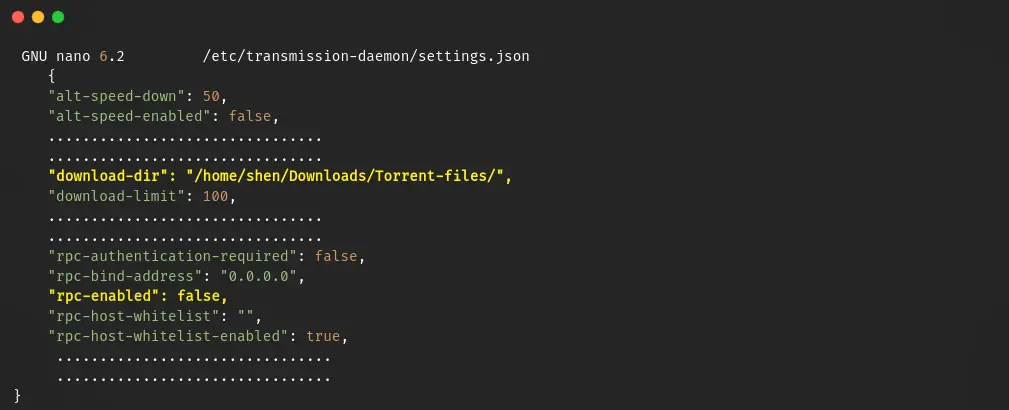
$ sudo nano /etc/transmission-daemon/settings.json After executing the above command, scroll down and look for the “rpc-authentication” option, which is enabled by default, but for the sake of this guide, I’ll disable the security mechanism (rpc-authentication-required=false) to make the process simple and easy to follow, but if you want to use it, then you can keep this option as it is.
Then, I’ll change the default download (download-dir=/download/location/) option because it always saves the file to the /var/lib/debian-transmission location instead of some local file like “/home/shen/Downloads/Torrent-files/”.
Once you make these changes, please save and exit the file, and then reload the transmission daemon service by executing the following command:
$ sudo systemctl reload transmission-daemon.serviceThe next step is to change the file permissions.
Otherwise, Stig won’t be able to save files to the new location. To avoid the permission denied error, run the following commands, which will change the file permissions.
$ sudo systemctl stop transmission-daemon
$ sudo usermod -aG shen debian-transmission
$ sudo chmod 775 -R /home/shen/Downloads/Torrent-files/
$ sudo chown -R debian-transmission:shen /home/shen/Downloads/Torrent-files/
$ sudo systemctl restart transmission-daemon
Make sure to replace [shen] with your username and mention the correct path where you want to save the files.
After making these changes, you can now use the Stig BitTorrent client on your terminal to download torrent content from the internet with a very simple interface.
Get Started with Stig
You can use Stig in two different ways, one using a command-line interface and the other using a text user interface, so there is no limitation on how you want to get started with Stig.
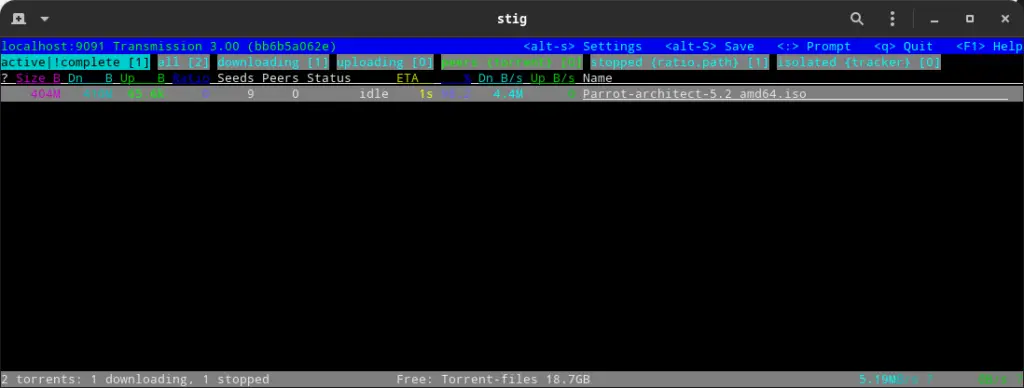
To launch Stig in TUI, you can simply execute “stig" on your terminal window, which will bring up the screen as shown below.
stigAs you can see, the output includes active, all (downloading, uploading, peers), stopped, and isolated tabs, which you can switch between using the arrow keys or the inbuilt keybinding options.
Keybinding
There are a number of keybindings available for you to use, which you can access using the fn + f1 + k keys, which will list all the keybindings you can use to interact with the Stig.
The following are some of the default keybindings for navigation:
| Vim Keybindings | Emacs Keybindings |
| j: down | Ctrl-n: down |
| k: up | Ctrl-p: up |
| h: left | Ctrl-b: left |
| I: right | Ctrl-f: right |
| G: end | g: home |
Stig Commands
Now you will learn how you can enhance your experience with the inbuilt command options and their aliases, which we will use to help you manage your torrents like a pro.
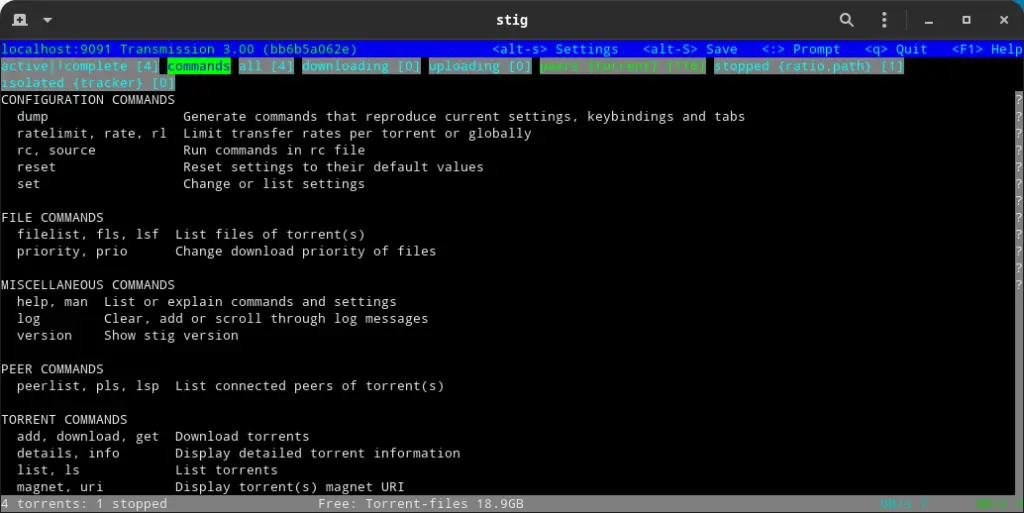
To print out the command options for the Stig BitTorrent client, simply invoke the fn + f1 + c keys in exact combination to list out all the commands available, along with their aliases and a short description of what each command does.
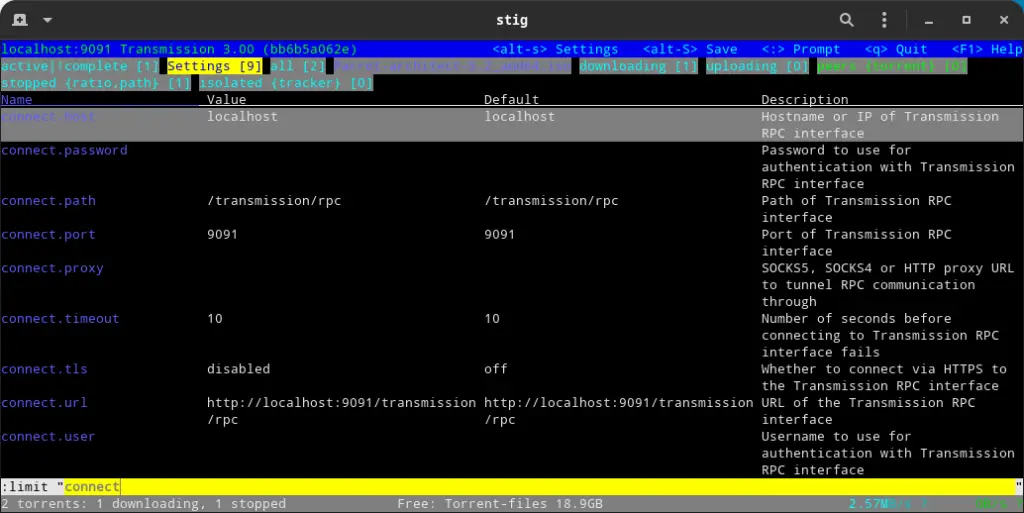
Acess Setting
Most of the Stig command settings can be changed from this page, so you don’t have to edit the /etc/transmission-daemon/settings.json file by hand. To find out what options are available for you to use, press alt + s, which will open the settings as shown below.
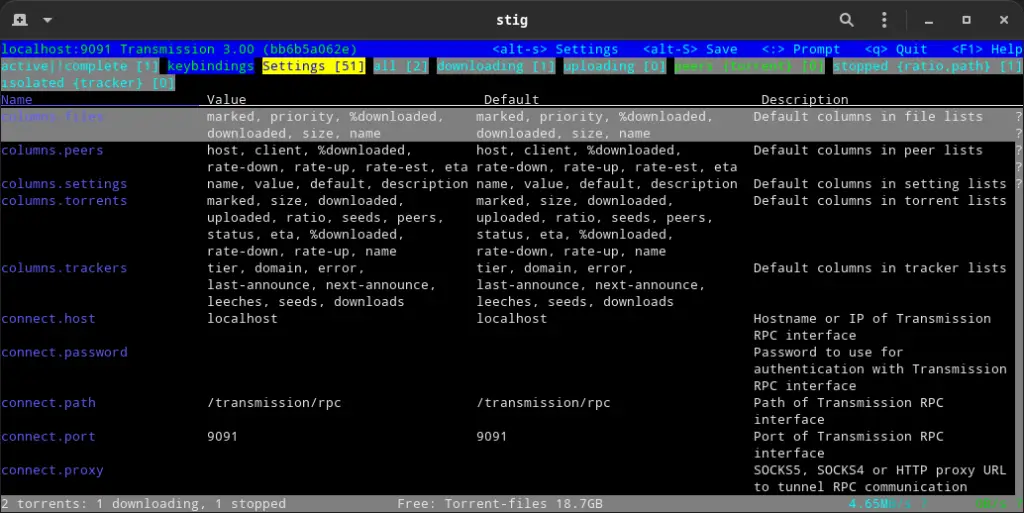
You can use “/” (a forward slash) to filter the setting keyword option. This will bring up the prompt where you can enter the name of the setting to show only those settings that are relevant.
Download files
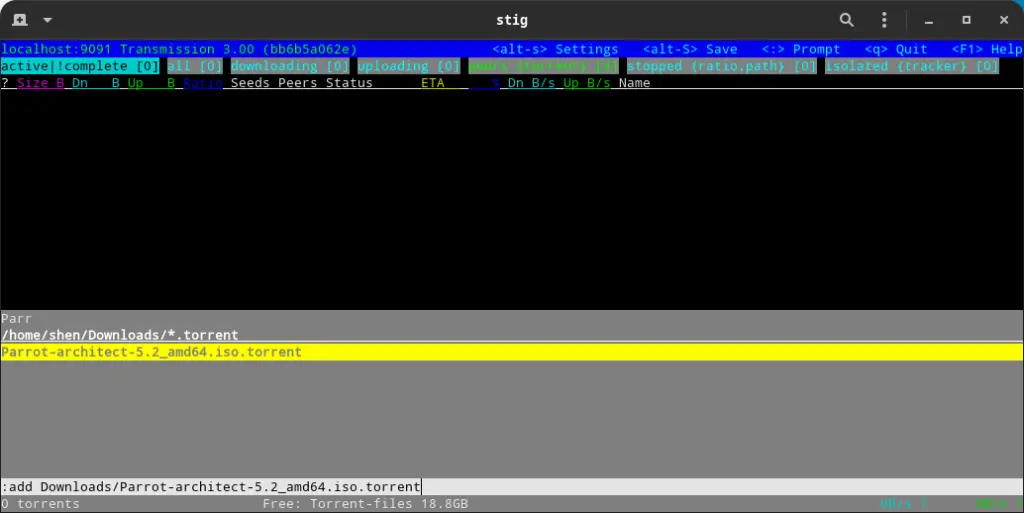
Now let’s come to the interesting part, where I’ll show you how to download any torrent file using the Stig CLI/TUI add command.
For example, if you have a torrent file link, you can directly open your terminal window and execute the following command, replacing the URL with the correct torrent file link, which will add the file to your download list.
$ stig add https://torrent.fedoraproject.org/torrents/Fedora-Astronomy_KDE-Live-x86_64-37.torrentAlternatively, if you have already downloaded the torrent file, you can use the stig add command to specify the path of the downloaded .torrent file extension, as shown below.
$ stig add Downloads/Parrot-architect-5.2_amd64.iso.torrentOr else, if you are using the Stig text user interface, then you need to press “:“ which will open the prompt where you can specify the link or the path of the .torrent file to initiate the download.
Remove files
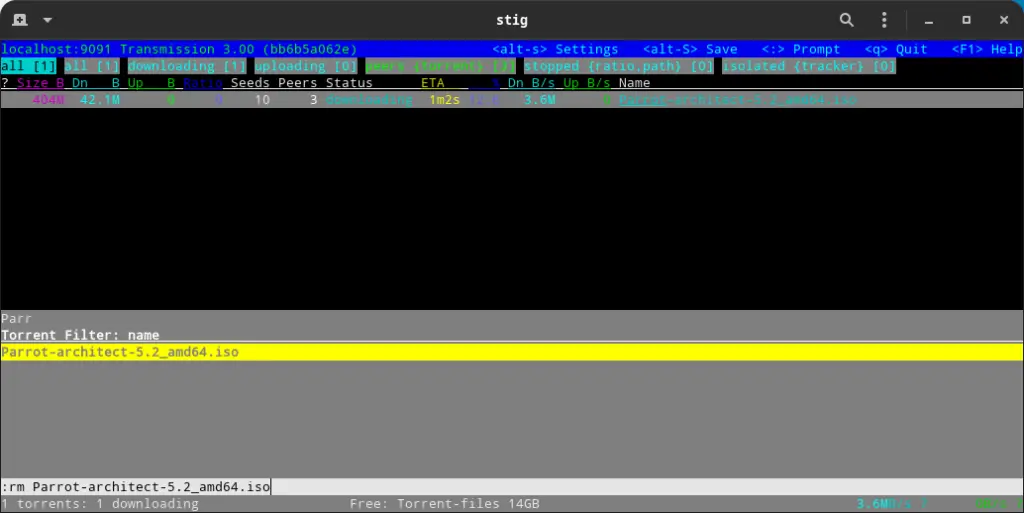
To remove files, you can use the rm command option on the command line/TUI interface by specifying the torrent file name or with other available filters to delete files dynamically.
For example, if I want to remove a file, I can use the following command, which will list all the torrent files. After that, I can use the file name to delete the file, as shown below.
$ stig ls
$ stig rm Parrot-architect-5.2_amd64.iso
If you want to remove a file from Stig TUI, simply select the file and use the rm command from the prompt to delete the file, or you can specify the file name as shown below.
If you want to come out of the TUI interface, press q or use the quit command from the prompt.
Wrap up
There’s more to show you, but I’ll stop here and let you explore for yourself.
During exploration, if you don’t know how to use the specific option, you can use the --help option with the command to get a brief description of what the command does and how it should be used.
If you have any questions or comments, please feel free to leave them in the comments section below. Until then, put your feet up and relax. As always, the next article will be up shortly.