Do you feel it’s quite confusing and not getting when to use apt clean, apt autoclean, and apt autoremove? then let’s come and clear it up.
While running commands like apt clean, apt autoclean, and apt autoremove, you may find it confusing to understand when and why to use each of them.
Yes, I find it confusing because it sounds similar and they all involve cleaning up packages, but what each one does I’m not getting.
I agree with your point, but there are distinct differences between them that can help you determine which one to use in different situations.
So, let’s learn this thing and navigate away from the fog of confusion!
Difference Between apt clean, apt autoclean, and apt autoremove
Here, I will explain the nuance of apt clean, apt autoclean, and apt autoremove with a small example so you can better understand when to use those commands.
But before that, get the essence of the following command:
📝 Quick Note
📦 apt clean
The apt clean command is useful for removing file contents from the local package cache directory (/var/cache/apt/archives) and not only this, but it is also very useful for removing packages that were interrupted during installation or upgrade.
📦 apt autoclean
It is also similar to apt clean the only difference that it only removes the obsolete version of the cache file, which is no longer available in the repository due to a higher version of the application being available.
📦 apt autoremove
When you run apt autoremove, it will remove all the dependencies that have been installed during the installation of packages but are no longer needed by any other installed packages.
Learn More About apt clean
When you run the apt clean command, it removes the packages that are stored in /var/cache/apt/archives and frees up disk space on your system.
But don’t worry; it won’t remove the package that has been installed.
Instead, it just removes the package that is lying in /var/cache/apt/archives that has been downloaded while installing the application or when the system is under update.
However, dselect(1) is no longer used in Ubuntu on modern systems, due to which, once the installation is complete, all files that are downloaded and stored in /var/cache/apt/archives will be automatically deleted.
Except if the installation is interrupted, then you will find the package in the respective directory, as well as the package that was downloading and stopped in between, which will be found in /var/cache/apt/archives/partial.
Enough talk. Let me show you an example of what will happen after and before executing the sudo apt clean command.
But before that, take a look at my system’s /var/cache/apt/archives/ directory using the tree command.

Now, on a new tab, I’ll try installing Wireshark, which is a very popular tool for sniffing and monitoring network traffic.
As you can see in the below output, Wireshark requires a large number of dependencies to work, so once I type ‘y, it will all get downloaded and stored in /var/cache/apt/archives.
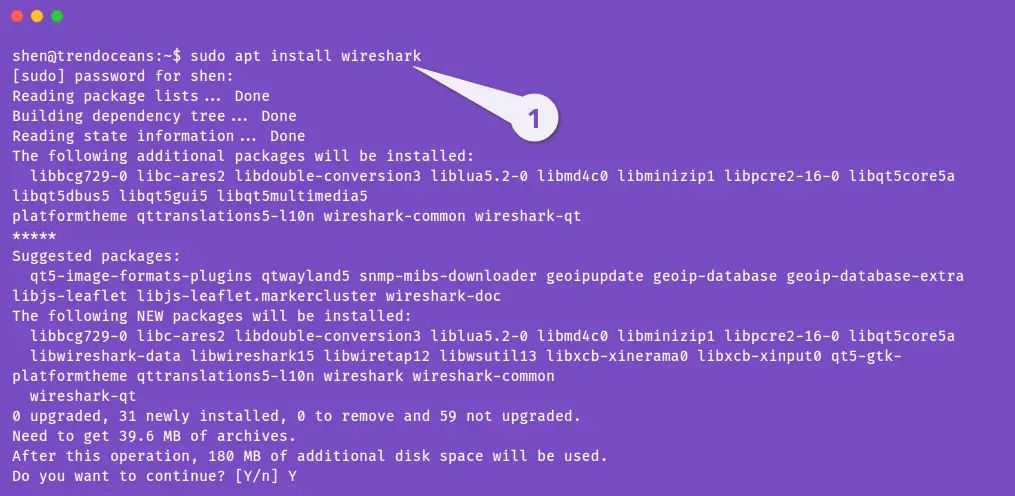
While the installation is happening, let me switch my terminal tab to the previous tab and show you what files have been downloaded so far
Almost all the files have been downloaded to the system, and if I don’t do anything, it will install all the downloaded .deb files and be automatically deleted.
But I’ll interrupt the installation process to show you how to use apt clean.
So, now I will stop the installation!
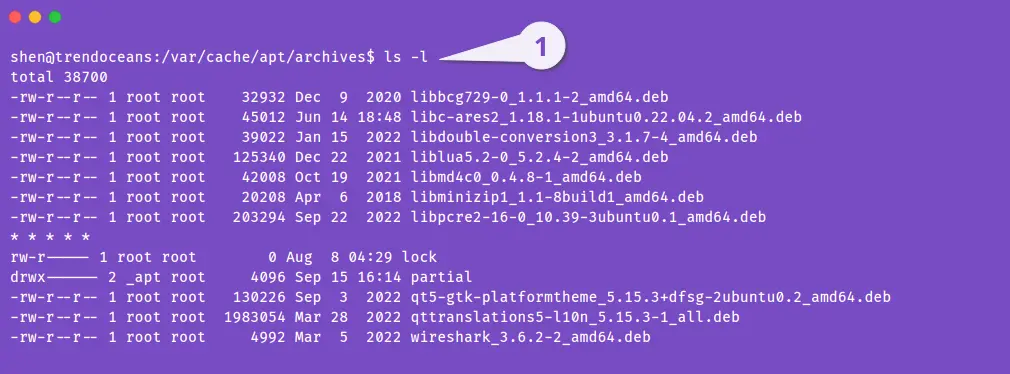
See, once you have stopped the installation process, all the files will be there even if you restart your system.
To see what files are in /var/cache/apt/archives, you can run the below command:
$ ls -l /var/cache/apt/archivesIn my case, 32.deb binary files are stored.
If I don’t do anything, this file will be kept until and unless I try to install the same command or the same dependency required in a different program.
But if you just abandon the installation and the library is also not used by other programs, then it is just taking up space on your SSD/HDD drive.
So to remove or clean this file, you can use the apt clean command, which will automatically remove all files and maintain the integrity of the package manager.
Do not try to remove this file using the rm command, which will corrupt the package manager.
This command is not only useful to free some space, but it also helps you resolve installation failures due to dependency conflicts.
After reading this, I don’t think you will have doubts about apt clean, isn’t it?
Learn about autoclean
Above, we have explained what the use of apt clean is and when to use it. Now it’s time to get familiar with the usage of apt autoclean.
In short, apt autoclean is similar to apt clean, which is used to clean the local package cache.
Just a difference is that apt autoclean primarily focuses on removing the obsolete package, and apt clean removes the local package that is stored in /var/cache/apt/archives.
For instance, if a newer version of a xyz application is available in the repository and an older version of the same xyz package is still stored in the local cache directory, running the apt autoclean command will remove the older application files of the xyz application, not to other stored application files.
As of now, with the reduced use of dselect (the Debian package management frontend), the apt autoclean command may not be as essential as it once was.
This is because packages are typically not retained in the local cache directory (/var/cache/apt/archives) unless explicitly configured to do so.
In this world, for any reason, if you want to retain the package in the local cache, you can add this line to /etc/apt/apt.conf.d/20DisableAutoClean.
APT::Clean-Installed "off";Learn about apt autoremove
When you install any application, it usually requires dependencies, which are additional files or packages that the application needs to function properly.
But when you remove the application dependencies, they don’t get rid of themselves.
So to remove the dependencies, you need to use sudo apt autoremove, which will remove all the dependencies that are no longer required.
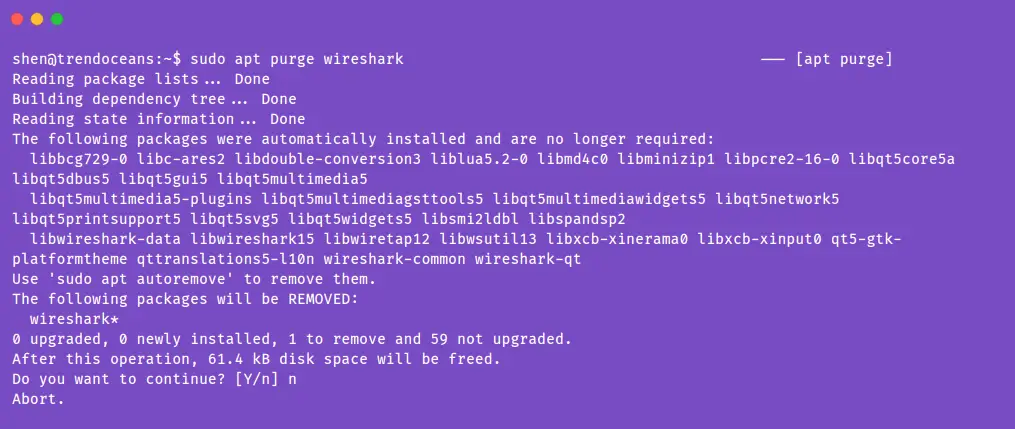
For instance, if I want to uninstall wireshark from my system, I’ll basically run the sudo apt remove wireshark or sudo apt purge wireshark commands.
I think you guys all also removed the application this way, right? If not, I’m curious to know your favored approach for removing software.
Now, if you look at the below output, apt remove is just removing a limited bunch of dependencies that were installed with Wireshark, and the rest are left to your system.
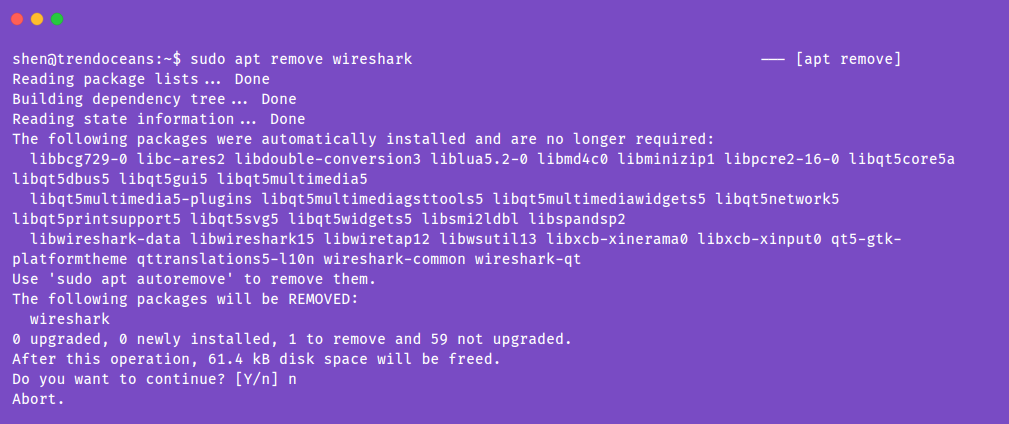
So, now the question arises that how can you remove the left-over dependency? Once you uninstall or remove the application, don’t forget to run sudo apt autoremove.
This will remove all dependencies that are no longer required.
Or else, there is an alternative, better way to remove the dependencies and program altogether using the --autoremove flag, as shown below.
$ sudo apt purge --auto-remove wiresharkIf you are planning to reinstall the application and want configuration & dependencies, then do not run the above command.
It seems we are done with the apt autoremove or apt-get autoremove command usage.
Wrap up
That’s all for this article, where I try to explain to you what the difference is between apt clean, apt autoclean, and apt autoremove.
Now I’m sure you will be able to easily choose commands according to circumstance.
Also read: Know how to use Apt or Apt-Get Command to Install a Specific Version of a Package on Ubuntu
If you find something I missed or need to include, then do let me know in the comment section. I’ll be glad to improvise it.
With this message, let’s conclude for now. See you soon in the next article!
Great explanation for a Linux noob like me. Thank you!