Still using Ubuntu 18.04 Beaver Bionic? Then don’t forget to enable Ubuntu Pro and activate the Extended Security Maintenance (ESM) for enhanced security to keep your system and its data safe from malicious attacks.
Raise your hand if you are still using Ubuntu 18.04 LTS. Of course, I can’t see you, but if you have raised your hand, then you should know that Ubuntu 18.04 LTS (Bionic Beaver) will reach its end of life in April 2023 and will no longer be supported for security updates.
Yeah! We know that and we are planning to migrate, but some users are still hesitant to switch due to the potential difficulties and uncertainties that a migration may bring.
However, the good news is that it’s not difficult to switch from Ubuntu 18.04 to Ubuntu 20.04 LTS (Focal Fossa), but if you still don’t want to upgrade for any reason, then you can stay with Ubuntu 18.04 by opting for Extended Security Maintenance (ESM).
What is ESM? How do I opt in? Do I have to pay for it, or is it free? What kind of service will I receive? And how long will it be applicable? Many questions may arise in your mind, so answer all of them; we are here to discuss them with you.
That’s a reason I’m here with you, where we will discuss all the details regarding the service, so just relax and let me help you out.
What is Ubuntu Pro and ESM?
Ubuntu Pro is actually a paid service, but free (five) personal tokens can be used that give you access to long-term support and security updates for Ubuntu Systems.
While ESM (Extended Security Maintenance) is an add-on to Ubuntu Pro that provides users with access to the latest kernel and application security updates for up to five years and provides access to security patches for common vulnerabilities and exposures (CVEs) and security updates for 2,300 packages in the main repository and 23,000 packages in the universe repository.
This means that with Ubuntu Pro and ESM, users are able to keep their systems secure for a much longer period of time than would be possible with a regular Ubuntu release.
For pricing, you can check here.
How to Enable ESM on Ubuntu 18.04
To enable ESM on any Ubuntu LTS release, you just need to get a few things ready, like an Ubuntu One account and an access token.
Step 1: Create account and get token
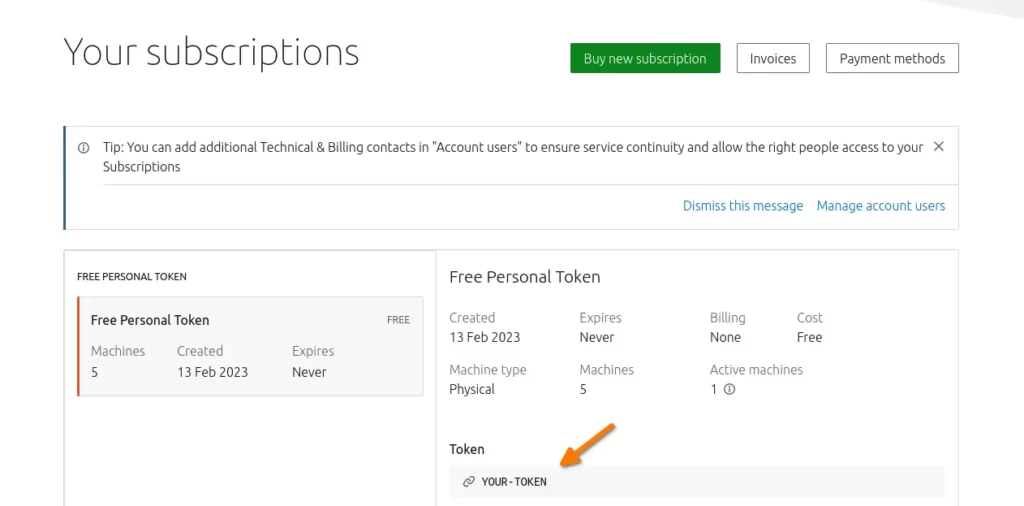
If you don’t have an Ubuntu One account, then please create one by following this link, and after that, click here to redirect to the Ubuntu Pro dashboard to get the required token.
Once you’re redirected to the Ubuntu Pro dashboard, you’ll find the token there, which is required to attach the machine to Ubuntu Pro as shown below.
Step 2: Ready machine
After you have your token, you need to prepare your machine to be connected with Ubuntu Pro. For that, first you need to install ubuntu-advantage-tools, which lets Ubuntu Pro users manage their Ubuntu Pro subscriptions.
Open your terminal window and type the following command to install the Ubuntu Advantage Tools:
$ sudo apt update && sudo apt upgrade
$ sudo apt install ubuntu-advantage-tools
After that, you can execute the below command to check the presence of the pro command. If it prints the version, you’re good to go.
$ pro --versionStep 3: Attach machine to Ubuntu Pro
The last step is to use a token to activate ESM on a particular machine, but before that, you should check the current status of your machine by executing the following command:
$ pro security-statusThe output of the above command is shown below:
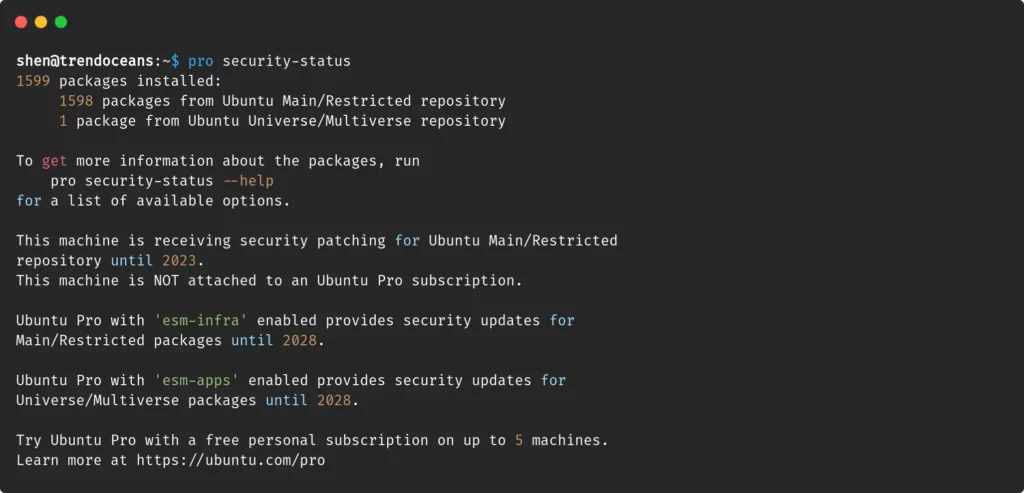
As you can see, my machine is not attached to an Ubuntu Pro subscription, and in order to attach it, I need to run the following command, replacing the right token.
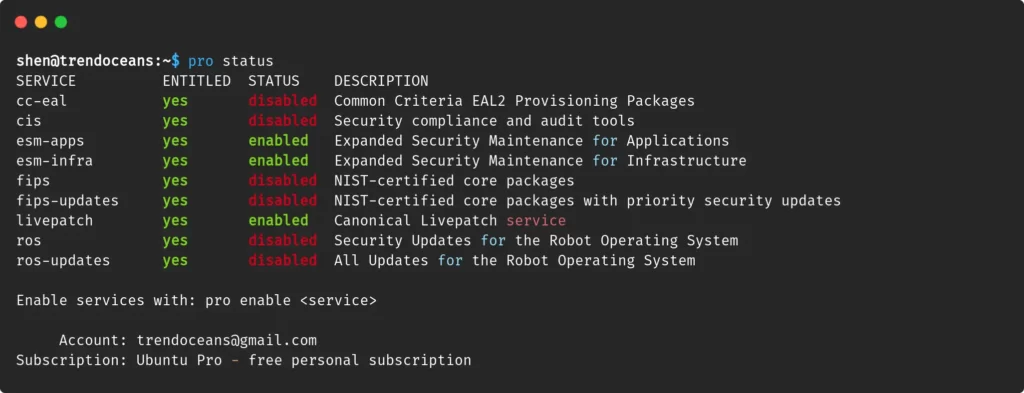
$ sudo pro attach C928AG73Wzei28FvkTpw7hqn4CPnCXThe output of the above command is shown below:

After that, running the pro status command will display the current status of your machine, as shown in the image below, which shows that esm-app, esm-infra, and livepatch are all enabled.
Because many services are only available in certain releases, the output of the above command will be different for other Ubuntu LTS releases.
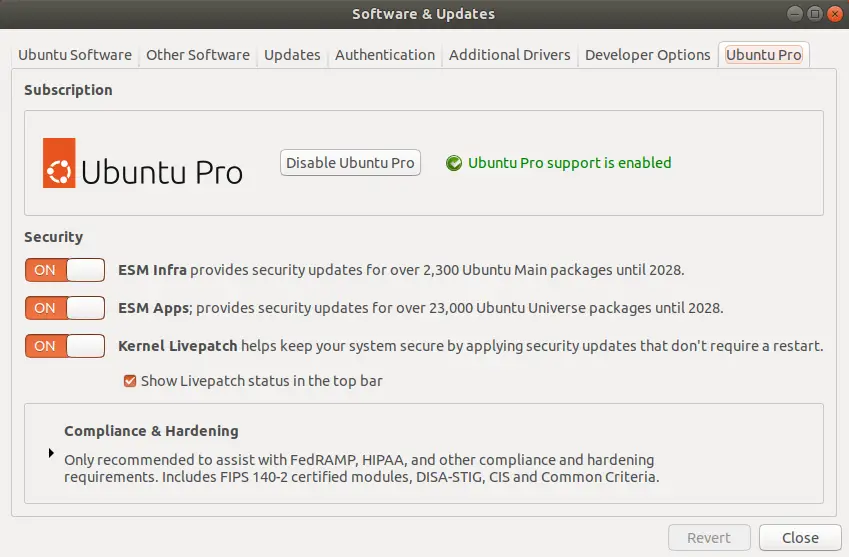
As you can see in the picture below, you can fully enable Ubuntu Pro on or off from the Software & Updates Center or any other service.
Step 4: Update the Repository
After making these changes, you need to update the repository to see the changes. To update the repository, enter the following command in the terminal:
$ sudo apt update && sudo apt upgradeWhen you update your machine, you will find the new source file has been added to your system, and the apt command is using the ESM repository to install or update software packages.
How to Disable ESM and Detach Ubuntu Pro
To stop using Ubuntu Pro, all you have to do is run a single command, which will remove all protection from your system. For this, you need to type the following command in the terminal:
$ sudo pro detachAfter you run the command, it will ask you to confirm. Press “Y” and wait for the process to finish.
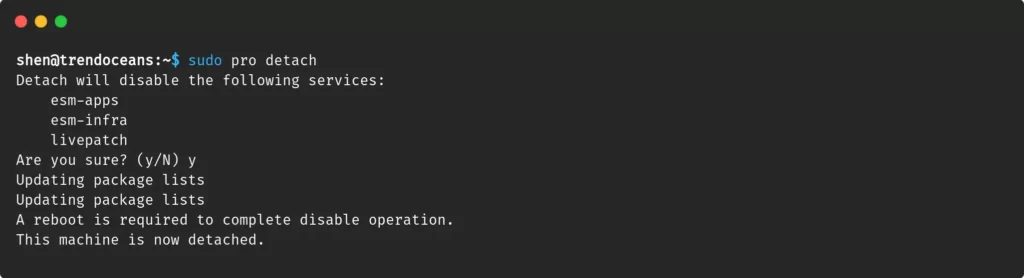
Reboot the machine once it does.
Wrap up
Users and organizations can keep their systems safe with Ubuntu Pro and ESM by getting regular updates and support. This lets them protect their data for a long time if they pay for a subscription to the services.
If you are a casual user, you won’t be interested in Ubuntu Pro because regular users usually want new features.
With this thought, I am ending this guide, but I would still suggest you to upgrade to the latest Ubuntu LTS version as soon as possible, because after some time, ESM support will end.