To generate TOTP codes, you don’t need a phone anymore; you can just get it on your Linux machine using Authy
Two-step verification is highly recommended for securing your online accounts and preventing unauthorised access to your account, which involves adding an extra layer of security to your login process.
In the early days, we used to rely on OTP for two-factor authentication, but if your device is lost, you lose access to your account, which can be inconvenient and frustrating.
To avoid this, you can use many other methods, and one of them is to generate a TOTP so you can access your account even if you lose your device, as long as you have the backup codes saved securely.
For this purpose, there are several third-party applications available, and one of them is Twilio Authy. So let us see how you can install Twilio Authy on your Linux machine to generate two-factor authentication codes.
What is Twilio Authy?
A Twilio Authy, a.ka. Authy, is an application that generates two-step secure tokens on your device, and you use that token to prove yourself as a legitimate user.
Authy does not provide a specific package for a specific Linux distro. They chose to go with Snaps, the most controversial program provided by Canonical.
Today we will see how to install Twilio Authy on Debian and Arch-based distributions.

Method to Install Authy in Linux
As I said above, Authy is only available in the Snap Store, but I’ll show you another method that does not require you to use the snap command to install Authy.
Installation of Authy in Ubuntu using Snap
The first and most important step is to install Snap on your Linux distributions. After that, we can install Authy from the Snap store to protect our accounts with two-factor authentication.
A Ubuntu user can skip this because Snap is preinstalled, but for distributions like Debian, you need to run the following command:
$ sudo apt update && apt upgrade -y
$ sudo apt install snapd
$ sudo snap install core
And if you don’t want to install Authy from Snap, go to this section.
One should always update their system repository before installing any new package, which will help you to get the latest version of applications.
For other Linux flavours you can follow this guide to install Snap store on Ubuntu, Arch, Manjaro, CentOS, Fedora.
Before going further, it is best to restart your system to ensure snap paths are updated correctly at their corresponding locations.
Once you have restarted your system, open up your system terminal using the assigned shortcut (Ctrl +Alt + T) and copy & paste the below code to install the Authy.
$ sudo snap install authy

Output:
authy 2.2.3 from Twilio Authy installed
After installation is complete, you can search for “Authy” in Activites windows and setup your account to get TOTP directly on your Linux machine, so from now onward you don’t need a mobile device to generate TOTP codes for two-factor authentication.
Installation of Authy without using Snap
Currently, Authy can only be installed using the Snap, so you don’t have the official way to get Authy installed on your desktop, but there is a workaround to install Authy on your Linux machine by following the steps that I’ll show you in this article.
Before getting started, let me direct you to what we are going to do first. We will grab the Snap based Authy package, then extract the file, and setup Authy to show up in the application list.
If you are ready, then open your system terminal and create a path where you want to store the necessary files for “Authy” on your Linux computer.
$ mkdir -p ~/.local/share/authy
$ cd ~/.local/share/authy
Once you’re done with the above steps, let’s download the latest version of Authy from the below command, which I have found from this link thanks to ruario.
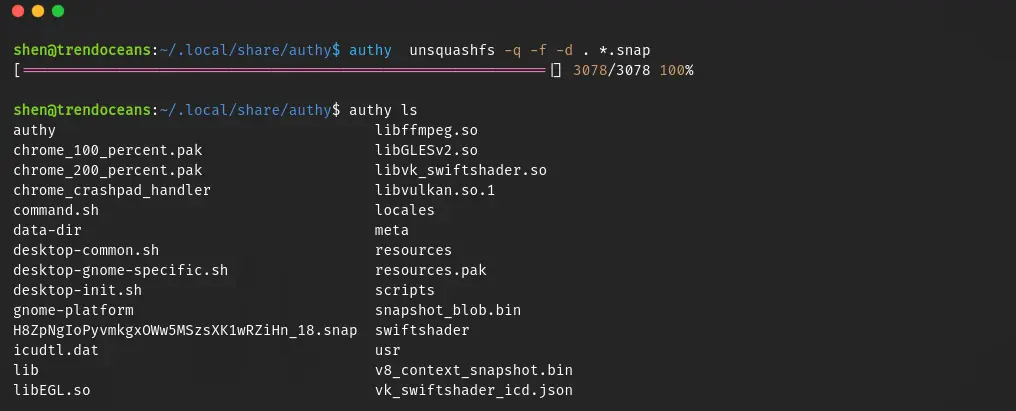
$ wget $(wget -qO- --header Snap-Device-Series:\ 16 https://api.snapcraft.io/v2/snaps/info/authy | grep -io 'https.*/download/[a-z0-9_]*.snap')Next steps is to extract the snap package using the unsquashfs command, which will basically extract the contents of the snap package to the current directory.
$ unsquashfs -q -f -d . *.snapOnce the extraction is complete, let’s verify the file by running the ls command.
According to the instructions, let’s run a few more commands, such as removing unnecessary files and fixing the paths in the “meta/gui/authy.desktop” file.
$ rm -r command.sh data-dir desktop-common.sh desktop-gnome-specific.sh desktop-init.sh gnome-platform lib meta/snap.yaml usr *.snap
$ sed -i "/^Exec=/s,=,=$PWD/,;s,\${SNAP},$PWD," meta/gui/authy.desktop
Now run the last final command to move meta/gui/authy.desktop to ~/.local/share/applications/authy.desktop so it can be launched from the “Activities” or “Application” menu.
$ install -Dm755 meta/gui/authy.desktop ~/.local/share/applications/authy.desktop
$ update-desktop-database ~/.local/share/applications
If the “Authy” icon is not appearing for you, please log in again.
Now that you’ve finally set up Authy without using Snap services, you can enjoy the benefits of two-factor authentication for your online accounts.
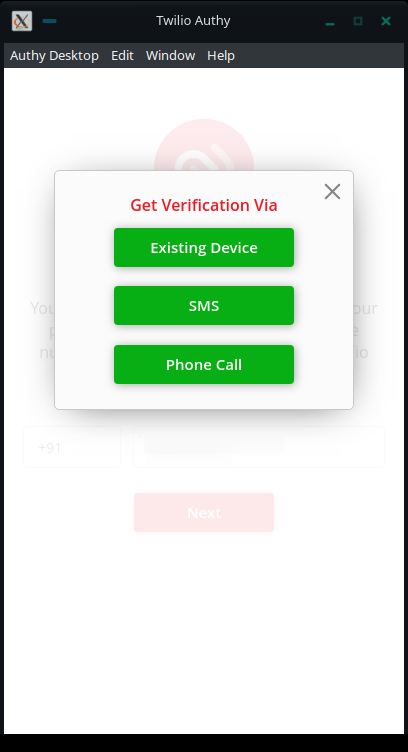
Basic Setup of Twilio Authy
I already have an account with Twilio Authy, so I have simply entered the contact number linked to the account and moved ahead to the verification step.
Once you have logged in, you will find the account that is mapped to your mobile number. If it is showing lockpad next to account, then you need to enter a backup password to “unlock” the account and access your two-factor authentication codes.

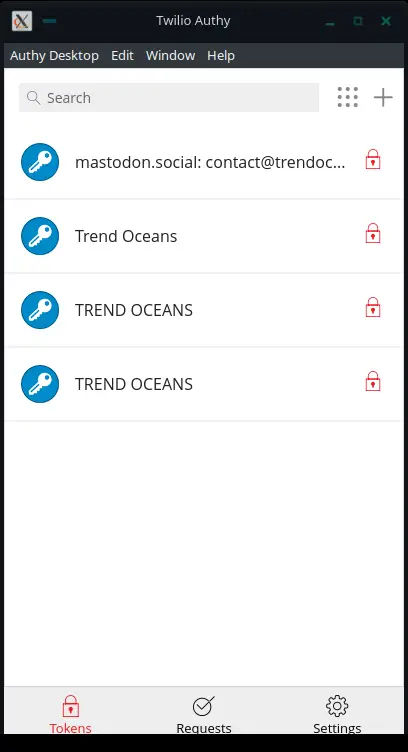
After that, Authy is all yours. Now you can generate a token or add a new account to your Authy.
Remove or Uninstall Authy
To remove Authy is pretty simple. You just need to run a single command, and the Authy will be purged from your Linux machine. If you used the snap command to install authentication, then run the following command:
$ sudo snap remove --purge authy

Output:
authy removed
To ensure it is correctly uninstalled. Use the below command to check authy still present in your system.
Most readers preferred to read: A simple solution to the Private Key-Loss Conundrum
$ sudo snap listIf you have installed Authy without using the snap command, then run the following command to remove the files from your system, and that’s all you need to do.
$ rm ~/.local/share/authy
$ rm ~/.local/share/applications/authy.desktop
Wrap up
That’s all for this article, where you have learned how to install “Authy” with Snap and also found a way to install Authy without a need for the Snap Core Service.
Now you can choose the method that suits your needs and preferences.
If you are interested in knowing how you can generate dynamic passwords in a Linux terminal, then you should read this one.
Keep your accounts secure with Authy’s two-factor authentication!
Thank you and ruario for this. The snap version of authy always opened slowly for me. Now it opens very quickly. Cheers!!