We have recently covered an article on the UUID of disk storage, where we discussed why we need UUID, how to retrieve it, and all. It is important to have a UUID when you want to automount your drive. If you don’t know what UUID is, then I highly recommend you read that article first. How to find the UUID of disk storage with a simple command.
And in this article, you will see how to automount disk or USB in Linux, and I believe these steps will work in all Linux distributions(Ubuntu, Debian, Arch, Almalinux) without any hustle.
Methods to automount drive
First, I’ll go through the GUI steps because this will be convenient for neophyte users because unintended modification of /etc/fstab can break down your system.
After that, you will see the second method, where we will modify /etc/fstab.
GUI Method for automount disk
This method is highly recommended if you are new to the Linux environment because an unintended modification to /etc/fstab can boot your system into rescue or maintenance mode, which can be overwhelming for you right now to get a rescue.
Install Gnome Disk Utility
First and foremost, you need to install gnome-disk-utility, which is the best tool for this purpose. This tool is preinstalled with Ubuntu as a gnome desktop environment. Another desktop environment, like KDE, XFCE, etc., needs to be installed.
To install gnome-disk-utility, pass the following command accordingly to Linux distributions:
$ sudo apt install gnome-disk-utility      // Debian/Ubuntu Based Distrbutions
$ sudo dnf install gnome-disk-utility      // AlmaLinux/RockyLinux/RHEL
$ sudo pacman -S gnome-disk-utility        // ArchLinux/EndeavourOS
Manipulate Mount options
After the installation, run gnome disk utility or search for “disk” in the App Drawer.
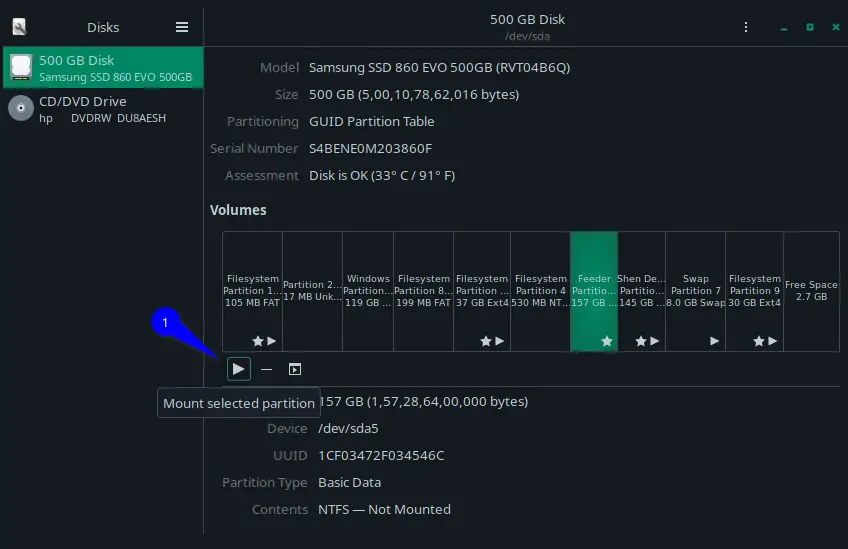
Once you open the disk utility, it will show you multiple disks only if you have attached them to your system. Under my system hood, I have a single SSD disk that has multiple partitions.
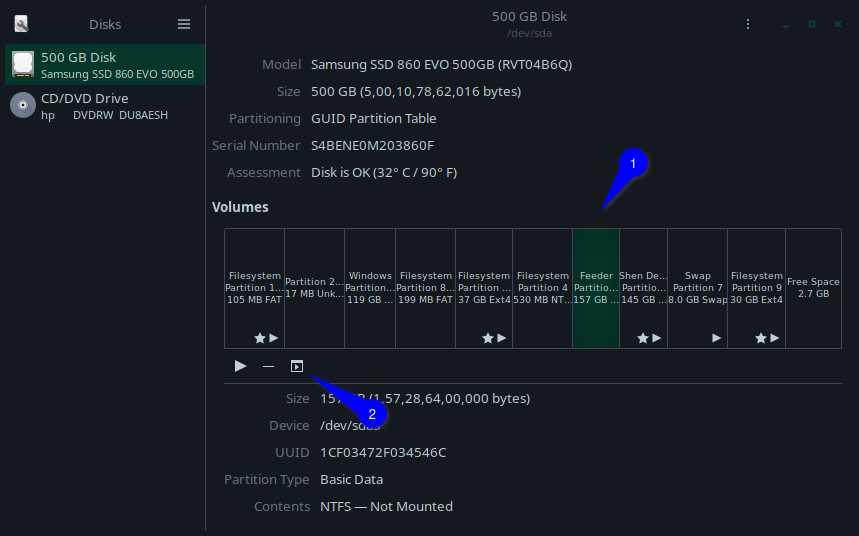
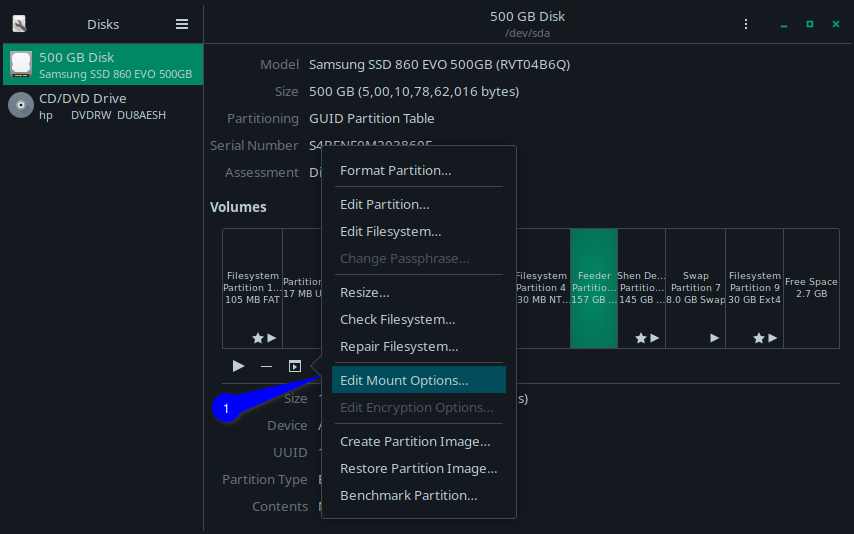
So, first, you have to select the partition that you need to automount, and then click on the button that looks like a square play button. This will open a dialog box. From here, you need to click on “Edit Mount Options”.
Once you click on “Edit Mount Options”, it will open another window which will be disabled by default. To interact with the window, turn off”User Session Default”
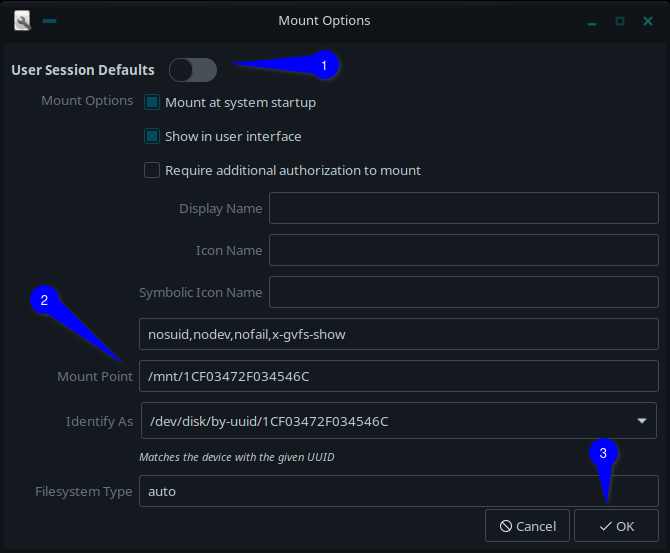
The above window is self-explanatory; maybe you are not getting “nosuid, nodev, nofail, x-gvfs-show”, which is known as mount options. Please read the manual section “FileSystem-Independent Mount Options” to learn more about the mount options.
If you are changing the “Mount Point, “ please provide an Absolute path (a complete path starts with/).
I suggest you keep everything default and click on OK, which will prompt you to authenticate yourself to modify the /etc/fstab file.
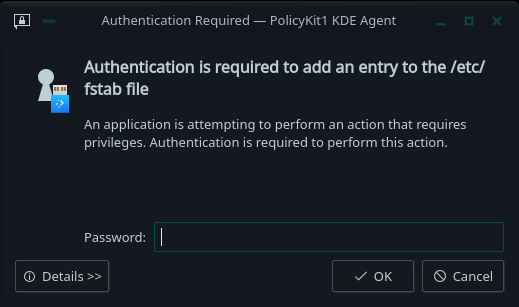
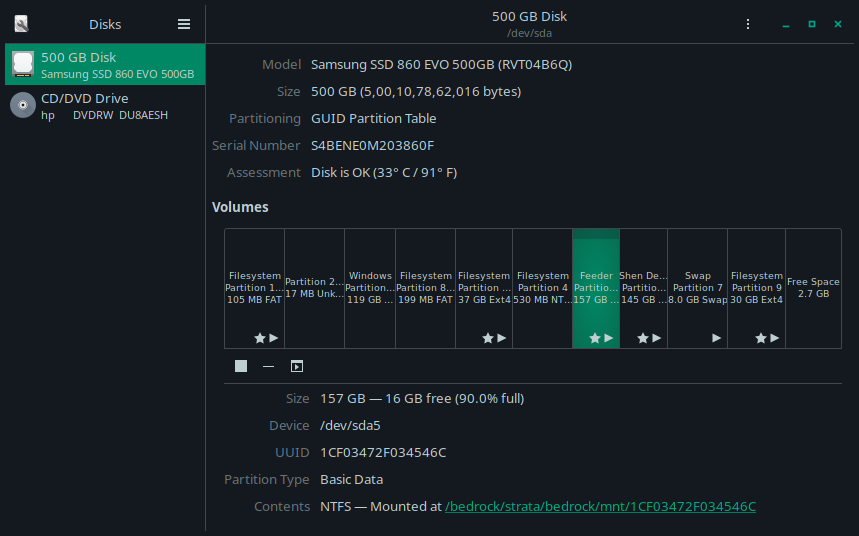
Once you authenticate successfully, you will get back to the main screen. From here, you can mount your drive or partitions.
That’s all for automounting through the Graphical (GUI) method, and now you will see a CLI way to automount drive.
CLI Method for automount disk
Above you have seen the graphical way to mount a drive. Now you will see a conventional way to automount a drive without installing any utility. Roll up your sleeves and open a terminal window.
As you know, to automount the physical drive or network drive, you need to add a line in the /etc/fstab file, which will handle the nitty-gritty of the mounting drive.
Backup of /etc/fstab
I would recommend you make a backup of the /etc/fstab file before making any modifications, which can be helpful if anything goes wrong.
To create a backup of /etc/fstab, run the following command.
$ sudo cp /etc/fstab /etc/fstab.bak
$ ls -l /etc/fst*
Find UUIDs value of drive partitions
Before making any modifications to the /etc/fstab file, find the UUID of specific partitions. To find the UUID, you can run the blkid command, which will print the UUID.
$ sudo blkid
    OR
$ sudo blkid  /dev/sda6 | grep UUID
From the output copy, the value of UUID. In my case, the UUID value of /dev/sda6 is “0ACA11CECA11B6C3“.
Note:-MS Windows (NTFS) has a 16-bit UUID string and Linux (ext2, ext3, etc.) has a 128-bit UUID string.
Output:

/dev/sda6: LABEL="Shen Default" BLOCK_SIZE="512" UUID="0ACA11CECA11B6C3" TYPE="ntfs" PARTLABEL="Basic data partition" PARTUUID="5695e26d-6006-4ac1-bef0-515344509b67"
Modify /etc/fstab to automount drive
After getting the UUID value, you can modify /etc/fstab using any command-line editor with sudo privileges to persist changes.
Once you open a file, you will find multiple commented lines with several mount location details. The basic structure to specify drive details in /etc/fstab is as follows
// Default structure to specify drive details in /etc/fstab.

<file system> <mount point> <type> <options> <dump> <pass>- <file system>: provide UUID string in case of a physical drive, and there are several other ways which you can use, but I advise you to use UUID.
- <mount point>: specify the absolute location where you want to mount the drive.
- <type>: declare type of format partitions.
- <options>: you can specify multiple options for now keep default
- <dump>: It is used as dump backup mechanism, keeps it 0.
- <pass>: use in fsck utility for reading priority purposes, 0 is the least
You should read: How to Determine the File System Type in Linux (Ext2, Ext3, or Ext4)?
To explain it in a better way, I’ll modify my system’s /etc/fstab to automount NTFS partitions in Linux.
UUID=0ACA11CECA11B6C3 /media/trendoceans/ShenDefault ntfs default 0 0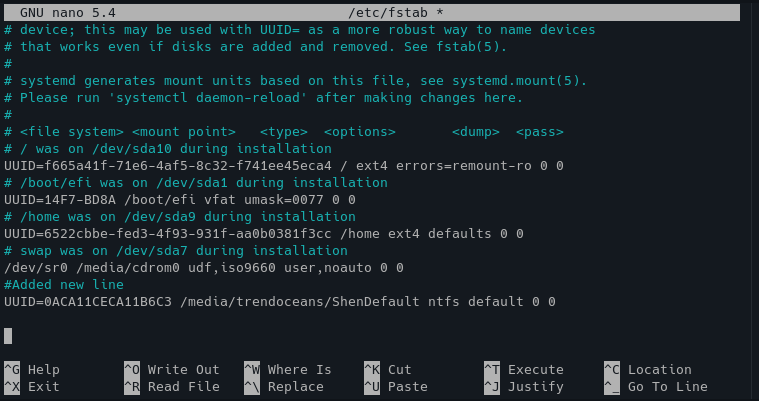
After modification, save the file and create a mount point if you don’t have one. To create a mount point, use the same path that you have mentioned in the /etc/fstab file.
$ sudo mkdir /media/trendoceans/ShenDefaultThe last command you need to fire mount command to mount a drive file from fstab file. And pass the lsblk -l command to check mount point.
$ sudo mount -a
$ lsblk -l
If something wrong happens with the original file, then replace it with a backup file of /etc/fstab.bak to /etc/fstab.
Most reader preferred to read: How to delete all files from Directory except one files.
Wrap up
That’s all to automount a disk or USB in Linux. You can follow these similar steps to automount your USB drive. If you don’t want to auto mount the drive, then simply comment the line from /etc/fstab for later use, or else you can just remove the specific line.
Please let me know in the comment section which method you guys have chosen to mount a drive in Linux.