How do I create an HTTPS server for NodeJS? Then let’s learn how to create an HTTPS server because this is the most frequently asked question by Node.js developers.
HTTPS is a secure protocol for web applications where all communication between your browser and the server is encrypted and decrypted only by using a private key.
This makes communication more secure and private.
If you remove the S from HTTPS, we get HTTP, a standard protocol for accessing web applications. It’s not secure; anyone can intercept your data packets connected to the same network, which no one wants to happen.
That’s why HTTPS was created, to provide an extra layer of security through encryption.
This makes communication more secure and private.
SSL certificates from a reputed certificate authority should be installed on the Node.js server.
For the lowest price, a site owner should buy RapidSSL, Comodo SSL, or AlphaSSL certificates, which provide strong encryption at a low price, but here we will use OpenSSL to create SSL certificates.
Today, you will learn to create an SSL certificate to start an HTTPS server for Express in Node Js.
Step 1: Standard Node Js Template
Without talking much, let me show you the standard NodeJS template that I have used to create a regular server running on HTTP.
const express = require("express"),
app = express()
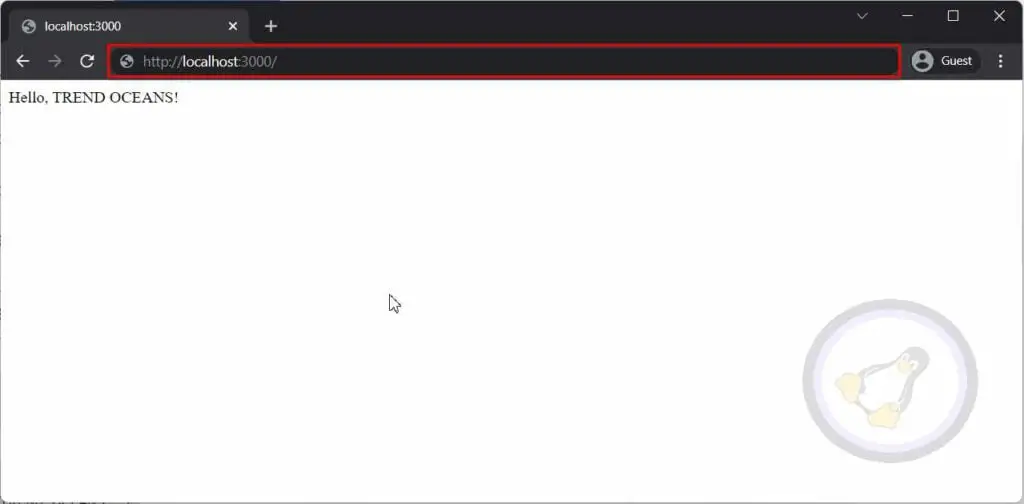
app.get("/", (req, res) => {
res.send("Hello, TREND OCEANS!")
})
app.listen(3000, console.log(`Server started on port 3000`))Running the above script using Node.js will start the webserver with the standard HTTP protocol and display a “Hello, TREND OCEANS!” message.
For instance, you can take the above code as an example and create a new file in a new directory and save itwith the name app.js.
Also, don’t forget to run the npm init command to initiate node modules in the current directory.
Step 2: Create an SSL Certificate
To use HTTPS, we have to first create an SSL certificate. SSL certificates can be generated on Windows, Linux, and macOS using OpenSSL.
OpenSSL is available by default for all Linux systems without installing any other package. Execute the below command to create cert.pem and key.pem on your Linux system.
$ openssl req -x509 --newkey rsa:4096 --out cert.pem --keyout key.pem --days 365For Windows users, you can install Git Bash. OpenSSL is available within the console of Git Bash.
When you execute the above command, it will ask a few things. First, the passphrase for your key PEM file to make it more secure.
I recommend setting a secure password.
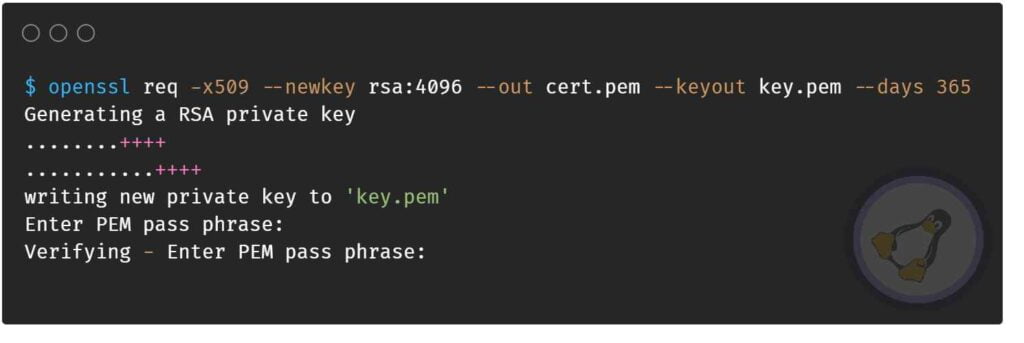
Next, it will ask general questions like country name in 2 letter code, email, organization name, etc. It’s up to you what information you want to provide.
Here I have simply ignored the input by pressing enter.
Country Name (2 letter code) [AU]:US
State or Province Name (full name) [Some-State]:
Locality Name (eg, city) []:
Organization Name (eg, company) [Internet Widgits Pty Ltd]:
Organizational Unit Name (eg, section) []:
Common Name (e.g. server FQDN or YOUR name) []:
Email Address []:
Once you are done, you will see two files created in the current directory with name cert.pem and key.pem.
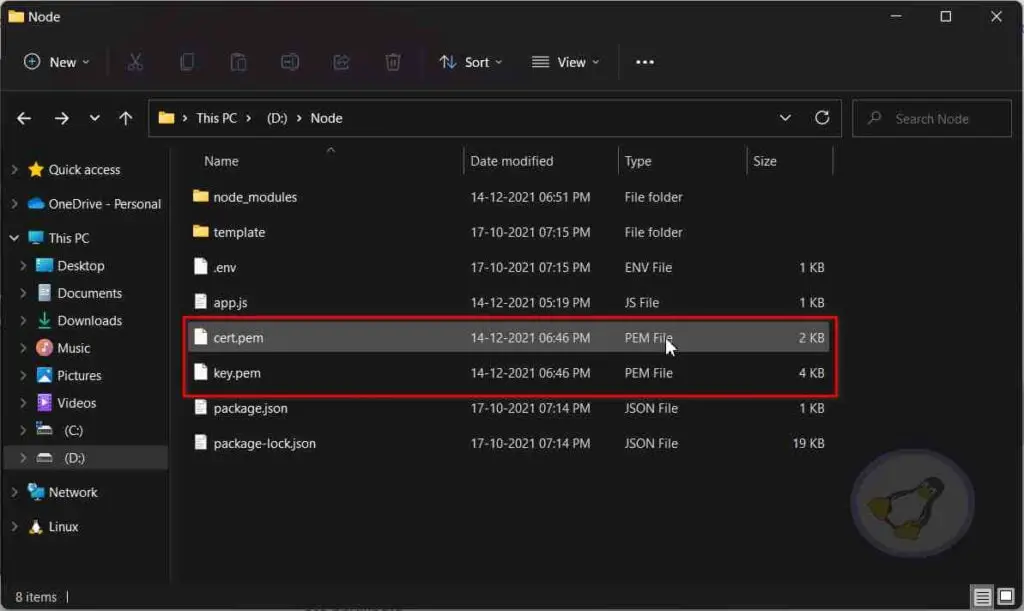
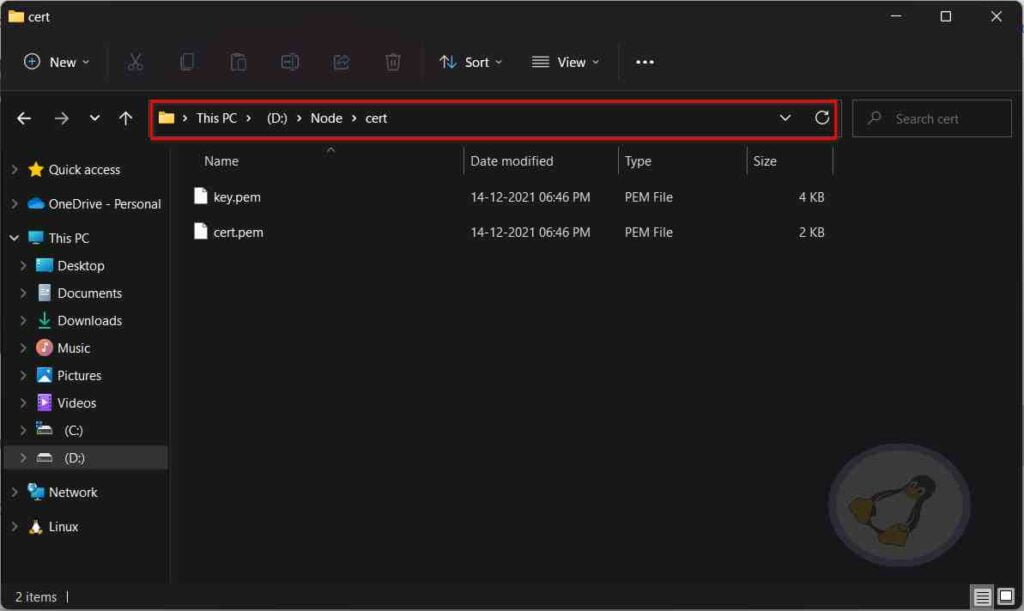
Now we have to place these files in the new directory.
If you were using a standard template from step 1. Then create a new folder inside your current project with name cert and place both files there to make it more structured.
Step 3: Modifying Node App
Now we have to make a few changes inside app.js from step 1. Below are the few changes we made. You can spot differences by revisiting step 1 to understand our changes.
const express = require("express"),
      app = express(),
      fs = require("fs"),
      path = require("path"),
      https = require("https")


certfile = fs.readFileSync(path.join(__dirname, "cert", "cert.pem"))
keyfile = fs.readFileSync(path.join(__dirname, "cert", "key.pem"))

const secureserver = https.createServer({ cert: certfile, key: keyfile, passphrase: "trendoceans" }, app)

app.get("/", (req, res) => {
    res.send("Hello, TREND OCEANS!")
})

secureserver.listen(3000, console.log(`Server started on port 3000`))
Let’s talk about the changes we made from step 1.
First, we included a few more modules in our current project, like fs, path, and HTTPS.
fs: We included this library to read the content of the certificates.
path: It helps us to locate certificates in our project. [Which we moved in cert directory]
HTTPS: This main module allows us to create an HTTPS server using the certificate generated from step 2.
Next, we have just created a few variables specifying the location of the certificate and to read them using fs and path modules.
certfile = fs.readFileSync(path.join(__dirname, "cert", "cert.pem"))
keyfile = fs.readFileSync(path.join(__dirname, "cert", "key.pem"))
Now we use the above variables to read the SSL certificates to create an HTTPS server using the HTTPS module. Don’t forget to replace the passphrase. In my case, it’s trendoceans; replace it with the one you specified while generating an SSL certificate.
const secureserver = https.createServer({ cert: certfile, key: keyfile, passphrase: "trendoceans" }, app)Finally, don’t forget to replace the last variable from the app to secureserver to start the listener in HTTPS protocol.
secureserver.listen(3000, console.log(`Server started on port 3000`))Once you have made the required changes, next, save your file and open the command prompt or terminal in your project directory to start the express server using the below command.
$ node app.jsNow open your browser and visit https://localhost:3000, and for the first time, it will show a warning message that the connection is not private.
We are getting this message because we used a self-signed SSL certificate, and our browser doesn’t know the authority.
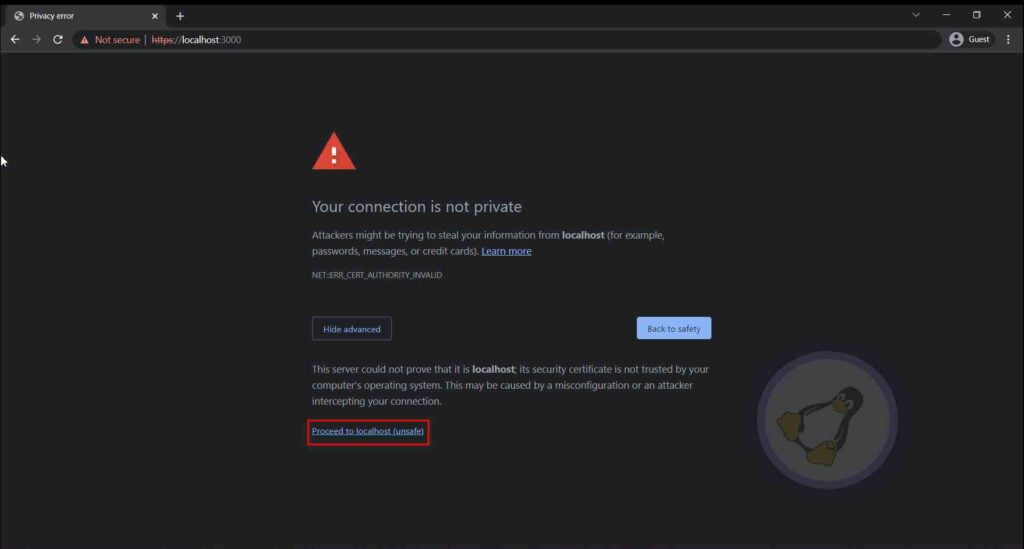
For now, click on advance and then Proceed to localhost (unsafe) to access your site.
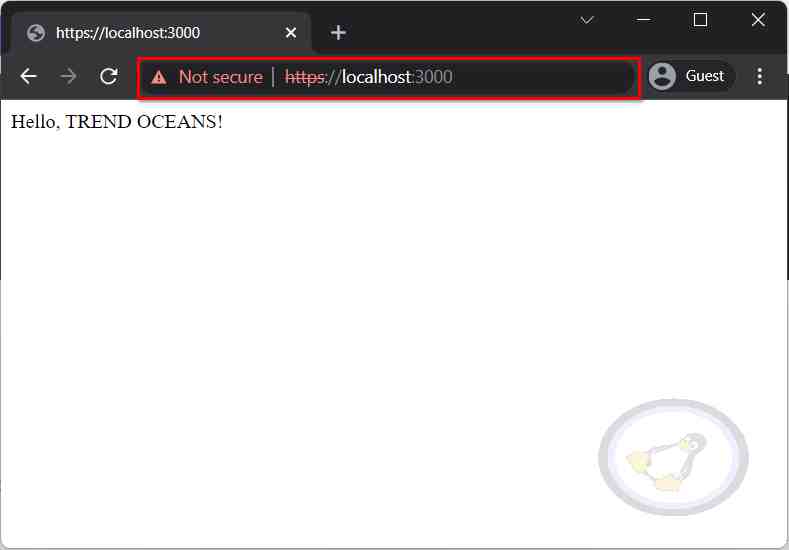
Tada, you have successfully created an HTTPS server for Express in Node.js.
Final Thought
I understand that in the beginning, it may seem a little bit tricky. But if you are facing any difficulty or are unable to create a secure server, let us know in the comment section.