Here you will find four different ways to install Node.js and the npm package manager. Which one will you choose?
Node.js is not a programming language but a JavaScript runtime for backend development, and that was made in the Chrome v8 JavaScript engine. To make development easier for the web developer who wants to have one skillset for frontend and backend.
NPM is a package manager for Node.js that helps to install modules within the terminal. Mostly used to discover, install, and publish modules, just like a PIP for Python.
In this guide, we will install the latest versions of Node.js and NPM in Ubuntu, RedHat, CentOS, and Manjaro and run the first application in Linux.
Table of Contents
Method to Install Node.js in Linux
There are several different way to install Node.js in your Linux like:
- Install Node.js from the package manager of your Linux distribution: One of the popular ways to install node.js is from the package manager, but you will not find the latest version here.
- Install Node.js and npm using the binary files: This method allows you to have the latest version of Node.js and npm installed on your system, but for future releases, you need to manually download and follow the steps again.
- Install Node.js from the NodeSource repository/PPA: If you are sure which Node.js version you need for your project, then you can use the NodeSource repository method to get the required version of Node.js.
- Install Node.js and npm using the NVM repository: It will allow you to install the latest version of Node.js and will also provide you with support for having multiple versions of Node.js installed on the same system, which can be useful for testing and development purposes.
If you are not sure which version of Node.js your project requires, then please check the documentation, or README, of the project, because some projects will not work if the runtime version is different.
Anyway, if you want my suggestion, then I’ll suggest you go with the NodeSource or NVM repository.
Install Node.js via package manager
One of the simplest ways to install Node.js is using the package manager, but the drawback of this method is that you will not find the latest release.
If you are okay with that release version, then run one of the following commands as per your distribution package manager to install Node.js and npm:
Ubuntu/Debian
$ sudo apt install nodejs
$ sudo apt install npm
RedHat/CentOS/Fedora
$ dnf install nodejs
$ dnf install npm
Arch/Manjaro
$ pacman -Sy nodejs
$ pacman -Sy npm
Once Node.js and NPM are installed on your Linux system, you can use a terminal or write a separate script to run any JavaScript application. But before we do that, let’s run the following command to make sure they are installed:
$ node -v #To check Nodejs is installed
$ npm -v #To check NPM is installed
The output of the above command confirms that Node.js and npm were successfully installed, and with that, you can move on to the next step where you will run short script to test the functionality of Node.js and npm.
Install Node.js and npm using the binary files
There is also another way to install the latest version of Node.js on your system, no matter what distribution you are using.
You just need to download the .tar package from the download page and run the following command in the given sequence to properly move and set the path for Node.js.
At the time of writing this article, the latest and most stable LTS release of Node JS is 18.15.0 with npm 9.5.0, so let me first download the latest “LTS tar” file, but if you want to have a more recent version, then you can switch tabs to “Current “, and download the file as per your system architecture.
$ sudo tar xvf Downloads/node-v18.15.0-linux-x64.tar.xz -C /usr/local/lib/After extracting the file to /usr/local/lib/, you need to set the node.js environment variable so you can use node and the npm command in a terminal at any time and from anywhere.
If you are using the zsh or bash shell, then copy the export PATH=/usr/local/lib/node-v18.15.0-linux-x64/bin:$PATH by replacing with your node version, into ~/.zshrc or ~/.bashrc as shown below.
$ nano ~/.bashrc
$ export PATH=/usr/local/lib/node-v18.15.0-linux-x64/bin:$PATH
To reflect the changes, you can restart your shell or run the following command:
$ source ~/.bashrc
or
$ source ~/.zshrc
Once everything is done, you can verify the installation by executing
$ node --version && npm --versionAfter that, you can move on to the next section to test the short script.
Install Node.js from NodeSource repository
Alternatively, if you are using Ubuntu, Debian, or RHEL based distributions, you can take advantage of adding the nodesource repository information to your system and get the latest version of node.js from your system package manager.
So let’s start the installation by first adding repository information for the latest Node.js release of version 18 by running the following command:
$ curl -fsSL https://deb.nodesource.com/setup_lts.x | sudo -E bash -            // Ubuntu-based distributions
$ curl -fsSL https://deb.nodesource.com/setup_lts.x | bash -                  // Debian-based distrbutions
$ curl -fsSL https://rpm.nodesource.com/setup_lts.x | sudo bash -                   // RHEL-based distributions
If you want another version of Node.js, run any of the following commands:
Ubuntu based distributions
$ curl -fsSL https://deb.nodesource.com/setup_19.x | sudo -E bash -     // Node.js 19
$ curl -fsSL https://deb.nodesource.com/setup_18.x | sudo -E bash -      // Node.js 18
$ curl -fsSL https://deb.nodesource.com/setup_16.x | sudo -E bash -     // Node.js 16
$ curl -fsSL https://deb.nodesource.com/setup_14.x | sudo -E bash -     // Node.js 14
Debian based distributions
$ curl -fsSL https://deb.nodesource.com/setup_19.x | bash - &&\         // Node.js 19
$ curl -fsSL https://deb.nodesource.com/setup_18.x | bash - &&\         // Node.js 18
$ curl -fsSL https://deb.nodesource.com/setup_16.x | bash - &&\         // Node.js 16
$ curl -fsSL https://deb.nodesource.com/setup_14.x | bash - &&\         // Node.js 14
RHEL, CentOS, CloudLinux, Amazon Linux or Fedora
$ curl -fsSL https://rpm.nodesource.com/setup_19.x | sudo bash -      // Node.js 19
$ curl -fsSL https://rpm.nodesource.com/setup_18.x | sudo bash -      // Node.js 18
$ curl -fsSL https://rpm.nodesource.com/setup_16.x | sudo bash -      // Node.js 16
$ curl -fsSL https://rpm.nodesource.com/setup_14.x | sudo bash -      // Node.js 14
Once you’re done adding the source information, let’s install Node.js by running the following as per your distribution’s package manager.
$ sudo apt install nodejs
$ sudo dnf install nodejs
Finally, execute the last command, which will check and show you the installed version of nodejs and npm package manager.
$ node --version && npm --versionTo find more information about the NodeSource repository, click here.
Install Node.js and npm using the NVM repository
When you want to have multiple versions of node.js installed on your system, then you should go with Node Version Manager (nvm), which will allow you to quickly install and use different versions of node.js via the command line.
To get started with this method, you need to first get the installation script from Github, which I have already done for you, so you just need to invoke any of the following commands:
$ wget -qO- https://raw.githubusercontent.com/nvm-sh/nvm/v0.39.3/install.sh | bash
OR
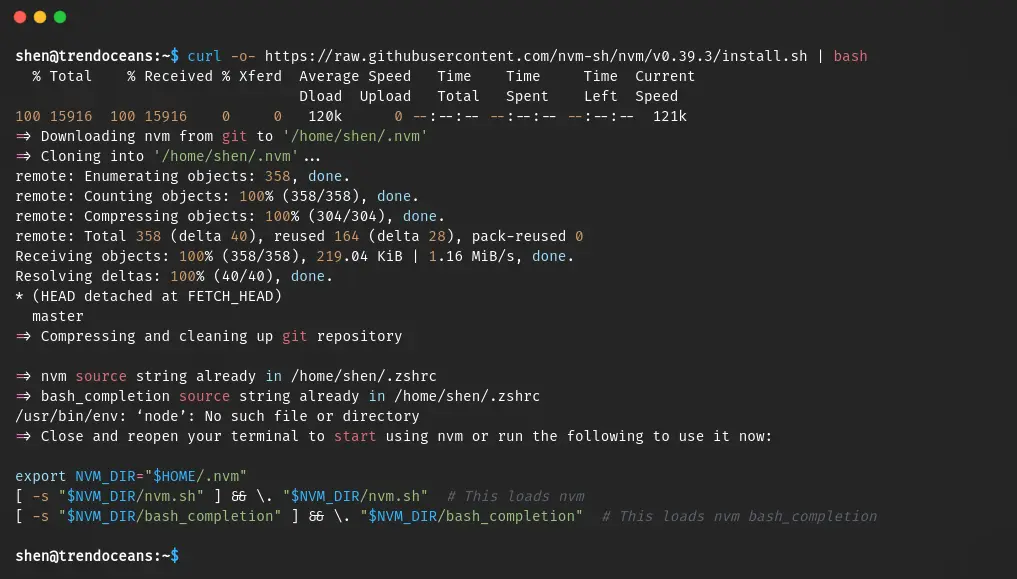
$ curl -o- https://raw.githubusercontent.com/nvm-sh/nvm/v0.39.3/install.sh | bash
The behaviour of the above command is shown below.

Once the installation is done, restart your shell to find the nvm command in your shell, which you will use to download the latest or multiple node js in your Linux system for development purposes.
Let’s see what versions of Shell you can install on your system by running the below command:
$ nvm list-remote
or
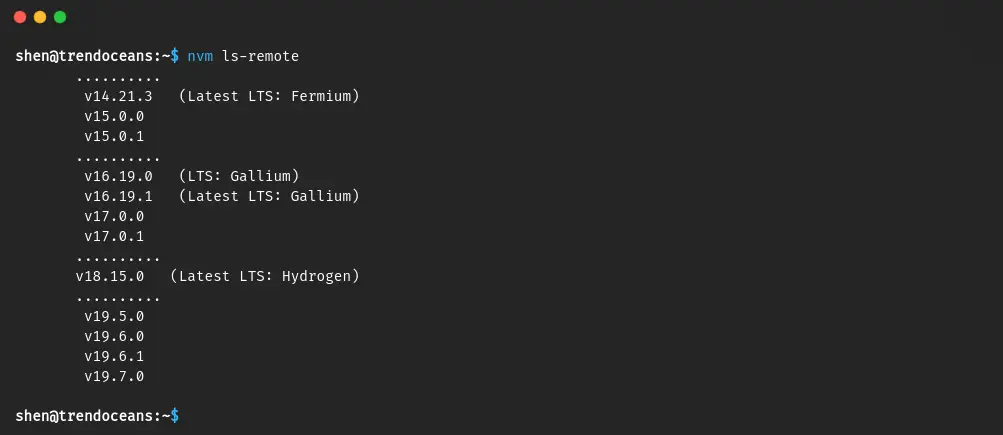
$ nvm ls-remote
Here is the output of the above command:

From the above list, let me download the latest version of node 18.15.0 (Hydrogen) by running the below command, and if you want any other version, then replace the version with another version number.
$ nvm install 18.15.0
$ node -v && npm --version
The output below confirms that node.js and npm were successfully installed on the system.

If you want to install any other version of node.js, then you can run the same command, which will install and replace the default node version with the last installed node.js version.
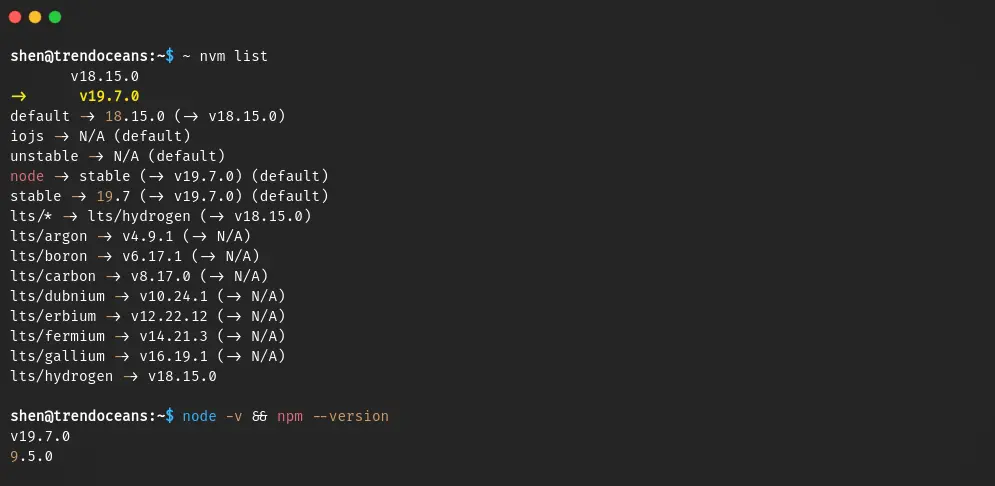
$ nvm install 19.7.0 But don’t worry; it will just replace the node version, and you can get back to your desired node version anytime. For this first let’s find all the installed versions of node js that have been installed using nvm.
$ nvm ls
or
$ nvm list
As you can see from the below image that “-> v19.7.0″ is the current Node.js version.

To change the current node version, use the next command, which will change the node version from 19 to 18 by executing the following command.
$ nvm use node 18There is more to learn from the nvm script, which includes a usage and troubleshooting guide. All the information you need can be found at this link.
Run Node.js using Terminal
After completing the installation process, let me show you how you can use the node command in your terminal. So first, open your terminal using Ctrl+Alt+T and type the below command to get into the Node.js console.
$ node
>
Once the “$” turns into a “>” (greater-than symbol), that means you’re now in the node.js console.
From here, you can start running JavaScript code and see the output in real-time. To exit the console, simply type “.exit” or press “Ctrl + C” twice.
Let me start by writing one line of code to print “Hello, TREND OCEANS”
> console.log("Hello, TREND OCEANS")If you look at the end of the line, there is an undefined output. What’s that?

Why Node.js displays “Undefined” in the Console
By default, if you do not specify anything in the return place, then the Node.js runtime will output “undefined” at the end. To avoid it, you can specify anything in return.
> console.log("Hello, TREND OCEANS") || 0; Above I have specified 0 in return which replaces undefined.

Run Node Js using Script
It’s not a good idea to use the console to write scripts.
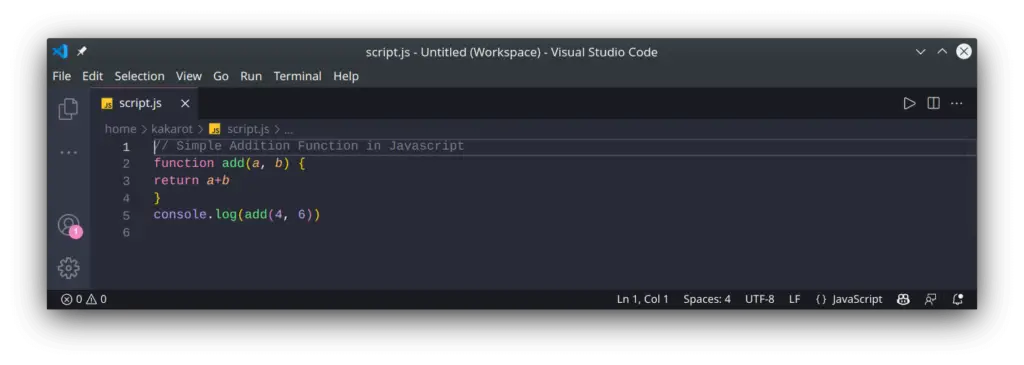
Instead, use the IDE or any text editor because having a separate script with JavaScript functions and an operator is more convenient than using the Node.js console.
// Simple Addition Function in Javascript
function add(a, b) {
return a+b
}
console.log(add(4, 6))
Write your code in your favourite text editor, like Visual Studio Code, and save your file using “.js” as an extension.

To run the script, use the node command and specify the script’s path in the terminal.
$ node script.js
10
Final Thought
That’s all for this article, where you learned how to install the latest version of node.js on your system.
If you are downloading and running a programme from Github or any other version control system, then make sure to read the “README” file to check which runtime versions are compatible with the programme.
Also Read: How to Automatically Generate Commit Messages for GitHub using aicommits
And If you found any difficulty while installing or running, let us know in the comment section.

Innovative tech mind with 12 years of experience working as a computer programmer, web developer, and security researcher. Capable of working with a variety of technology and software solutions, and managing databases.
Really helped me alot and yes finally installed it.
Thanks man!