High DNS latency equals high loading times.
We recently published an article titled “The Top Ten DNS Servers That Gamers Should Use,” in which we listed the DNS servers that gamers can use to improve their latency speed over the ISP-provided DNS servers.
But how do you know which DNS server will offer the best speed? The answer is simple: you need to check and compare the speeds of various DNS servers to find out which one works best for you.
To do this, you need to run a latency test, which measures how quickly your device is able to communicate with the DNS server, because the result I’m getting will not be the same for everyone.
This can be done by using various tools such as “dig” and “nslookup,” which allow you to check the speed of the DNS server by pinging it and then comparing its response time.
So let’s start with checking the speed of the DNS servers in order to determine which one works best for your particular needs.
Check DNS Speed in Linux
It’s very simple to test DNS speed in Linux because the tools we’ll be using are already on your device, and if for some reason the command isn’t available, you can use this guide to install dig and nslookup on your system.
Check DNS Speed using dig command
A dig acronym for Domain Information Groper command is a tool used for querying DNS nameservers for various DNS related information, like resolving a hostname to its IP address and the other way around, finding mail server records, etc.
So let’s open the terminal window and run the command dig followed by the domain you wish to query; if you don’t provide any domain, then dig will query your default DNS nameserver as set in the /etc/resolv.conf file.
Manual way to test DNS speed
To show you the result, let me execute dig on my terminal without any arguments or parameters, and you can see it has queried the default DNS nameserver as set in /etc/resolv.conf along with a few extra pieces of information.
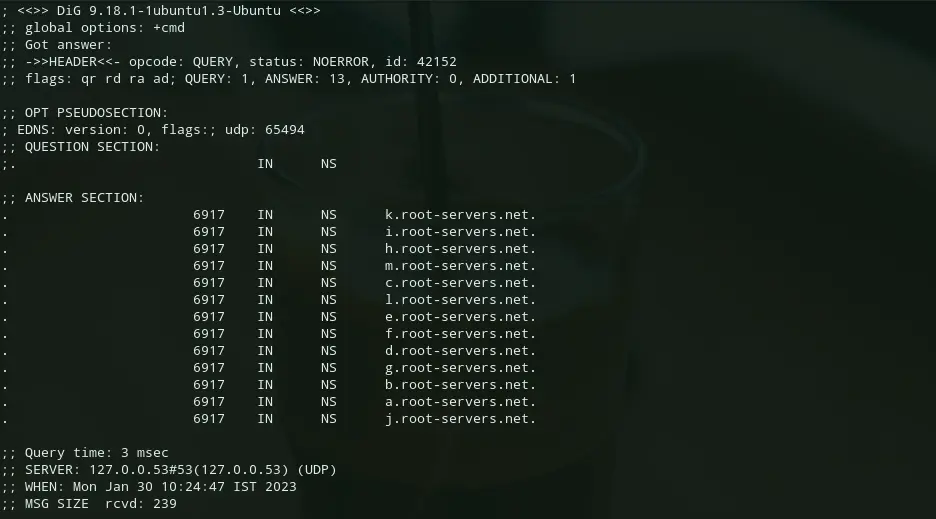
That was the basic usage of the command dig. Now let’s provide the DNS address for which you want to check the latency, speed, or query time to respond to your request.
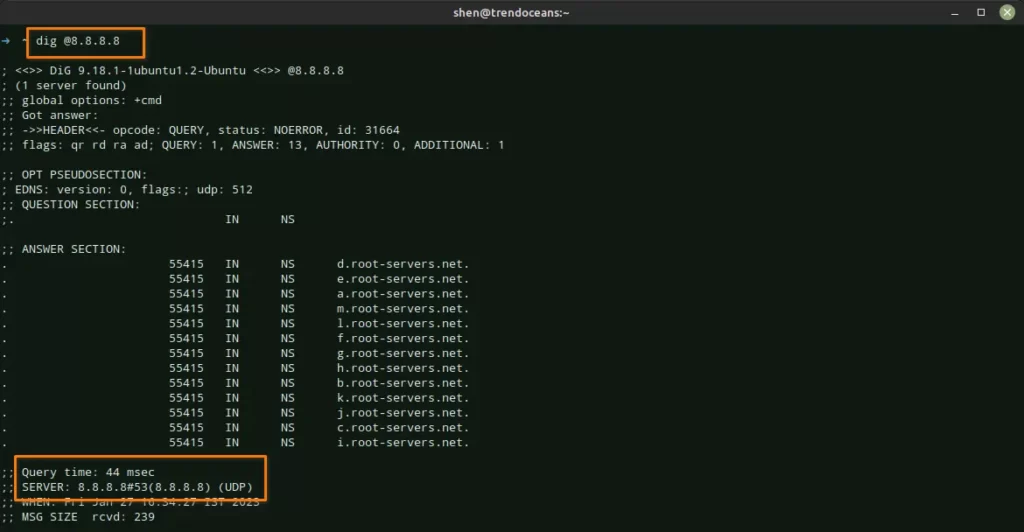
The DNS nameserver you want to query must be followed by “@” for this purpose. For instance, the following command must be used to query Google’s public DNS nameserver:
$ dig @8.8.8.8
or
$ dig @8.8.8.8 trendoceans.com
The output of the command above shows that it took the DNS server 44 milliseconds to respond and retrieve the information from the requested DNS server.
Now, let me choose another DNS IPv4 address from this article to see which DNS will work best on my end, so I chose Cloudflare DNS for our test.
Auto-test DNS speed with time interval
I will run the same command as before, but this time I’ll provide the Cloudflare DNS ip address to it like shown below, with grep to filter the output result.
$ dig @1.1.1.1 google.com | grep "Query time"The output of the above command is shown below:

I think you have already tried running the above command more than once and found that the result is different each time. Instead of doing it by hand, attach a short script that will run every two seconds and keep asking the Cloudflare DNS for the best response time.
$ while true; do dig @1.1.1.1 trendoceans.com | grep time; sleep 2; doneThis will help us compare the performances and also make it easier to track which DNS is giving us the best performance on our end.
Check DNS Speed in Windows
After learning how to check the DNS speed in Linux, we will now learn how to use the nslookup command to check the DNS speed in Windows.
The nslookup command lets us send a query to a specific name server and get information about it, such as its IP address, how long it took for the query to reach the name server, and other useful information.
To find DNS response time, open a Powershell window and execute the following command, which will show you the time taken for the query to reach the nameserver in milliseconds.
> Measure-Command {nslookup www.google.com 8.8.8.8}The result of the above command is shown below:
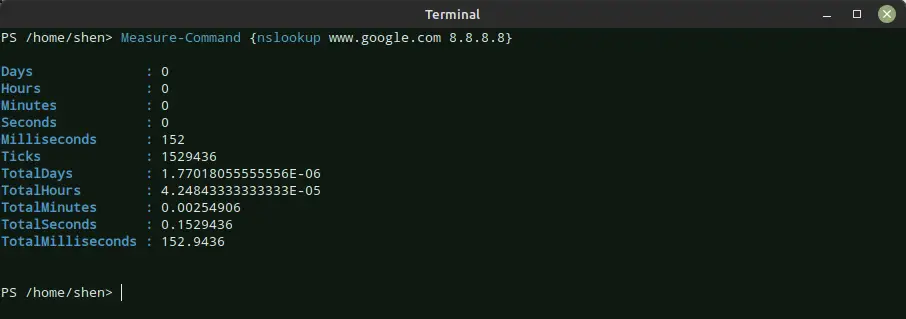
I have used the Google DNS address. If you want, you can test with a different DNS IP address by just replacing the address in the command.
Of course, you can use nslookup in a Linux environment, but the results you get here will not be available; this is one of the reasons we didn’t mention it.
Wrap up
I hope you now know how to test DNS server speeds using dig and the nslookup command in both Windows and Linux, and if you have experienced slow response times, you can now identify the cause and work on finding a solution.
If you know any other tools or tips to test DNS speed, feel free to share them in the comments section below.