When you don’t want to use any third-party virtualization application to create virtualization, or you want to know the step-by-step process to create a Virtual Machine in Hyper-V.
If you don’t know, Microsoft provides Hyper-V technology; you can virtualize the guest operating system through that.
By default, Hyper-V is disabled in Windows. You need to enable it manually. In this guide, we will show you how to enable and create a new Virtual machine. Please read this guided article step by step.
Enable Hyper-V
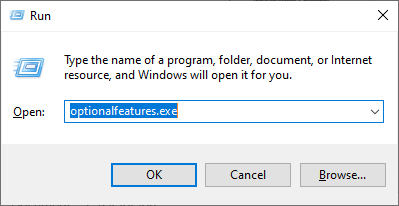
We need to turn on Hyper-V from “Turn Windows features on or off.” To enable press Window + R and type optionalfeatures.exe
In this screen, you need to scroll down and enable all the Hyper-V options like the below screenshot.
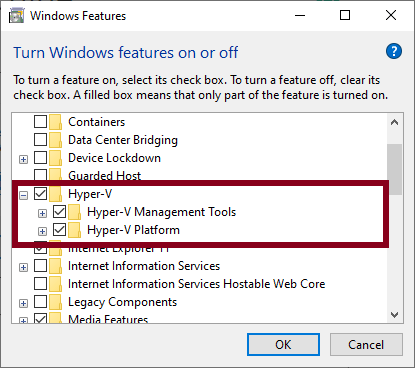
Click on OK, Wait for some time to Apply the setting, and it will request you to reboot your PC
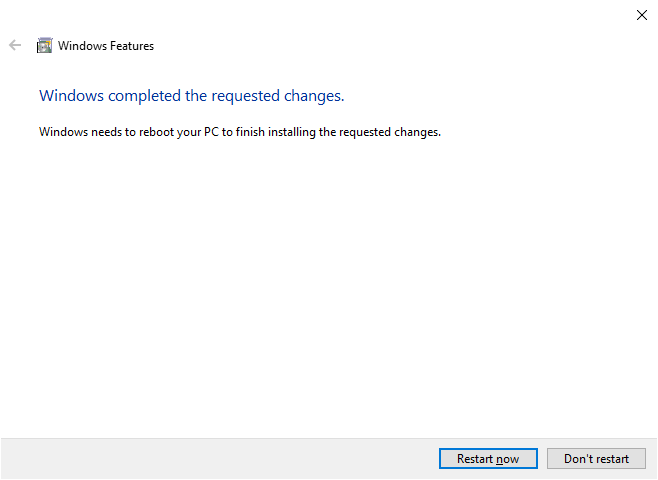
Please click on Restart now to successfully apply new changes.
Create a New Virtual Machine in Hyper-V Manager
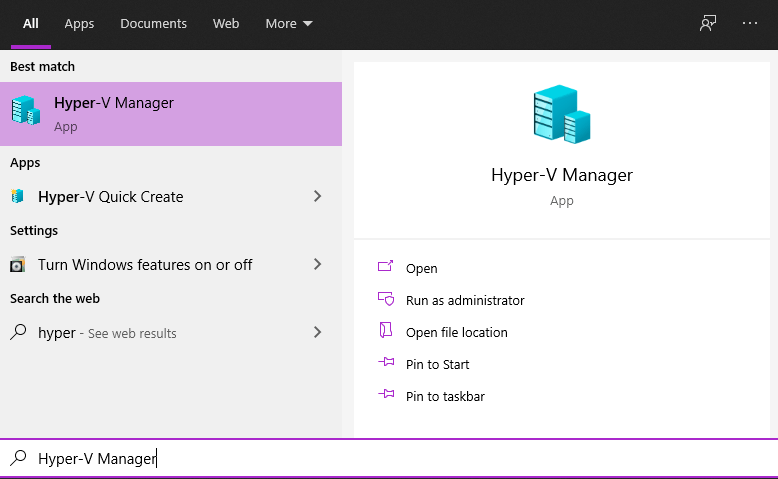
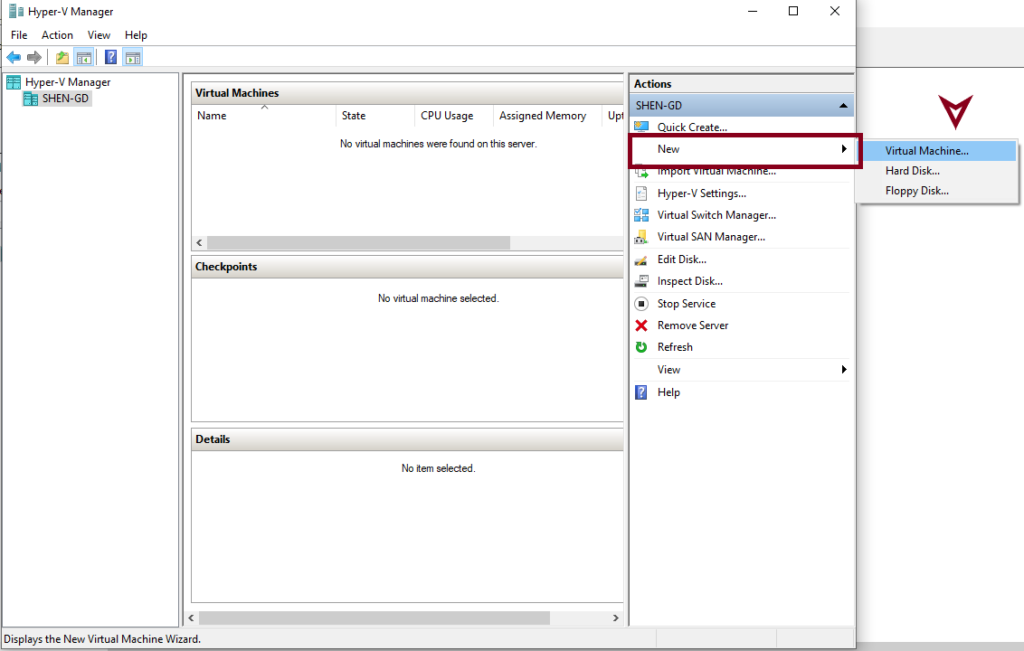
Once the system gets restart, press the Window key and search for Hyper-V Manager; Click on Open.
When you open Hyper-V Manager On the right side, you will get the activities option to Create New Virtual Machine. Click on that and select Virtual Machine Wizard
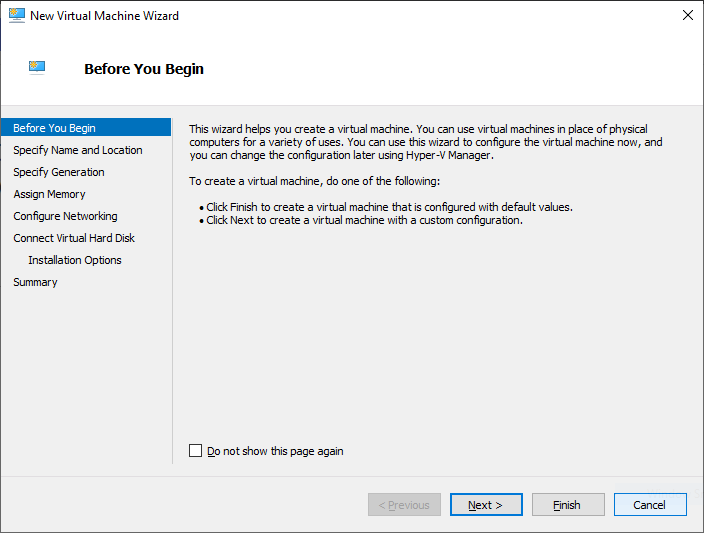
Step1:- Before you Begin
As you click on Virtual Machine Wizard, you will get the set of wizard screens. The first screen Before you Begin, this screen wizard gives you the basic instructions to create a Virtual Machine.
If you don’t want to get the Before you begin to screen for the Next Virtual Machine Wizard, Click on Do not show this page again and click on Next.
Step2:- Specify Name and Location
In this screen, you need to provide a Virtual Machine Name. In my case, I have put Garuda Linux. If you want to change the default location, click on Store the virtual machine in a different location and click on Browse to choose a location.

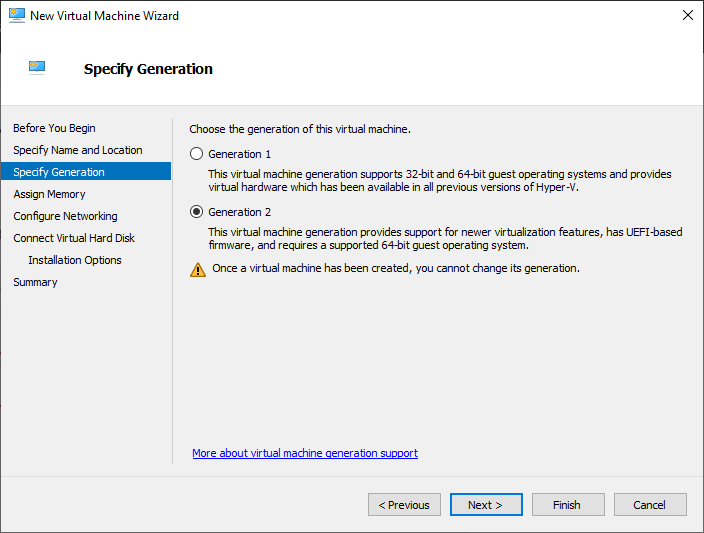
Step 3:- Specify Generation
Over here, you need to select the Generation, and In a Hyper-V Manager, you are allowed to choose between Generation 1 and Generation 2.
It depends upon the guest operating system which you are trying to install. Microsoft, and we recommend you to use Generation 2 if you are trying to install the latest version of guest operating systems.
In short, if you want to install the latest version of Linux, Windows, you should choose Generation 2.
If you are still unsure about what generation you should choose to read this guide. Once you choose the virtual machine’s generation, you will not be able to modify it later.
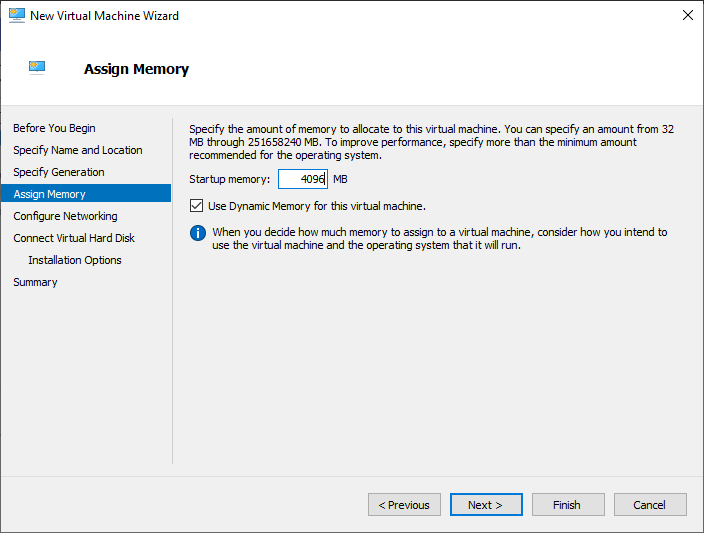
Step 4:- Assign Memory
This screen helps you to specify RAM memory for the Virtual Machine. It’s better to read the minimum RAM requirement for the guest operating to get optimal performance.
Keep check Dynamic Memory for this virtual machine and click on Next.
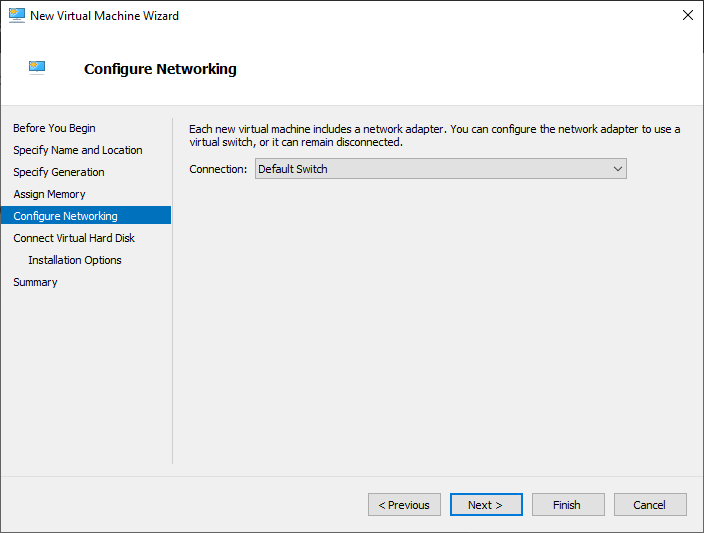
Step 5:- Configure Networking
Who Don’t want Internet connection To get network connectivity on your virtual machine, click on the Connection Drop-down and choose Default Switch.
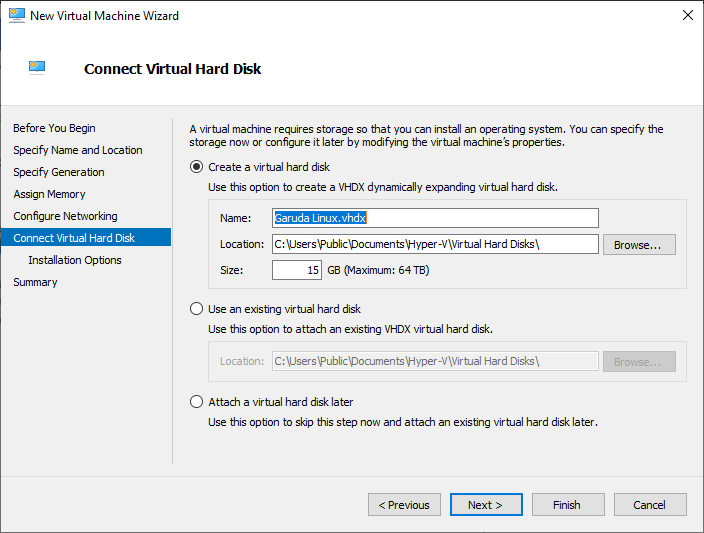
Step 6:- Connect Virtual Hard Disk
In this screen, you will get the three option to connect a virtual Disk such as follows
- Create a virtual hard disk
- Use an existing virtual hard disk
- Attach a virtual hard disk later
When you choose a virtual hard disk, it allows you to provide a Virtual hard disk name, a location where you need to keep the Virtual hard disk and the last size of the Disk.
A second option use an existing virtual hard disk option, which is useful when you have already created or downloaded .VHDX file
Click on Browse and locate.

The last option Attach a virtual hard disk later is like a temporary skipping the current process, and you can attach virtual hard disk later.
In this excerpt, we will use Create a virtual hard disk. We have provided a virtual disk name, kept the default location. If you want to change location, click on Browse and the last provided disk size 15 GB.
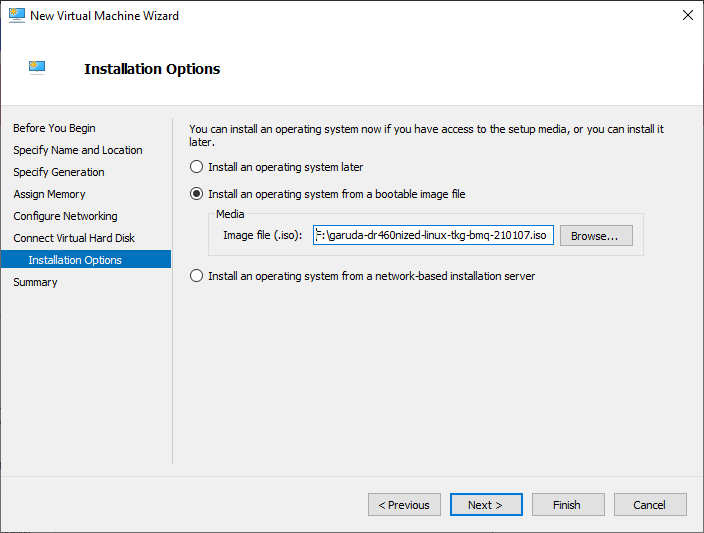
Step 6A:- Installation Options
This option will show when you choose the Create a virtual hard disk. In this step, we will provide the .iso file location to provide a location. Click on Browse after providing the .iso file location click on Next to summarize Configuration.
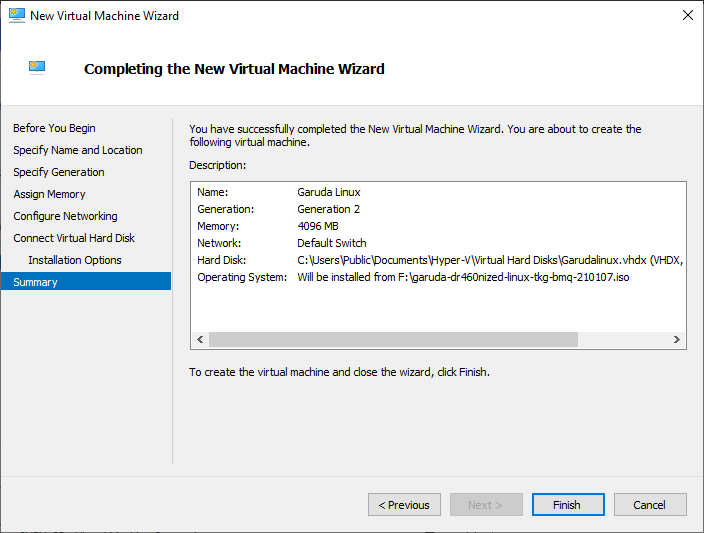
Step 7:- Completing the New Virtual Machine Wizard
This is the last step. Please check the configuration once. When you are sure about your choices, click on Finish.
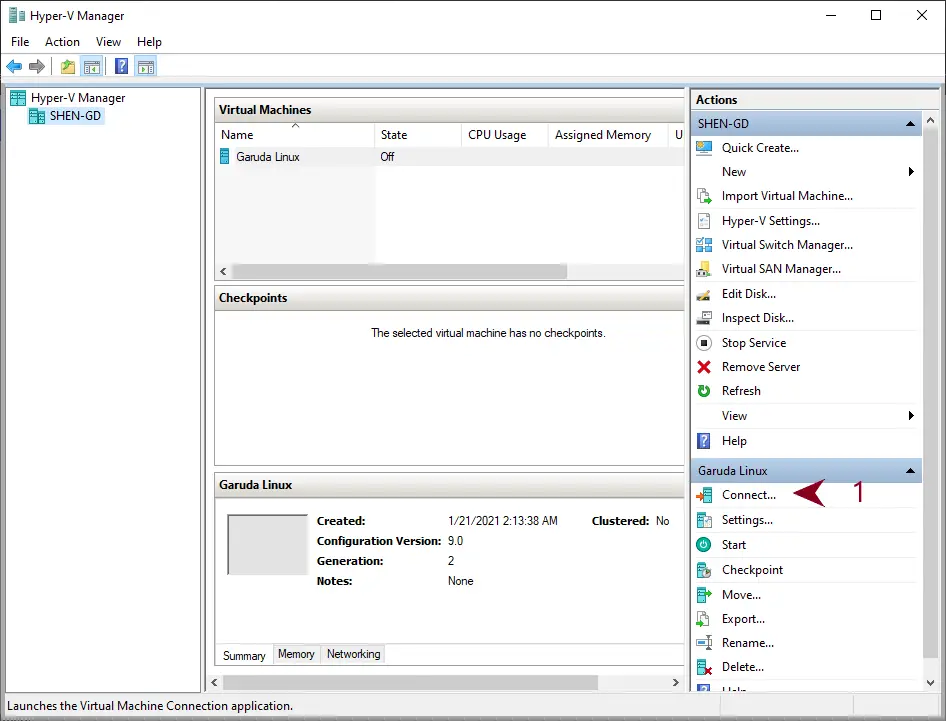
Start Virtual Machine
From the above step, we are able to create a new Virtual Machine in Hyper-V. Now, it’s time to power on the Virtual Machine.
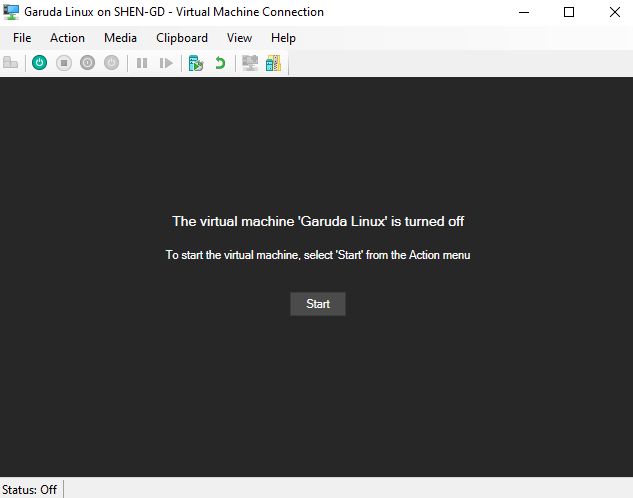
To start Virtual Machine, click Connect under the Virtual Machine Name column and wait for the machine to connect.
We are almost done click on Start to Power on
Wrap-Up
That’s it for today, and In the upcoming article, we will show you the Installation part too. If you are not able to make it, please drop the query in the comment section.
If you want me to cover something please let me know.