The graphics card (also referred to as a GPU or video card) has become one of the most important parts of today’s computing technology. The most widely known graphics card manufacturers are Nvidia, Radeon, and Intel, which are integrated into major desktop/laptop systems.
Does Linux require a graphics driver?
Assembling them does not allow them to function properly until the appropriate driver is installed, and most of these graphics card drivers are proprietary (closed-source). And as you know, Linux is famously known for being open-source and providing FOSS software.
Also Read: How to Find Graphics Card in Linux System
So, it’s become challenging for Linux distributions to have proprietary drivers, so they replace them with an alternative open-source driver. Sometimes, this open-source driver malfunctions and behaves unusually, which can only be resolved by installing proprietary drivers.
How to Install Proprietary Graphics Drivers on Ubuntu Linux?
Ubuntu and other major Linux distributions automatically detect the system graphics card and install their open-source driver by default. To install a proprietary driver, you need to perform a few more steps.
Step 1: Open Software & Updates Application
First, search for software in the Ubuntu application launcher menu, as shown below.
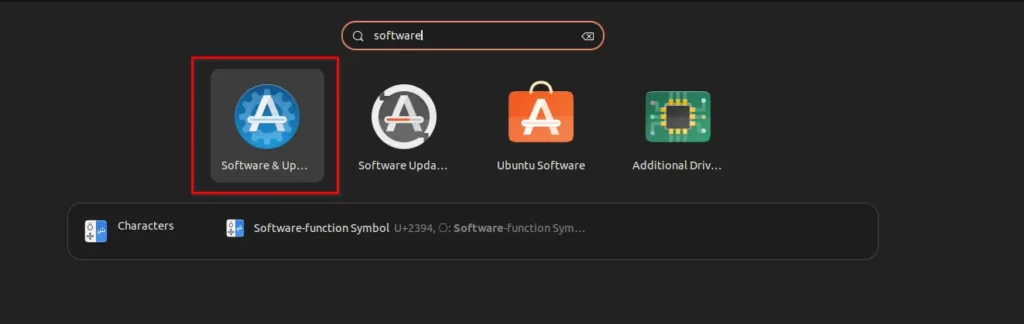
Click on the Software & Updates icon, or you can directly launch it using the below command.
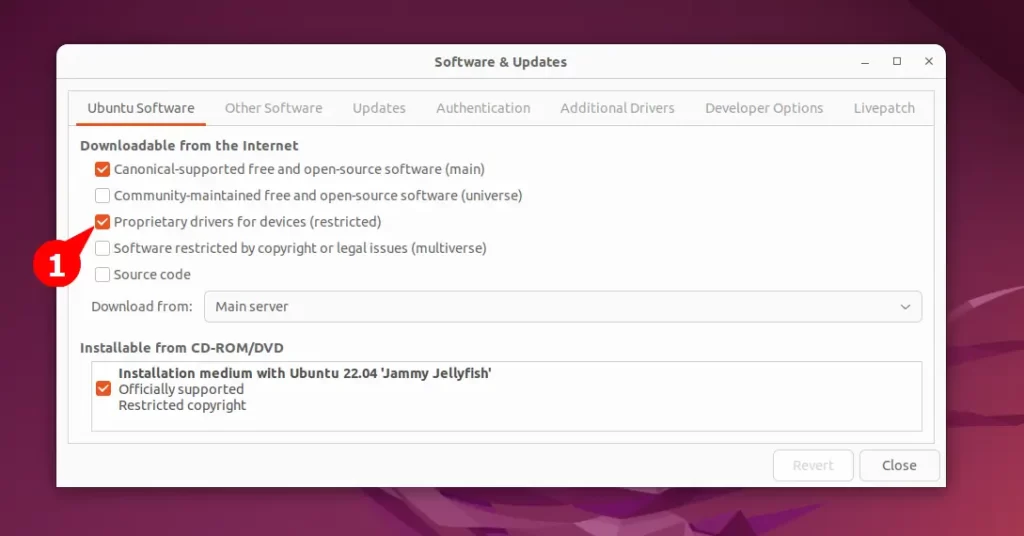
$ software-properties-gtkStep 2: Enabling Proprietary Graphics Drivers
From the Downloadable from the Internet section, check the box in front of Proprietary drivers for devices (restricted).
Step 3: Installing Proprietary Graphics Drivers
Now, navigate to the Additional drivers section, as shown below.
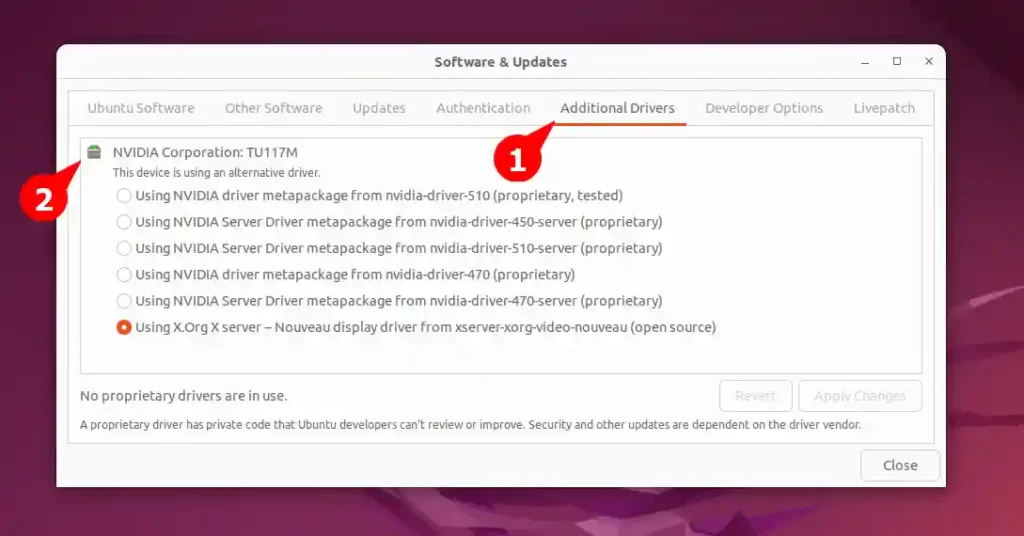
It will list the drivers for all connected devices like graphics cards, sound cards, wireless (WiFi), etc. As you can see, it shows the NVIDIA Corporation: TU117M hardware in the system.
Suggestion: How to fix rtl8723be no Wifi Network connection in Debian
Currently, the open-source Nouveau driver is installed, which might lack some functionality. However, you can check any other driver available for the same device.
In this case, I will install the first driver by checking the box in front of nvidia-driver-510, but you can change it according to the device assembled in your system.
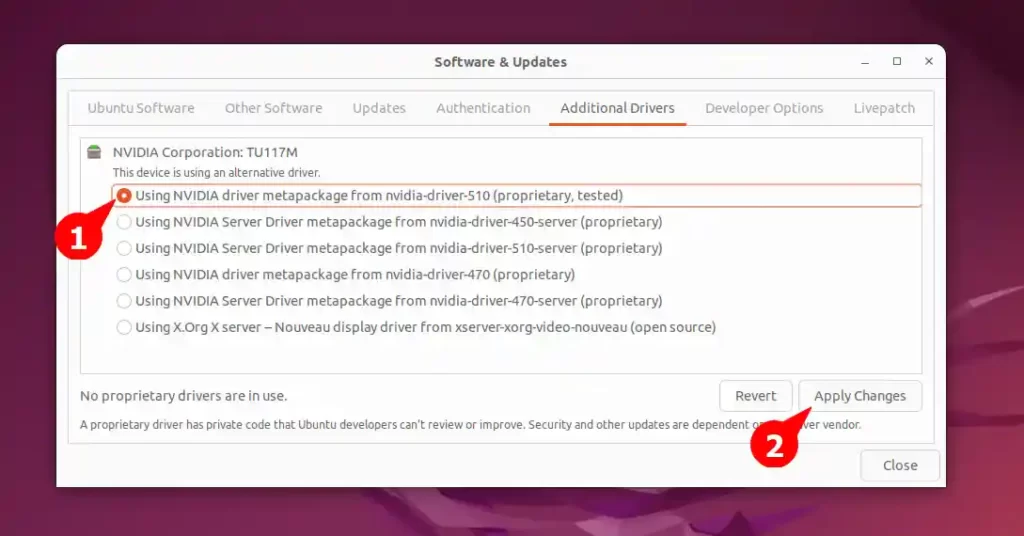
After you choose the graphic driver you want to install, click on the Apply Changes button and wait for a few minutes. Lastly, reboot your system to let it properly reflect the new changes.
These can be short articles but can be effective. If you want to know more about this topic, then definitely let us know in the comment section.