Backup is one of the essential requirements for Linux users. The next Sudo command may ruin your whole system into an empty bucket.
It’s happened to me, and I have also heard it from others. When new user joins the Linux army, they tend to forget that they are not in the Windows system anymore; here, any wrong step can bring misfortune to your files.
“Data is a precious thing and will last longer than the systems themselves.”
Tim Berners-Lee
Today, you will learn to install and configure Deja Dup for automatic schedule backup to protect your file.
What is Deja Dup
Deja Dup is a GUI application that offers a simple backup solution for your files and documents. Duplicity would be another name for Deja Dup if you used command-line to backup your files.
Ubuntu provides Deja Dup out of the box, and other distributions can also install it using the respective package manager. Besides being a simple tool, it bundles with a lot of features.
Features
- Schedules regular backup.
- Support for local, remote, and cloud backup locations like Google Drive.
- Built-in encryptions and compression support.
- Incremental backup. (Restore from any particular backup)
- Best suitable for the GNOME based systems.
Installation
Deja Dup is quite a popular tool, and Ubuntu provides it out of the box. To find out, open your activity manager (or dash) and search for backup (or Deja Dup).
Didn’t find it? Don’t worry; below is the method to install it on Debian-based distros like Ubuntu and other distributions.
Debian and Ubuntu
$ sudo apt install deja-dupFedora and CentOS
$ dnf install deja-dupArch and Manjaro
$ sudo pacman -Sy deja-dupAfter installation, open your dash (or menu) again and search for backup (or Deja Dup).
Take Custom Backup
Now we will look into creating custom backups before scheduling. Once you open the Deja Dup, the “Overview” tab will be the active tab, from where Backup and Restore are done after configuration.

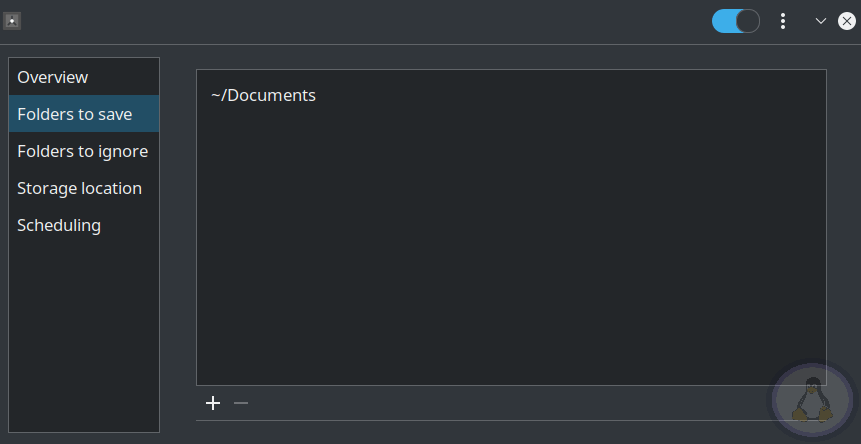
For now, skip the overview tab and jump to the “Folders to save”. Folders containing required backup files, add them all using the below “+” Button.
In my case, “Documents” is the leading directory to take backup.
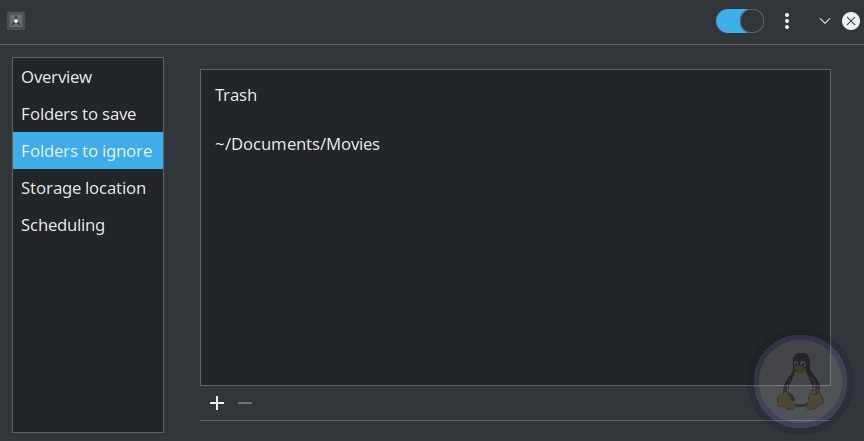
Undeniably my added “Documents” directory contains many subdirectories without needing them to take backup right now.
To ignore them, jump to the “Folders to ignore” tab and add all those folders that need to be ignored while taking backup. (In my case, its Movies directory)
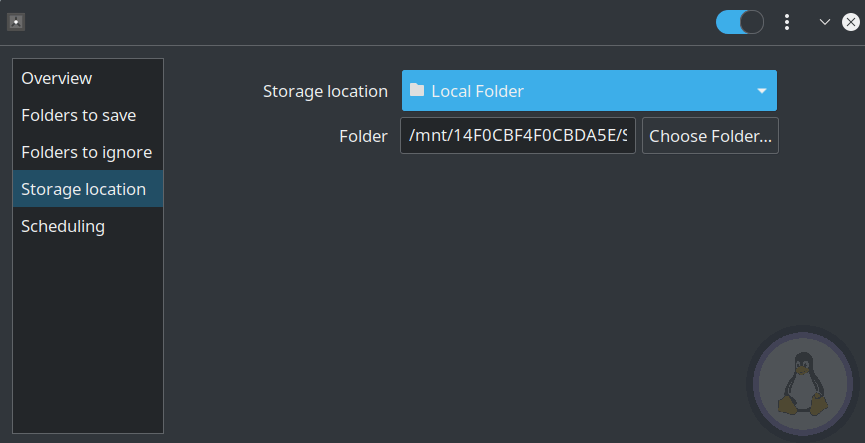
The next step is to specify where the backup files will be stored. Jump to the “Storage location” and select the location. By default, three locations are available locally, remote, and google drive.
In my case, I am going with the “Local folder” same for you; then, choose the destination place to store backup files by clicking “Choose Folder”.
Once you are done, go to the “Overview” tab and click on the backup button to start the process of taking backups.
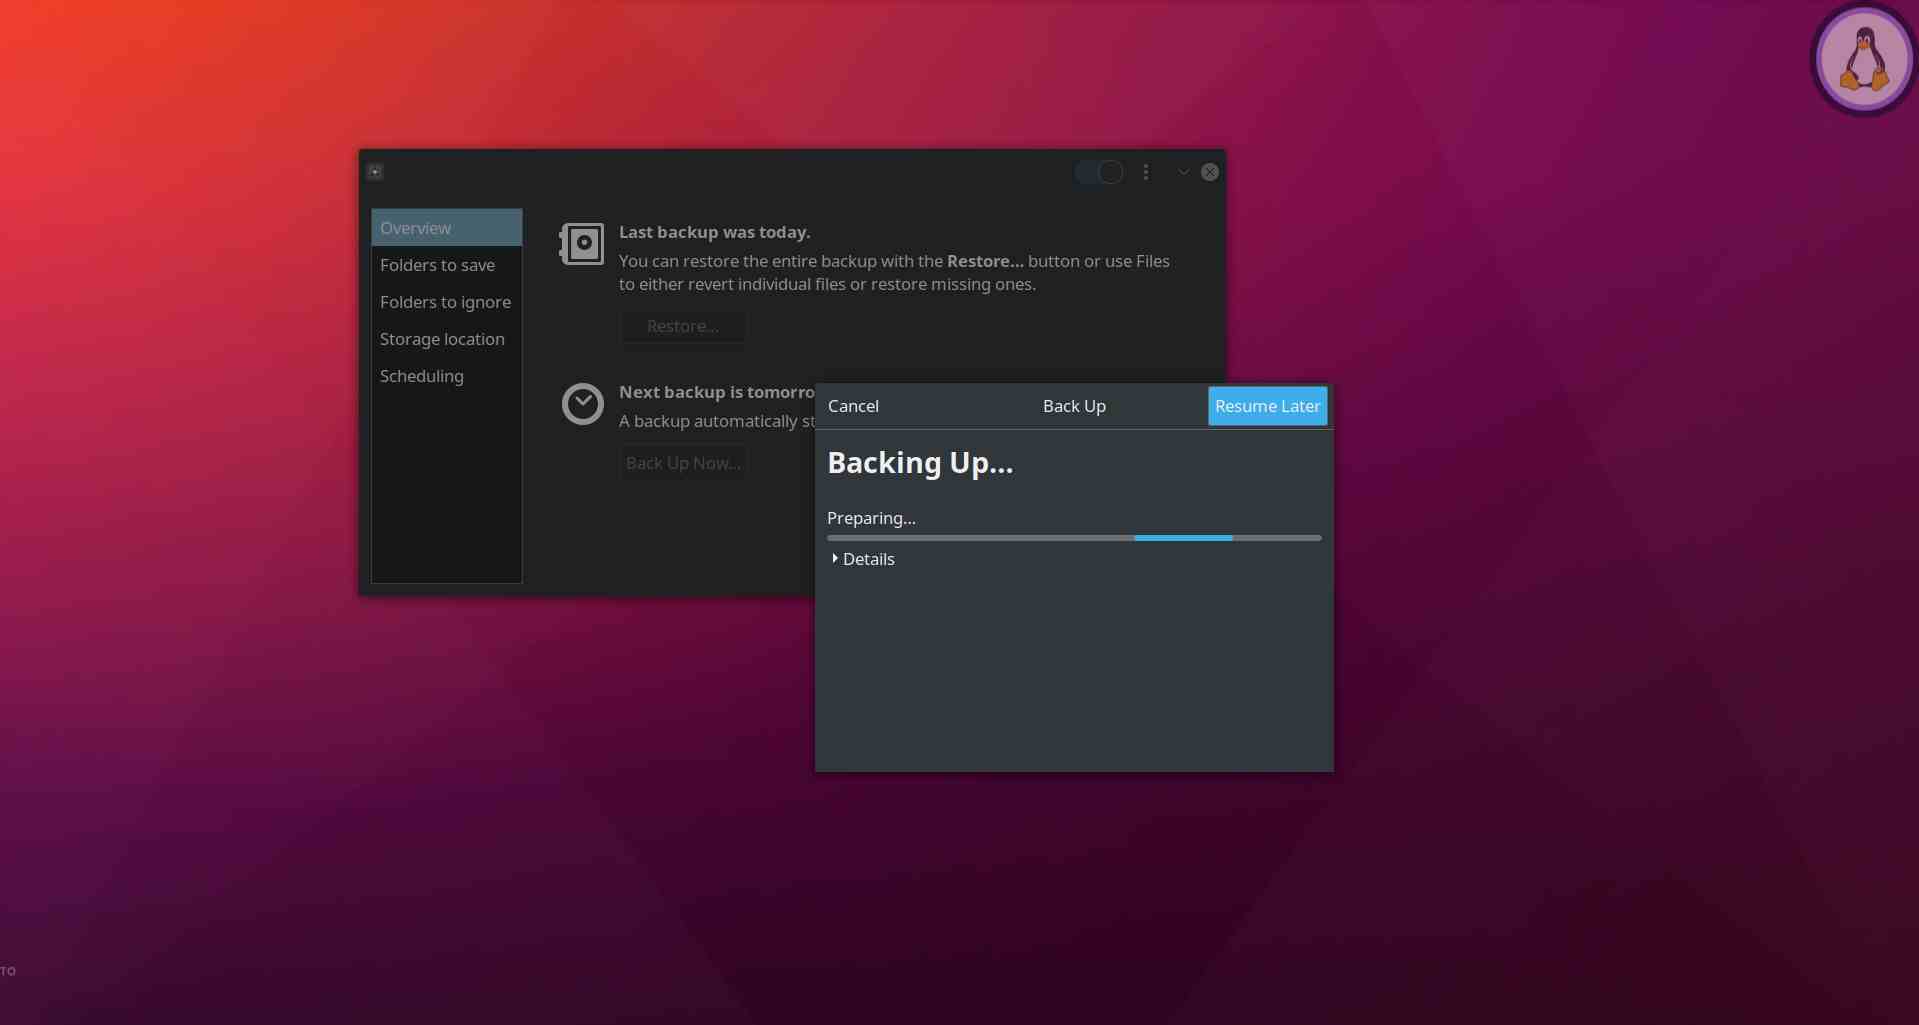
Now grab a coffee and wait a while until it is completely done.
Scheduling a Backup
Who wants to have a headache clicking the backup button every time to take backups. Deja Dup supports schedule backup with the help of cron jobs.
To enable, go to the last tab, “Scheduling,” and allow Automatic backup, and select your good day to take backup; also, don’t forget to choose the amount of timeframe your old data stay.
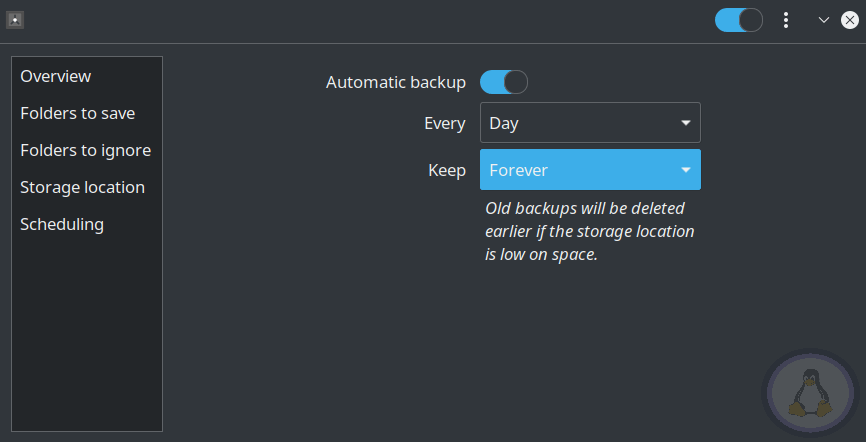
Once done with your work, close the windows and wait for the day to start the automatic backup.
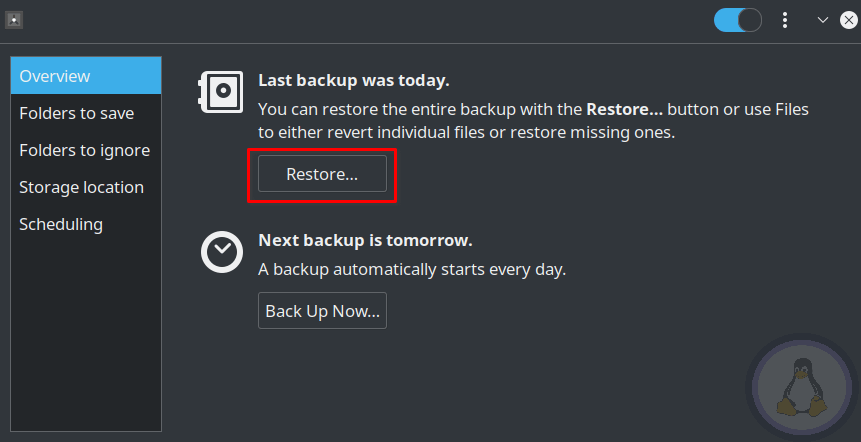
Restoring a Backup
From the “Overview” tab, click the “Restore” button to start the process of restoring, or we can say recovering files.
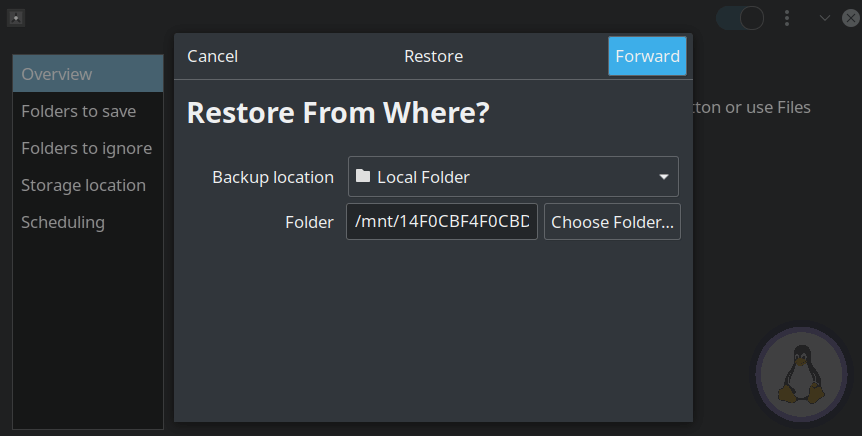
Now Restore window will pop up, asking you for the location of your backup files. If your encrypted file is from a different system, place it inside Pendrive and select “Local folder,” and choose the encrypted folder and click “Forward.”
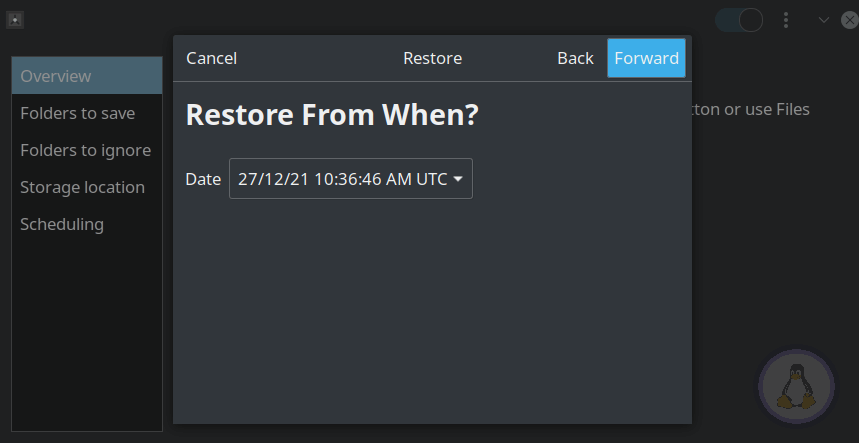
It will take some time to analyze the backup and then present you with the available “Date” list where the backup is taken. Choose the respective date and again click “Forward.”
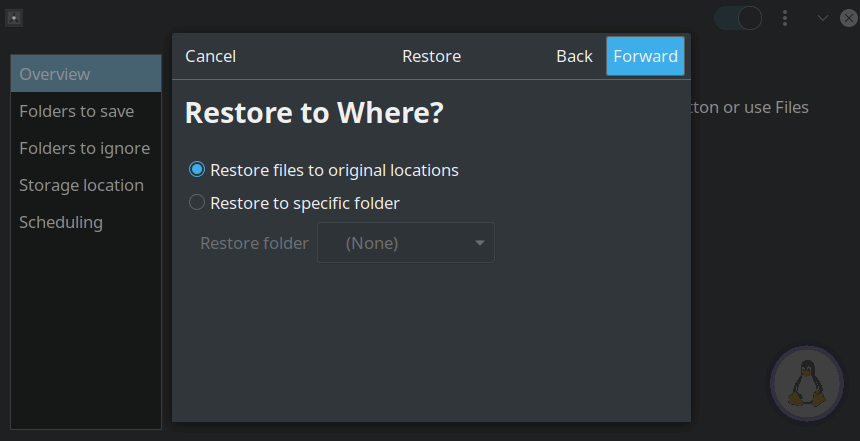
Now Select the respective place to store all of the decrypted backup files. You have two options “Restore files to original locations” it automatically restores the file to its original location. Avoid it if the backup was taken from a different system.
“Restore to specific folder” is the option to restore backups encrypted in a different system. In my case, I will go with “Restore files to original locations” because the backup is taken and the restoring system is the same.
Finally, it will show you the summary with all the settings.
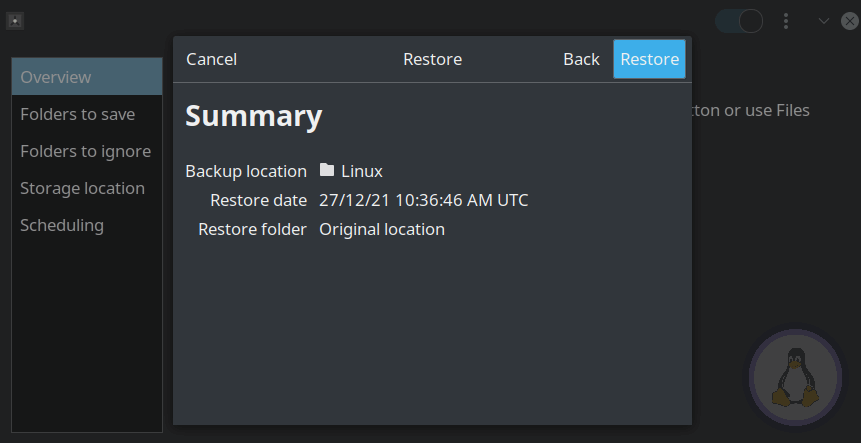
Check it out, and click the “Restore” button to start the process of restoring.

Now have another cup of coffee because it will first prepare the files and then start restoring, which takes a reasonable amount of time depending upon the size of the encrypted backup.
Final Thought
Deja Dup is a good application for taking backups for files and folders. Being long in the game but still lacks a few things, like we cannot take the backup of our whole system.
We have another excellent tool known as timeshift for that job, but still, Deja Dup is worth considering. Let me know how many times you have lost your files permanently in the comment section.