Dealing with data loss is quite tricky. You might encounter a malware threat that suddenly deletes important files. The odds of a natural disaster are also there, but they are not as common, particularly given how computers and other devices with data advanced in built-in safety nets.
Having said that, the need to recover lost files could also arise because of your own mistakes. You might be looking for storage tips for your computer and find suggestions to delete certain files. Without realizing it, you select other unrelated files and click the delete button.
Well, there is no real need to panic even if you have removed the only copy of very important files from your computer.
This article will tell you how to recover files in Linux using the TestDisk tool.
TestDisk
The tool should be part of the built-in package as most Linux distributions include it in official repositories. However, it does not mean that you can start using TestDisk right away.
No, you still need to install it if you have not. To do that, use the following command:
************* On Debian/Ubuntu ******************
$ sudo apt update && apt upgrade
$ sudo apt install testdisk

************ On RHEL/CentOS 8 Stream *************
$ sudo dnf install https://dl.fedoraproject.org/pub/epel/epel-release-latest-8.noarch.rpm
$ sudo dnf update
$ sudo dnf install testdisk

************ On Arch/Manajaro Linux *************
$ sudo pacman -S testdisk
If you have Arch Linux, you can download and install TestDisk from AUR or other distributors who offer Linux products.
The last thing to note before we get to the actual file recovery process is that this guide is not just for the Ubuntu Linux operating system. The steps we discuss in this article also apply to other Linux Distributions.
Step #1
As expected, the first step is usually the easiest, and this particular guide is no exception. You want to start by running TestDisk in the terminal. To do that, enter this command:
$ testdisk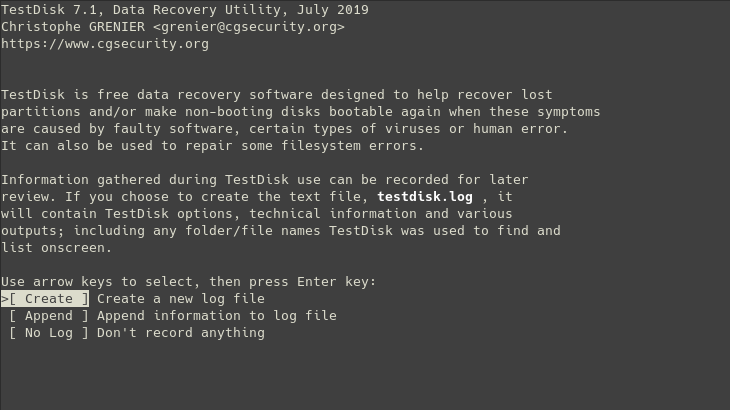
Step #2
The second step is to look through the tool’s interface. When you open TestDisk, you might feel a bit overwhelmed with the presented information. However, once you spend a few minutes reading the text, things should become clear.
Use the arrow keys on your keyboard to navigate the interface so that you end up in the “Create a new log file” section.

Step #3
If things are okay, you should gain access to the computer’s drive. However, for the purpose of this guide, we will cover situations where accessing the drive is not that straightforward. Some users might have a multi-boot machine, and TimeDisk will ask you for permission to open them.
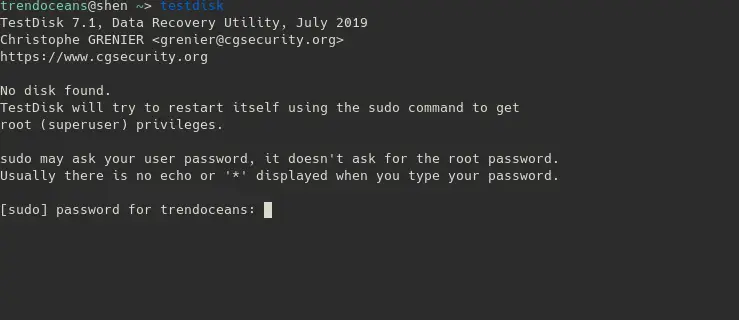
On the interface, you should see three options at the bottom: Proceed, Sudo, and Quit. To continue, select “Sudo” and type in your password. Click “enter” twice to let TestDisk create a log file.
Step #4
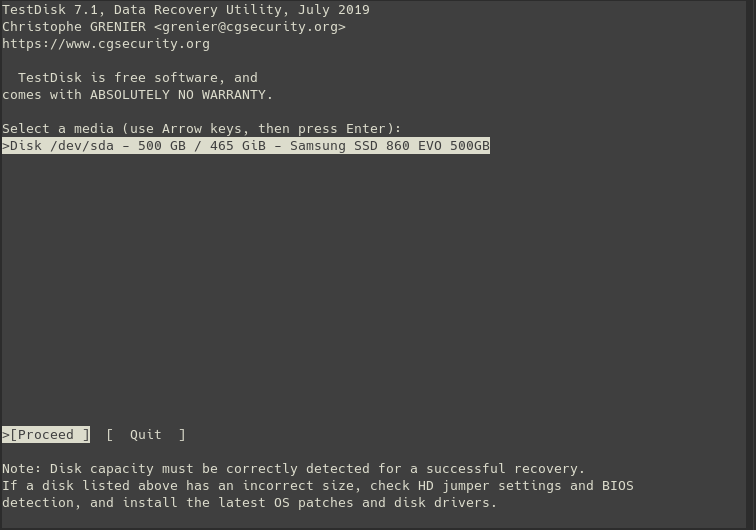
After hitting enter and waiting for TestDisk to create a log file, you should get access to all of the drives on your computer. Use the arrow key again to navigate to the drive that had a deleted file and select it.
Step #5
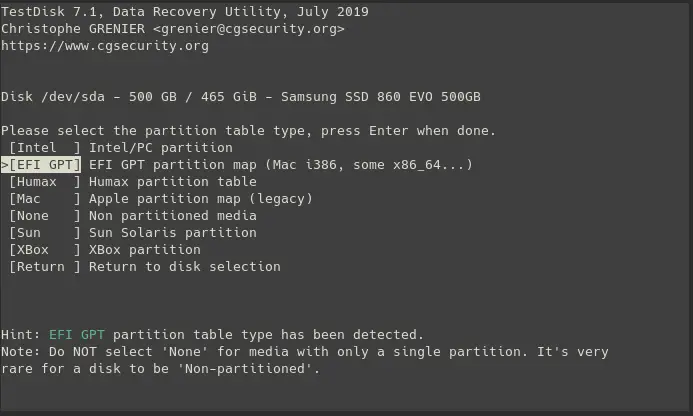
TestDisk should select the right option, titled “Non partitioned media,” which makes sense given how most storage devices are not really partitioned. Of course, if there is an exception with your computer, you will need to pick the right option. Once you navigate to the right setting, hit “enter.”
Step #6
We are nearly at the end. If you bothered learning a bit about TestDisk, you might be aware that the tool does more than just file recovery. One could say that it is also a powerful disk utility.
Regardless, the point of this guide is to recover a deleted file, right? Out of the presented options in the TestDisk interface, select “Advanced” and press the “enter” key.

Step #7
At the bottom of the interface, you will see a few different options, including Type, Boot, Image Creation, and Quit. Ignore those and click on the [Undelete] setting for Window files system.
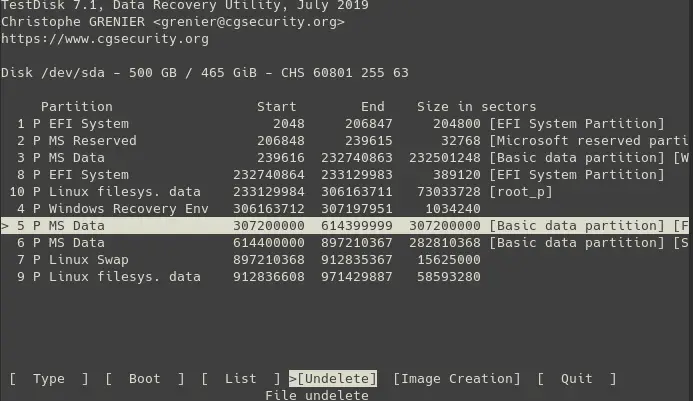
For Linux file system select [List] options to perform next step.
From here, you will need to carefully look through the presented files and use the arrow keys to navigate and end up on a file you want to recover.
Step #8
Again, the bottom of the interface shows you instructions that you should follow. If you want to recover an individual file rather than a group of files, click “c” to proceed. After clicking “c,” you will end up in the interface that shows individual deleted files.

TestDisk highlights deleted data in red, which makes it, and to recover a file, just highlight it, and then press “c”.
Some Pointers While Using TestDisk
Figuring out how TestDisk works is not that difficult, even if you are not that tech-savvy. However, there might still be a few issues since you are not familiar with a new environment.
A good piece of advice to remember is that you can use the “q” key as a return button. If you want to go back to a previous window instead of quitting and launching TestDisk again.
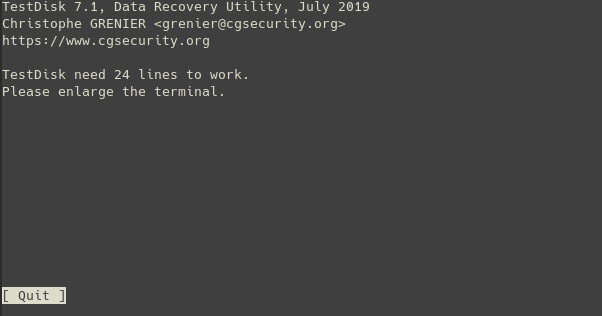
While working you may encounter with error “TestDisk need 24 lines to work. Please enlarge the terminal.” I think error is self-explanatory, so please increase the size of the current terminal window.
Also, if you have connected an external drive or another storage accessory to the computer, disconnect them while using TestDisk so that there are fewer storage locations to look through.