Today, you will learn what a Nim programming language is, why we need Nim over other programming languages, and different ways to install Nim on your Linux system.
What is Nim Programming Language?
Nim is an open-source, imperative, statically typed compiled programming language. Nim combines the concepts from mature programming languages such as Python, Ada, and Modula.
The public release was in 2008, and while writing this article latest stable version of the Nim is 1.6.4. It supports all major operating systems such as Linux, macOS, BSD, and Microsoft Windows.
Why to use Nim?
Nim is a multi-paradigm programming language that supports both procedural and object-oriented programming philosophies. It can compile everything from C to Javascript. You can use it in a project where you don’t want to sacrifice performance and learning is very easy if you were familiar with python.
Nim is the Replacement of Python?
No, Python and Nim may share the same syntax for programming, but both have their own uniqueness while python is a mature language where nim came in 2008. Nim is mostly used to write fast systems such as games, blockchain, scientific computing libraries, etc.
Install Nim Programming Language on Linux [3 Ways]
Before installing Nim using any of the below-mentioned methods, first, you need to install a GCC compiler to allow Nim to work perfectly. To do that, you can install a developer tool in your Linux system that bundles all the Nim programming language requirements.
Below is the different method to install it depending upon your distribution.
On Debian/Ubuntu
$ sudo apt update
$ sudo apt install build-essential
On RHEL/CentOS/Fedora
$ sudo yum update
$ sudo yum groupinstall "Development Tools"
On Arch/Manjaro
$ sudo pacman -Syyu
$ sudo pacman -S base-devel
After the installation is complete, use any of the below-mentioned methods to install Nim on your system.
1. Install using choosenim [Offically Recommended]
Nim officially recommends using the choosenim installer to install the Nim programming language. The reason behind is pretty simple, choosenim is a toolchain multiplexer. It helps the user install multiple versions of the Nim simultaneously and gives them the power to switch between versions easily.
To install the latest stable version of the Nim using choosenim, use the below command and execute it into the terminal.
$ curl https://nim-lang.org/choosenim/init.sh -sSf | shWhile installation, it may ask for permission in “yes/no” for asking you to allow or not for choosenim to send telemetry data to their server. In my case, I choose “N” for my personal preference and then press enter.

After the successful installation, you can see the below screen.
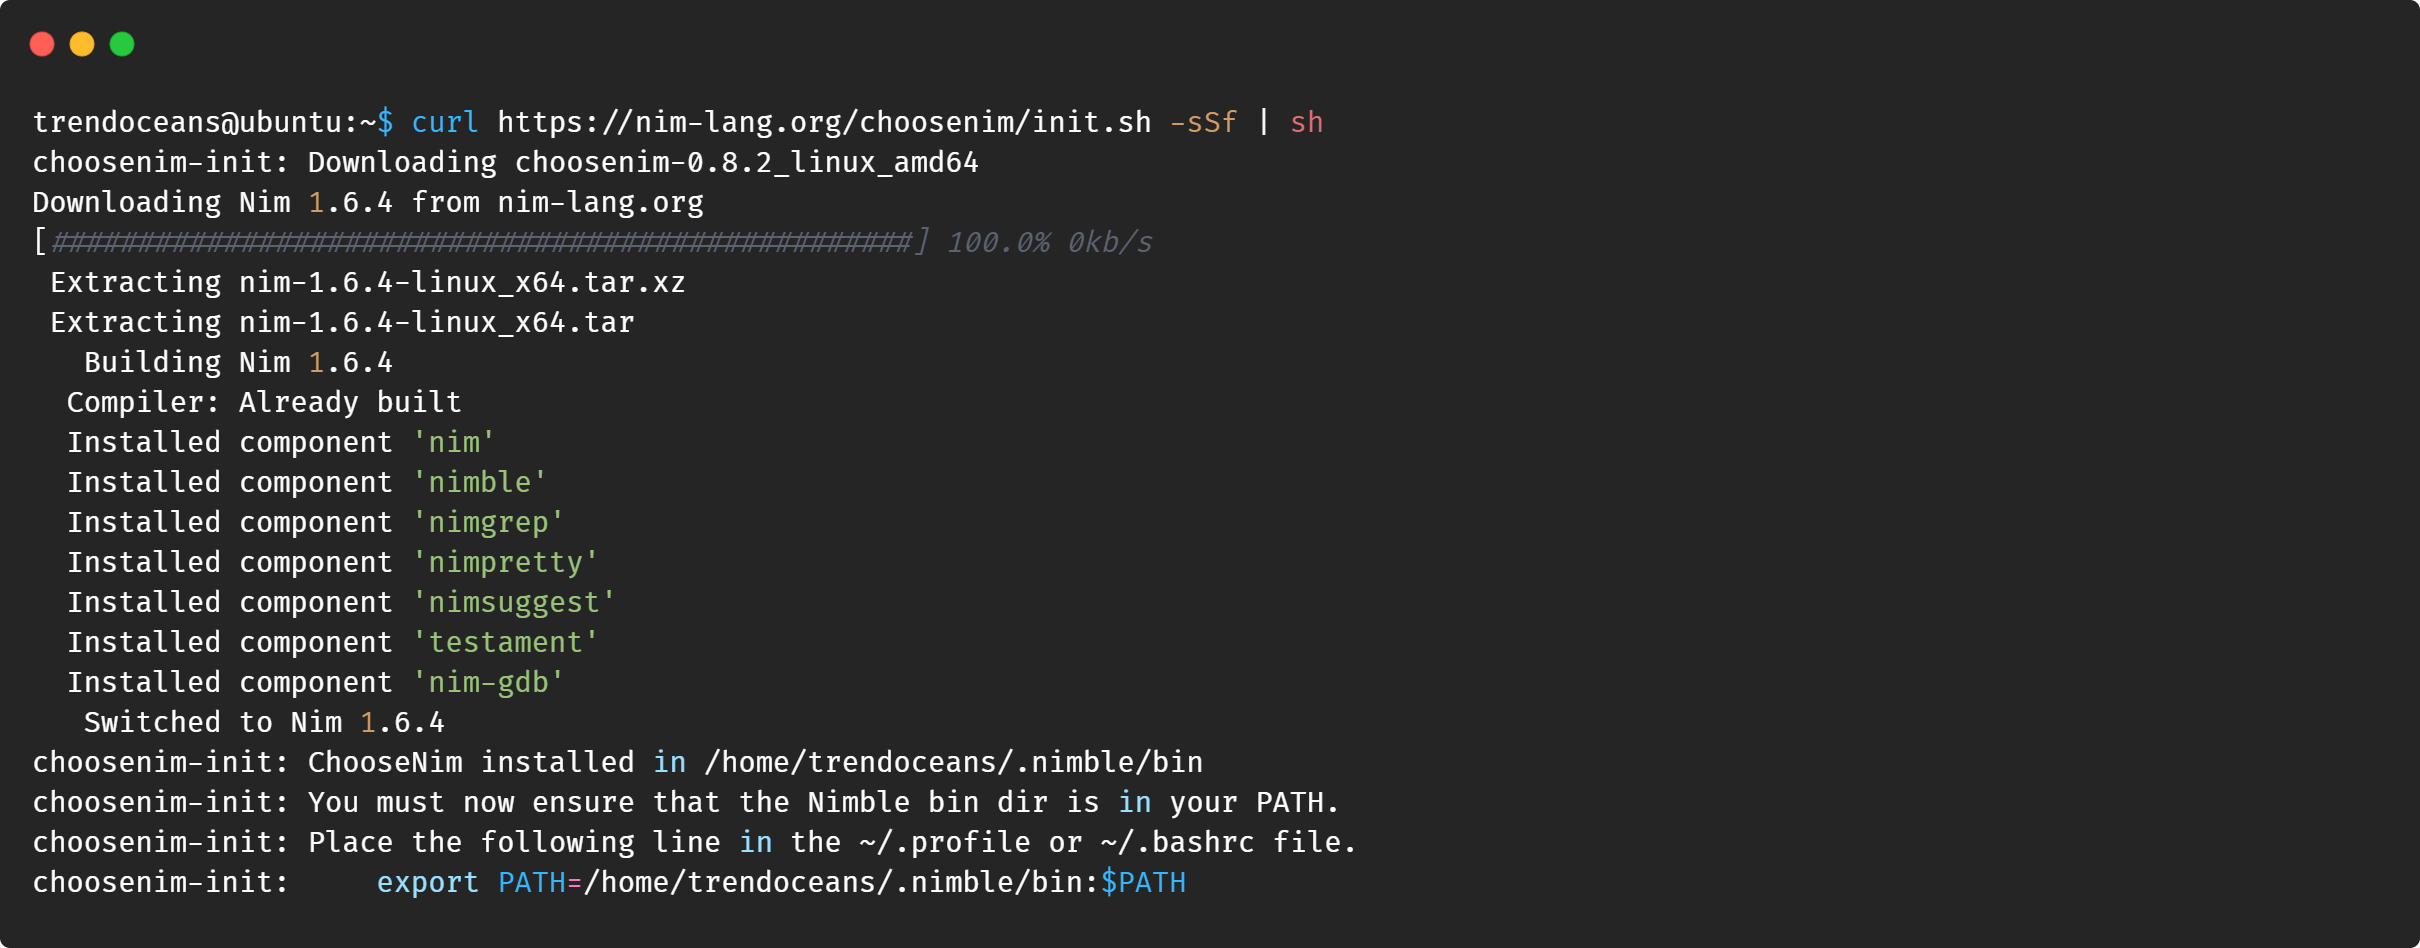
As you can at the last line, Nim asks you to add the “~/.nimble/bin” directory to your system path. Edit the “~/.bashrc” or “~/.profile” file and paste the path and end as described below.
Edit .bashrc or .profile file using your favorite text editor.
$ nano ~/.bashrcOr,
$ nano ~/.profileAfter that, paste the below code at the end of any one file mentioned above.
export PATH=/home/trendoceans/.nimble/bin:$PATH
Don’t forget to replace [trendoceans] path with your home directory.
Finally, update the changes made in the .bashrc or .profile file using the below method.
$ source ~/.bashrc #If Nim path is added in .bashrc
$ source ~/.profile #If Nim path is added in .profile
Now Nim is perfectly installed and added to your home path or if you are unsure about that, execute the below command to check.
$ nim -vBelow is the behavior of the above command.

Now, as it is successfully installed, let’s use the choosenim toolchain multiplexer to switch between different versions of the Nim programming language.
Switch from stable to the development version of the Nim.
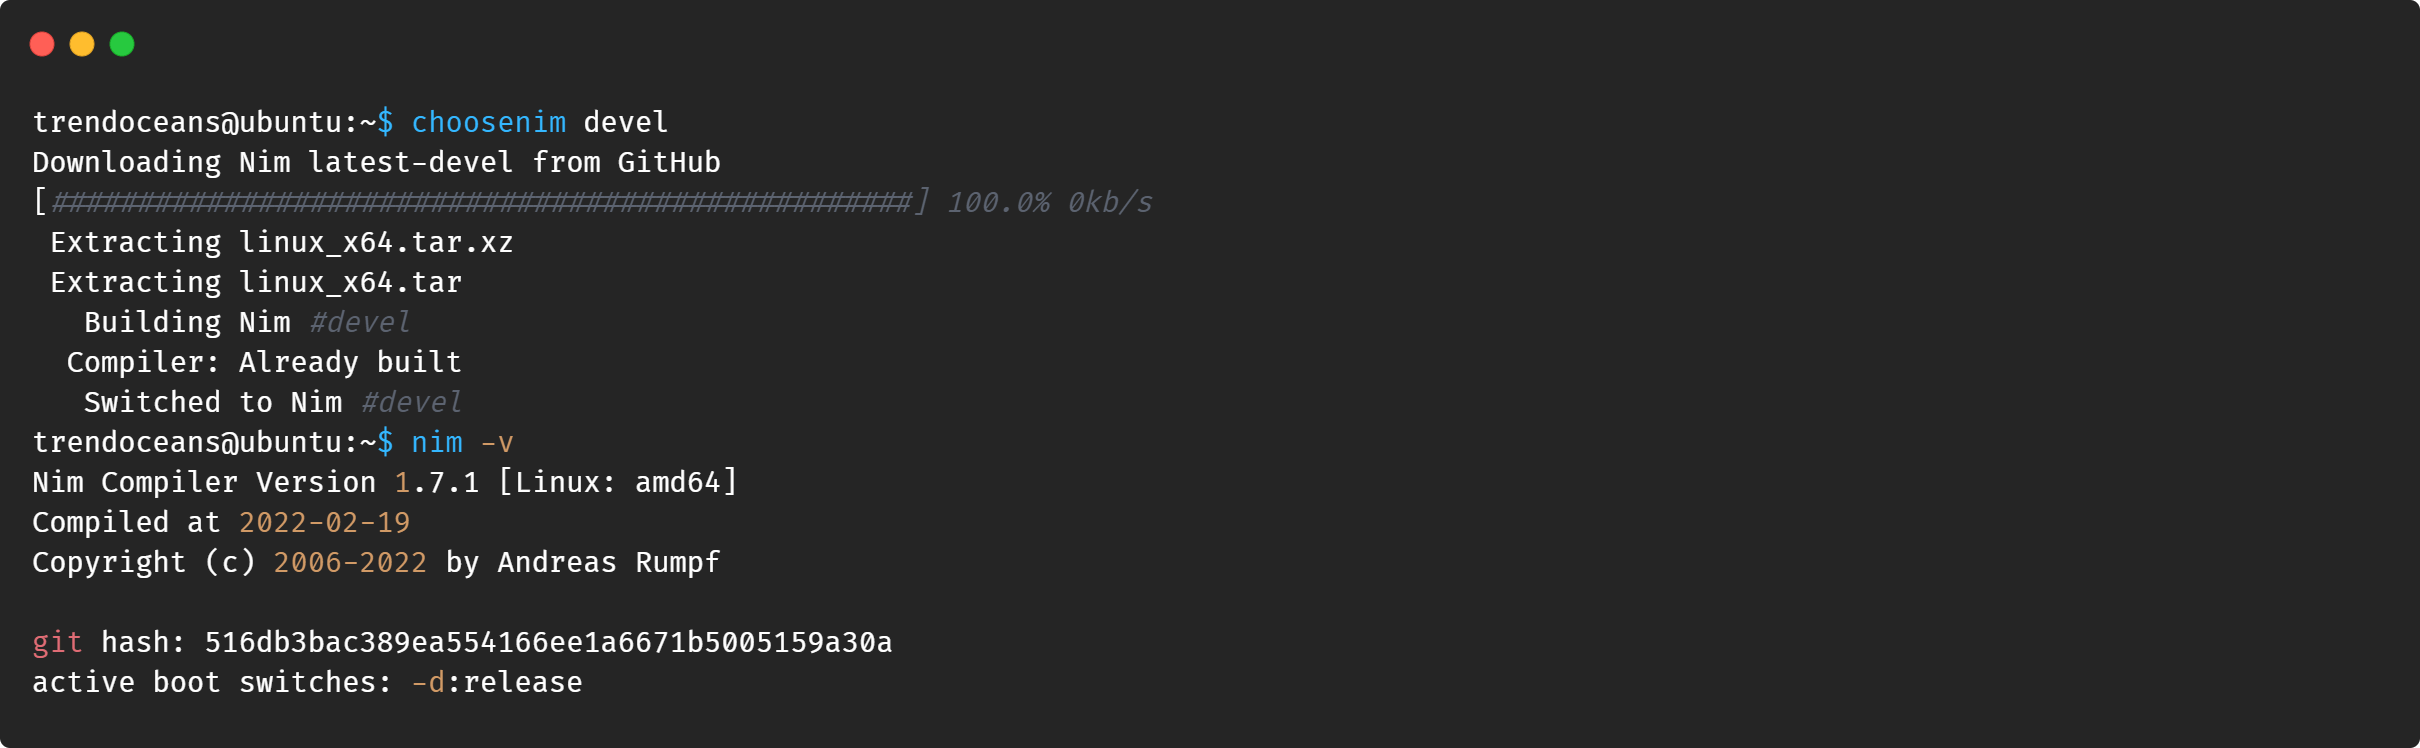
By default, choosenim goes with a stable version during the installation, but you can switch to the development version of the Nim by running the below command in the terminal.
$ choosenim devel
$ nim -v
Below is the behavior of the above command.
To switch back to the stable version, run the below command.
$ choosenim stable
Switched to Nim 1.6.4
Listing all available versions of the Nim programming language.
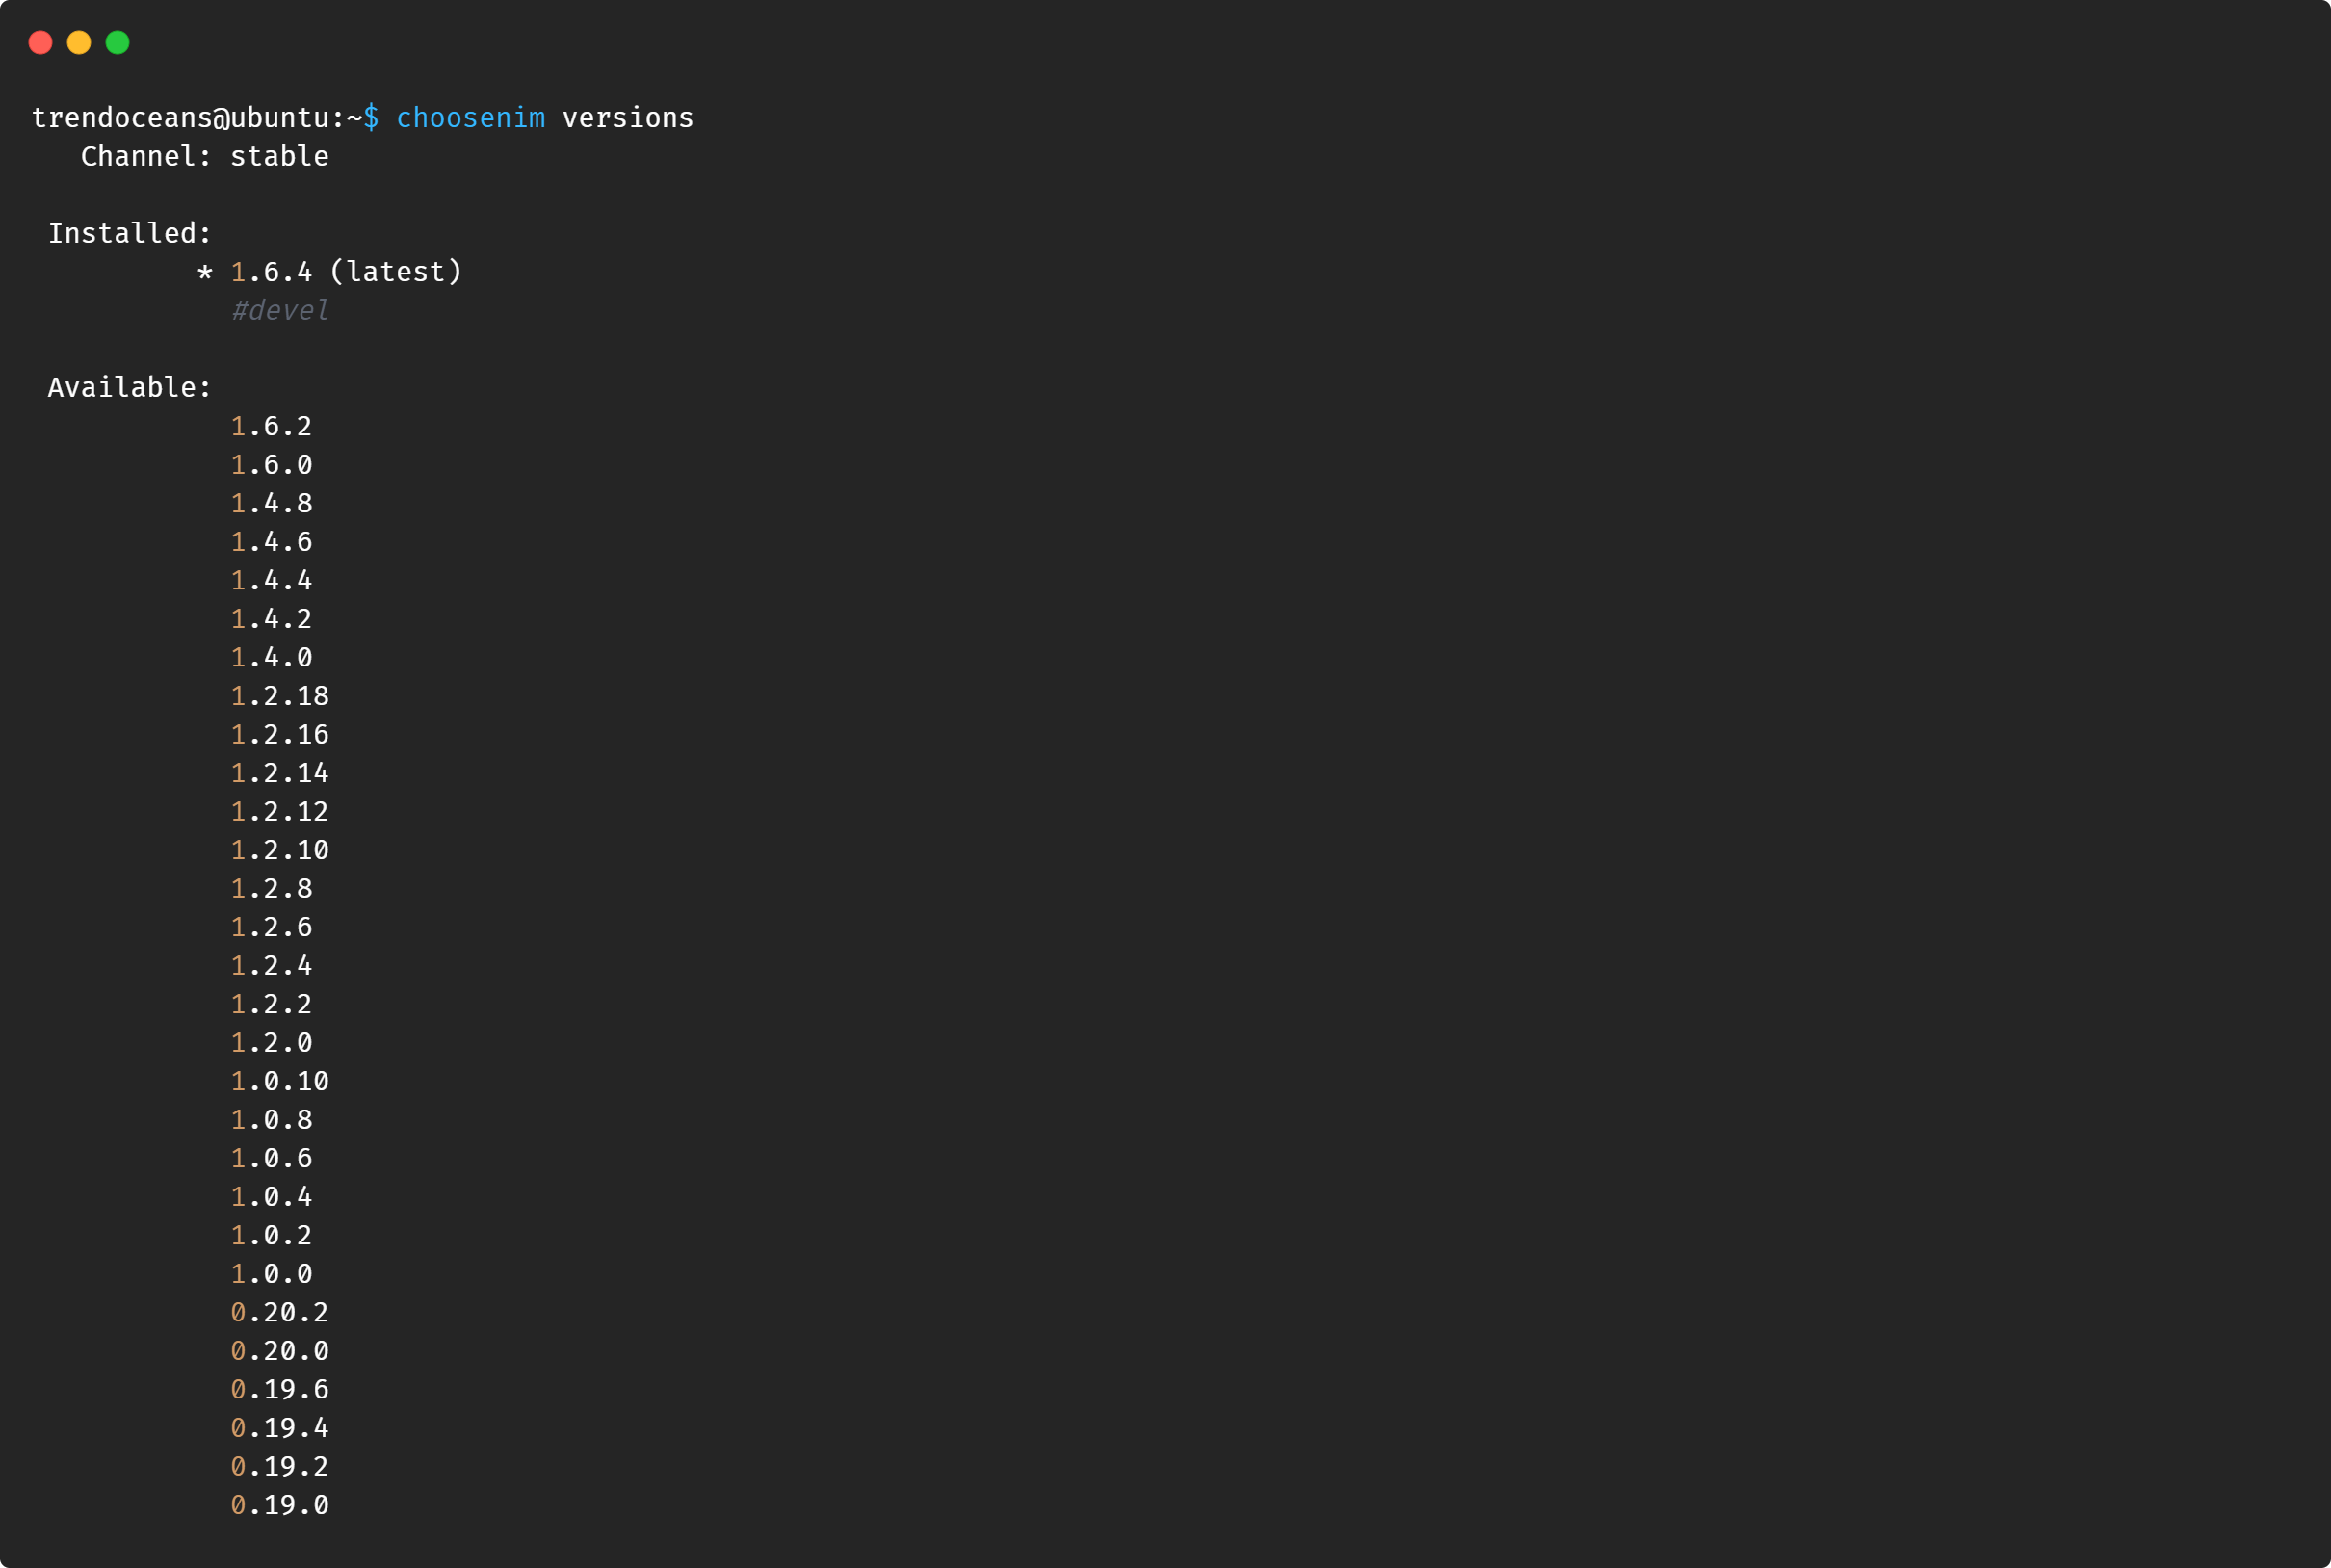
Besides stable and development, you can list all versions of Nim and cycle through each one of them using the choosenim installer.
To view the list of all Nim available versions, run the below command.
$ choosenim versionsBelow is the behavior of the above command.
Let’s take a scenario that I want to install Nim 1.6.0 in my system. For that, I follow the below command.
$ choosenim 1.6.0To revert to the stable version, follow the below command.
$ choosenim stableUpdating Nim
If you stick with the stable or development version of the Nim, then you can follow the below command to update the Nim to its latest available version.
We are updating the stable version of Nim.
$ choosenim update stableWe are updating the development version of Nim.
$ choosenim update develWith that, we can now see how to install Nim using the default package manager.
2. Install Nim using Distribution’s Package Manager
Nim is available to install in all popular Linux distributions using their default package manager. The only difference I have seen between choosenim and default package manager is the ability to cycle through versions.
If you are happy to stick with a stable version, follow any below commands respective to your distribution package manager.
Note: This method install the latest GCC compiler in your system along with Nim. If it is not installed.
$ sudo apt install nim #Debian/Ubuntu
$ sudo pacman -Sy nim #Arch/Manjaro
$ sudo dnf install nim #Fedora
$ sudo zypper install nim #OpenSUSE
Nim also has a snap package for a system having snapd. Follow the below method to install it using the snap package.
$ snap install nim-lang --classic #Latest stable release
OR
$ snap install nim-lang-lts-1 --classic #Latest LTS 1.0.x release
OR
$ snap install nim-lang-nightly --classic #Latest nightly build
3. Install using Docker
The Nim community had managed the docker image on the Docker Hub for the system having a docker engine.
To install it using docker, use any of the below commands.
$ docker pull nimlang/nim #Latest stable image
OR
$ docker pull nimlang/nim:devel #Latest development version
Running Nim Program
To verify that everything is working correctly, let’s run the simple program with Nim.
Step 1: Creating Text File
In my case, the file’s name is “trendoceans,” and don’t forget to add the “.nim” extension at the end.
$ nano trendoceans.nimStep 2: Adding Content
Now add some content inside the text file, which will be compiled and executed later.
$ echo "Welcome To TRENDOCEANS!"Step 3: Compiling the Nim Program
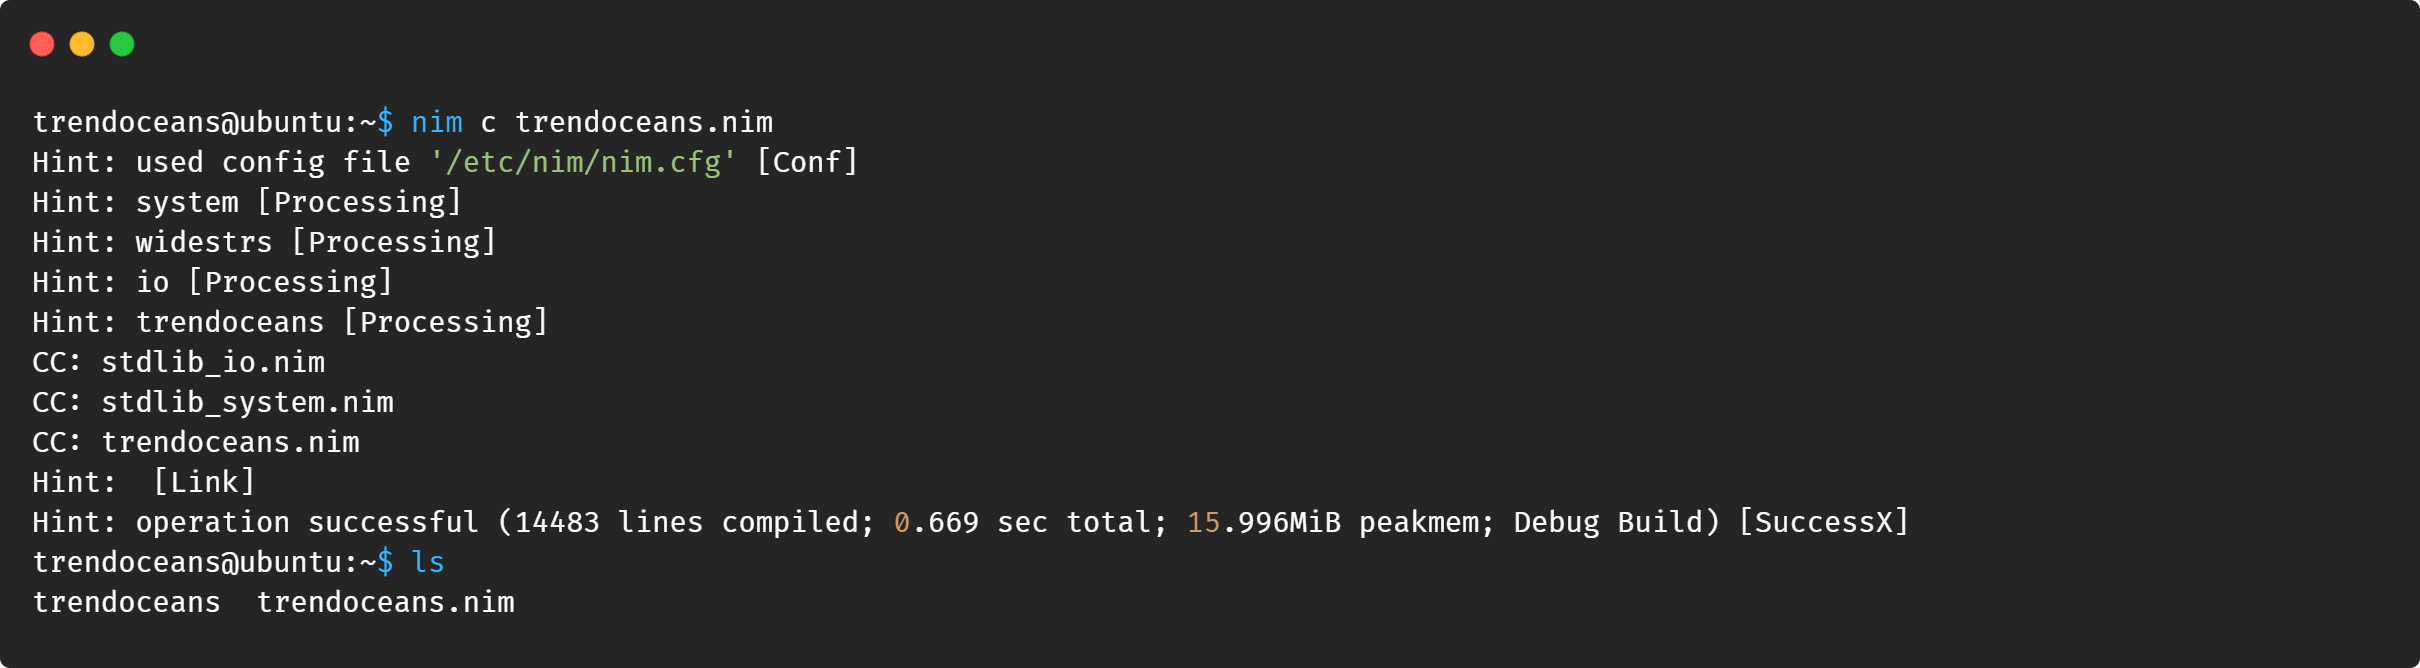
Save and close, and execute the below command to compile the file.
$ nim c trendoceans.nimBelow is the behavior of the above command.
Step 4: Running Compiled Nim File
After executing the above command, a new compiled file with “trendoceans” will be generated in the same directory.
Finally, we can run the program using the below command.
$ ./trendoceans
Welcome To TRENDOCEANS!
Or, if you prefer to compile and run the program simultaneously, then follow the below command.
$ nim c -r trendoceans.nimBelow is the behavior of the above command.
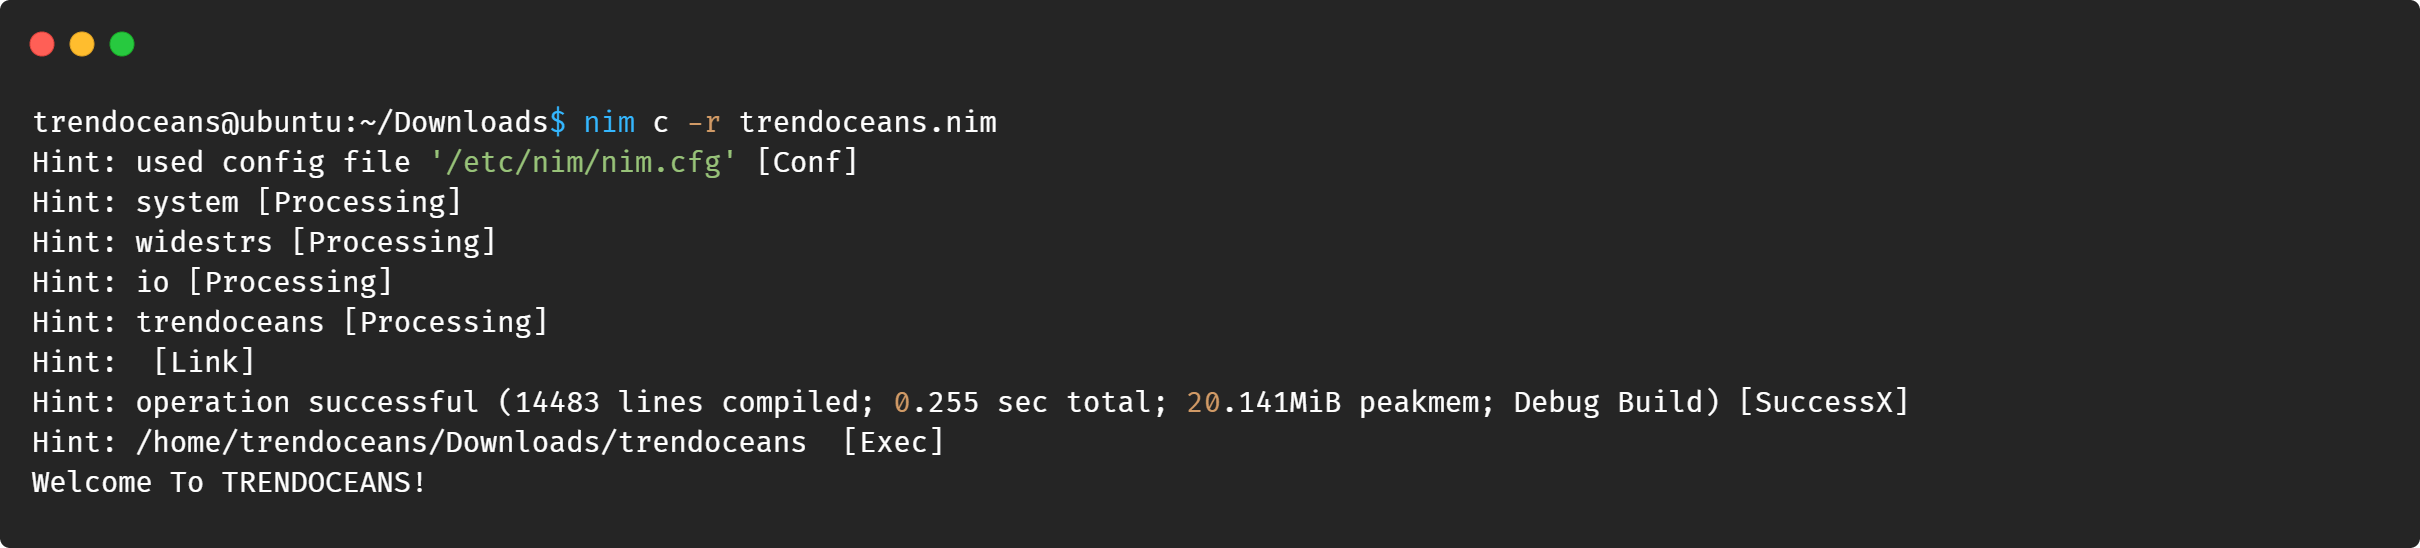
You can check the Nim documentation to know more about the flags.
Uninstall Nim
If you have installed Nim using the choosenim installer, use the below command to remove it from the system.
$ rm -r ~/.nimble/ ~/.choosenim/If you were using the distribution package manager to Nim, follow the below command.
$ sudo apt purge nim #Debian/Ubuntu
$ sudo pacman -Rs nim #Arch/Manjaro
$ sudo dnf remove nim #Fedora
$ sudo zypper rr nim #OpenSUSE
Let me know in the comment if you have any queries or issues while installation and running.