For new Linux users, reinstalling the operating system is a hurdle. It’s funny, but I’ve seen many Linux users manually install packages and applications from their previously installed Linux system into their freshly installed Ubuntu Linux system.
I used to be one of them, and you might be too. So, let’s forget the time we have wasted and learn today how to backup a list of installed packages and restore them on a freshly installed Ubuntu system.
Backup List of Installed Packages and Restore Them on a Freshly Installed Ubuntu System
There are manual and automatic ways to backup and restore the installed packages on your system. The working process for both methods is identical; only one is the manual work, and the other uses the apt-clone package, which automatically does all the manual work on your behalf.
Also, remember that while restoring the packages, you must take care of a few points mentioned below.
- Restore the packages with the same architecture and operating system.
- For example, I have created a backup of my list of the installed packages from the Ubuntu Jammy 22.04, and the packages should be restored in the same freshly installed system.
- If you are using another version of Ubuntu, it will only work if that version of Ubuntu supports the same package.
- Restoring the packages might replace your
source.list.d,trusted.gpg.d, and packages, so perform the step only on a freshly installed system.
So, let’s start the backing and restoring process manually or using the apt-clone command.
Method 1: Backing and Restoring Installed Packages using the apt-clone command
The first step will be to install the apt-clone package on your system using the below command.
$ sudo apt install apt-cloneAfter the installation is finished, execute the below command to automatically create a compressed file containing all the required things for restoring the packages, such as Repository Source (source.list.d), Preferences (preferences.d), Trusted GPG (trusted.gpg.d), Installed Packages (installed.pkgs), etc.
$ sudo apt-clone clone mypackagesOnce the above command is executed, it will create a compressed file with the name defined while creating in your current directory.
In my case, it will be mypackages.tar.gz as shown below.
$ lsBelow is the output of the above command.

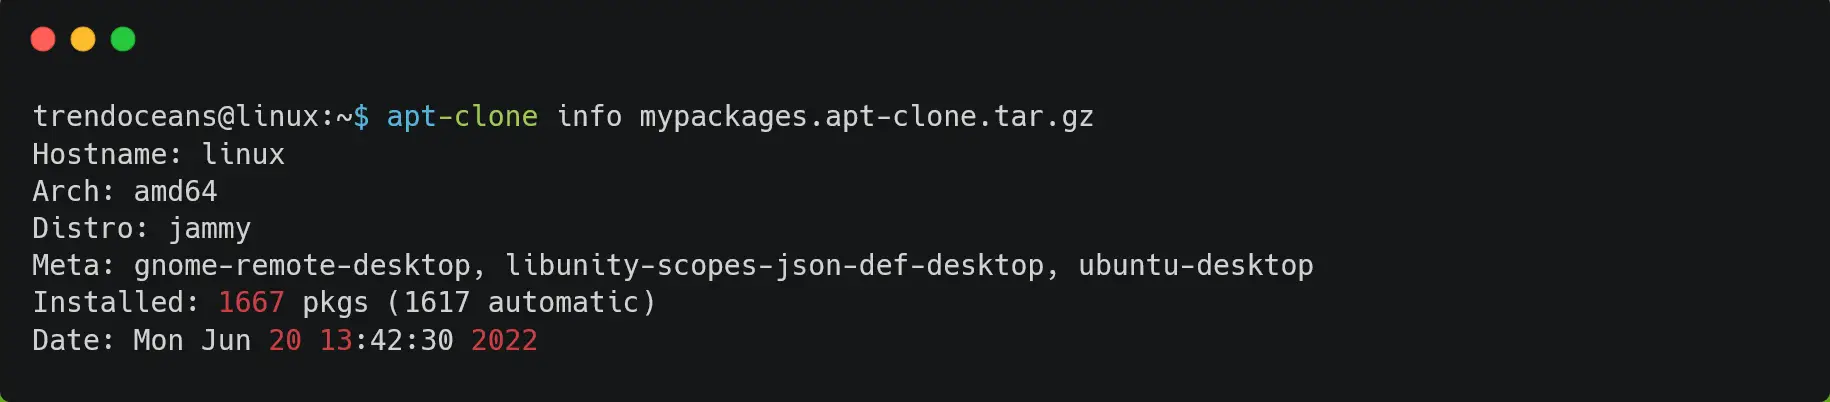
If you want to inspect the compressed file, use the apt-clone info command with the compressed file path or name to find the information related to the hostname, architecture, distribution, meta, number of packages, and date, as shown below.
$ apt-clone info mypackages.tar.gzBelow is the output of the above command.
Now it’s time to restore the packages to the freshly installed Ubuntu Linux system. To do that, move this compressed file onto the new system and install the apt-clone package onto your new system using the sudo apt install apt-clone command.
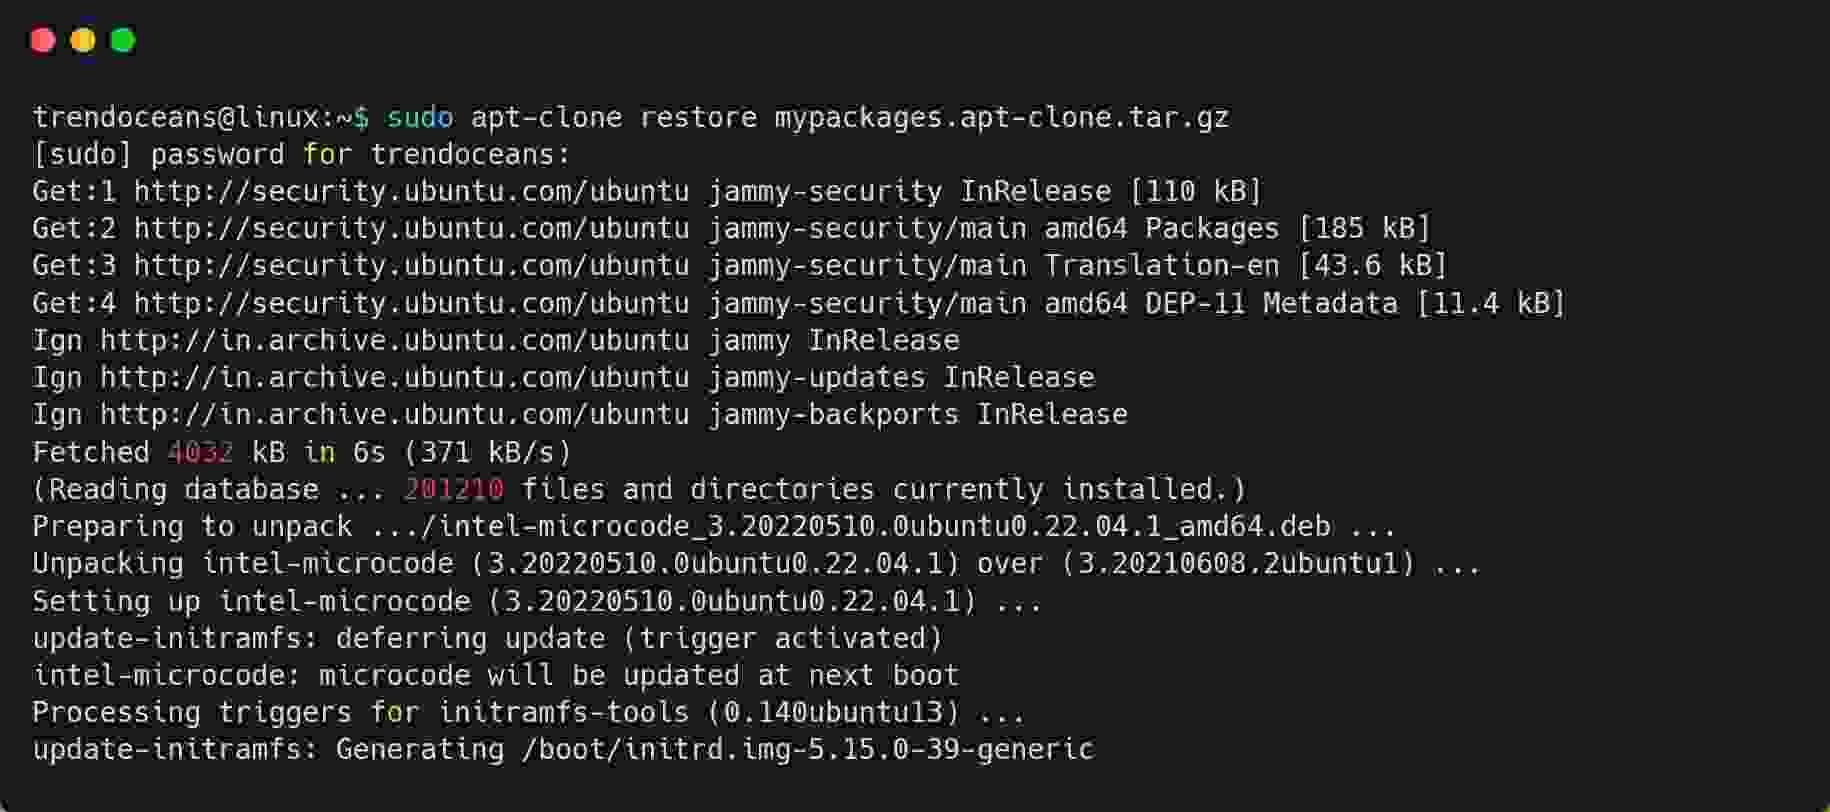
Finally, execute the below command with the path of the compressed file to restore all the packages from your past system to the new system.
$ sudo apt-clone restore mypackages.tar.gzBelow is the output of the above command.
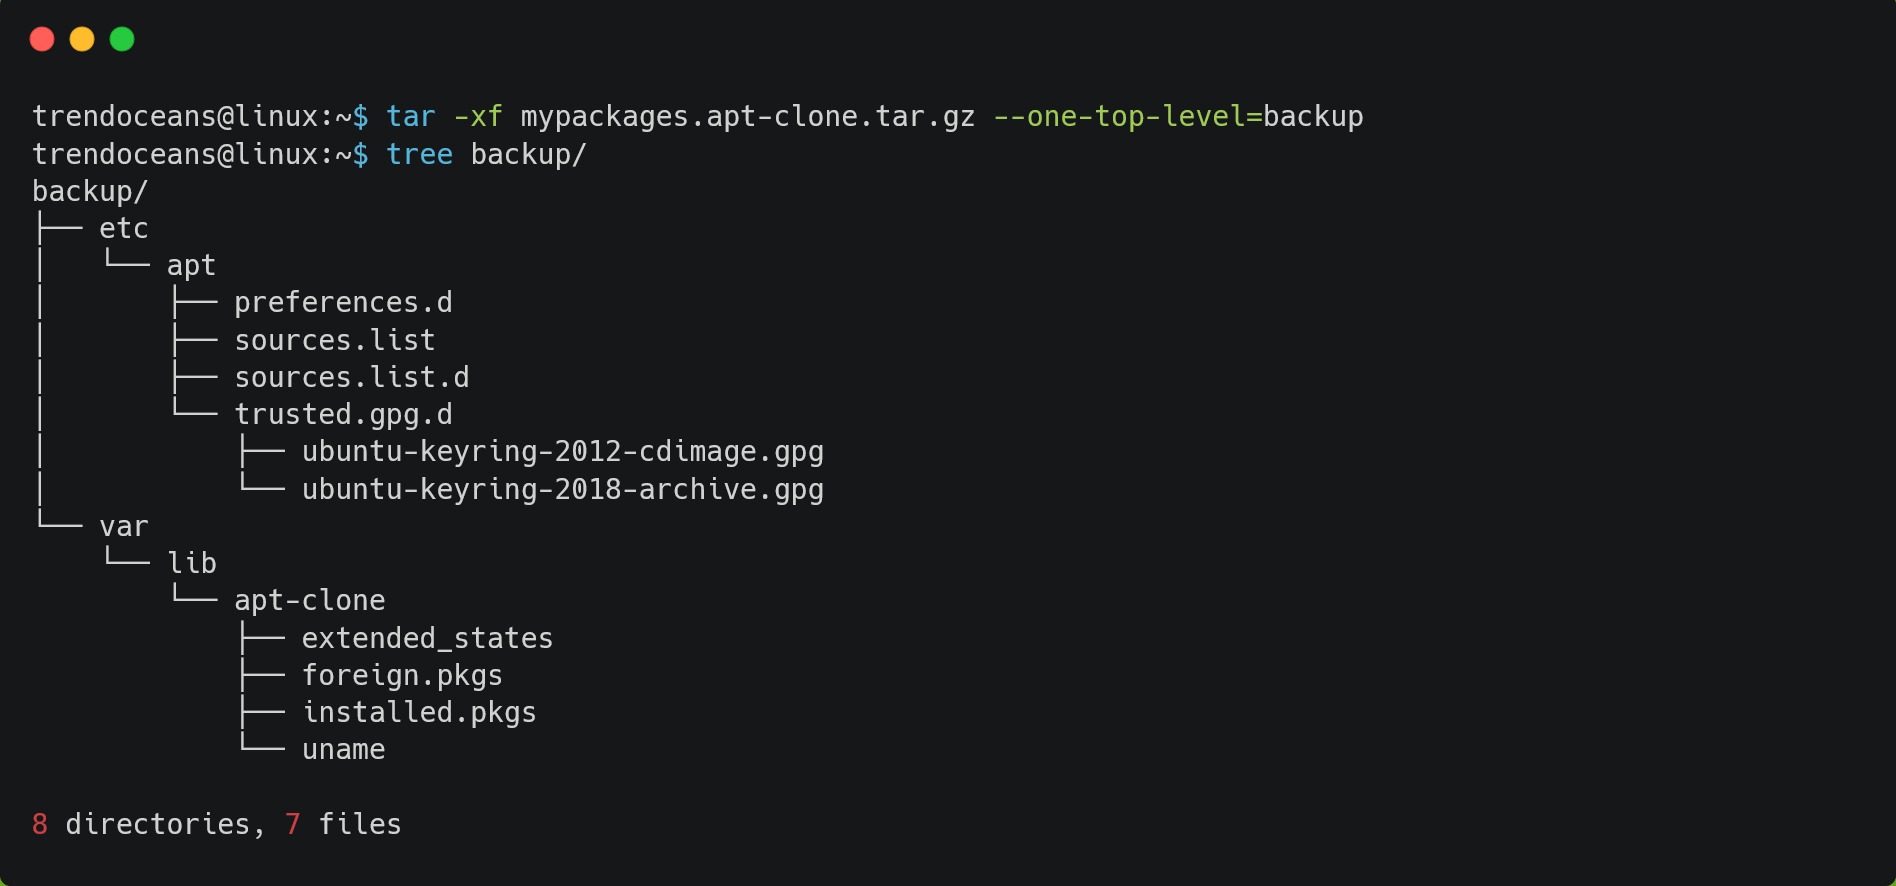
If you want to check the compressed file content, then execute the below command to extract the compressed file into the mybackup directory.
$ tar -xf mypackages.apt-clone.tar.gz --one-top-level=mybackupDo not forget to replace the compressed file name with your file name. Below is the output of the above command and the content of the compressed file.
For more details, refer to the manual page of the apt-clone command:
$ man apt-cloneMethod 2: Manually Backing and Restoring Installed Packages
The manual method is no different from the automatic method. The only difference is that before the apt-clone package was handling the backup and restore process, this time you have to manage it using your command-line skills.
Let’s get this done quickly. First, back up all of the installed packages into a single file.
$ dpkg --get-selections > ~/mybackup/packages.listThe above command will fetch all of the manually installed packages in your system using dpkg --get-selection and save the output into the ~/mybackup/packages.list file.
Some packages are available within the distribution repository, and others require manually adding their repository. For example, Visual Studio Code, AnyDesk, etc., programs require adding their repository.
Execute the below command to backup manually and the system default repository into mybackup directory.
$ sudo cp -R /etc/apt/sources.list* ~/mybackup/For verification purposes, a manually added repository requires a GPG key that can be quickly backed up using the below command.
$ sudo cp -R /etc/apt/trusted.gpg.d ~/mybackup/Now, as you have all of the information required to install packages into the freshly installed system, copy the mybackup directory into your newly installed system and follow the below steps to restore all of the packages.
The first step will be to add the repository GPG key to the new system using the below command.
$ sudo cp -R ~/mybackup/trusted.gpg.d /etc/apt/The second step will be to restore the source repository of packages to their location as shown below.
$ sudo cp -R ~/mybackup/sources.list* /etc/apt/The third step will be to update, install the dselect package, and update dselect.
$ sudo apt update
$ sudo apt install dselect
$ sudo dselect update
The fourth step will be to install packages based on the list of your target system after updating the list of available packages.
$ sudo dpkg --merge-avail <(apt-cache dumpavail)
$ sudo dpkg --clear-selections
$ sudo dpkg --get-selections > ~/mybackup/packages.list
Lastly, execute “apt-get dselect-upgrade” and it will remove any packages not in the list and install all other packages in the list.
$ sudo apt-get dselect-upgrade -yThis method is tricky, and the wrong step can produce an unexpected error. I suggest using an apt-clone to handle all these tasks on your behalf.
If you are stuck on any of the mentioned steps, feel free to ask in the comment section.