Add a desktop icon for an AppImage based application and launch it from the app menu like any other application .
One of the easiest ways to install applications on any Linux distribution is with the AppImage, and because of that, it’s also one of the most common ways of getting applications in the Linux world.
But there is a small problem: It doesn’t add an icon to the application menu, and because of that, it cannot be started with a click. Instead, we must enter the terminal and run the command each time, which can be inconvenient for new users.
To tackle this, you can manually create a desktop icon for the AppImage application, which will allow you to start the application from anywhere on your Linux system.
Sounds interesting, right? So, open your terminal window and follow the steps below to add an icon for the AppImage application on Ubuntu, Debian, Fedora, Arch, or any other Linux distribution.
Steps to Create a Desktop Shortcut Icon for AppImage Applications
I believe you have already downloaded the application to follow along with this tutorial, but for sake of completeness, let’s quickly go over the process of downloading an AppImage application so we can stay on the same page.
Step 01: Download AppImage and Icon
For this guide, we are downloading CPU-X, which is an application that shows details about the hardware of your Linux system. If you have used CPU-Z, then you may be familiar with the application’s usage.
I have already grabbed the AppImage of CPU-X for you, so please download it using the below command:
$ wget https://github.com/TheTumultuousUnicornOfDarkness/CPU-X/releases/download/v4.5.2/CPU-X-v4.5.2-x86_64.AppImageAfter getting the AppImage, please download the png icon from the search engine so that when you search for the application name, you can find a suitable icon to represent it.
Here, I have picked up an icon for CPU-X.
$ wget https://appimage.github.io/database/CPU-X/icons/128x128/cpu-x.pngOnce you have performed the above steps, let’s move on to the next section.
Step 02: Make executable permissions and change directory
The file that we have downloaded will not be able to execute until we change the permission, so we must open the terminal and change the permission for that file by typing in:
$ chmod a+x CPU-X-v4.5.2-x86_64.AppImage After making the file executable, we can now make an icon for the application. However, I suggest that you move this application and its png icon to the /opt/cpu-x/ directory.
This will keep us from accidentally deleting the application while cleaning up other unwanted files.
To maintain the directory structure of the /opt/ directory, we will first create a directory for the application name, and while moving the file, we will rename the AppImage to match the directory name and finally move the png file.
$ mkdir /opt/cpu-x
$ sudo mv CPU-X-v4.5.2-x86_64.AppImage /opt/cpu-x/cpu-x.AppImage
$ sudo mv cpu-x.png /opt/cpu-x/
Step 03: Create .desktop file
The last step is to modify the .desktop file, which I’m going to share with you, so whenever you want to create a .desktop shortcut for any AppImage app, all you have to do is use this “appname .desktop” structure and place the .desktop file in the ~/.local/share/applications/filename directory.
[Desktop Entry]
Type=Application
Name=NAME-OF-APPIMAGE
Icon=/PATH/OF/ICON
Exec=/PATH/OF/AppImage
Terminal=false
Hidden=false
Categories=Utility
Now, using the above entry, let me make the following changes to the ~/.local/share/applications/CPU-X.desktop using the nano editor:
$ nano ~/.local/share/applications/CPU-X.desktop And here is the result after making the changes, so now let me save the file to see the changes.
[Desktop Entry]
Type=Application
Name=CPU-X
Icon=/opt/cpu-x/cpu-x.png
Exec=/opt/cpu-x/cpu-x.AppImage
Terminal=false
Hidden=false
Categories=Utility
As I’m searching for “CPU-X”, the system is showing me the app indicator in the activities or menu, which means I can now launch an application anytime.
If you’re thinking this is too much for you to handle, then you can create an app indicator using the “Arronax” tool, which I’m going to discuss in the next section.
[BONUS] Create an AppImage Icon using Arronax
If the AppImage icon is not showing, then you can use Arronax, which is a GUI tool that helps you quickly create AppImage icons with just a few clicks.
To download and install Arronax, you must first go to the official website. There, you will find a binary package for Ubuntu/Debian-based distributions and a tar file for other distributions.
Once you have the .deb binary file, execute the following command to install it, and then look for “Arronax” in the app menu to start the application.
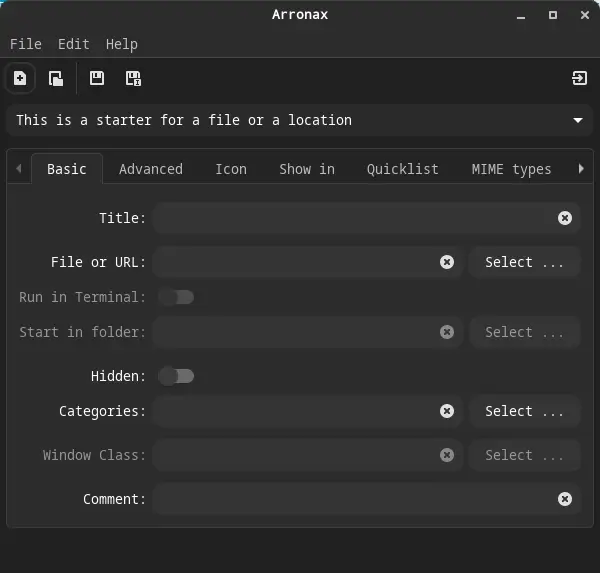
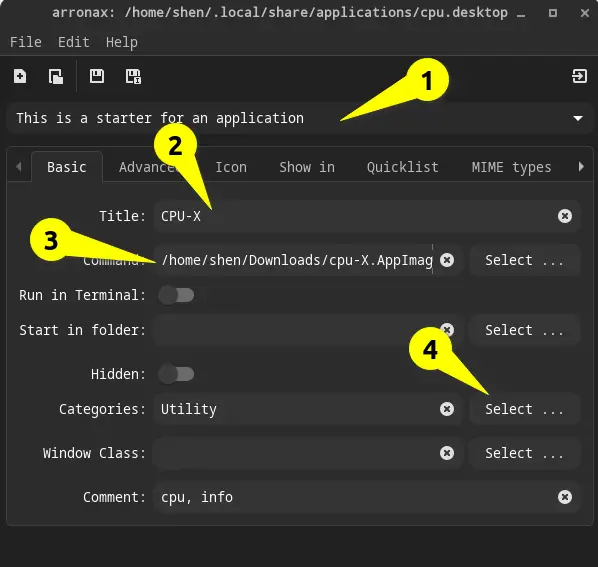
$ sudo dpkg -i Downloads/arronax_0.8.1_all.debWhen you launch “Arronax” for the first time, you will find a pretty simple interface that is self explanatory, but still, I’ll explain to you how to use this application to add an app indicator.
To create an app indicator, you just need to follow the steps in the given sequence: First, select the type of link -> Provide AppImage Path -> Select categories “Add a comment.
After that, switch tab to “Icon” and specify the path where the image is located, then save the file.
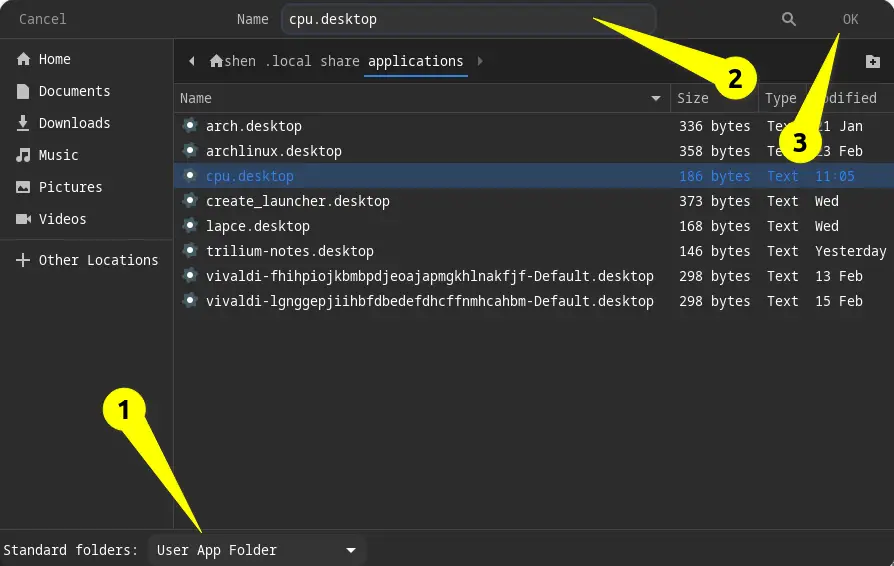
To save the “.desktop” file, I’ll suggest you to select “User App Folder” from the Standard Folders section, then save the file.
Once you have completed the above steps, you will find the application in the app menu, or activities.
Wrap up
That’s all it takes you to create a desktop icon for an AppImage application in Linux.
BTW, It is recommended to create a desktop shortcut icon or launcher for Appimage application to make it easier for you to acess application from the app drawer inseated of running command everytime.
If you are facing any issue while adding a.desktop icon to your system, then let me know and I’ll see what I can do to resolve your issue.
Nice post. It never occurred to me to download the icon. I usually just extract the contents of the AppImage:
«some_pkg.appimage –appimage-extract» this creates a folder named «squashfs-root» with the contents of the AppImage, including the icon, so I just copy that to my «AppImages» folder.
I accidentally named the application i made an icon for “CPU-X” how do I fix that? I went into nano and changed the name but it still shows up on my app screen as cpu-x.
Nevermind. I just deleted the .desktop file and made a new one.