One of the best-known tools in the community for cracking passwords is “John the Ripper,” so let’s learn how to download and install it on your Linux, macOS, and Windows systems.
John the Ripper is open-source software that comes preinstalled in Kali Linux, but you can also install it on your favourite operating system.
Prior to this article, if you had never heard of John the Ripper, let me tell you straight: it is a well-known tool that is used for cracking and recovering passwords for Linux, Winrar, Windows, FTP, SSH, WordPress, etc.
Initially, it was released for the UNIX system to detect weak passwords, but it now supports more than 100 hashes and ciphers.
Moreover, John the Ripper comes in two different variants: a free version that is available for free and a pro version, which is developed keeping in mind the commercial needs of organizations.
Free vs Premium
Now you may be interested in finding the difference between the free and premium or pro versions of John the Ripper, so let’s take a closer look.
Free
A standard tool without any support. (Enough for the beginners.)
John the Ripper Pro for Linux
In the pro version, Openwall provides the tool with premium support (via email) for the first 30 days up to 1 hour after purchase.
John the Ripper Pro for Linux with Upgrades
In the Pro with Upgrades version, Openwall provides the tool on the condition that further 1.x Pro releases are free upgrades, and premium support (via email) is available for the first 30 days up to 1 hour.
John the Ripper Pro for Linux with Upgrades and Support
In the pro version with upgrades and support, Openwall provides the tool on the condition that further 1.x Pro releases are free, and premium support (via email) is available for the first year for up to 2 hours.
This includes support for the community version of John the Ripper Jumbo.
I probably suggest you start with the free version because, instead of their premium support, we guide you through setting it up on your system.
Installation
Let us move to the installation part to install John the Ripper on Linux, macOS, and Windows systems.
You can click on the respective operating system to learn the step-by-step process.
Install John the Ripper on Linux
John the Ripper is available by default for major Linux repositories, and for the rest, you can use Snap, or else if you see Snap as a security risk, you can download the source code and compile it yourself.
Install John the Ripper on Debian and Ubuntu
Open your terminal, and update your system to fetch the latest repositories before installation.
$ sudo apt update & sudo apt upgradeAfter the complete system upgrade, you are good to install John the Ripper on your system using the below command:
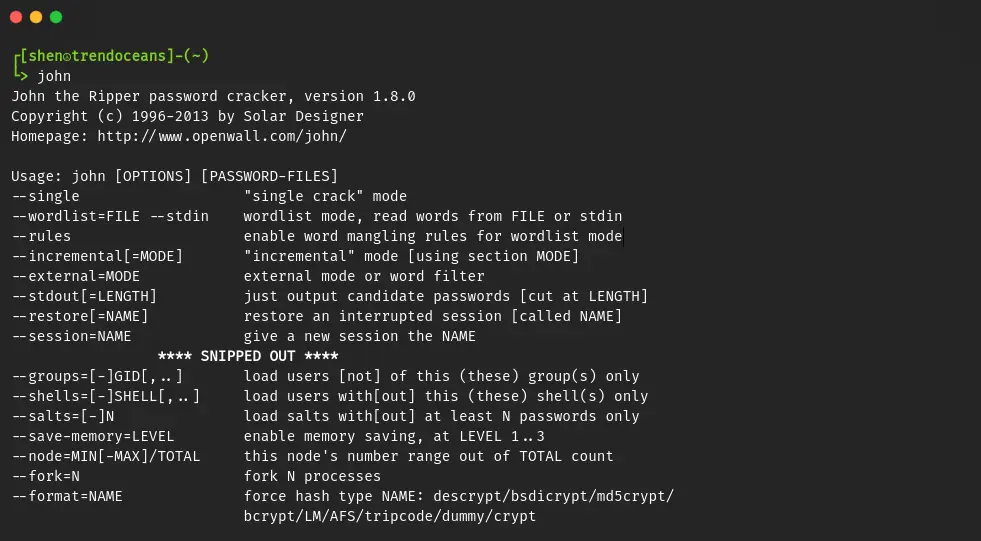
$ sudo apt install johnThat’s all. Now type the "john" command in your terminal to start cracking.
Install John the Ripper on RHEL
In the RHEL system, you need to take the help of Snap to install John the Ripper. Before starting with the installation, add the EPEL repository below, depending on the RHEL version.
RHEL 8
$ sudo dnf install https://dl.fedoraproject.org/pub/epel/epel-release-latest-8.noarch.rpm
$ sudo dnf upgrade
RHEL 7
$ sudo rpm -ivh https://dl.fedoraproject.org/pub/epel/epel-release-latest-7.noarch.rpmNext, you need to add a few more recommended extra repositories to both RHEL versions.
$ sudo subscription-manager repos --enable "rhel-*-optional-rpms" --enable "rhel-*-extras-rpms"
$ sudo yum update
Now you can install Snap on your system using the below command.
$ sudo yum install snapdAfter installation, enable the systemd unit that manages the snap communication socket.
$ sudo systemctl enable --now snapd.socketYou need to reboot your system to reflect all the changes properly.
Then use the below command to install John on your RHEL system.
$ sudo snap install john-the-ripperThat’s all. Now type the "john" command in your terminal to start cracking.
Install John the Ripper on Fedora
On Fedora, it can be installed using the dnf package manager using the below command.
$ sudo dnf install john Install John the Ripper on Arch and Manjaro
For Arch and Manjaro users, you can easily install it using the Pacman package manager on your system.
$ sudo pacman -S johnSource Code
If you have the pro version of this tool, then you will find the binary file to install for your respective distributions, but as we are going to use the free version, we have to just run a few extra commands to install John the Ripper from the source code.
The main benefit of using this method is that the package installer does not by default include many crucial tools, like zip2john.
To use them, you need to clone the Jumbo version of John.
First, install the required tools for the compiler using the below command.
$ sudo apt install build-essential libssl-devAlso, install the below-recommended tools after compiler.
$ sudo apt install yasm libgmp-dev libpcap-dev libnss3-dev libkrb5-dev pkg-config libbz2-dev zlib1g-devClone the latest version of John the Ripper in your system using the below command. (Any error came run "apt install git")
$ git clone git://github.com/magnumripper/JohnTheRipper -b bleeding-jumbo johnGo to the source folder to compile John the Ripper.
$ cd john/srcAnd build from code.
$ ./configure && make -s clean && make -sj4To start using john type the below command:
$ ../run/john --testInstall John the Ripper on macOS
In macOS, open your terminal using Command + Space search and click it. If you have already installed brew on your system, skip ahead to the next command.
$ ruby -e "$(curl -fsSL https://raw.githubusercontent.com/Homebrew/install/master/install)" 2> /dev/nullIt may ask for the user password; type it and press enter to start the brew installation process. Now use the below command to install John the Ripper on your macOS.
$ brew install johnDone! You can now use john.
Download and Install John the Ripper on Windows
It is available in two different architectures, 32-bit and 64-bit, for Windows users. Visit the Download page and download the one depending on your system architecture.
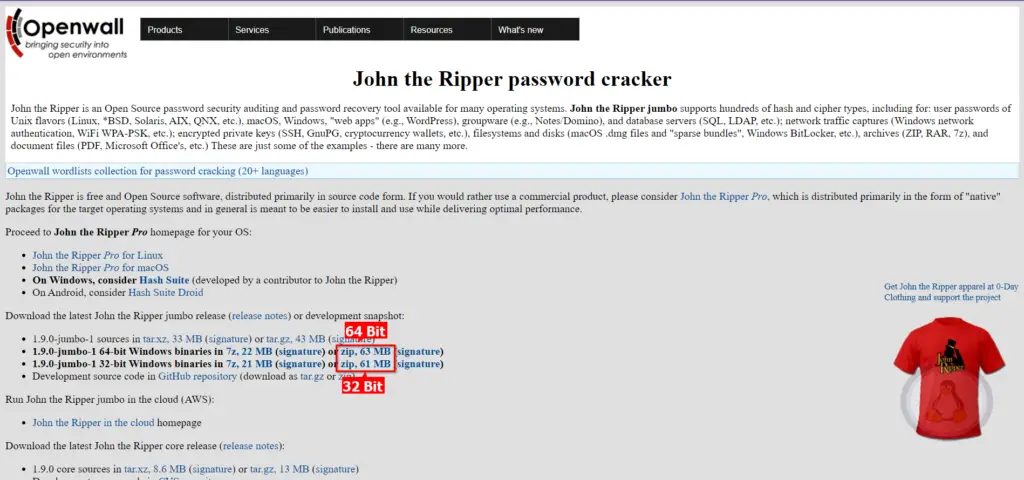
Once you click the download link, compressed zip with John the Ripper will start downloading.
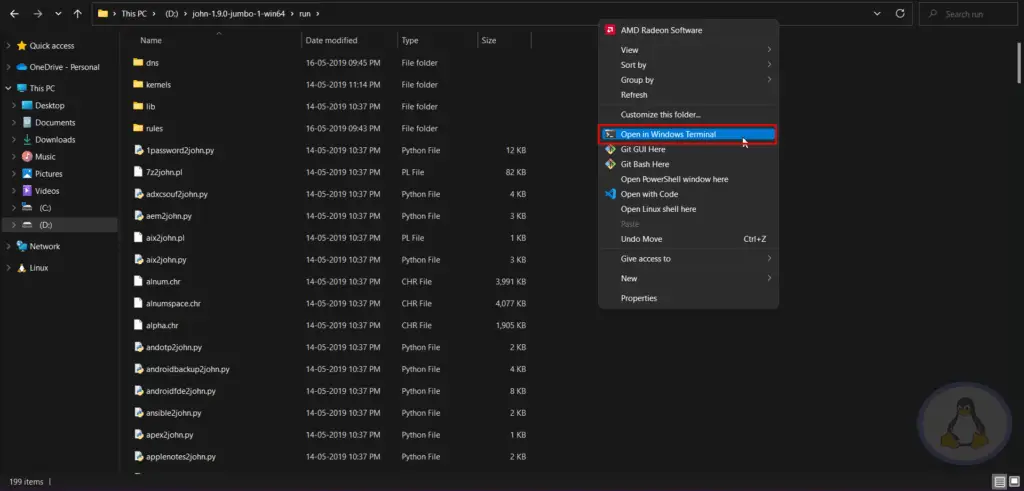
Next, go to the download location and uncompress the zip using any compression tool. (recommended 7zip)
After that, you need to navigate inside the “run” directory and press shift + right click to list the command prompt in the context menu, as shown below.
In your command prompt, type "john" to use John the Ripper on Windows.
Uninstall John the Ripper
If you do not want it anymore and want to remove it completely from your system, then use the following command as per your installation method:
$ sudo apt purge john					// Ubuntu and Debian
$ sudo snap remove john-the-ripper			// Snap based installation
$ sudo dnf remove john					// Fedora
$ pacman -Rs john					// Arch distributions
Final Thought
That’s all for this article, where I showed you how to download and install John the Ripper on your respective platform.
After John the Ripper is in your system, you can start cracking or recovering your lost password. We will publish more articles to recover Winrar’s password and others in the upcoming days.
Also, I’m linking community resources that you can refer to when using this tool.
Don’t forget to subscribe to us, and if you have any questions, feel free to ask them in the comment section.