In the latest build of ONLYOFFICE Doc, it has brought up the option to use ChatGPT on the platform, so let’s learn how to enable ChatGPT on ONLYOFFICE Docs.
ONLYOFFICE Docs is an open-source office suite package that includes collaborative editors for text documents, sheets, and presentations, together with the form creator and PDF viewer.
The suite is licensed under the GNU AGPL v3.0, with OOXML (docx, xlsx, and pptx) as a core file format.
ONLYOFFICE Docs integrates and works within various DMS, CMS, collaboration platforms, issue tracking services, and e-learning solutions, for example, Odoo, Nextcloud, WordPress, Drupal, Redmine, Moodle, Jira, Confluence, and many others.
Besides, the editors can be embedded into your own web service.
There is also a desktop application for Linux (as well as Windows and macOS) that allows working with offline documents locally and, if necessary, can be connected to the cloud for online collaboration.
Let’s see how you can install ONLYOFFICE Docs using Docker and activate ChatGPT in the form of the AI helper plugin.
System requirements and prerequisites
- CPU: dual core 2 GHz or better
- 4 GB RAM or more
- HDD: at least 40 GB of free space
- At least 4 GB of swap
- amd64 Linux distribution with kernel version 3.10 or later
- The latest Docker version
Install ONLYOFFICE Docs
Launch Docker and run the command below. This way, you install ONLYOFFICE Docs with all the dependencies:
$ sudo docker run -i -t -d -p 80:80 --restart=always -e JWT_SECRET=my_jwt_secret onlyoffice/documentserverJWT (JSON Web Token) protects documents from unauthorized access. Enter your own value in the -e JWT_SECRET=my_jwt_secret parameter.
In case you will need to configure the additional parameters, use the Docker run command options for the --env-file flag, where you can specify all required environment variables in a single file.
Change the port
By default, ONLYOFFICE Docs listens to port 80. It’s possible to change it if you’re planning to use another port instead of the default one. To do so, change the mapping port during the installation:
$ sudo docker run -i -t -d -p <PORT_NUMBER>:80 --restart=always -e JWT_SECRET=my_jwt_secret onlyoffice/documentserver
Store data outside containers
It’s strongly recommended to store logs, certificates, cache, and databases outside the Docker containers on the host machine since it allows seamlessly updating ONLYOFFICE Docs when the new version is released without losing the data.
Mount the volumes to get access to your data located outside the container – specify the -v option in the Docker run command:
$ sudo docker run -i -t -d -p 80:80 --restart=always \
    -v /app/onlyoffice/DocumentServer/logs:/var/log/onlyoffice  \
    -v /app/onlyoffice/DocumentServer/data:/var/www/onlyoffice/Data  \
    -v /app/onlyoffice/DocumentServer/lib:/var/lib/onlyoffice \
    -v /app/onlyoffice/DocumentServer/db:/var/lib/postgresql -e JWT_SECRET=my_jwt_secret onlyoffice/documentserver
Switch to HTTPS
The easiest way to switch the editors to the HTTPS protocol is to automatically get Let’s Encrypt SSL Certificates using certbot.
Run the ONLYOFFICE Docs Docker container, specifying ports 80 and 443 and setting your own values for the variables:
$ sudo docker run -i -t -d -p 80:80 -p 443:443 --restart=always \
-e LETS_ENCRYPT_DOMAIN=yourdomain.com -e [email protected] -e JWT_SECRET=my_jwt_secret onlyoffice/documentserver
LETS_ENCRYPT_DOMAIN: a domain name to use for the certificate.
LETS_ENCRYPT_MAIL: an email used for registration and recovery contact.
Once ready, ONLYOFFICE Docs will be available at the https://yourdomain.com address.
Connect ONLYOFFICE Docs to the cloud platform
To be able to use the editors, connect them to any document or content management system or platform. We will use Odoo as an example.
First of all, install the integration app from the Odoo admin panel.
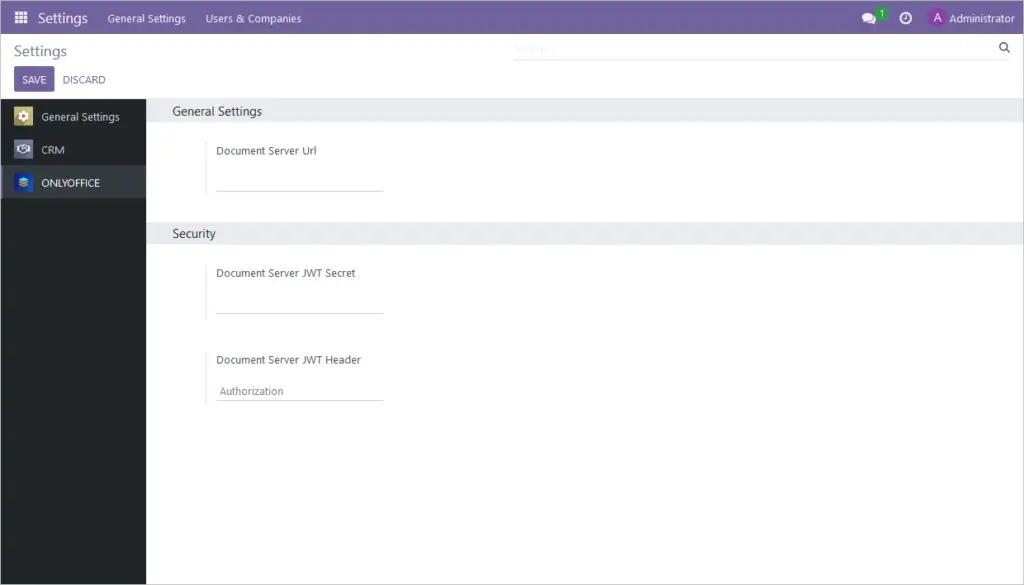
Once done, go to Home menu -> Settings -> ONLYOFFICE within your Odoo and specify the URL of the ONLYOFFICE Docs installed in the Document Server Url.
JWT is enabled by default in the ONLYOFFICE-Odoo integration, and the secret key is generated automatically. If you want to specify your own secret key, enter it into the corresponding field and specify the same secret key in the ONLYOFFICE Docs config file to enable the validation.
Enable ChatGPT
You can add extra functionality to ONLYOFFICE Docs using plugins. The ChatGPT plugin is one of them.
To enable it, launch the editors. Switch to the Plugins tab, press the Plugin Manager located on the top toolbar, and click the Install button for ChatGPT.

An alternative installation method for the ChatGPT plugin is to use the pluginsmanager utility:
$ cd /var/www/onlyoffice/documentserver/server/tools/
./pluginsmanager --directory="/var/www/onlyoffice/documentserver/sdkjs-plugins" --install="chatgpt"
To start using the ChatGPT plugin, you need to obtain an API Key from OpenAI or use the existing one. Once you have it, launch the plugin settings via the text context menu, enter your API Key, and click the Save button.
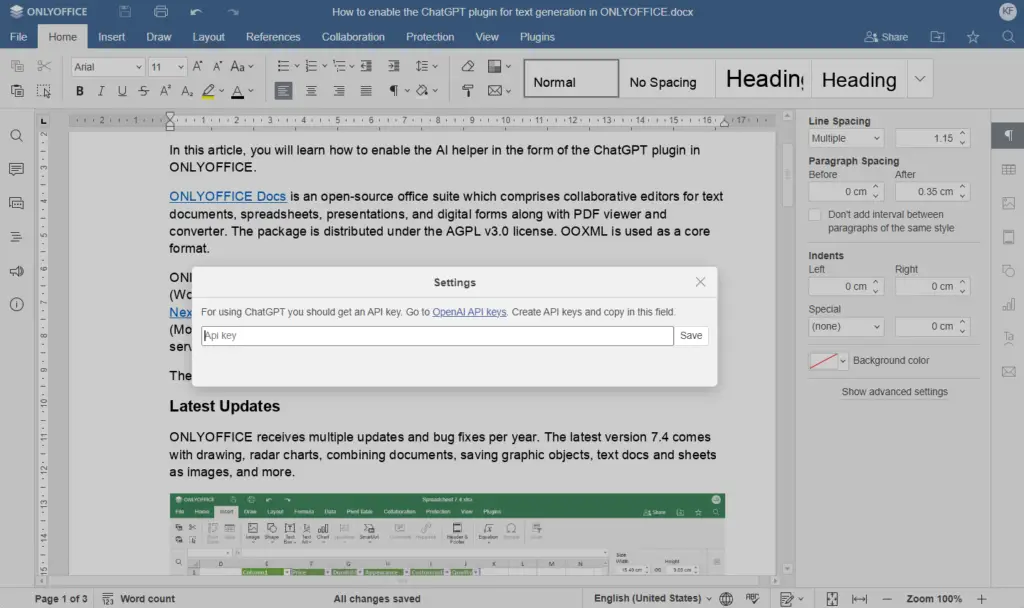
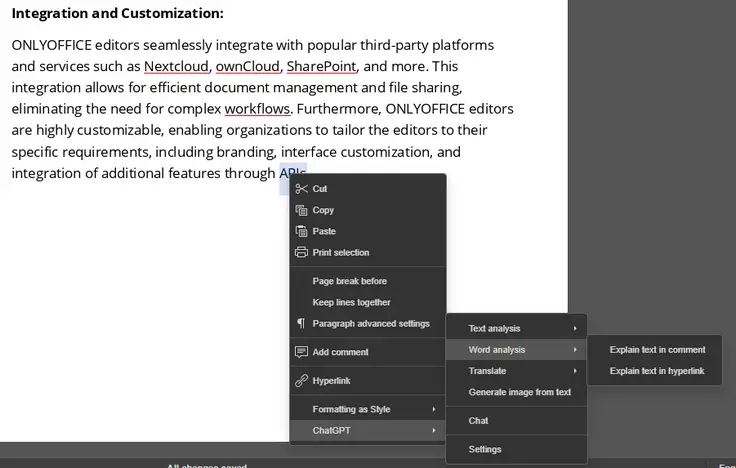
The activated plugin allows you to use the ChatGPT chat to make various requests in free form, run word analysis, generate images and keywords, summarize and translate texts, find synonyms, etc.
Wrap up
That’s it! In this article, we explained how you can install the collaborative ONLYOFFICE suite on Ubuntu and enable the ChatGPT plugin to run AI tasks directly in the editors.
We hope you find this guide useful. If you have any comments or suggestions, please leave a reply below.