WSL2 is a great option if you don’t want to completely setup your Linux machine and just want to use Linux on Windows without having to deal with dual-booting or virtual machines.
No matter if you are a security professional or are pursuing cybersecurity, you have probably heard about WSL2, which is commonly used as an alternative to VirtualBox & VMware.
But if you’re not sure how to get started with WSL2, then you are at the right place, where I will show you how to install the Windows Subsystem for Linux (WSL2) on Windows 10 with Kali Linux.
So let’s roll up our sleeves and get started with the first task of installing WSL on your Windows, and then we will show you how you can install Kali Linux on Windows 10 and 11.
What is WSL2 on Windows 10/11
Before jumping to the installation part, first understand What is the WSL? In layman’s terms, a WSL, or Window Subsystem Linux, allows users to use GNU/Linux distributions alongside Windows as their default system.
At present, WSL has two versions: WSL1 and WSL2, but it’s good to have the latest version of WSL on your Windows machine.
And here is the comparison between WSL1 and WSL2, in that you can clearly see that WSL2 is a significant improvement over WSL1 in terms of performance, compatibility, and functionality.
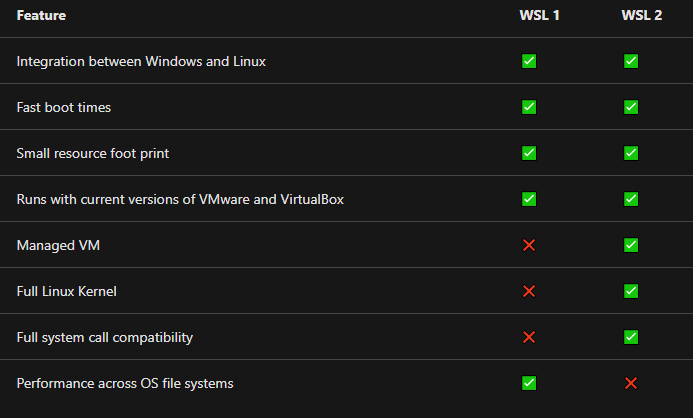
Not only that, after installing wsl2, you can access most of the Linux command-line tools like awk, sed, grep, and many other utilities directly on Windows without switching to Dual-Boot or using virtualization technology like VMware or VirtualBox.
Benefits of Using WSL2
- No need to use VirtualBox
- Download the GNU/Linux Distribution directly from Microsoft Store.
- Run the native Linux command-line utilities
awk,sed,grep, and thevicommand line editor on Windows. - Use both Windows and Linux in parallel
There are many other advantages to using WSL2, but there are some minor limitations, too, like the fact that I/O file transfer is slow compared to native environment.
Install WSL2 on Windows 10
Now the fun part begins, where you learn how to install WSL2 on Windows 10 by two different methods, one of which is as simple as running one command and WSL is ready for use, and another one is quite intensive.
I would recommend you to go with the first method, if it’s not working for you then move the second.
Install WSL2 on latest build of Windows 10/11
One of the easiest ways to install WSL2 on the latest build of Windows 10/11 is by running one line of command, which will install the WSL.
But for that, you need to be on the latest build, and to verify, run the following command on your system command prompt or PowerShell:
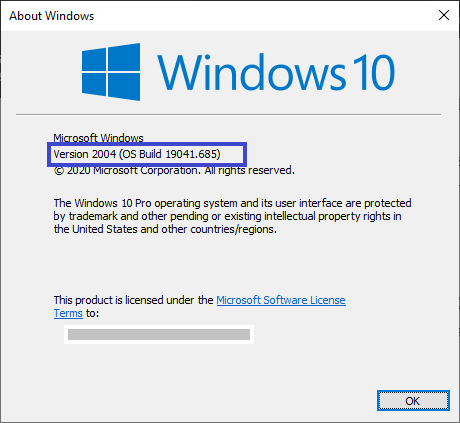
winverOnce you run the above command, it will show the system build version. If the build version is 2004 or higher, then you can follow this method, and if not, then read these steps.
The output of the above confirmed that my system is eligible for installing WSL2 with the following method:
If your system build version is 2004 or higher, then run the next line of command into PowerShell or a command prompt with administrator privileges.
wsl --installOnce you have run the above command, it will make the necessary changes and install the Ubuntu distribution on it.
After completion of the above step, click here to install Kali Linux on Windows 10 or 11.
Install WSL2 on older build of Windows 10
Due to some reason, if you are not on the latest build of Windows 10, then you can follow this method to install WSL2 on your computer by first checking the minimum version that should be available (like 1903 or later, with Build 18362 or later) to install
Step 1: Check the Latest Version of Windows
If you are unsure which version of Windows 10 you are using, type the following command on the “command prompt” or in the “Run” box.
In case your window version does not match the requirement, then update the window version.
To update Windows to the latest version Press the Start or Window key + I to launch the settings menu, click on Update and Security, then click on Check for updates.

or directly click this link to open Windows Update Settings and click on Check for updates.
Download the update for your system, and then restart your computer to make sure the update is fully installed.
If you are not able to see the latest window version despite the old version, then my advice is that you should restart your PC or check the service status of “Window Update Service” from the Services.
Step 2: Enable WSL2 on Windows
After completing the above step, you now have to enable WSL2 in your system.
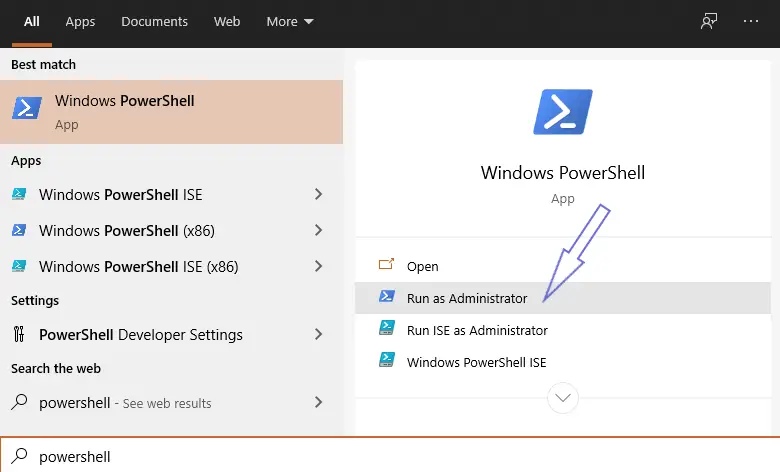
To enable WSL2, press the Windows Start key and search for Powershell, click on Run as Administrator, and when it prompt click on allow.
or else you can use the shortcut Window Key + X and open Command Prompt as administrator .
To enable WSL2, type or copy-paste the following command on Windows PowerShell:
dism.exe /online /enable-feature /featurename:Microsoft-Windows-Subsystem-Linux /all /norestart

dism.exe /online /enable-feature /featurename:VirtualMachinePlatform /all /norestart

It’s not necessary to restart your system; then also restart your system to avoid any package clashes.
Step 3: Set WSL version to WSL2
After restarting your system, open PowerShell as administrator and pass the following command to set the WSL to version WSL2.
wsl --set-default-version 2

That’s it, your work is done; now you will see how to install Kali Linux on your Windows computer.
Install and Run Kali Linux on WSL2
We were able to enable WSL2 on the Windows system, and now we will install Kali Linux on WSL.
To install Open Microsoft Store, press the Start Key and search for “Microsoft Store” or simply click the below button to open the store.
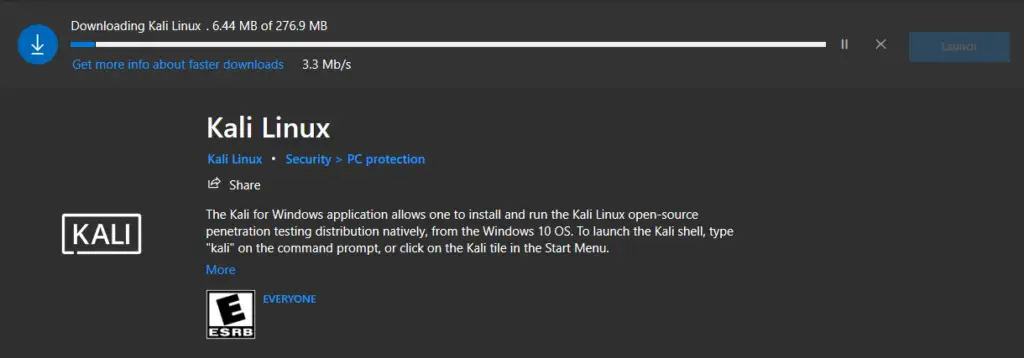
On the right side corner, you will able to see the search bar. Type “Kali Linux” and download the file.
The file size is approximately 276 MB, and it will take some time to download on your system as per your internet speed.
Run Kali Linux
When the download is finished, click on Launch or press the window key and search for Kali Linux.
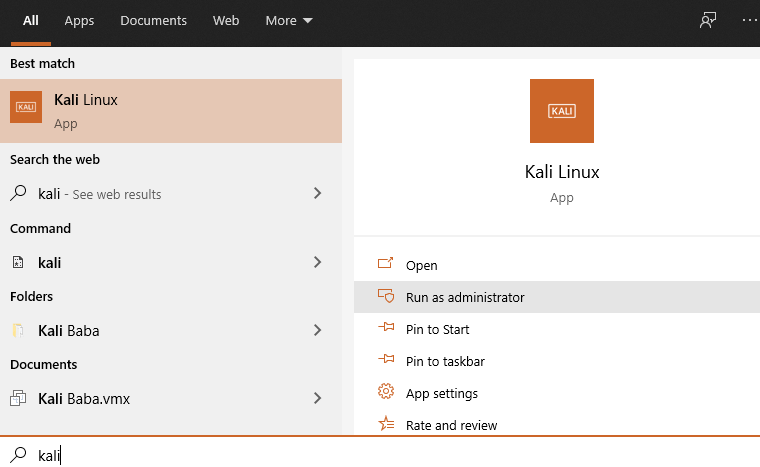
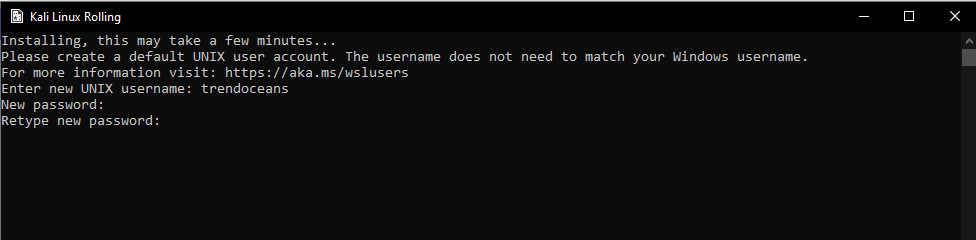
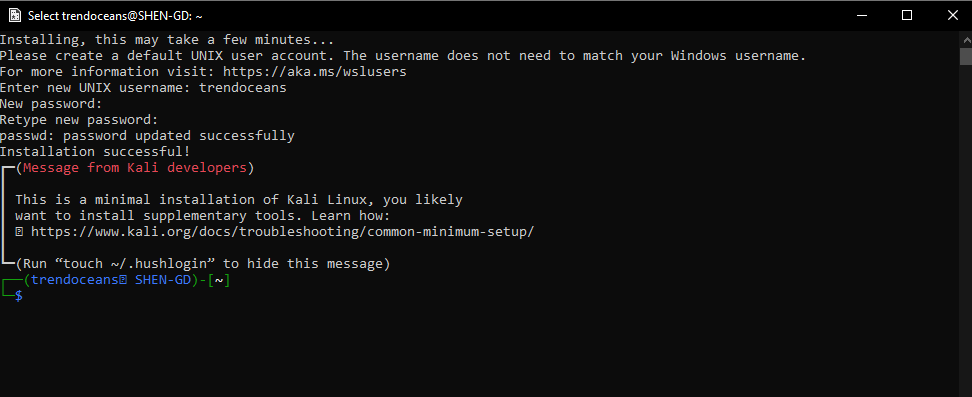
Initially, it will ask you to set a “username” andpassword,” so please enter the username, password, and confirm password.
Now you will able to use Kali Linux on WSL.
Troubleshooting
If you are not able to install Kali Linux from the Microsoft Store and you’re getting the error “0x80073D05” like below the screen:

To resolve this issue, it is advisable to restart your device and try again to reinstall Kali Linux.
If you are not able to install Kali Linux and getting the WslRegisterDistribution failed with error 0x8007019e.
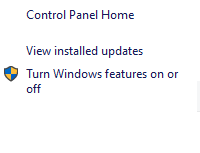
To resolve this issue Open the Run box and type appwiz.cpl . On the left side of the screen, you will find the option “Turn Windows features on or off,” so please click on that.
Now scroll down below and you will see the Windows Subsystem for Linux, so please check that option and wait for a few seconds to apply the settings.
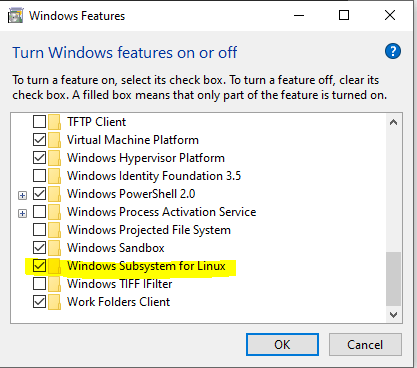
Next, restart your system and run Kali Linux from the start menu.
There is another kind of error that causes WSL 2 to won’t run Ubuntu and throw the error 0x80370102. If you are getting this error, then you need to run the following command to enable Hypervisor:
bcdedit /set hypervisorlaunchtype autoIf you are facing any other issue, then check this guide for complete troubleshooting steps for WSL.
Wrap up
That’s all for this article, where you learned how to install WSL on Windows 10 and 11 with Kali Linux, but I have not included the steps to enable the GUI interface here.
If you want to learn how to install or enable a GUI for Kali-Linux using Win-Kex, then click here.
And with that message, let me end this article here.
How to run the GUI?
Today, we are going to drop another post on Kali Linux gets a GUI desktop in Windows Subsystem for Linux.