Want to Expose your localhost on the Internet? Often, clients ask for an update, or your friends want to know the site you were working on. We can solve all these problems using Localtunnel.
Localtunnel exposes your localhost to the Internet without foul play on DNS or deploying on another commit. Apache, Nginx, and Node Js application can be easily accessed by your friends or client for updates.
My favorite time I was using Locatunnel was when I was working with an external API callback service like Twilio, which requires a public URL for a callback.
Install Localtunnel
Localtunnel is a Node Js module available to install using the npm package manager for all platforms. Ensure Node and NPM are installed in your system using the below command.
$ node -v
v14.17.6
$ npm -v
6.14.15
If it throws an error like a “command not found”, use the below command and install Node Js and NPM in your system.
$ sudo apt install nodejs npmNow type the below command in your terminal to install Localtunnel in your system.
$ npm install -g localtunnelNote: To expose you localhost on internet, first you have to install server application like apache, nginx, or node js. Then start them before using localtunnel and notedown the port no they were using (Default for HTTP is 80).
Expose Localhost using Localtunnel
Let’s assume that your localhost server is running at “http://localhost”. In this case, the default port number is 80. We will pass 80 port in localtunnel to get unique URLs accessible from anywhere on the Internet.
$ lt --port 80
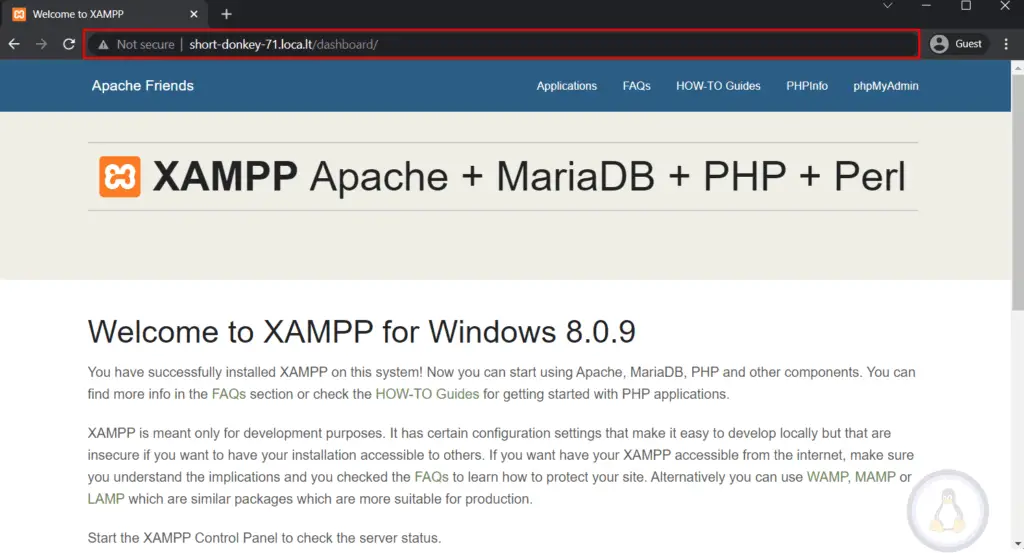
your url is: https://short-donkey-71.loca.lt/Once you execute the above command, it will generate a unique URL like shown below.

Note: Ensure not to close your terminal while connection is established.
In my case, the generated URL is “https://short-donkey-71.loca.lt” you can share this with anyone you want to give access to your localhost. The first time when they visit the URL, they get a message. It’s Localtunnel notice to assure the users that it can be a phishing page made by an attacker.
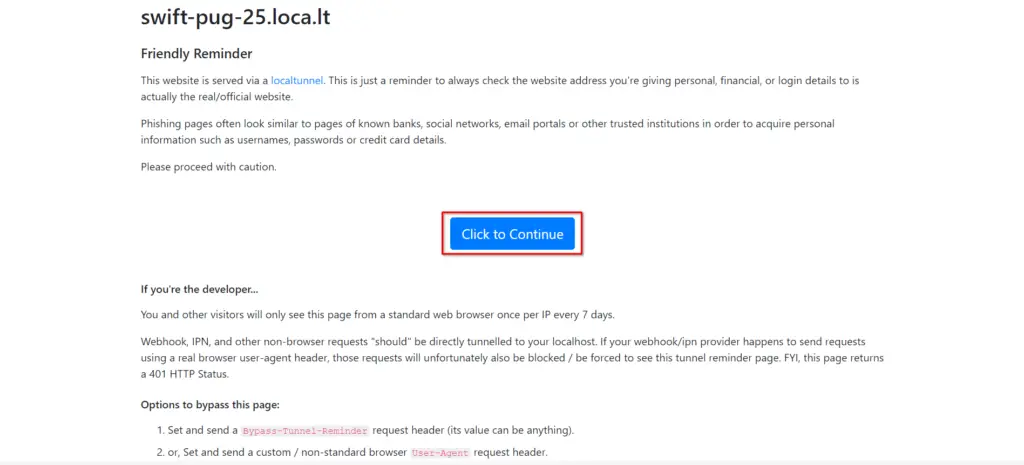
Just click on the “Click to Continue” button to access the actual content of the site.
Change Host for a Localtunnel
Localhost is the default host for the localtunnel but can be replaced with a different host connected to the same network. Use the “-l” flag with the new host address to specify the different hosts, as shown below.
$ lt -l 192.168.43.59 --port 80
your url is: https://breezy-turtle-43.loca.lt
Above I switched host from localhost to 192.168.43.59. Any traffic that comes through “https://breezy-turtle-43.loca.lt” will be redirected to 192.168.43.59 host.
Static URL for a Localtunnel
Whenever you close your connection and execute the localtunnel command, it will generate a new URL, obviously hard to remember.
Localtunnel provides generating subdomain in which you can specify any name for your subdomain by using the “-s” flag.
$ lt -s trendoceans --port 80 your url is: https://trendoceans.loca.lt I have used trendoceans as a subdomain, so in the future, I want to have the same subdomain, then I can go with the same process to generate one.
Open the tunnel URL in your browser
Every time a new URL is generated, you have to copy and paste it into your browser. You can use the “-o” flag to make things easier. It will directly open the generated URL in your system default browser.
$ lt -o --port 80
your url is: https://breezy-turtle-43.loca.lt
Uninstall Localtunnel
In case if you are done with Localtunnel and want to eradicate it from your system. Then you can remove it like a standard NPM package using the below command.
$ npm uninstall -g localtunnelFinal Thought
There are many tools to expose your localhost on the Internet like ngrok. But localtunnel seem too easy and convenient without any connection break.
Let us know how easily localtunnel made your project cycle in the comment section.