Don’t you feel Bash Shell looks stale compared to ZSH, which has a number of extra features that Bash Shell is missing if you do, then let’s find out the steps to install ZSH on Ubuntu.
As a starter, you might think that Ba(sh) is the only shell available to use in UNIX-like distributions, but that’s not the case in modern Linux distributions.
There are several other shell interpreters available to help you out, like KornShell (ksh), C Shell (csh), Z Shell (zsh), and fish Shell.
From this list, you can use the zsh shell, which is highly customizable with more than 100+ themes and plugins that can help you to perform your work swiftly with an aesthetic look.
Z Shell, or zsh, is a shell interpreter that inherits features from bash, ksh, and tcsh, which can be used as an interactive shell, utilities, and basic programming language functionality.
In short, it gives you power over your computer, and it’s hailing since 1990.
From 2019 onwards, macOS replaced zsh over bash, which was the backbone of shell until Mojave. Also, Kali-Linux also replaced bash with zsh, and even Manjaro Linux ships with a zsh shell.
So let’s see how you can also replace bash with zsh in Ubuntu 22.04. Also, you will learn how to customize zsh using OhMyZsh and Powerlevel10k.
Install ZSH on Ubuntu 22.04
Installation of ZSH is very simple on Ubuntu, so you just need to run the below command, which will install the ZSH shell on your system.
$ sudo apt update && apt upgrade
$ sudo apt install zsh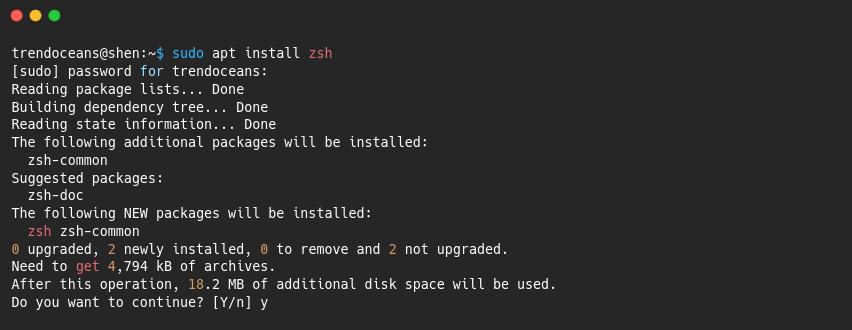
Once the installation is finished (you thought I’d say to run? Yeah, I know you thought that). Anyway, there is one more step that you need to follow before using zsh as the default shell.
Change Bash Shell to ZSH Shell
To change your current shell, you need to be aware of where the zsh binary file is located.
You don’t need to worry about location if you are unaware of it because you can find the zsh binary path using which command, or else you can look for the path in /etc/shells, which holds the path of an available shell that you can use on your system.
Once you are aware of the path, you can execute any of the below commands, which will change your current shell to zsh:
$ chsh -s /usr/bin/zsh
or
$ chsh -s $(which zsh)
After invoking the above command, it will ask for your password, so enter it.
Even after following the steps, your shell will not get updated to zsh until you restart your system.
Before doing a restart, run the below command, which will show whether your login shell has been changed or not.
$ grep 'zsh' /etc/passwdAs you can see, changes have been implemented, so let me restart my system.

Initial Setup of ZSH Shell
Once your system is restarted, open your terminal application, where you will be prompted with some sort of preference-based question, like how you want to continue with the zsh shell.
For this guide, we will suggest you press Zero (0) because we are going to install Oh My Zsh and Powerlevel10k, which will automatically configure zsh for you.
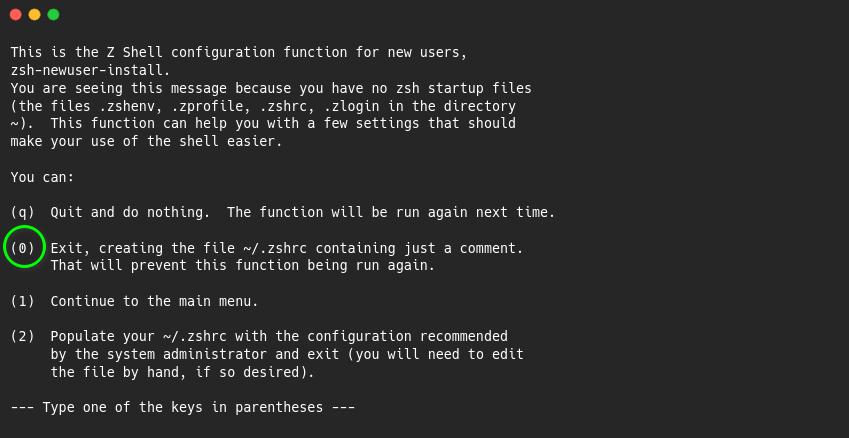
If you want to tinker with all things by yourself, then you can use the main menu by pressing (1), where you will be able to modify how you want to manage executed command history, the autocompletion feature, which you learned how to enable it on Ubuntu system, and some of the shell options which you want to disable or enable.
I’ll not suggest you go with the (1) option for the first attempt. After getting used to it, you can modify the following settings in the .zshrc file, which is located in your home directory.
Or else you can press (2), which dumps some of the recommended configuration to ~/.zshrc file, and later you can add your preference by following this link.
So for now, simply press 0.
And run the below command, which will confirm your current shell path. If it is /usr/bin/zsh, then your initial work is done here.
$ echo $SHELLConfigure and Customize Oh My Zsh on an Installed ZSH
I assume you have followed the above steps without any issues. If there is some issue, then do not hesitate to comment down below. We will give you a hand to resolve it.
On top, we left it to customize the zsh shell, so let’s configure it by using the Oh My Zsh script.
For that, you need to have curl, wget, and git commands installed on your system.
Anyway, you can run the following command to install missing packages.
$ sudo apt install curl
OR
$ sudo apt install wget
$ sudo apt install git
I do satisfy all the requirements, so let me run the below command:
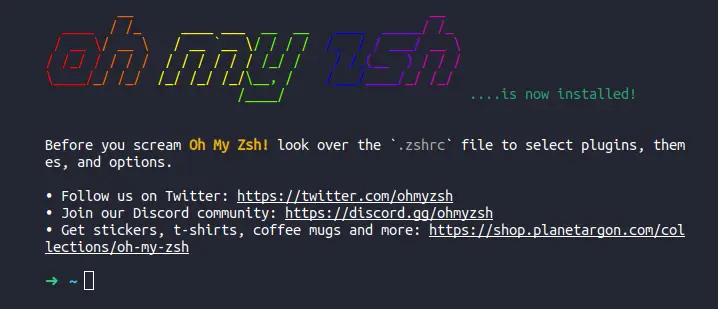
$ sh -c "$(curl -fsSL https://raw.github.com/ohmyzsh/ohmyzsh/master/tools/install.sh)"
OR
$ sh -c "$(wget https://raw.github.com/ohmyzsh/ohmyzsh/master/tools/install.sh -O -)"
Once you run the above command, you will find your shell looking like the below image.
Also read: 10 Wget Command Examples in Linux
Customize ZSH with Oh My Zsh
Oh My Zsh is installed over Zsh Shell, so let’s scream for it by changing some of the themes, which you can find in ~/.oh-my-zsh/themes directory.
If you open ~/.zashrc file, you will find “ZSH_THEME=”robbyrussell”” selected, so let’s change it to something else. But how do I know which theme will look good? If we could find some previews, then it would help us choose the right theme.
I agree with your concern, so let me share with you the link through which you can find the appearance of the theme before changing it in the configuration file.
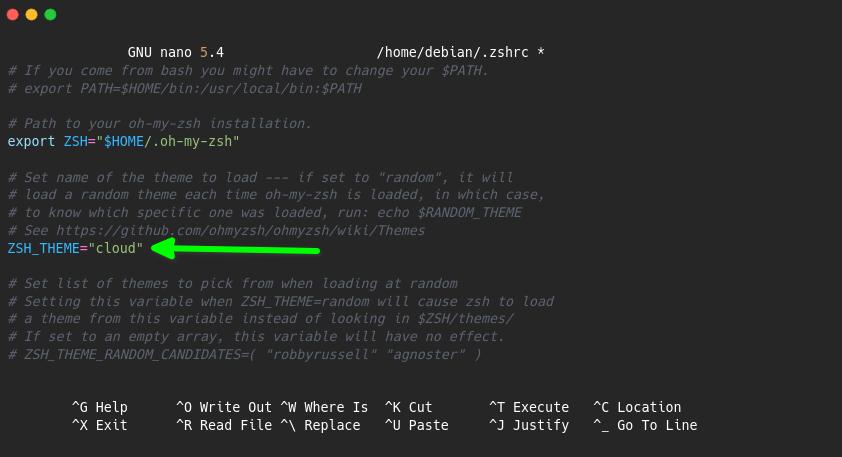
From the theme list, I have selected “cloud”, so let me apply changes to the ~/.zshrc file. To apply the changes, copy-paste the below code into your terminal:
$ nano ~/.zshrcAnd you will find the line “robbyrussell”.
Change it to “cloud” or whatever you want to set it to, like in the below image.
After applying the changes, open a new terminal where you will see the changes.

If, for any reason, the image doesn’t look appropriate, then replace your shell font with Nerdfont, which you can download from this link.
After testing multiple preloaded themes, I didn’t find anything eye-catching. If it’s like that, then don’t get disappointed here because you can tweak ZSH with Powerlevel10k.
Customize ZSH with Powerlevel10k
One of the most preferred themes for zsh is powerlevel10k, which you can get for your zsh shell by invoking the following command on your terminal window:
$ git clone --depth=1 https://github.com/romkatv/powerlevel10k.git ~/powerlevel10k
$ echo 'source ~/powerlevel10k/powerlevel10k.zsh-theme' >>~/.zshrc
After that, you can run “zsh” on the same terminal, or else you can open a new terminal window where you will be prompted with multiple questions on the basis of your preference on how you like to setup Powerlevel10k for your zsh shell.
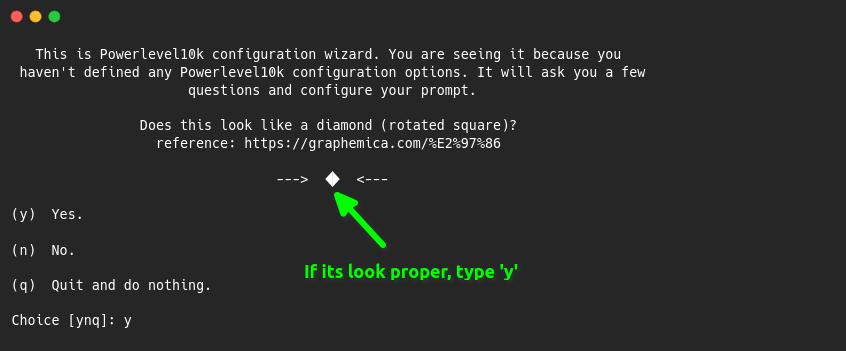
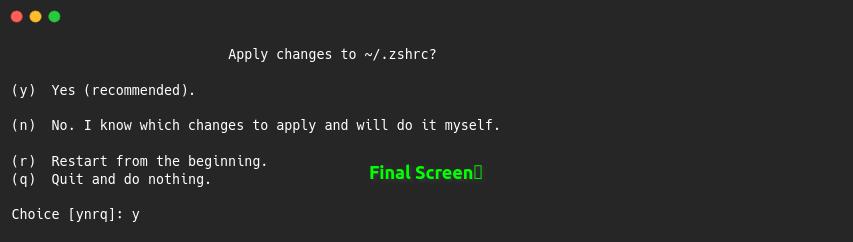
In the end, the terminal will look like the below image.

Now I can literally scream “Oh my zsh!”
Add Plugin in ZSH
Thanks to ohmyzsh, you do have more than 275+ plugins that you can use with zsh, and they’re all stored in the ~/.oh-my-zsh/plugins directory, so to use them, you just need to add the plugin name into ~/.zshrc plugins sections, which will enable the plugins for you.
You can even find out the plugin’s name and usage from this link.
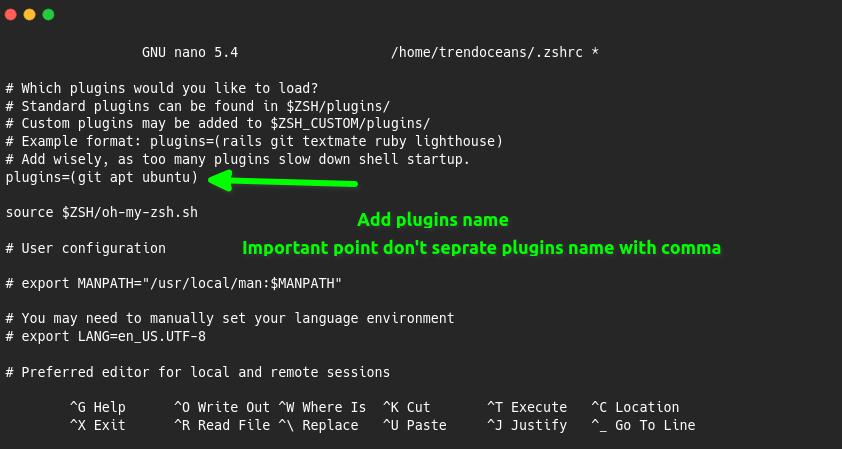
To add one of the plugins to your zsh shell, copy and paste the below code:
$ nano ~/.zshrcOnce you open the above-mentioned file, find the line “plugins”, which accepts plugin names inside the parenthesis, so you just need to enter the proper plugin names without separating them by a comma.
Do not only whitespace is allowed.
If your current screen looks like mine, then you are good to save the file.
To test the plugin, restart your shell or run omz reload to implement changes, and after that, use the plugin documentation for usage.
Cheatsheet
All you learned on top was how to install and customize it. Let’s see some of the key bindings and aliases that you can use to make your work easier than before.
| Command | Description |
|---|---|
omz update | Update Oh My Zsh |
omz reload | Reload changes after modifying ~/.zshrc |
zsh_stats | Show most used 20 commands |
md [dir1/dir2] | Similar to mkdir -p |
mkcd [directory-name] | Create a new directory and get inside of it |
rd [directory-name] | Remove directory name |
cd /~ | Get back to your home directory |
- | Similar to cd - |
.. | Similar to cd .. |
alias | List all aliases |
Uninstall ZSH, Oh My Zsh, and Powerlevel10k
I totally agree with you that you may not like zsh shell for the first time, but I would say try it for at least one week; after that, you will find zsh is fully compatible with your daily usage.
Still, if you didn’t find it worthwhile to use zsh, then you can come any time here and remove zsh and other utilities from your Ubuntu machine.
Don’t forget to change the current shell to bash to avoid login failure. You can use this article if it’s occurred [Solved] Fix login issue after removing zsh from Debian/Ubuntu.
Prior to that, first change your current shell to bash by invoking the below code.
$ chsh -s /bin/bashUninstall ZSH
Once it’s done, execute the below code to remove zsh from your Ubuntu machine.
$ sudo apt autoremove zshUninstall Oh My Zsh and Powerlevel10k
After that, you can remove the Oh My Zsh and Powerlevel10K by executing the below code:
$ uninstall_oh_my_zsh
$ rm -rf .zsh* .p10k.zsh
Wrap up
That’s all for now.
From this article, you have learned the following things:
- How to Install ZSH on Ubuntu
- How to Install OhMyZsh on Ubuntu
- How to Configure zsh
- How to change the shell theme in zsh
- How to add plugins in zsh
- How to completely uninstall ZSH
Anyway, if you want, you can also install Fish Shell along with ZSH, so you can easily switch to different shells according to your preferences.
If you have any queries or troubles, then do check this FAQ.