Synaptic Package Manager is a lightweight GUI software manager that uses the APT package manager as a backend to install, uninstall, update, and list packages in Debian-based distributions.
There was a day when we used to recommend Synaptic over the APT package manager to new Linux users. However, the GUI software manager recommendation remains the same, only replaced by more modern tools such as GNOME Software and KDE Discover.
Also Read: Nala: A Beautiful and Structured Frontend for the APT Command
The question arises: why would someone prefer to install Synaptic over the modern software manager? If you recall from the first paragraph, I told you it is a frontend for the APT package manager, meaning it can do whatever stuff can be done with the APT package manager.
Synaptic Package Manager Features
Let me tell you the list of features Synaptic offers you.
- Update and upgrade your whole system.
- Manage system repositories.
- Install, uninstall, upgrade, and downgrade single or multiple packages.
- Hold an application from being upgraded with the system upgrade.
- Find packages by name, description, and several other attributes.
- Sort packages by name, status, size, or version.
- Select packages by status, section, name, or a custom filter.
- Browse all available online documentation related to a package.
- Download the latest changelog of a package.
- Force the installation of a specific package version.
- Built-in terminal emulator for the package manager.
There are countless more features that Synaptic offers you. Although, providing so many features still puts Synaptic away from being preinstalled.
So, today you will learn how to get started with Synaptic by first learning how to set it up.
How to Install Synaptic Package Manager in Linux
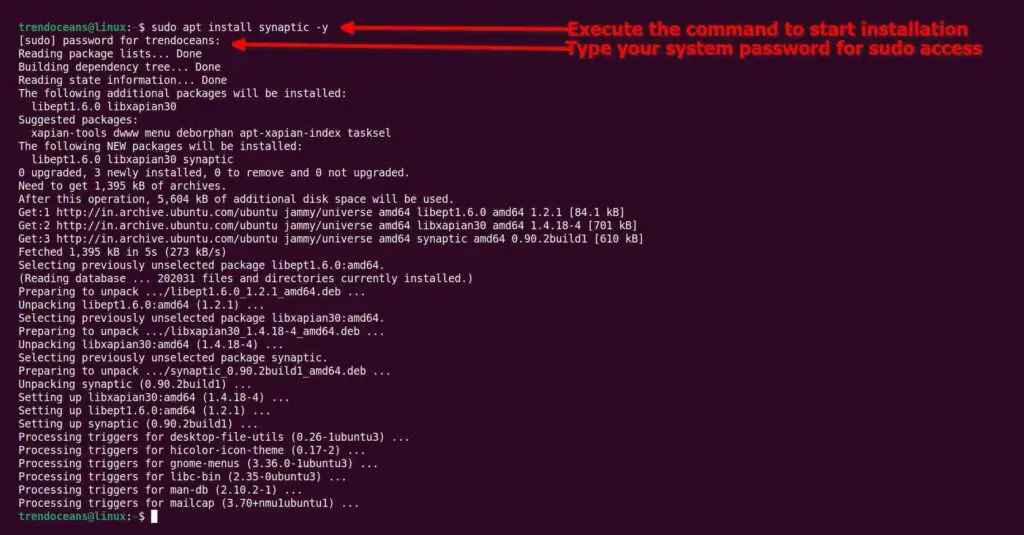
The installation of the Synaptic Package Manager is pretty simple and straightforward. Just use Ctrl+Alt+t or Ctrl+Shift+t keyboard shortcut keys to open your terminal app and execute the following command.
$ sudo apt install synaptic -yYou might have to enter the system password for sudo access, as shown below.
Great work! You have successfully installed Synaptic on your system. Now you can easily open it by executing synaptic from your terminal app or searching for it in the menu, as shown below.
Now, let’s get to the interesting part: learning how to use Snaptic to manage your system applications and packages in Ubuntu and other Debian-based distributions.
How to Use Synaptic Package Manager in Linux
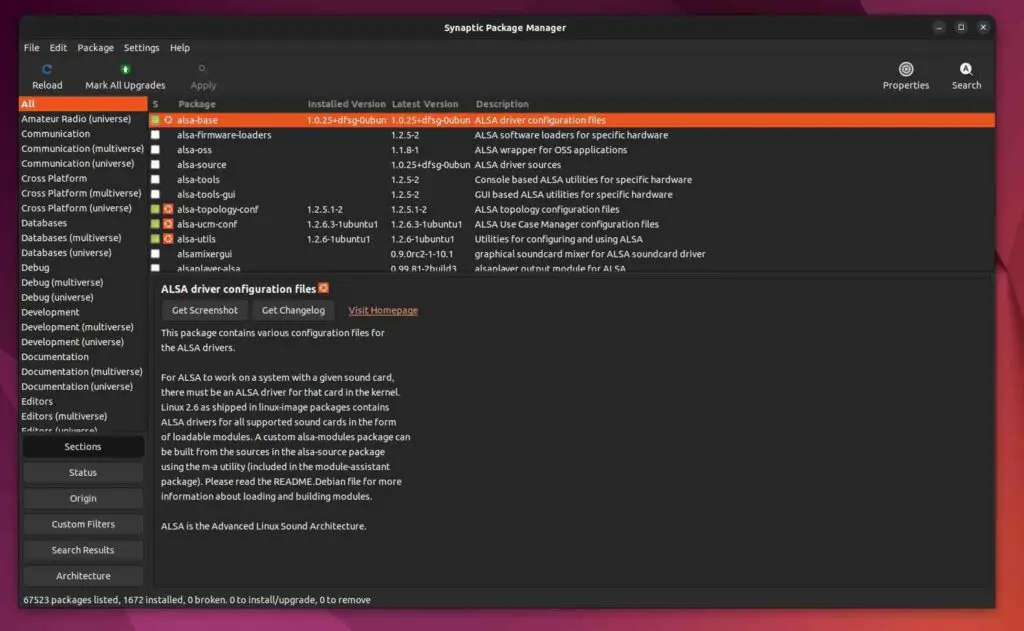
The main windows consist of many sections. So, let’s start with the package list section, where you will see the list of packages offered by the official and manually added repositories in your system, as shown below.
Here, unchecked white boxes are not installed and green checked boxes with the Ubuntu logo are installed.
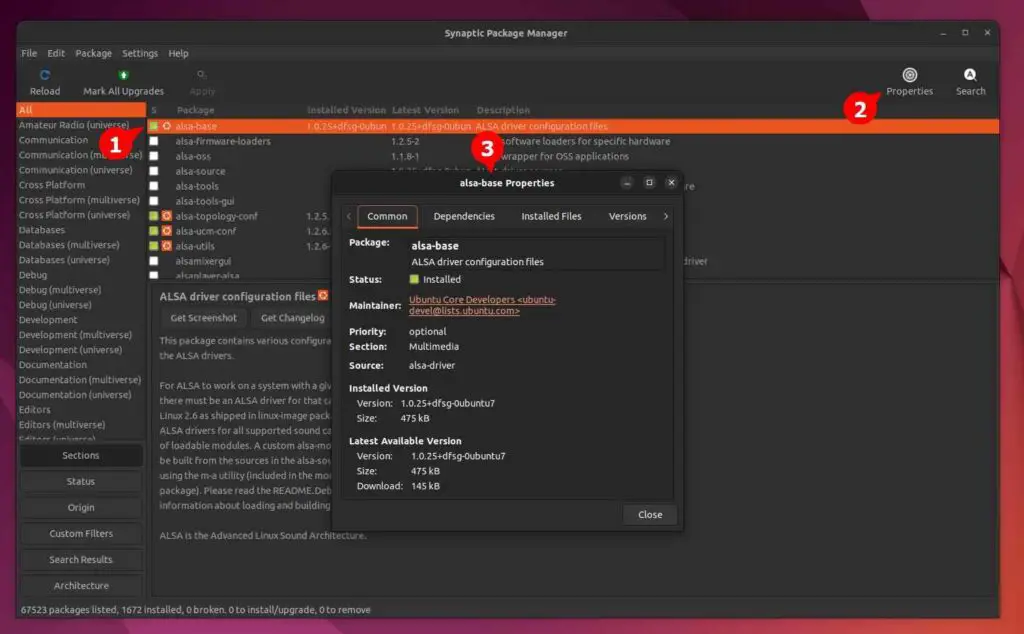
Furthermore, you can select the package to display the description. However, you can click on the top right corner button with the name Properties to explore more information related to the package, as shown below.
From the properties windows, you will find a variety of detailed information about a package, such as a package name, status, priority, section, source, installed version, latest available version, dependencies, installed files, and many more.
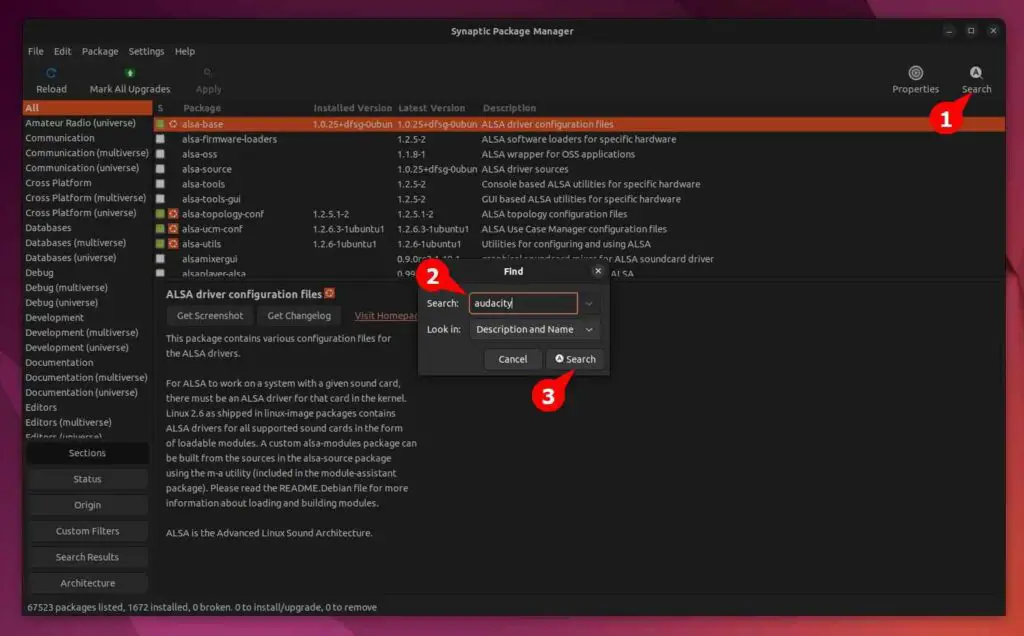
Besides the Properties button, you will also see a Search button. Click on it and type the package name, description, maintainer, version, etc. you know about the package.
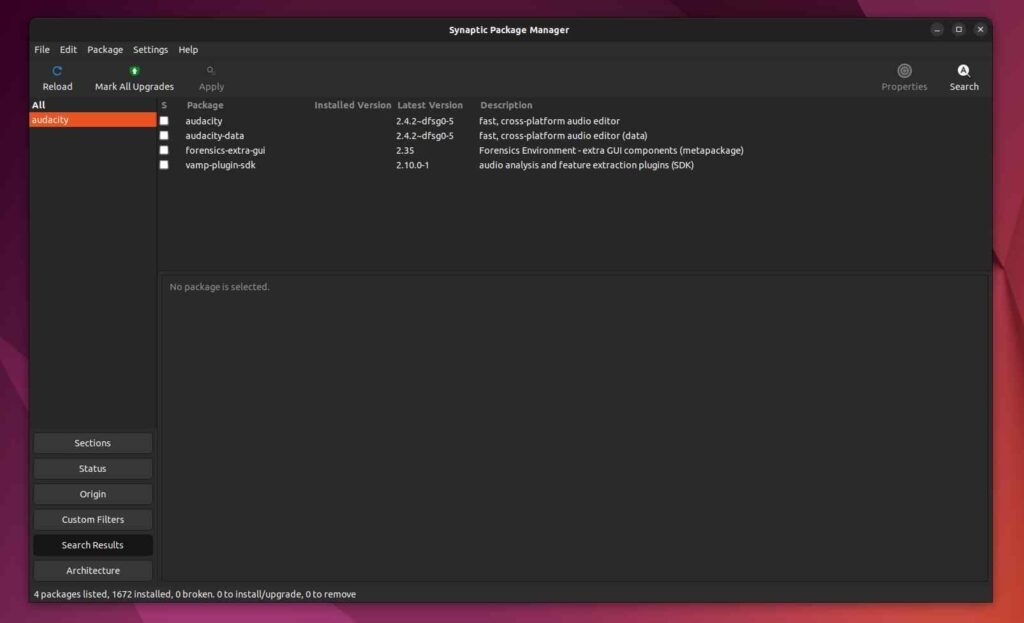
In my case, I already knew the package name (audacity) I wanted to install. For it, I’ll simply type the name of the package in the search field and click the Search button.
Apart from audacity, you will find that there are other packages named audacity in their package descriptions, dependencies, etc.
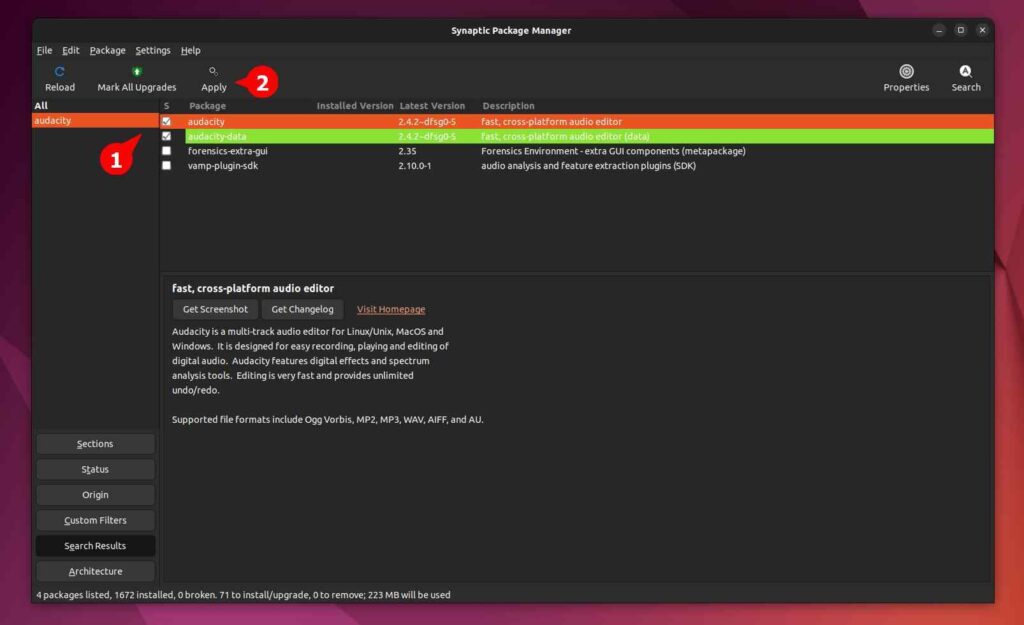
For now, I’m sure the first package is the actual Audacity program. When you select Audacity, it will also highlight (green) packages that will be installed as a dependency. Hit apply to install the selected packages:
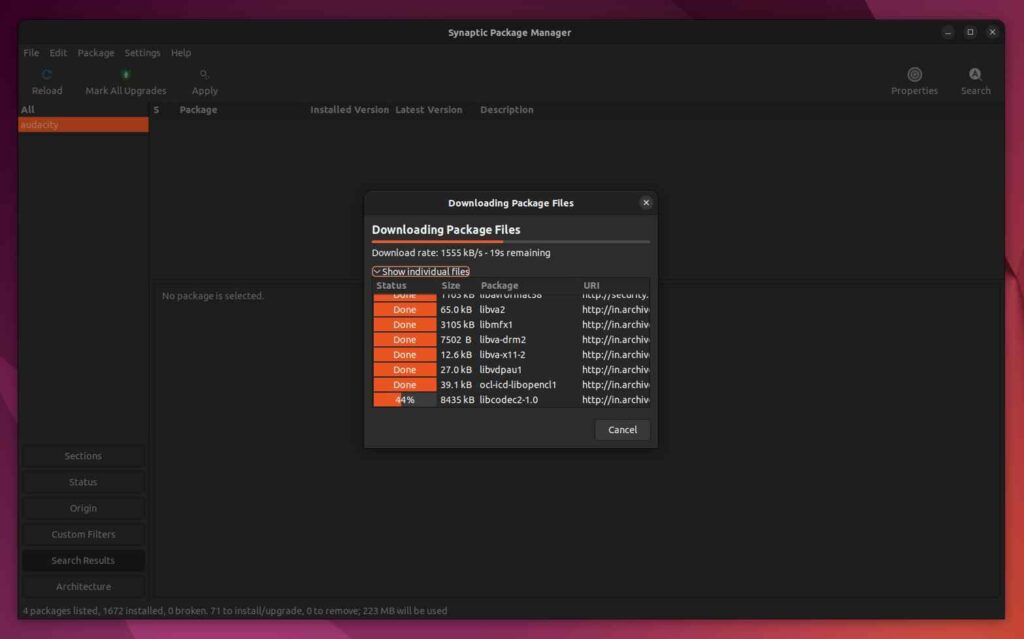
When you click on the Apply button, it will start to download your package. Click on the show individual files to see the dependencies getting installed along with the actual package, as shown below.
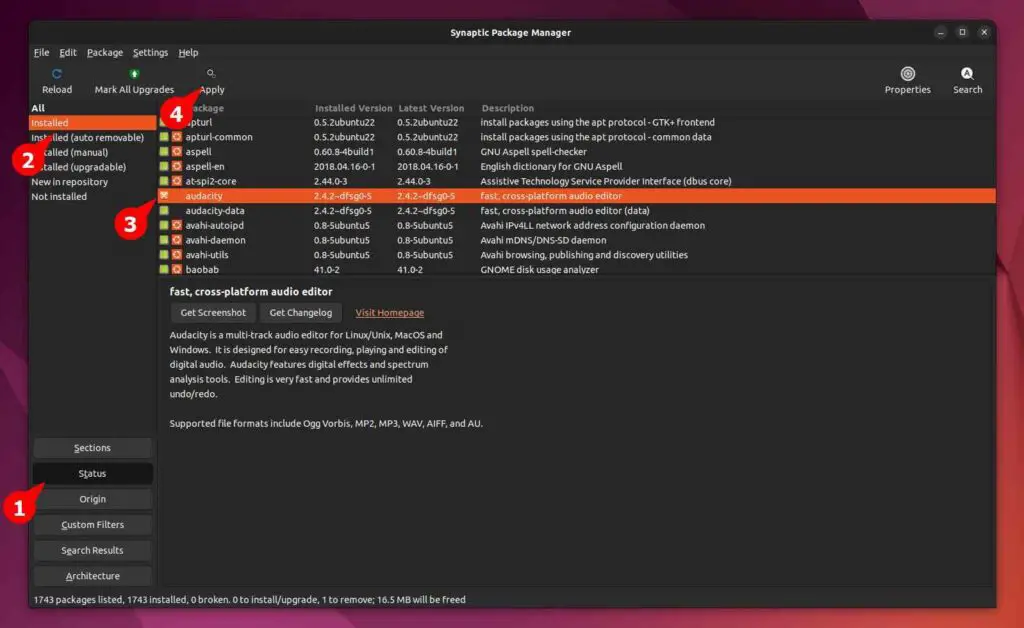
To remove the package, go back to Status and select the Installed section. Uncheck your application or package and click on the Apply button for removal.
Also Read: The Right Way to Remove Apt, Deb, Snap, and Flatpak Packages on Ubuntu
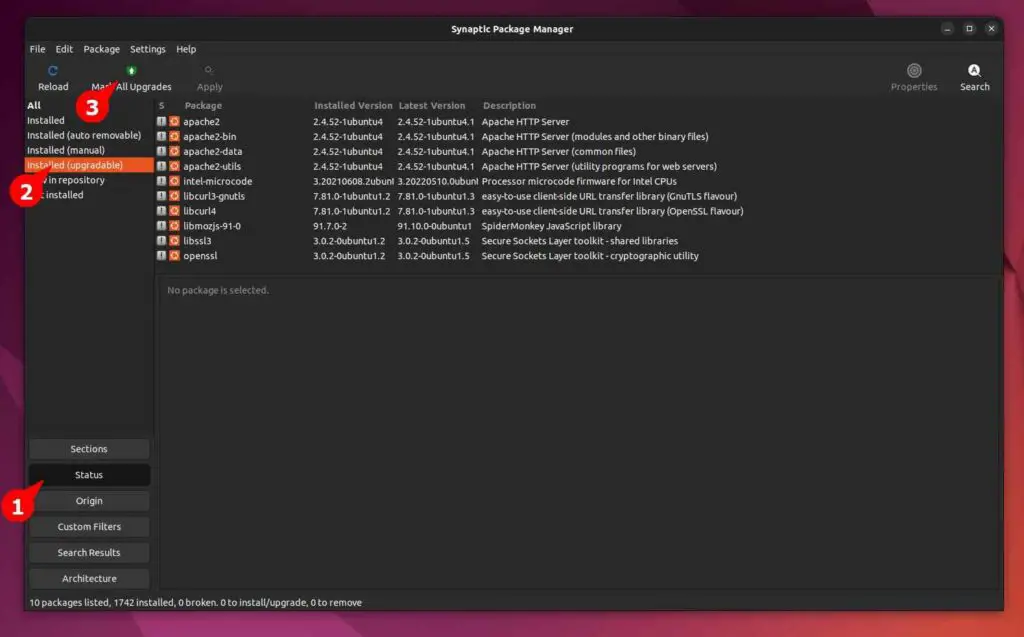
From the Status option, you will also find the sections for Auto-removable, Upgradable, and New in repository packages. For example: if you want to upgrade your system packages, select Upgradable and click on the Mark All Upgrades button.
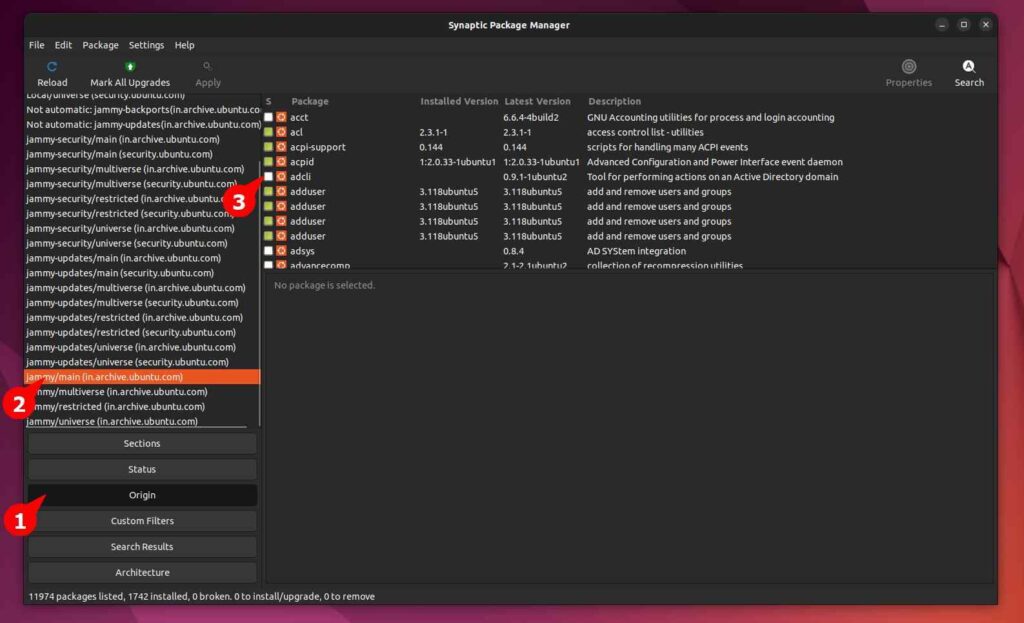
From Origin option, you can see what packages belong to which repositories based on their origin.
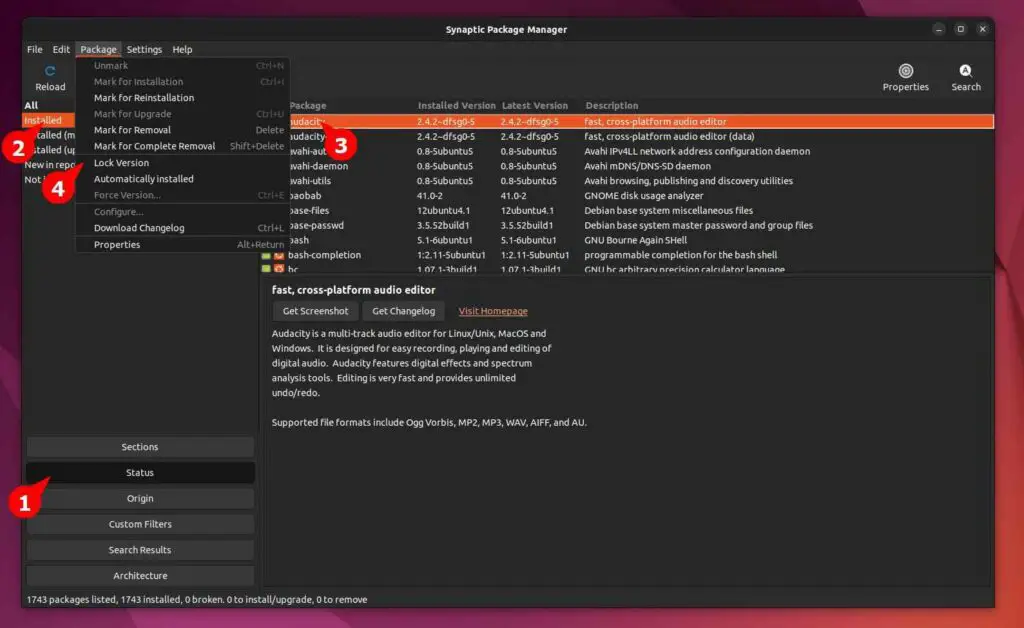
If you want to prevent any package version from getting an update along with a system upgrade, you can disable it by selecting the package and clicking the Lock Version from the Package menu.
There are a lot more things to explore in Synaptic, but that will make this guide monotonous. I will let you explore and tell us what you have explored in the comment section. Also, share your experience with other software management applications.
