Android Studio IDE (Integrated Development Environment) all in one tool to develop Mobile Applications, and it’s built on JetBrains’ IntelliJ IDEA software. A few years back, developers use Eclipse to build mobile applications, and now it’s not supporting anymore.
Features
- Intelligent Code Editor
- Android Emulator
- Testing tools and framework
- Designed for Teams
- C++ and NDK support
- Firebase and Cloud Integration
Throughout this article, We will install Android Studio on Ubuntu 20.04. I believe this article will help for other Ubuntu versions, too, such as 18.04, 20.10 as well as other Ubuntu-based distributions like POP-OS, Linux Mint, Kubuntu, Elementary OS, and Zorin OS.
Different way to Install Android Studio on Ubuntu and Other Linux Distributions
One can install Android Studio on Linux machine through several way such as:
As you can see how many different ways to Install Android Studio, and trust me, we will cover all this method. After all, It’s up to you which method you will choose.
Prerequisites
We will not ask much from your end, Simply you should be able to install applications from the Internet on your Ubuntu Systems rest assured to us, and If you don’t how to add users into the sudo group in Linux learn more.
Install JDK on Ubuntu 20.04
To run Android Studio on your Ubuntu system, android require OpenJDK. If a question arises, What is OpenJDK? In short, OpenJDK (OpenSource Java Development Kit) makes work easier to Implement Java features in Applications.
First, we need to verify whether JDK is already Installed or not to check pass the below command:
$ java --versionOnce you throw a command, you should expect to get the Install JDK version, In case of the following output on the terminal screen:
Command 'java' not found, but can be installed with:

sudo apt install default-jre              # version 2:1.11-72, or
sudo apt install openjdk-11-jre-headless  # version 11.0.10+9-0ubuntu1~20.04
sudo apt install openjdk-13-jre-headless  # version 13.0.4+8-1~20.04
sudo apt install openjdk-14-jre-headless  # version 14.0.2+12-1~20.04
sudo apt install openjdk-8-jre-headless   # version 8u282-b08-0ubuntu1~20.04
The above output confirmed that we are missing OpenJDK, so we need to proceed with Installation. You can simply install OpenJDK with a single command:
$ sudo apt install openjdk-8-jdkOnce the java installation process gets completed pass the -version command to check version details:
$ java -version

openjdk version "1.8.0_282"
OpenJDK Runtime Environment (build 1.8.0_282-8u282-b08-0ubuntu1~20.04-b08)
OpenJDK 64-Bit Server VM (build 25.282-b08, mixed mode)
Install Android Studio from Ubuntu Official Repository
You cannot directly install Android Studio from Ubuntu Official Repository until and unless you don’t add PPA Key. To add PPA key, do-copy paste the below code, and you will be to Install it:
$ sudo add-apt-repository ppa:maarten-fonville/android-studioWhen you pass the above command, it will ask your consent whether you want to add PPA or not? Simply press Enter key to continue.

Once you complete the above process, pass another set of commands to Install Android Studio. After adding PPA, it’s necessary to update the repository. Otherwise, you may not see any changes.
To update repository type the usual command and press enter:
$ sudo apt updateWe are very close to Install android studio on Ubuntu using the Official repository, Now you simply need to do-copy paste the below code into the terminal screen and pass Y
$ sudo apt install android-studio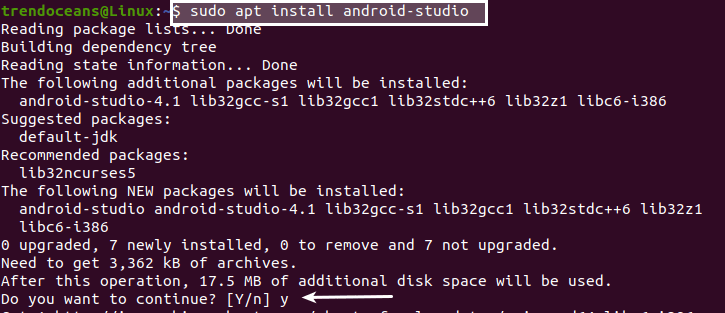
After passing the command, wait for some time to get the installation complete; and one thing you should note If you are Downloading Android Studio from metered connections, The File size is approx 1 GB, so keep watch it.
Once the installation is over, you can easily run Android Studio on Ubuntu by pressing the Super key or making click on Activities and search for “Android Studio”.

When you run the applications for the first time, it will ask you to configure them. To configure, click on the How to configure Android Studio for the first time.
Install Android Studio using Snap
If you are a person who doesn’t want to add PPA to sources.list and finding an alternative way to Install Android studio, then you should use snap. As you know, all the Ubuntu Distribution comes with snap for anyhow your not able to find snap on your Ubuntu machine. Check out How to install the official Snap Store on Ubuntu, Arch, Manjaro, CentOS, Fedora
To install android studio using snap pass the following command into a terminal:
$ sudo snap install android-studio --classic
[sudo] password for trendoceans:
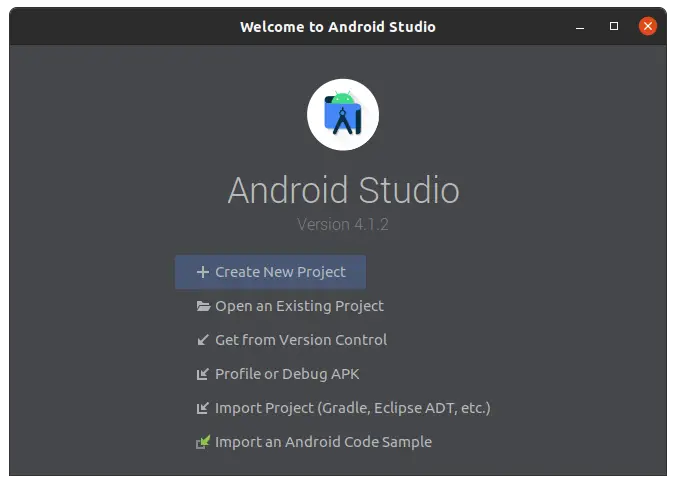
Download snap "android-studio" (100) from channel "stable" 0% 331kB/s 48.6mOnce the installation is completed, you will get the “Welcome to Android Studio” screen, and no further configuration required.
That’s pretty simple, isn’t it?
Install Android Studio using Ubuntu Store
Not a fan of the terminal? Finding a way to Install Android studio Using the GUI method or from the Ubuntu store, your search end here.
To Install Android Studio from Ubuntu Store follow the subsequently steps:
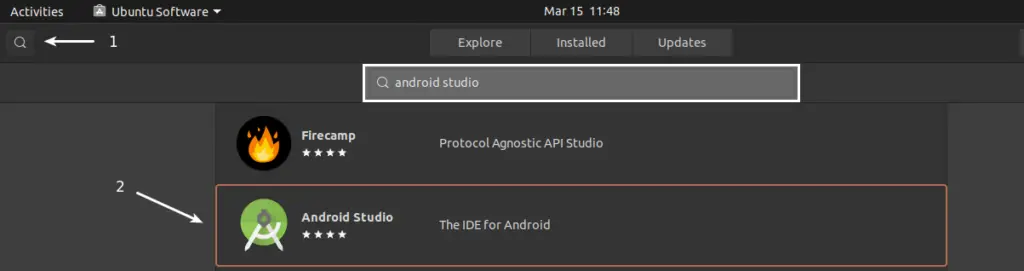
Step 1:- Click on Activities or press Super key and search for “Ubuntu Software” This name may vary for different Ubuntu-based distributions:

Step 2:- Now click on Magnify glass and search for “Android Studio”, Click on the Second Options, which says “The IDE for Android”.
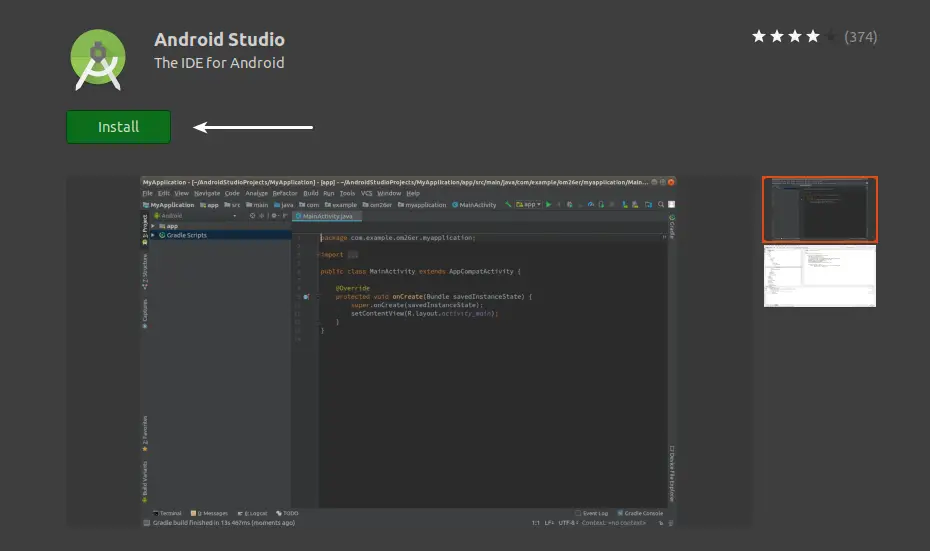
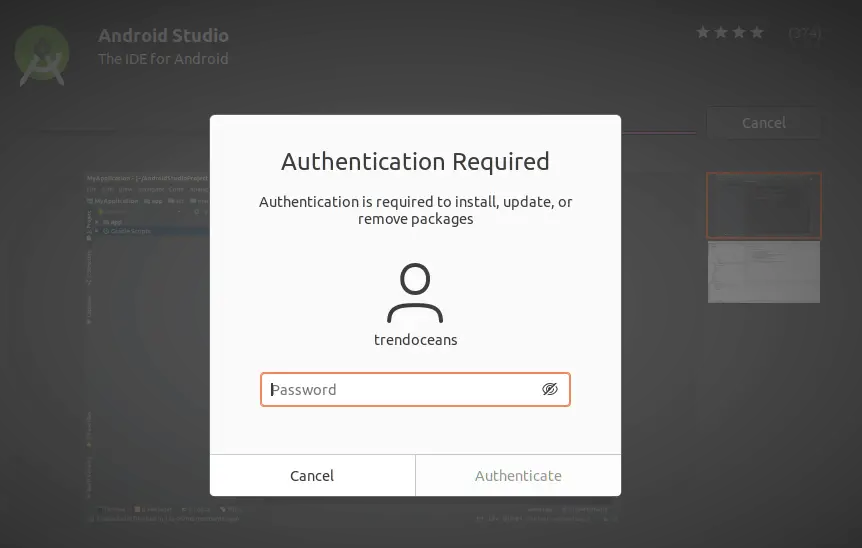
Step 3:- We very close to Install Android Studio, Simply click on Install and wait for Authentication Screen to pop-up.
Step 4:- This is the final step to complete the installation process. Over here, provide a password and wait for the process to get complete.
That’s all to Install Android Studio from Ubuntu Software, and You should note that Android Studio, which you are downloading and Installing from Ubuntu Software, is possible through the snap.
Install Android Studio using tar.gz
This method will work for all Linux distributions, no matter whether you are using Ubuntu or Arch. By the way, you can even install Android Studio using snap. As you know, many Linux users don’t like to use snap to Install any Software. Rather, they prefer to build an application from a source file than a snap.
To Install Android Studio, you do not need to do much. Just pass a couple of commands, and Android Studio is ready to use. Before that, we need to Download android studio from the Official Site.
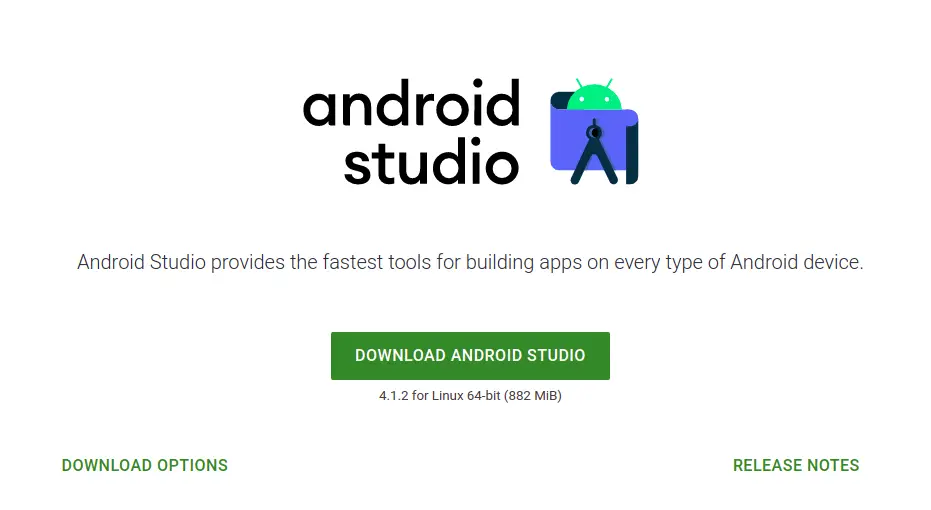
Step 1:- Download android studio tar.gz
To Download android studio tar.gz file click on the below button to redirect on Official Website.
Once the page is ready to use click on the green button which says “Download Android Studio”
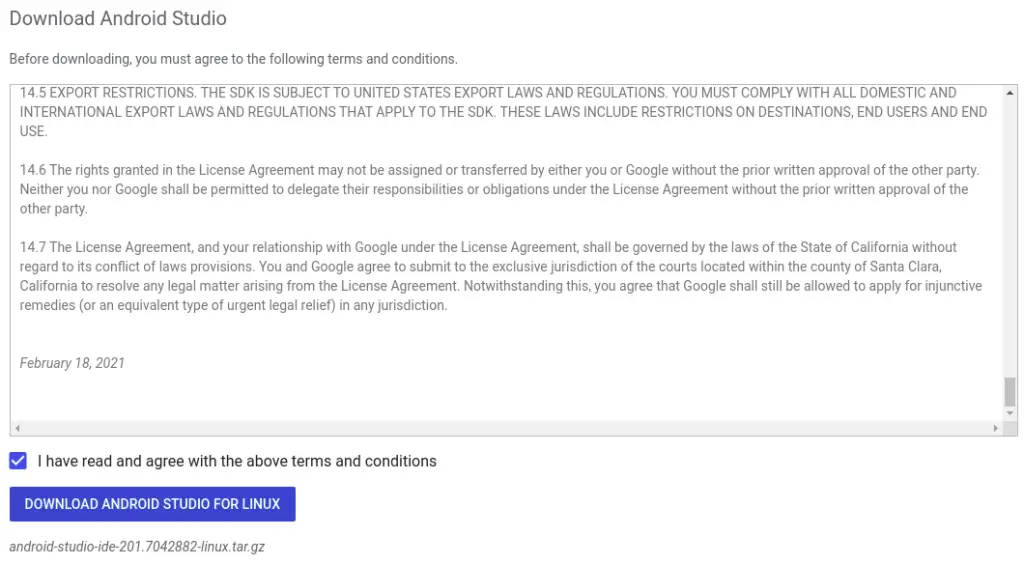
Without accepting Terms and conditions, you will not be able to Download Android Studio. So, first, make a check on “I have read and agree with the above terms and conditions” after that, click on “Download Android Studio for Linux” to start the download.
Step 2:- Extract android studio tar.gz
Once the file is Downloaded from Internet, Open terminal and go to the directory where file is stored, after that extract the configuration file at /opt directory to prevent from making any unwanted changes or deletions of files:
$ sudo tar xvf android-studio-ide-201.7042882-linux.tar.gz -C /opt/Step 3:- Install android studio
After that, change your current working directory to the below path and run the script called studio.sh to Install Android Studio.
$ cd /opt/android-studio/bin
$ sudo ./studio.sh
Next step is to configure android studio.
Step 4:- Create Desktop
Well, you have successfully installed Android Studio on your Ubuntu machine from a source file, but there is a complication to run an android studio. For example:- Whenever you want to run an android studio, you have to access it from the terminal where the file is stored.
To solve this problem we have to options:
- Create Symbolic link (Temporary Solution)
- Create Desktop icon (Permanent Solution)
Even if you create a symbolic link, you have to run the android studio from a terminal, but when choosing the create Desktop icon, it will create an icon on Application Managers. From there, you can easily access it.
So, Let’s learn how to create a desktop icon for android studio.
Step 1:– First of all run the android studio from the terminal. To run android studio go to the directory where you have extracted the tar file after that you should get the same screen as mine.
In my case, I have extracted tar file at /opt/android-studio/bin from this directory, I’ll run the script file studio.sh.
$ cd /opt/android-studio/bin
$ ./studio.sh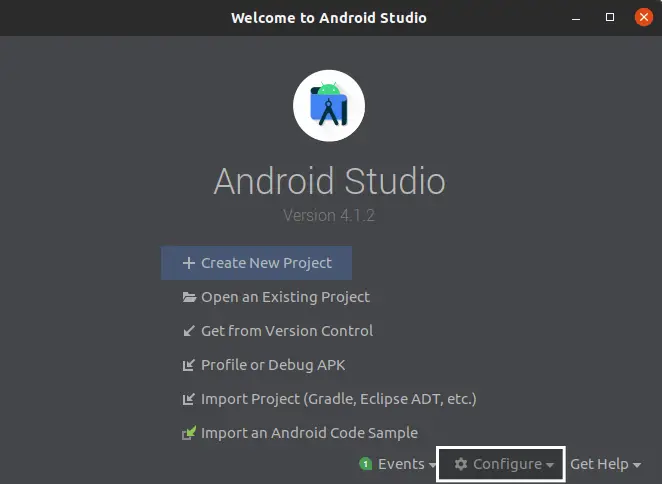
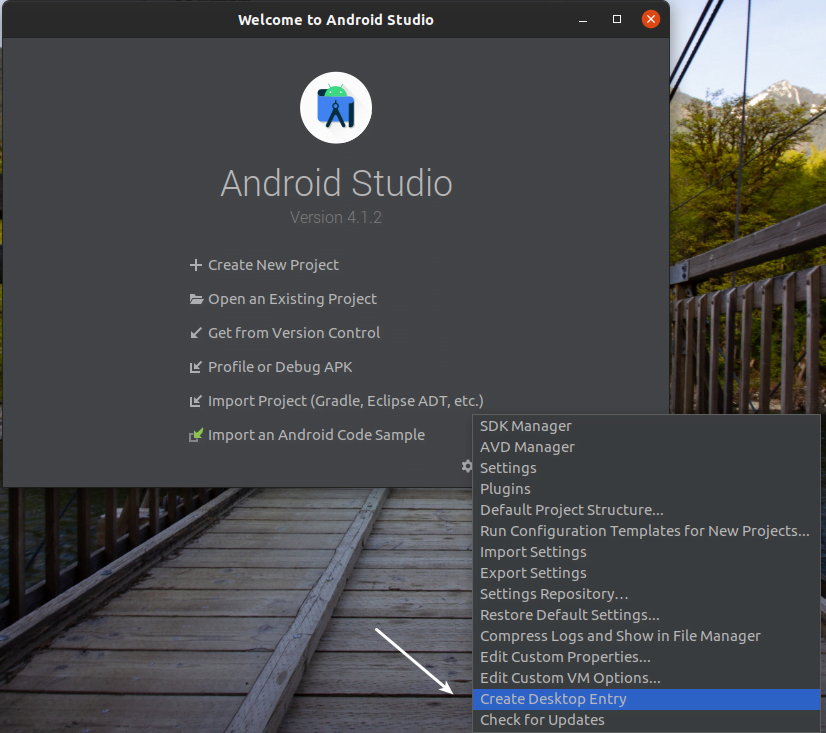
Step 2:- Once you get the above the screen, click on Configure, which will be at the bottom of the screen, and click on Create Desktop Entry.
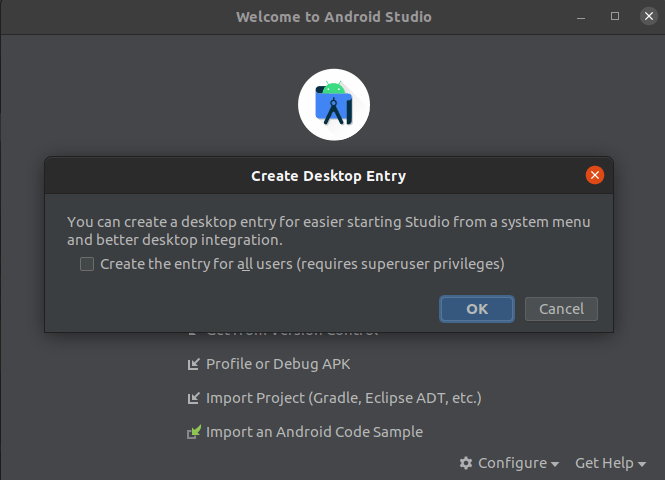
Step 3:- As you clicked on Create Desktop Entry, you will get a confirmation pop-up to create a desktop icon. If you want to create a desktop icon for all the available users, please check on Create the entry for all users or simply click on OK.
Now you can run Android Studio from Application Manager, To run click on Activities or press Super key and search android studio.
Configure Android Studio
Suppose you have installed Android Studio from the Ubuntu repository or Official source file (tar.gz). You need to perform form few extra steps.
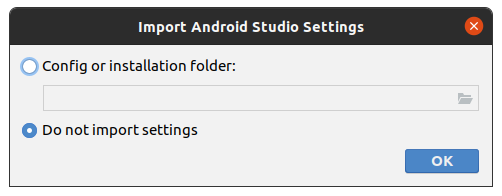
There will be series of screens to configure. The first screen is to Import Android Studio Settings. In this pop-up screen, select “Do not import settings” and click “OK”.
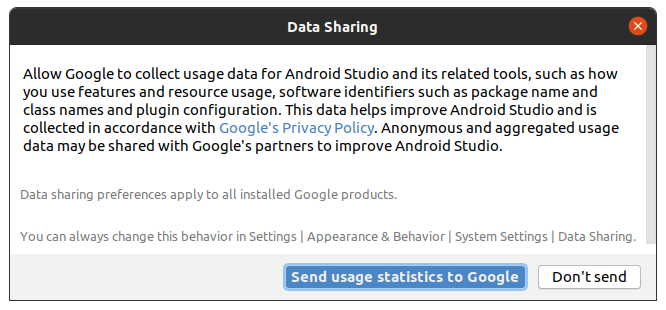
On a second screen, Android Studio will ask for your consent to Share Usage data anonymously. If you want to share data to google, click on send usage statistics to Google, But I don’t want to share anything, so I’ll simply click on Don’t send.
Not to worry, even If you clicked send usage statistic to Google, You can easily turn off this by going to Settings > Appearance & Behavior > System Settings > Data Sharing.
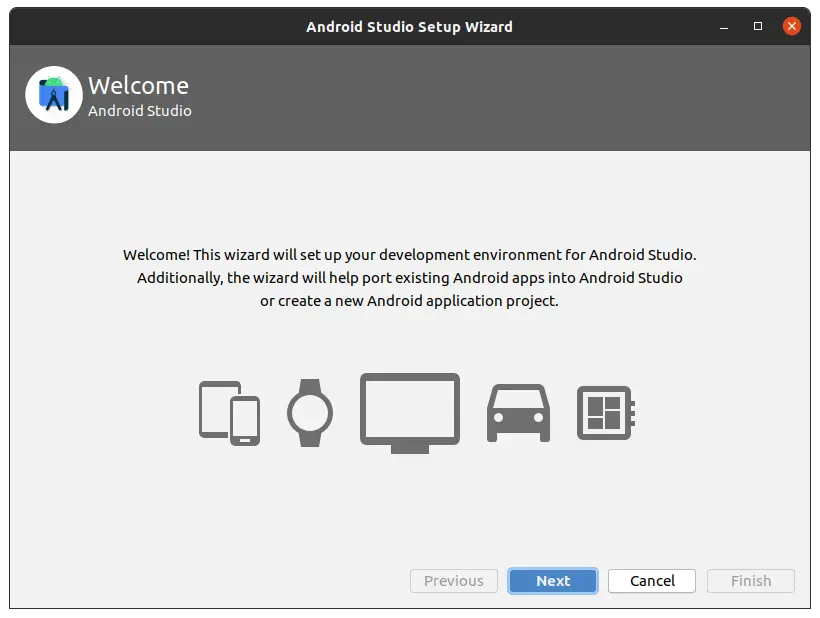
This is setup wizard screen simply click on Next to get an Options to configure further.
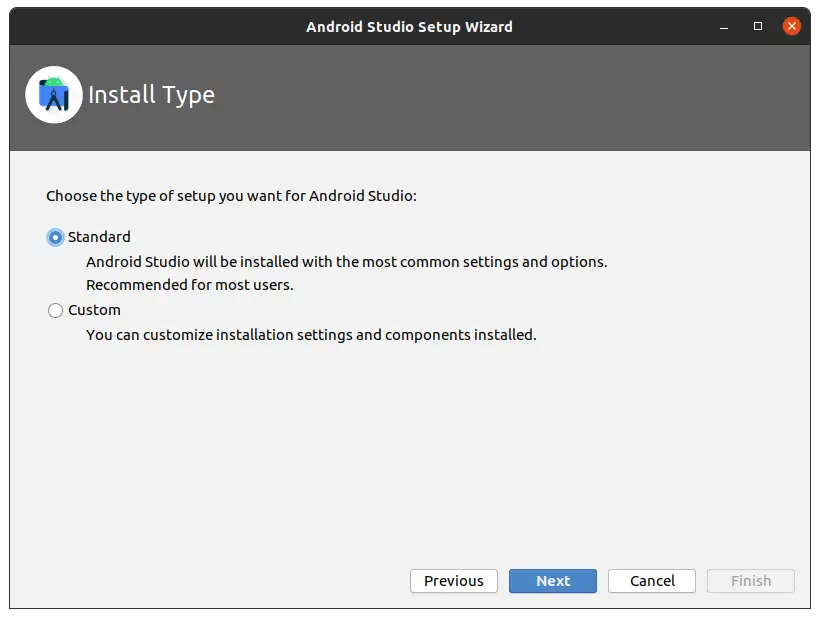
On this screen, you will get the two options to proceed further? If you are a beginner or do want to set it up manually, click on “Standard” rest android studio will manage.
You can choose “Custom” Only If you know what you are doing. Over here, you will be able to choose a specific SDK version where the SDK file should store. Otherwise, you will make a mess. Just select the “Standard” and click “Next”.
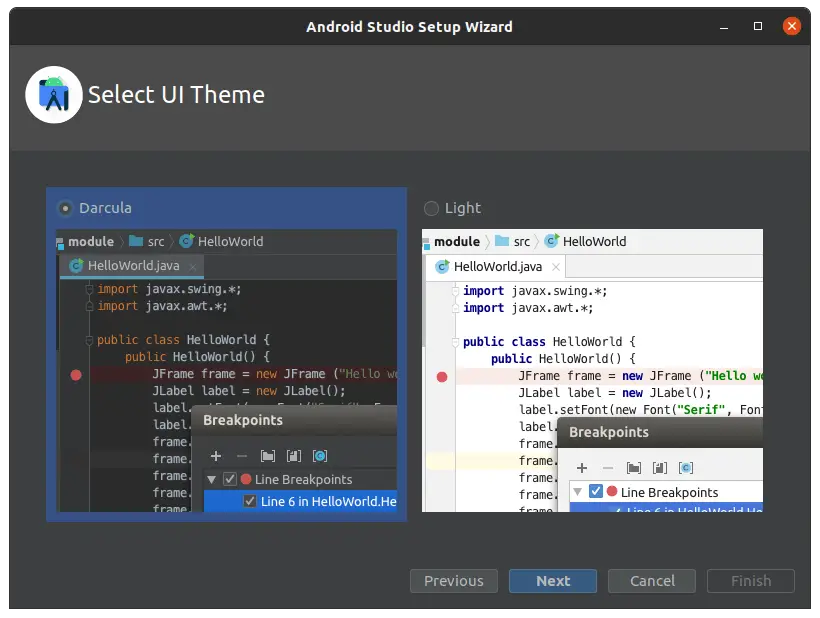
What a theme name “Dracula”, As I read this my mind start portraying Dracula Image of Pennsylvania 😉 Nevertheless, It’s up to you which theme you prefer some user like Light or Dark theme.
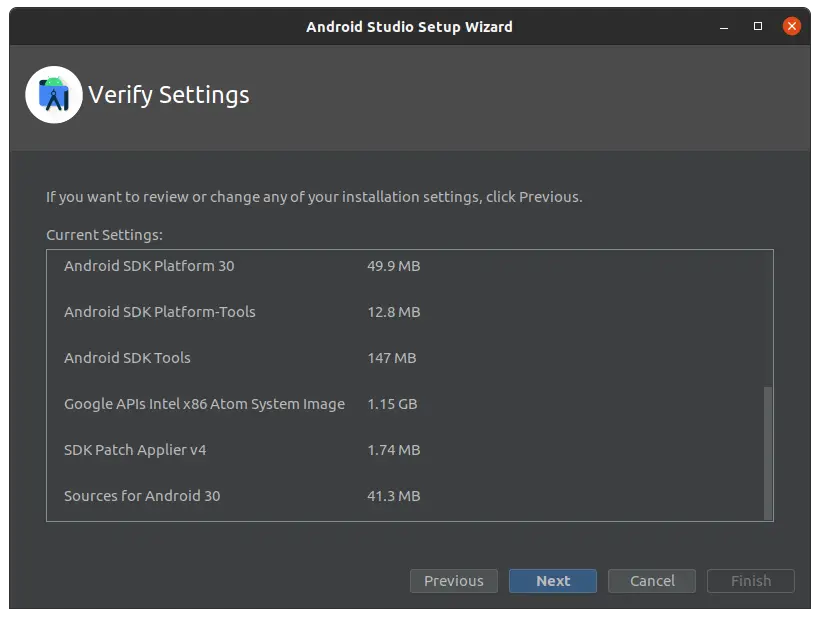
Once make a review of what you selected, If sure about your preference, simply click on Next else, click on Previous and make changes.
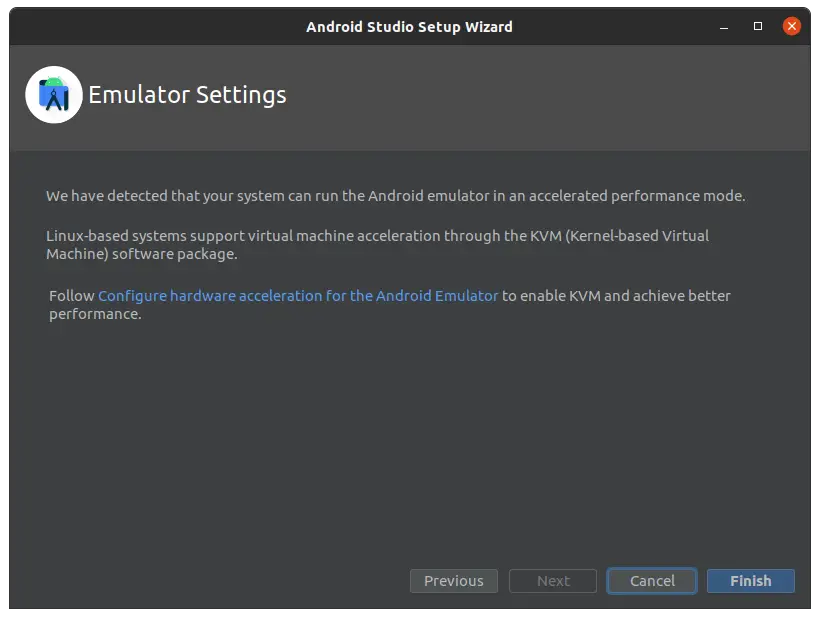
This is an extra wizard screen for Linux users. Over here, you should click on the Finish button and wait till the extra required file gets Installed.
Once the Configuration process gets completed, you will see the screen to manage project and customs settings.

Wrap up
That’s all to Download and Install android studio on Major Linux and Ubuntu Machines. Let me know which method you prefer to Install android studio.
If you are stuck somewhere, please feel free to comment down and If you like the article or somewhere I missed something, please let me know to make this article more amazing.