Garuda Linux is based on Arch Linux. It is provided with all major Desktop environment like KDE, GNOME, Xfce, Cinnamon, MATE, LXQt-kwin, Wayfire, Qtile, BSPWM and i3wm.
On a short period, Garuda Linux is most preferable distribution on Linux community.
So, we will walk through the Garuda KDE Installation process and feel the Garuda KDE’s Beast.
Table of Contents
Prerequisite
- Garuda KDE Dragonized ISO file
- Bootable Thumb drive
- 30 GB Disk Free
- 4 GB RAM
Live session login details
While using live session if the screen gets locked, please use the below credentials to login back.
- Username garuda
- Password garuda
Download Garuda KDE Dragonized
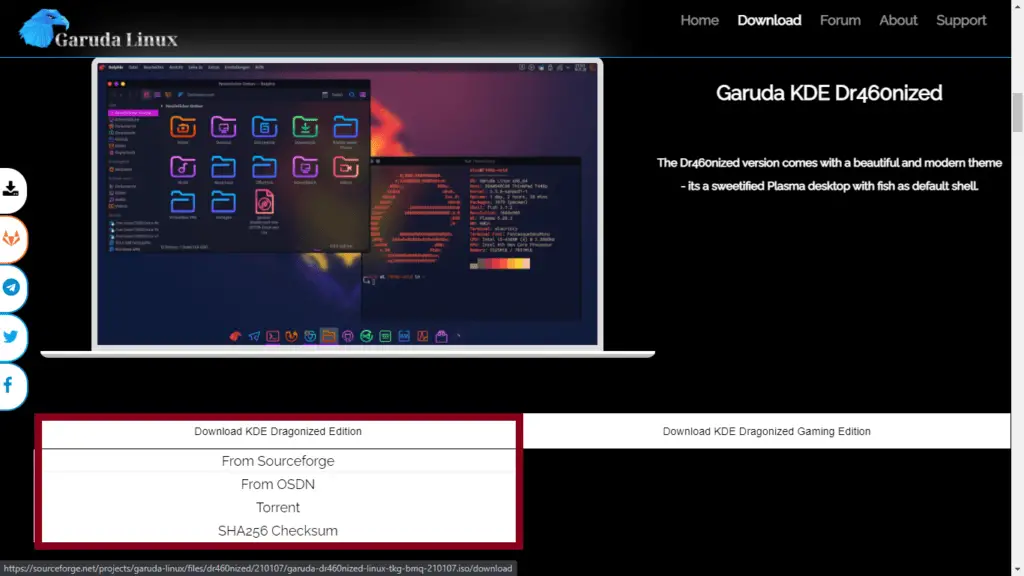
To Download Garuda KDE Dragonized visit to the Official site. As you scroll down, you will see various Garuda version.
From that, we have to Download Garuda KDE Dr46onized. It’s come up with the two editions.
- KDE Dragonized Edition
- KDE Dragonized Gaming Edition
We will Download the KDE Dragonized Edition from Sourceforge.
Create bootable disk
We have downloaded the Garuda KDE Dragonized iso file. It’s time to make bootable thumb drive or USB drive.
To create a bootable thumb drive, we can use an etcher or dd in Linux for Windows, also use etcher to create a bootable drive.
I’m already using Ubuntu 20.04 LTS in my Linux system, and I’ll use the dd command to create a live disk.
Step 1. Connect your thumb drive to your Linux system
Step 2. Check partition name, To check partition name we can use lsblk command this will list out the drive partition name with the disk size and make sure to jot right drive otherwise you can lose your data.
In my case partition name is /sdb with the disk size around 14 GB.

From the above step, we have jotted down the USB drive partition name. To make bootable drive pass command the following command.
Command Syntax
$ sudo dd if=/[ISOFILE-LOCATION] of =/dev/[PARTITION NAME]Example command
$ sudo dd if=/media/trendoceans/Shen\ Default/garuda-dr460nized-linux-tkg-bmq-210107.iso of=/dev/sdbWait for some time to make bootable drive till that don’t interrupt the process.

Thumb drive is ready to use, Now restart your machine and select the bootable drive.
Start Garuda KDE Installation
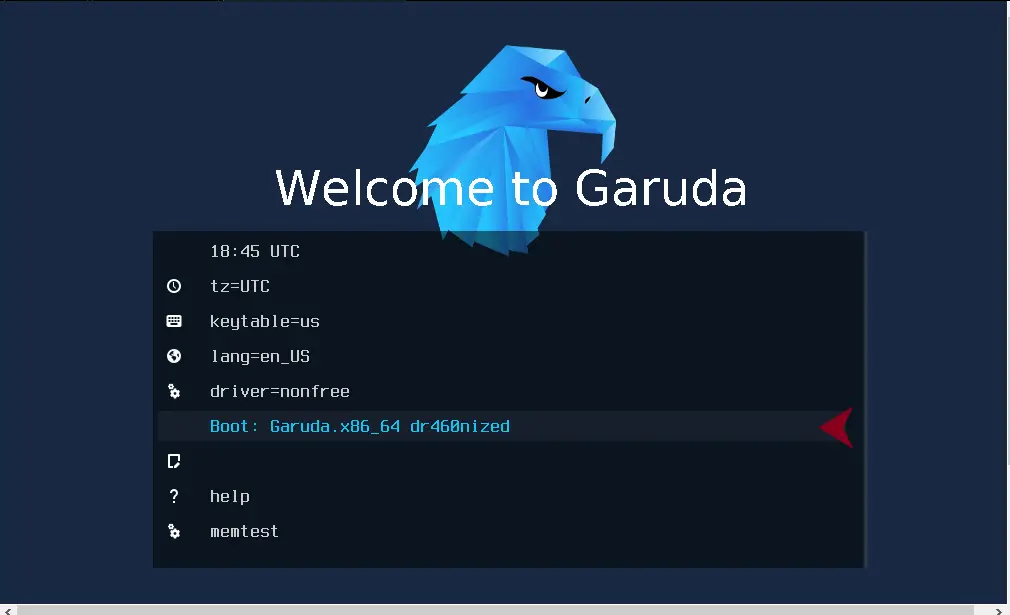
The first welcome screen with the Garuda grub select the Boot: Garuda.x86_64 dr460nized to start live boot.
It will take some time to load Garuda Linux “Serpent Eagle”. On the bottom you will see the button to Install Garuda Linux click on that.
Before that, please connect your Laptop with the power source and the Internet connection.
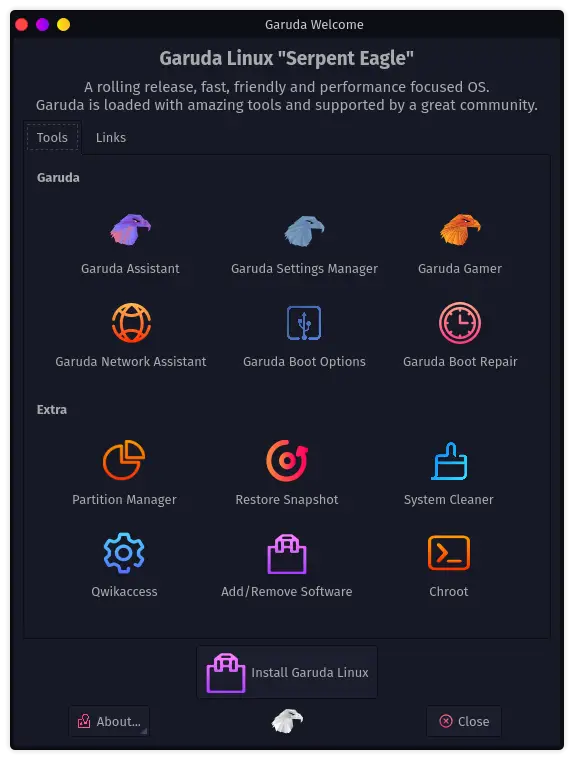
When you clicked on Install Garuda Linux you will get the series of screen follow the below steps
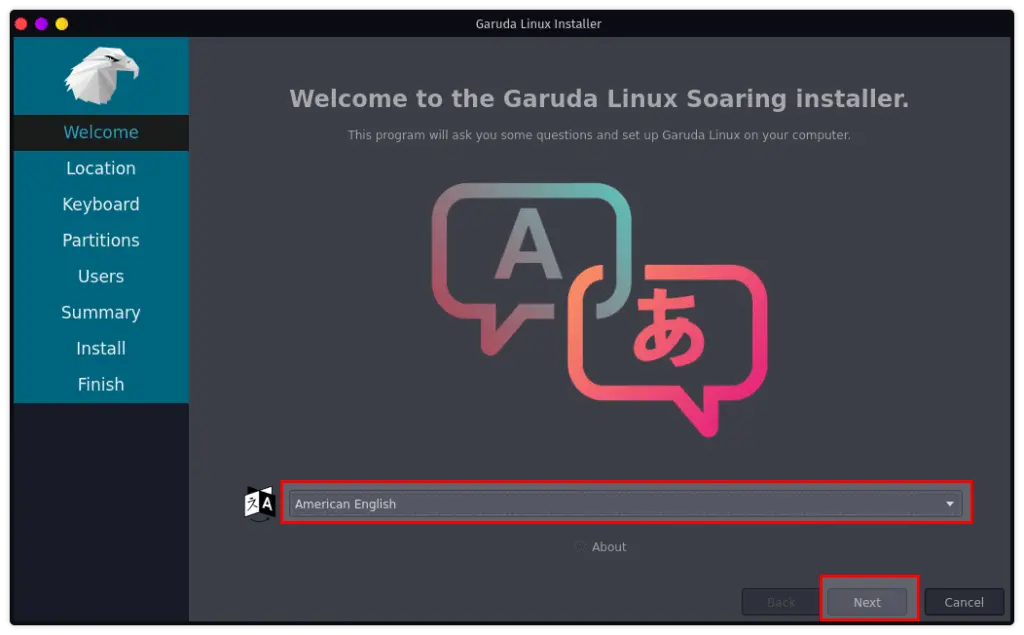
Step 1:- Select the Language
Click on the drop down menu to change language from the given drop option.
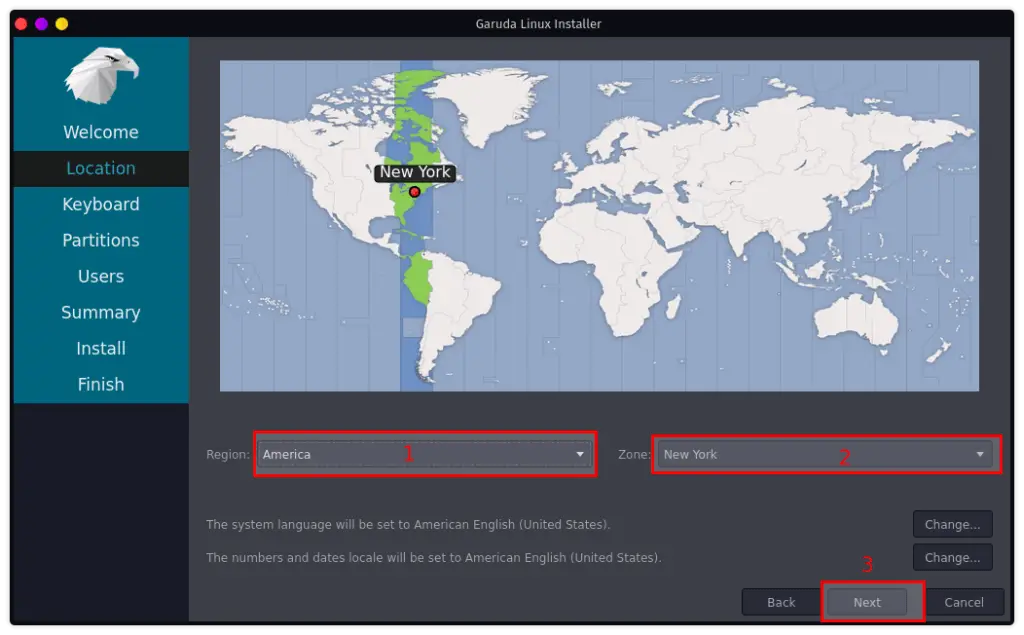
Step 2:-Select Location
To change the location you need to first click on the region drop-down menu, click on Zone after selecting a location, please click on the Next button to choose Keyboard type.
Step 3:- Choose keyboard
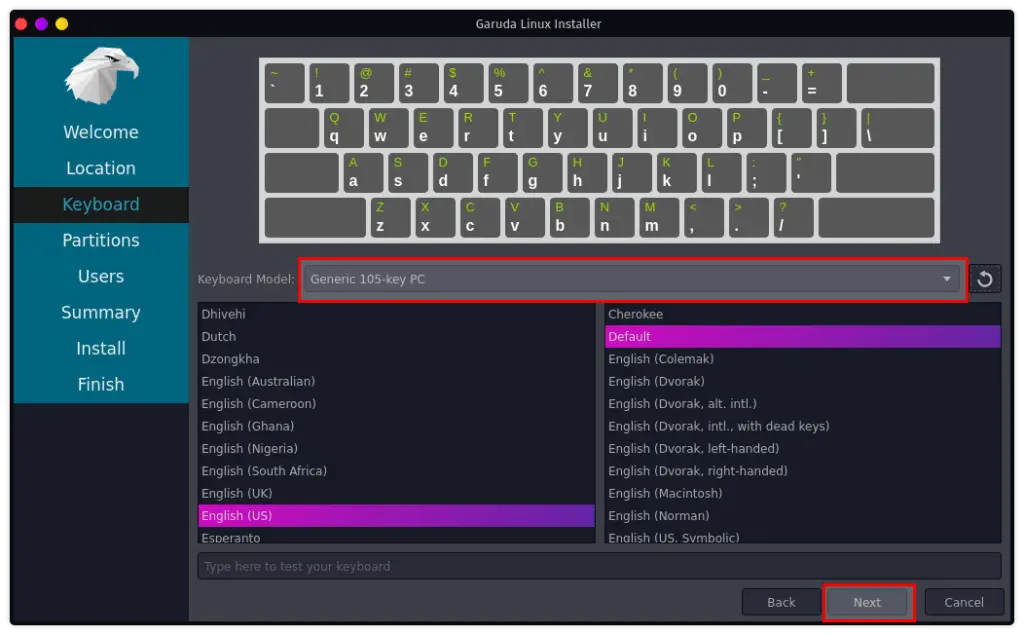
Garuda Linux support number of keyboard Model and several languages too. If you were having a different type of keyboard, click on the Keyboard model drop-down menu else you can choose the default and click on the Next button.
Step 4:- Create Disk Partitions
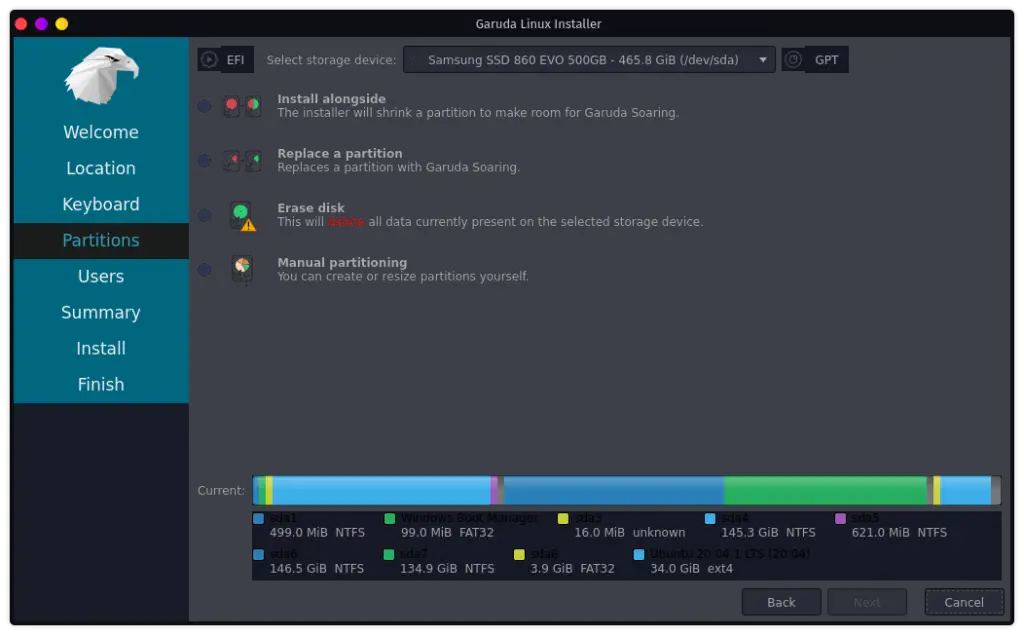
Garuda Linux Installer provider several ways to create a partition on disk such as
- Install alongside
- Replace a partition
- Erase disk
- Manual Partitioning
We can use any method to Install Garuda on disk.
Install alongside
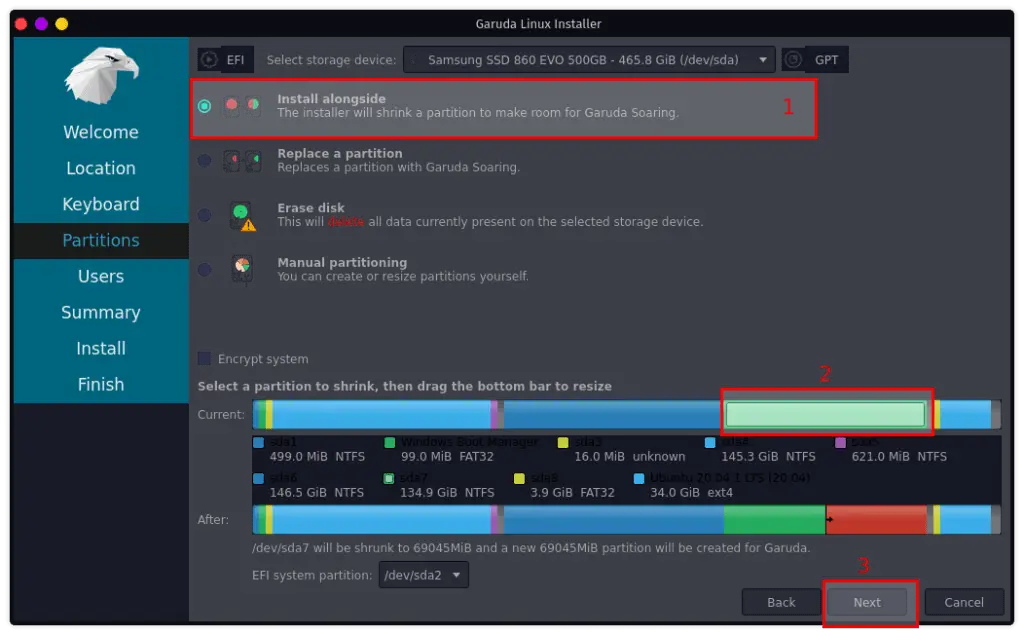
When you choose to Install alongside It will shrink from the actual disk size and Install Garuda on a particular partition.
- Click on Install alongside
- Select the Partition where you need to Install Garuda (If you want to resize shrink space drag the bottom bar)
- Click on Next
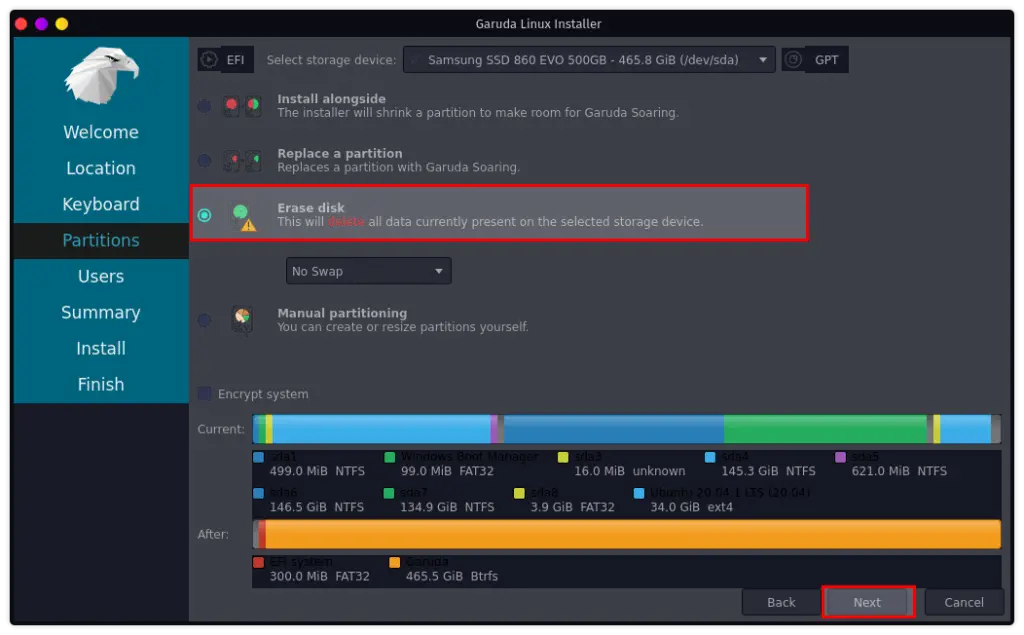
Erase disk
This option will erase all disk data and Install Garuda on disk storage. To erase and install garuda, follow the simple steps.
- Select Erase disk option
- Click on Next
Manual Partitioning
This is useful when you want to create /home, /usr, /var and / partition at a different location on disk.
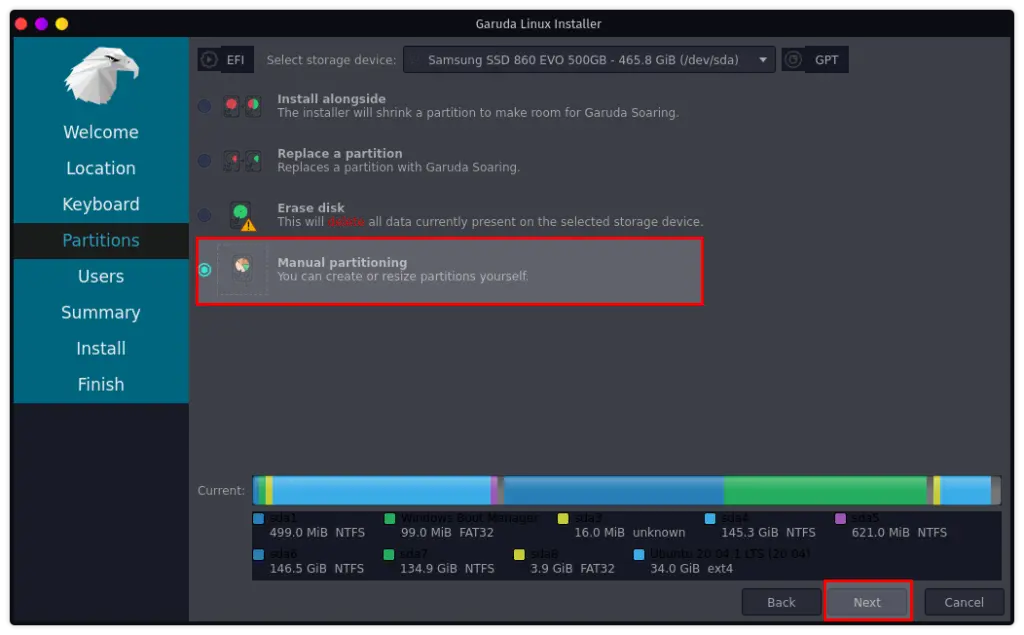
With a few simple step, you can create a manual partition. It is not advisable to select Manual partition for a neophyte user.
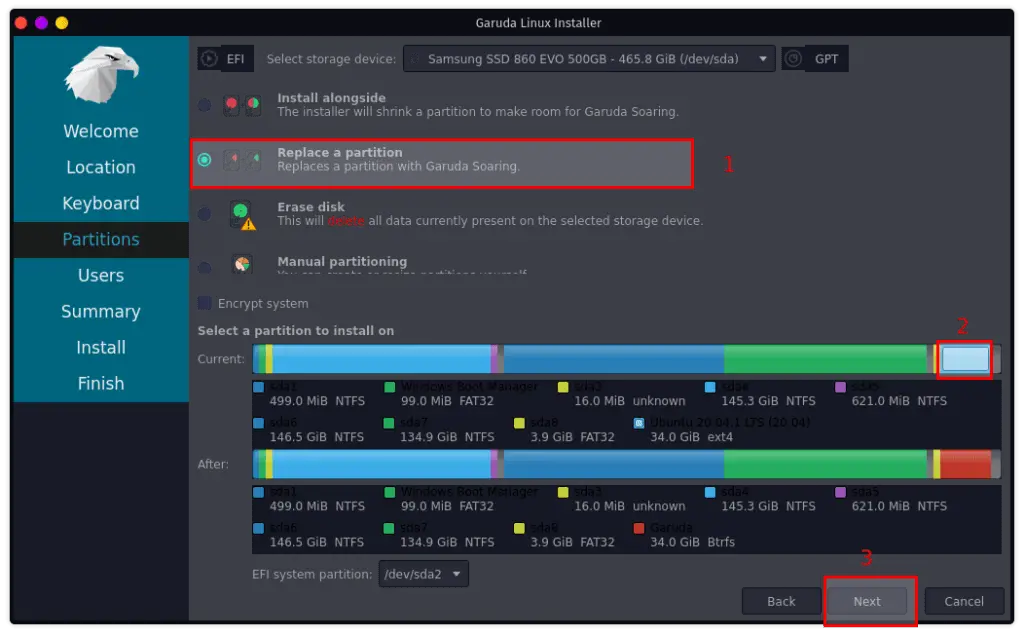
Replace a partition
This is useful when you want to replace the partition with the Garuda Image file. In my case /sda 9 is occupied with the Ubuntu Distribution that I don’t want anymore, so I have selected replace partition.
- Click on Replace a partition
- Select the Partition where you need to Install Garuda
- Click on Next
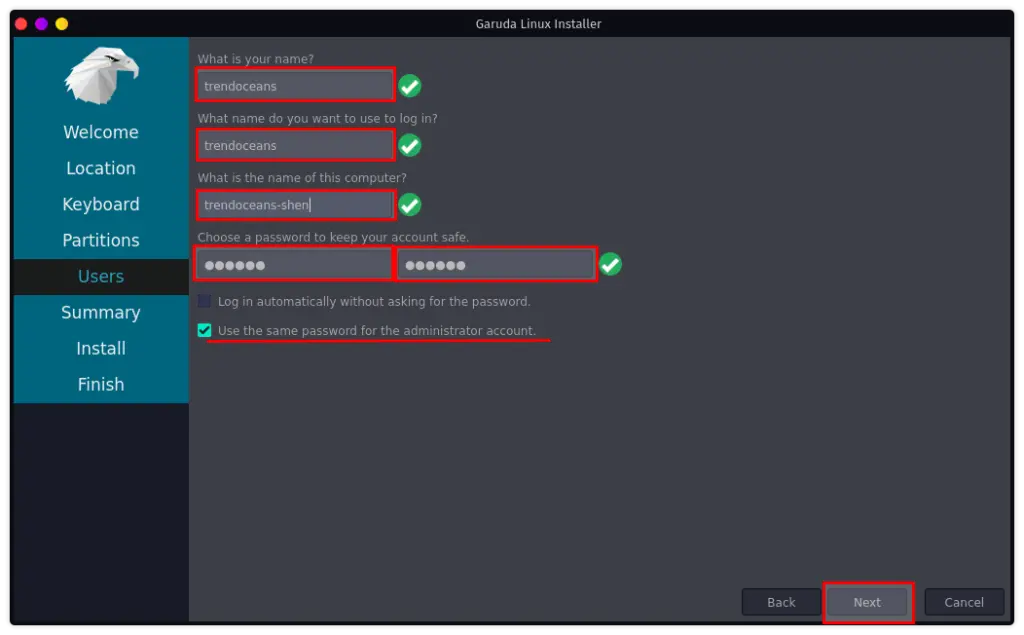
Step 5:- Create Users
It’s time to create a user for Garuda provides few details like name, login name, computer name, password.
If you want to keep the same password for the administrator user, check the radio button and proceed to the Next button.
Step 6:- Summary
This is the final checkpoint read the summary if you felt something wrong click on the back button and make changes after that you will not be able to make any changes.
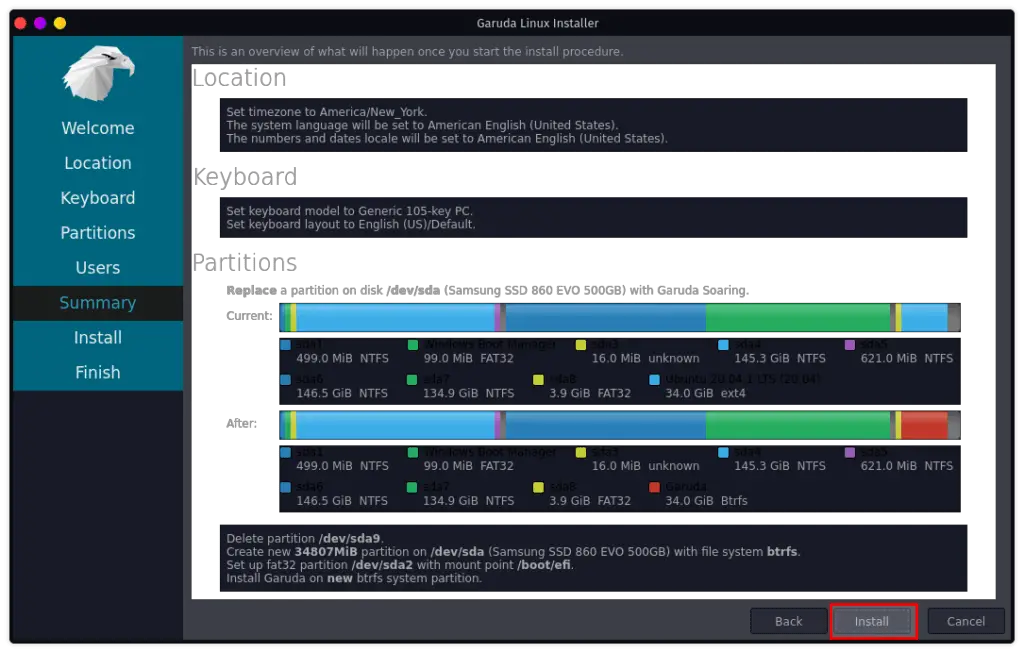
Click on Install now to proceed Installation process.

Step 7:- Install
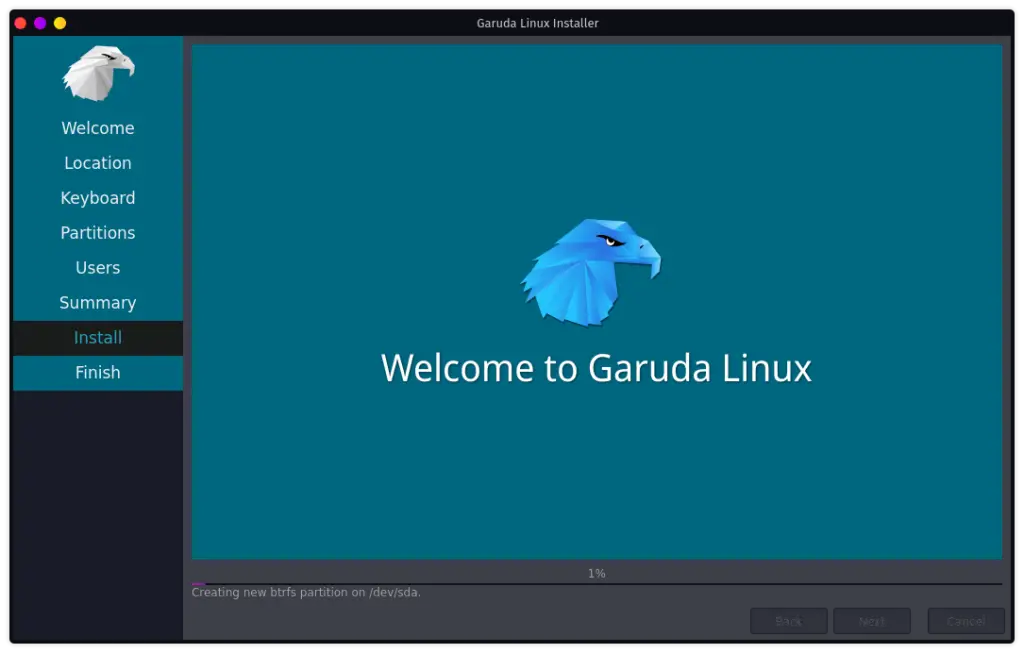
Now, wait for the installation process to get complete till that explore Garuda Live environment.
Read this:- How to add a new user to the group in Linux
Step 8:- Finish
Installation is completed restart your Linux system before that remove the live disk.
- Check Restart now
- Click on Done button
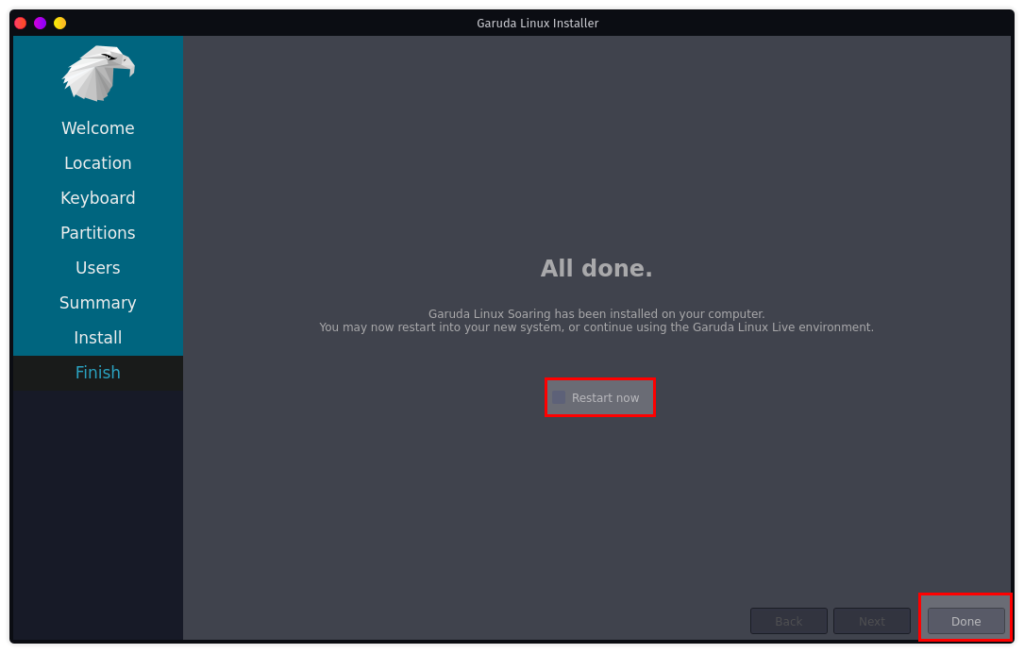
Once the system gets restart, you will ask to start the setup assistant to finish your installation? Click on Yes.

Wrap-up
That’s it to install Garuda KDE Dragonized, and If you stuck somewhere, you could drop the comment below, or else you can raise your query on the Official Garuda Linux forum
Please drop the feedback how much you like Garuda KDE Linux Envirnoment.

A man with a tech effusive who has explored some of the amazing technology stuff and is exploring more. While moving towards, I had a chance to work on Android development, Linux, AWS, and DevOps with several open-source tools.
Is there another way to download? Source forge taking 12 hrs 🙁
Try to download from torrent.
FYI, the dd command has an extra space between the of and =.
No
$ sudo dd if=/[ISOFILE-LOCATION] of =/dev/[PARTITION NAME]
Even if Garuda Linux is so popular, then why it’s not in the list of linux distro list of wiipedia?
You can refer https://distrowatch.com/